Restoring from VM Backups on Google Cloud
Related posts:
- Commands-and-Reference-Guide for common docker debug commands and docker container information.
- Sample competition bundle and Sample submissions.
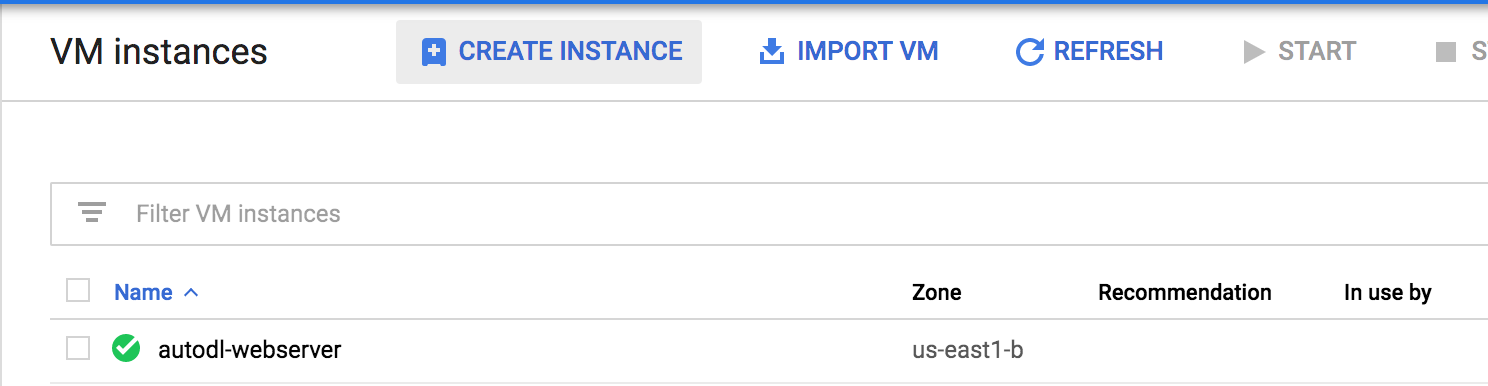
- Start from your Google Cloud Storage Control Panel, and click
VM InstancesunderCompute Enginein the side menu

- Select create new instance on the top menu
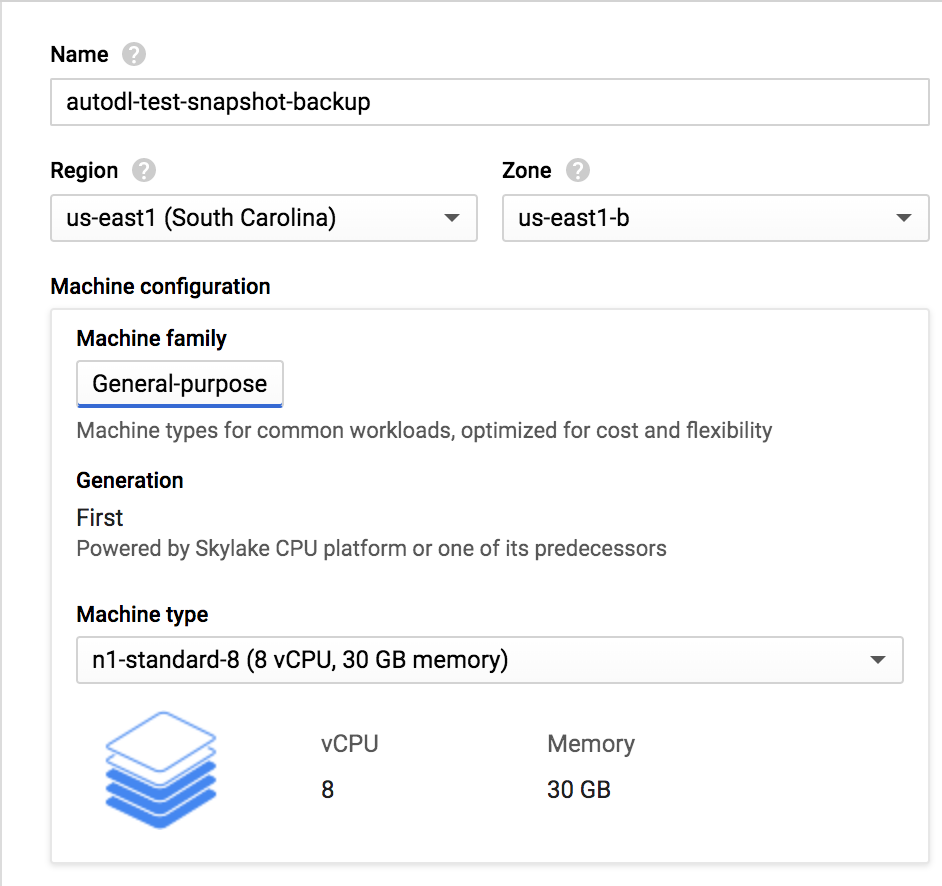
- Configure your machine options and name. We recommend for a production level Codalab server with heavy traffic between 4-8 vCpus/Cpus and between 16-32GB of RAM.
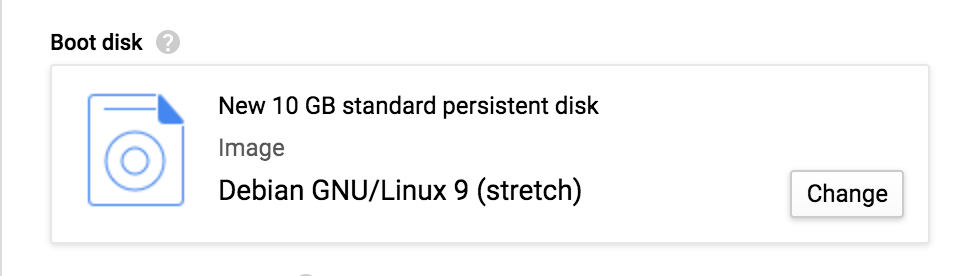
- Under boot disk, select change
-
Select the
snapshotstab. -
Select the snapshot you wish to restore from. They will display the date they were created here as well.

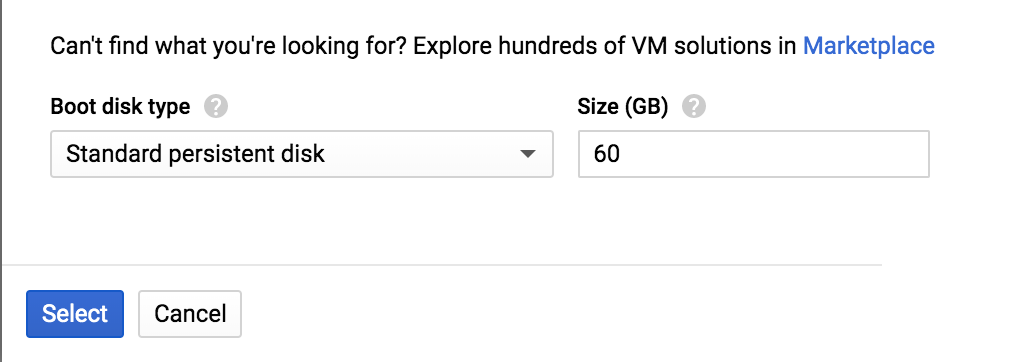
- Ensure the disk size and type is correct and submit the form. Note: We recommend at least 50+ gb of disk space.
- Under firewall configuration, enable HTTP/HTTPS traffic
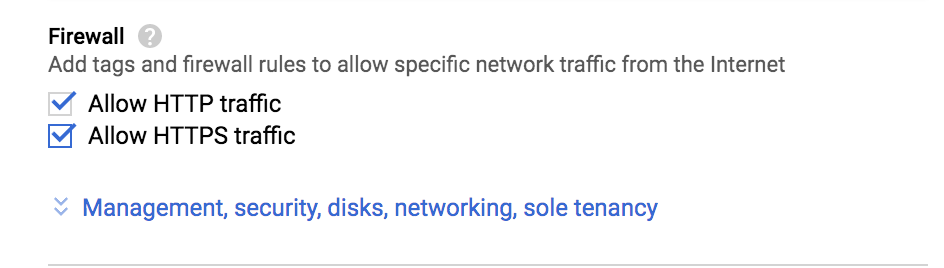
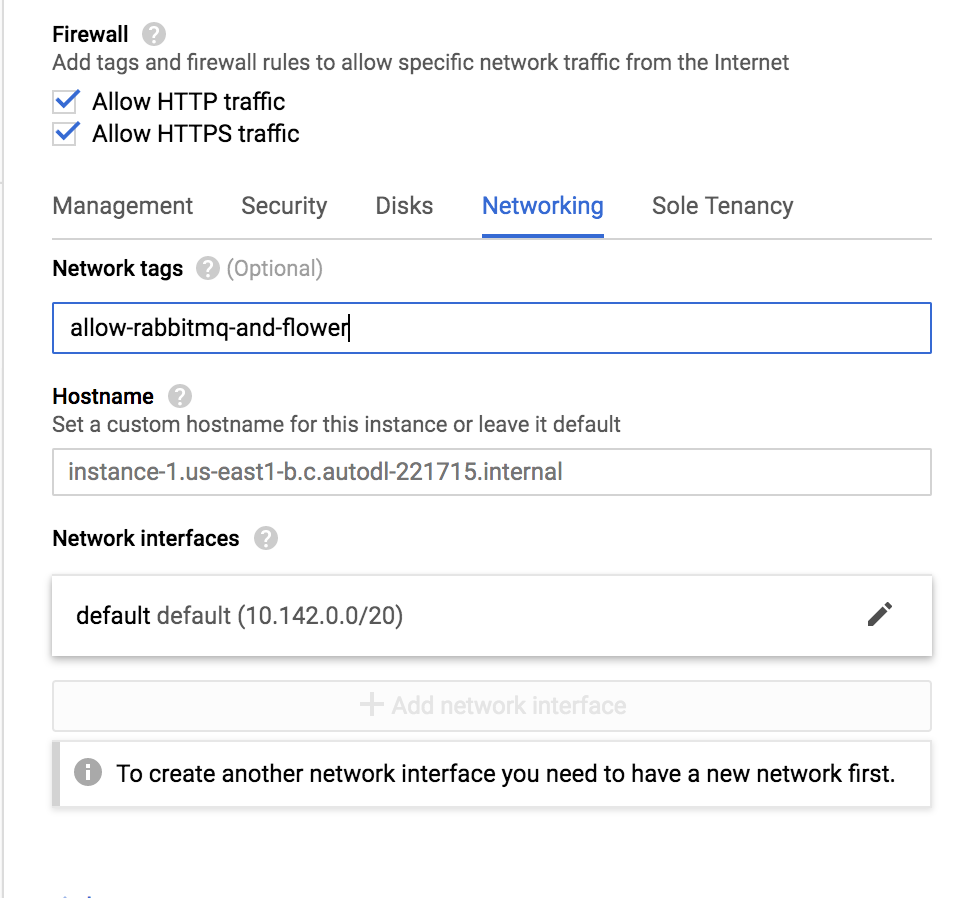
- Expand
Management, Security, Disks, Networking, Sole Tenancy

- Add the tag
allow-rabbitmq-and-flowerunder network tags. (This allows RabbitMQ/Celery/Etc to communicate with workers)
- Submit the form and create your new instance from a snapshot backup.
- SSH into the instance via the SSH button from the instances menu

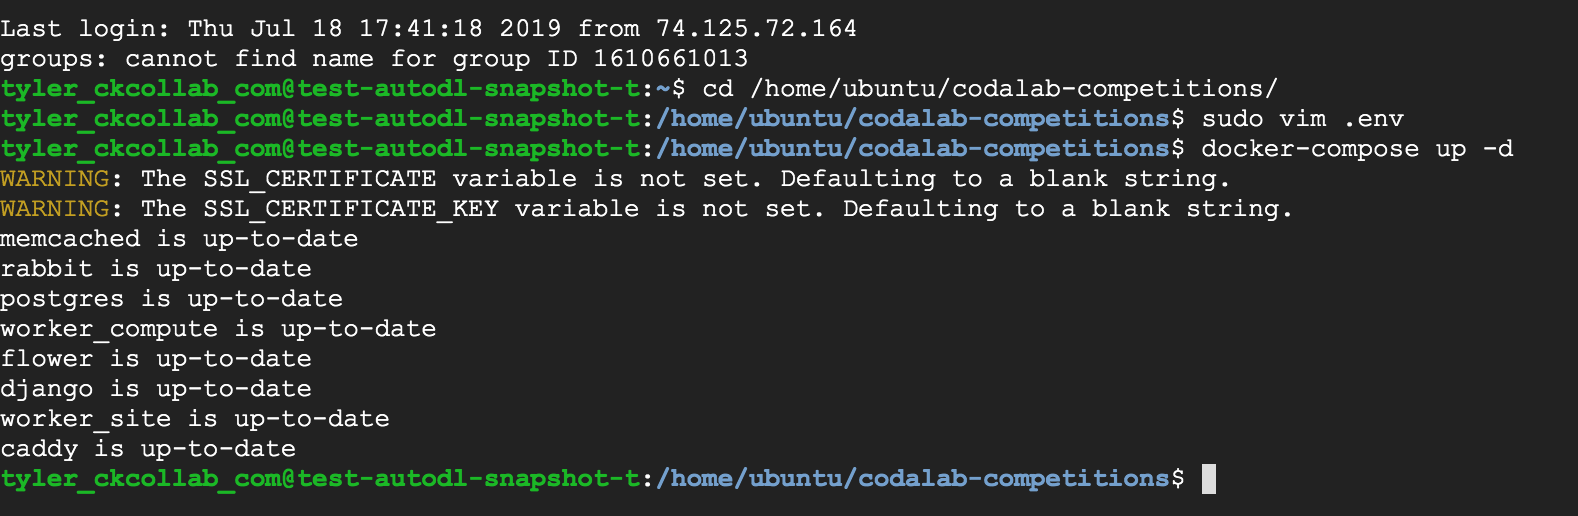
- Change directory to the Ubuntu user's
codalab-competitionsdirectory. (Note if you SSH in under the userUbuntuit's in the same directory as you will be)

- If you are practicing backup recovery and/or will not be using the same URL as the original instance that was backed up OR, if the restored instance has a new different IP address not pointing (yet) to the original URL
(e.g. autodl.lri.fr), then you need to edit the Docker environment configuration file (.env) to use the new VM in the mean time. Sudo is not needed if SSH'ed in as Ubuntu. (To do that you need an editor, if you hate vim, run
sudo apt install emacsto get emacs).

- Change all references of the domain name of the original instance to the new instance IP (or the new URL if you already have a URL pointing to the right IP address). The most important setting is
CADDY_DOMAINas this is what Caddy will try to serve. If the DNS/IP it's trying to serve doesn't match the IP it is being served from, it will not work. You will see a message likeautodl.lri.fr is not served from this instance. Make sure if using an IP to append:80on the end to specify not to use SSL. Otherwise you will receive an SSL error as it will try to run with SSL enabled, but not be able to retrieve a certificate.

-
WARNING: Google cloud creates a NEW DYNAMIC IP every time you restore your VM, so unless you had a static IP assigned, you need to redo this procedure every time you restart your VM. Here is the procedure to request a static IP.
-
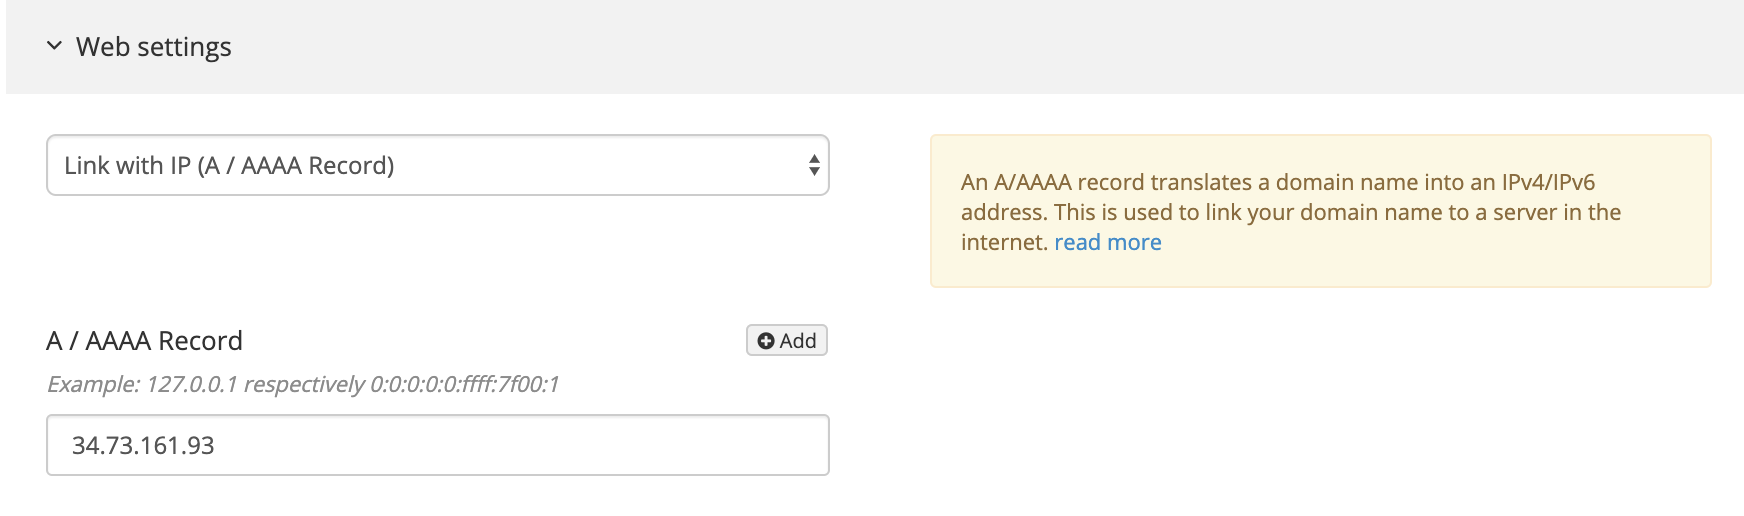
If you want to assign a new URL, then instead of the IP address, put the new URL in
CADDY_DOMAIN. Do not forget to create an A record to make your URL point to the correct IP address at your ISP. Here is how it is done at Moniker (it may take a while for the DNS to propagate):
- Run
docker-compose up -dto update all containers (Note: Your output should show the containers as having been recreated)
-
Verify you can connect via web browser to the instance
-
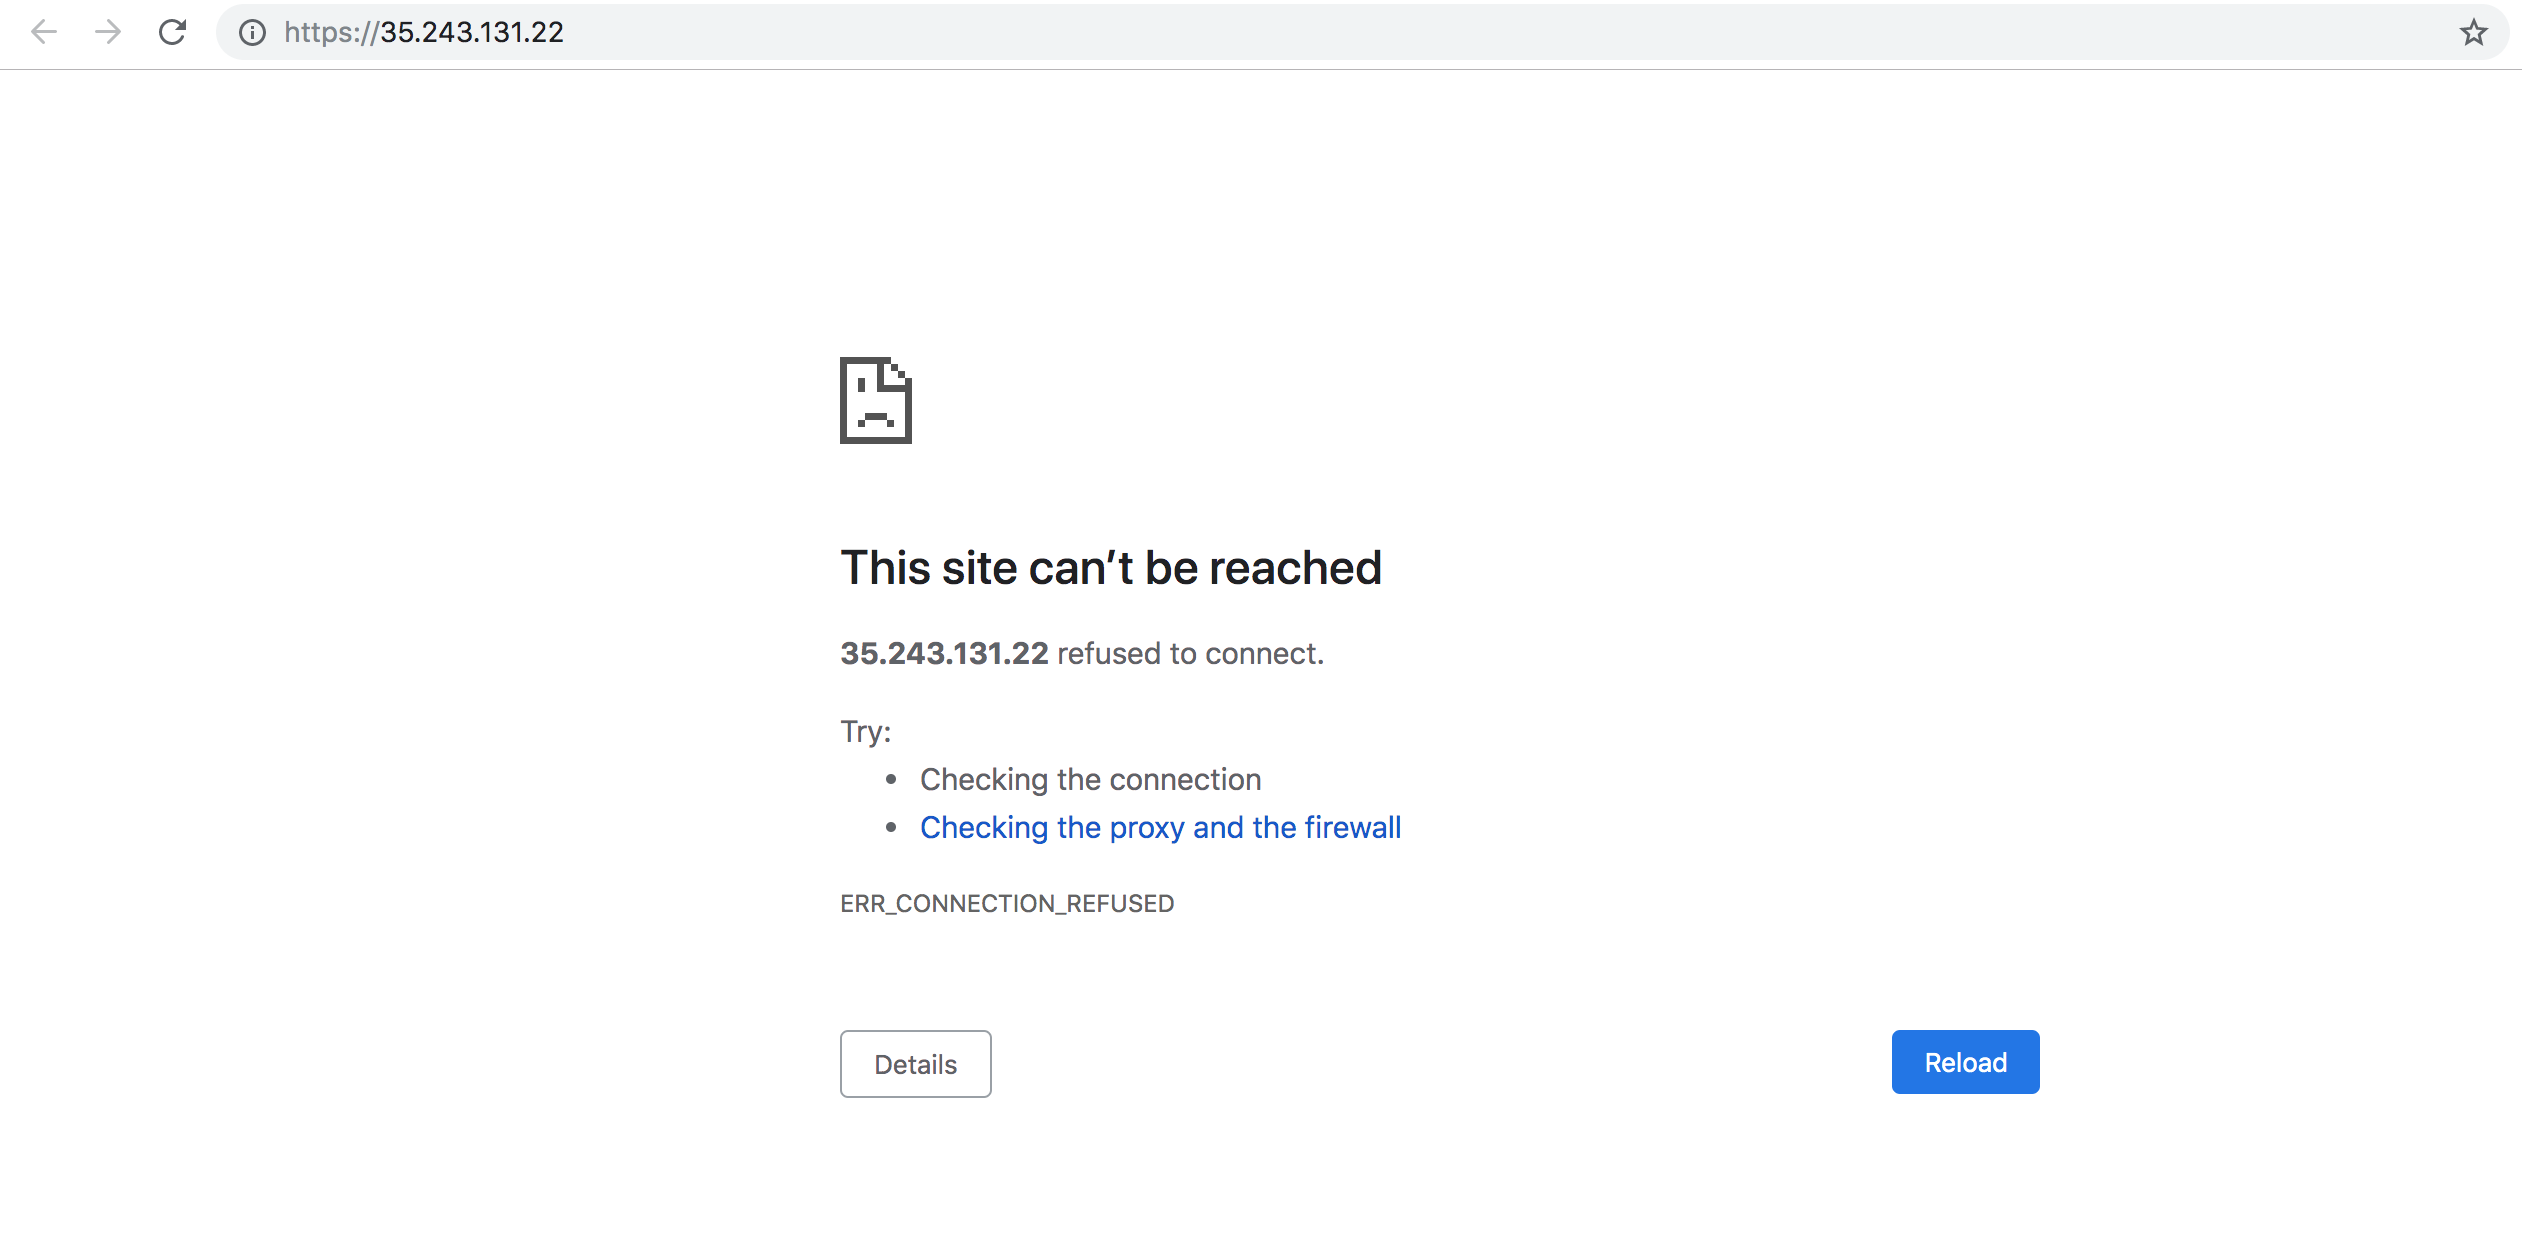
If you get the below error after following these steps, make sure you're not trying to use https.
-
If you get a message similar to: "The Codalab site is not currently available" then Codalab is probably still starting up. Check the
djangocontainer logs withdocker-compose logs -f django. The last few steps should be checking static files and running any migrations. -
!OPTIONAL!: If not restoring a specific domain or doing a test it is possible that the instance will not have the default worker enabled, and no compute workers will be attached. To re-enable the default worker you can simply rename or delete
docker-compose.override.yaml. It may also be necessary to ensure the correct worker version is specified. -
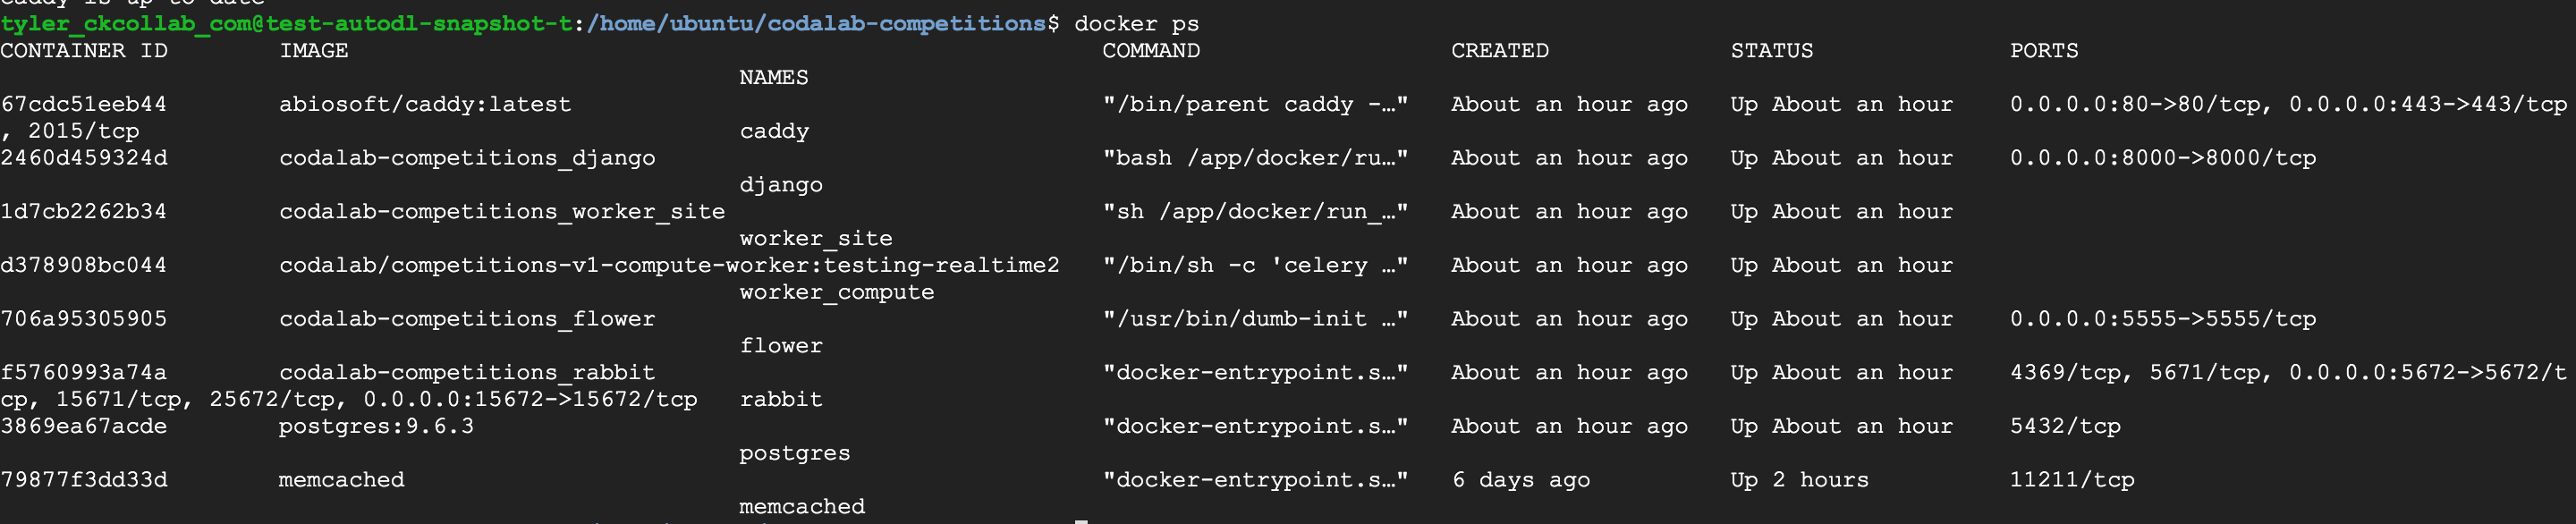
Verify all services are running with
docker ps
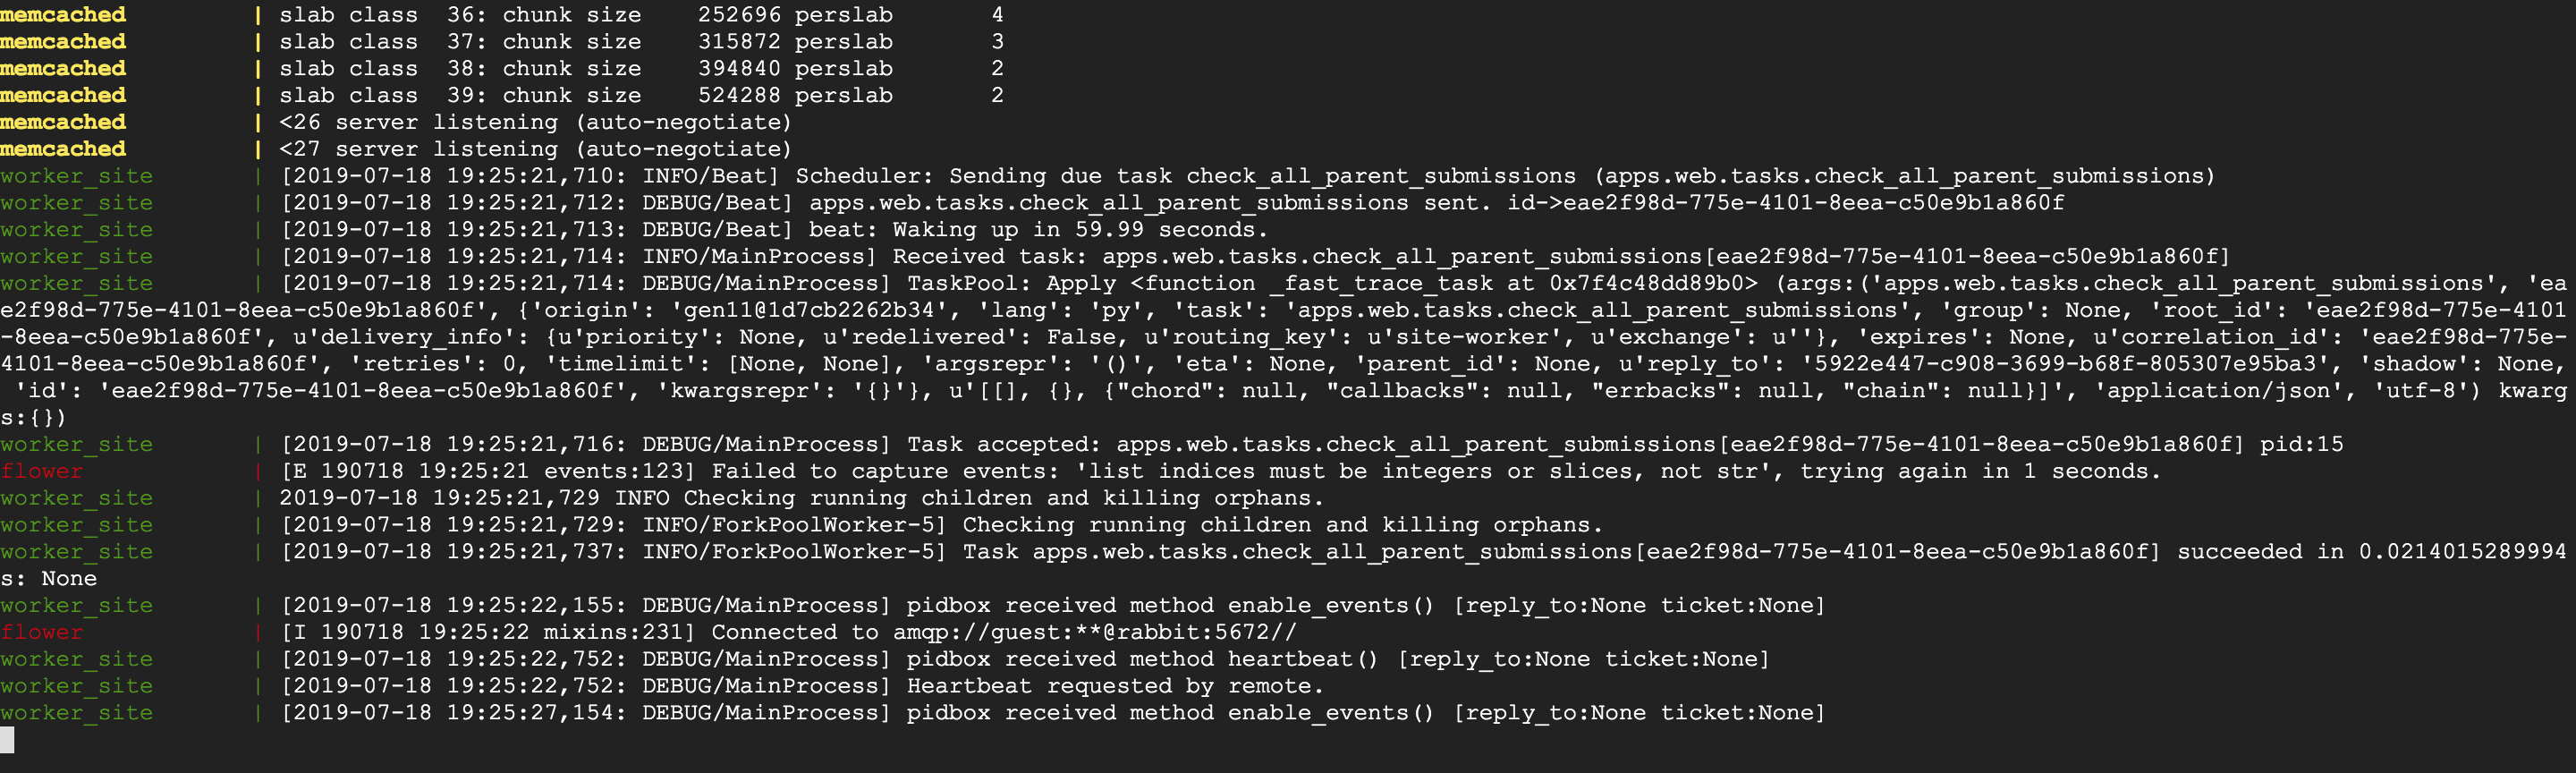
- Access the logs with the command
docker-compose logs -f(Usedocker-compose logs -f <container>to view a specific container's logs)
-
Upload the test competition and make sample submissions to verify everything is working correctly. Baseline0 should work with the default CPU queue. The other baselines require a GPU queue. If your submissions get stuck, make sure you are submitting to the right queue.
-
Next you have to restore the GPU queue and test the sample submissions that require a GPU (Baselines 1 and 2).