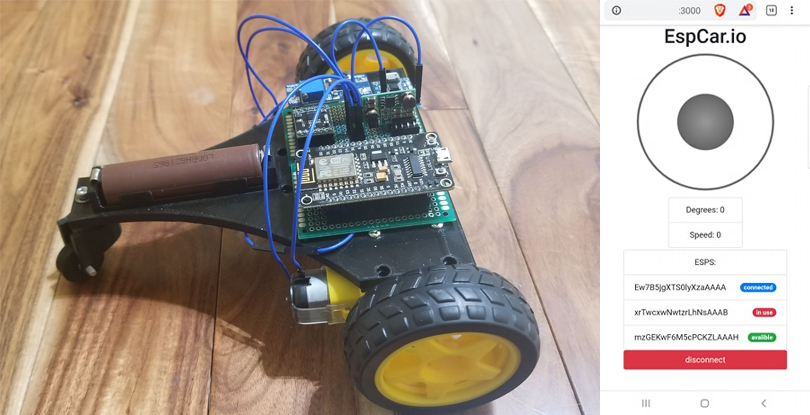
EspCar.io is an application that will allow you to control a car made with esp8266 and an H bridge with a virtual joystick through socket.io
- Supports multiple web clients and esp clients.
- Distinguish between web clients and esp clients.
- Each web client can control an esp car.
- Each web client can see the status of each esp car.
$ git clone https://github.com/mayuk24/espcar.ioEdit the config.js file located in the root directory with your host, port number and the credentials of your wifi network.
const
	host	= (process.env.HOST || 'YOUR-HOST'),
	port	= (process.env.PORT || 'YOUR-PORT'),
	ssid	= (process.env.SSID || 'YOUR-SSID'),
	pass	= (process.env.PASS || 'YOUR-PASS');
Make sure you do not use "localhost", instead use your local ip address otherwise the Esp will not be able to connect to the server websocket.
Go to the directory espcar.io-server and run the command: "npm install" to download the repository's dependencies
$ cd /espcar.io/espcar.io-server$ npm installGo to the espcar.io-server directory and run the script: "npm run build" to update the client's app.js file and the espcar.ino file with the data you previously added in the config.js file.
$ cd /espcar.io/espcar.io-server$ npm run buildYou will see the following confirmation message in the terminal
espcar.ino updated
app.js updatedUse the Arduino Library Manager.
- Go to Sketch > Include Library > Manage Libraries.
- Install WebSockets by Markus Sattler
- Install SocketIoClient by Vincent Wyszynski
If you don't have the arduino IDE configured to work with esp8266 boards yet, this link will help you.
After completing the above just upload the Sketch to esp8266.
Finally all that remains is to run the script : "npm start" in the espcar.io/espcar.io-server directory.
$ cd /espcar.io/espcar.io-server$ npm startNow you should be ready to go.
If you want to edit the Vue project just go to the directory espcar.io/espcar-vue and run the command "npm install"
cd /espcar.io/espcar.io-vue$ npm install Then edit the main.js file inside the src directory with your host and port
Vue.use(new VueSocketIO({
	debug: true,
	connection: io('http://YOUR-HOST:YOUR-PORT/')
}));The main components you need for the esp car are an esp8266 and an h-bridge with 4 inputs and 4 outputs.
In another moment I will add a more detailed guide for the assembly of the esp car and share the stl files.
copyright © 2020 Marco Concepcion. Licensed under the MIT license.

