[PORT] [Webex Adapter] Add Webex Functional Test and YAML File #237
Description
Port this change from botbuilder-dotnet/master branch:
microsoft/botbuilder-dotnet#3257
Description
This pull request adds a YAML file to set up a build pipeline for Webex Functional Test.
Specific Changes
We added the file botbuilder-dotnet-ci-webextest.yml inside the build/yaml folder.
By default, the file is configured to run the pipeline for each commit or pull request in the master branch. This can be changed in the file or in the UI when setting the pipeline.
How to use
The next steps will guide you through the configuration of a Build pipeline based on the YAML files.
Prerequisites
- Azure DevOps organization.
- Azure subscription. Required to create and delete Azure resources.
- One app registration in Azure. More info
- Configure an Azure Connection Service.
- Create a Webex Application and a Webex webhook.
Creating an account & a Bot in Webex
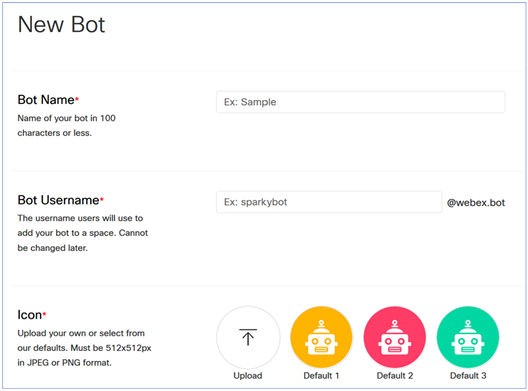
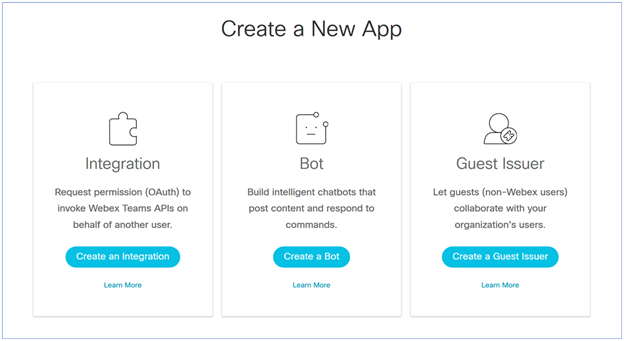
Sign up for a developer account in the Webex Developer portal and create a new Webex Bot app. The only mandatory fields you'll need to set are the bot's name, user (email) and icon:
Once created, you will receive the bot's Access token and ID. The Access token will be displayed only once when you create your bot and never again, so don't forget it or you will have to generate a new one.

You can find further reading about Bots and how to create one on Webex's Documentation Page.
Creating and configuring an Azure pipeline
We will be using the file at \build\yaml\botbuilder-dotnet-ci-webextest.yaml for setting up a pipeline in Azure with the following steps:
• Use .Net Core sdk 2.1.x [Use .NET Core]
• Use .Net Core sdk 3.0.x [Use .NET Core]
• Use NuGet 4.9.1 [NuGet tool installer]
• NuGet restore [NuGet]
• Build solution Microsoft.BotBuilder.sln [Visual Studio Build]
• Dotnet Publish TestBot [.NET Core]
• Create Azure Resources [Azure CLI]
• Zip Deploy Bot [Azure CLI]
• Set Environment Variables [PowerShell]
• dotnet test [.NET Core]
• Delete Resources [Azure CLI]
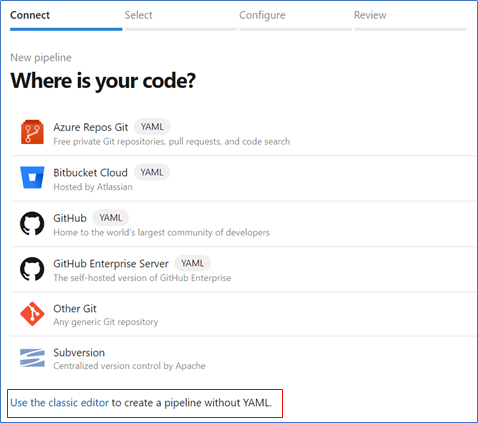
To create a pipeline based on a yaml file, select this option when creating a pipeline
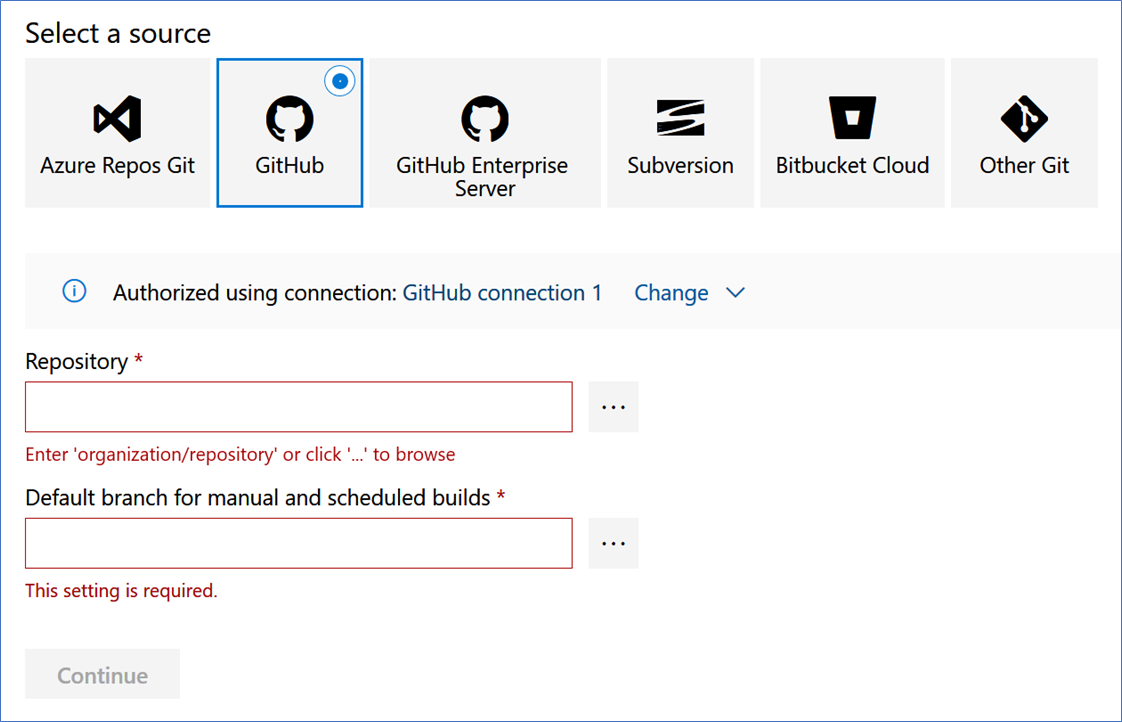
Configure the repository and branch.
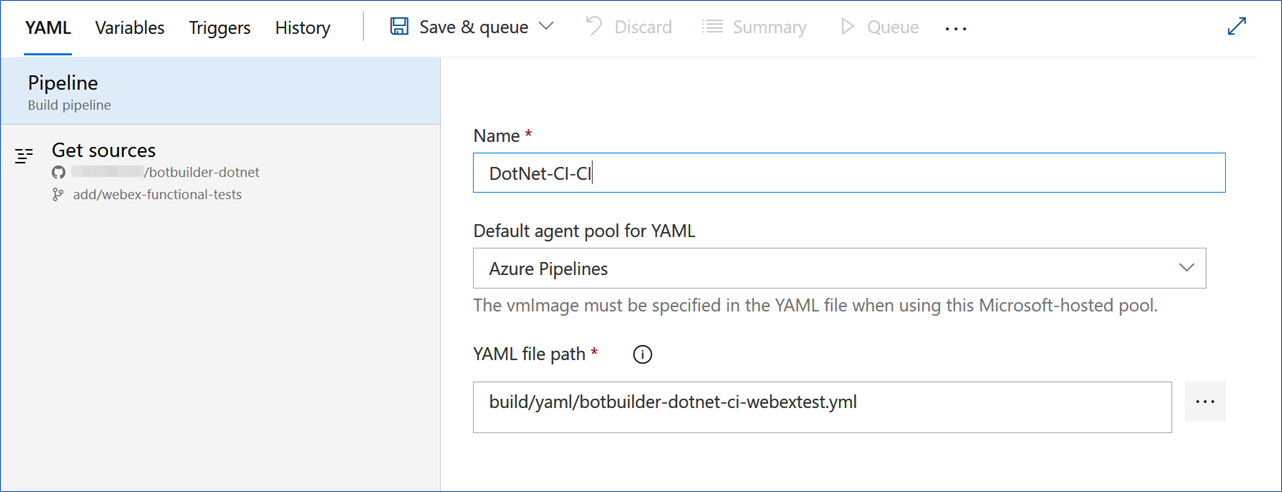
In the Configuration as code, select the YAML option

In the YAML section, write the build name and select the build YAML file inside the build folder in the root of the directory.
Setup variables
The following are the variables we need to add to the pipeline. It is a good idea to prefix their names with "Webex" or something to make them more relatable to Webex, since more than one set of functional tests may be running in the same pipeline.
| Name | Value |
|---|---|
| BuildConfiguration | Set it to debug |
| BuildPlatform | Set it to any cpu |
| AppId* | An App Id registered in Azure |
| AppSecret* | The App Secret from said App registration |
| RefreshToken* | (see Create an Integration below) |
| WebexIntegrationClientId | (see Create an Integration below) |
| WebexIntegrationClientSecret* | (see Create an Integration below) |
| WebexBotAccessToken* | The bot's access token obtained when it was created |
| WebexRoomId* | (see Obtaining the room Id below) |
| WebexBotUserName | This is the username (an email @webex.bot) that identifies the Webex bot you created in the previous step |
| AzureSubscriptionName | The subscription connection service to authorize the pipeline with Azure |
| AzureBotPublicAddress | The public, messaging endpoint address the bot will have when deployed to Azure |
| WebexWebhookName | The name you want for the webhook. Make up one and write it down for later |
| WebexWebhookSecret | An optional secret string to secure the communications. Make up one and write it down for later |
| *Set these variables as private. |
Create a Webhook
The Webex .NET Echobot requires webhooks to be created manually. You can find the Webex webhook reference and a platform to test them at https://developer.webex.com/docs/api/v1/webhooks
In there you'll have a list of what the API offers in relation to webhooks (list, create, update…)
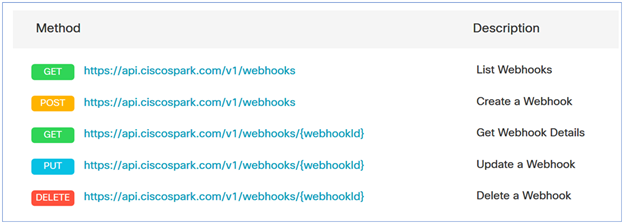
Either through the corresponding link, or using curl/Postman, you'll have to create a webhook by making a POST request to https://api.ciscospark.com/v1/webhooks
You will be given a 12-hours-expiring personal access token for this operation. You can leave the 'Use personal access token' option on if you make the POST from the web interface, otherwise you'll need to copy this value if you are going to make the POST from curl or Postman.
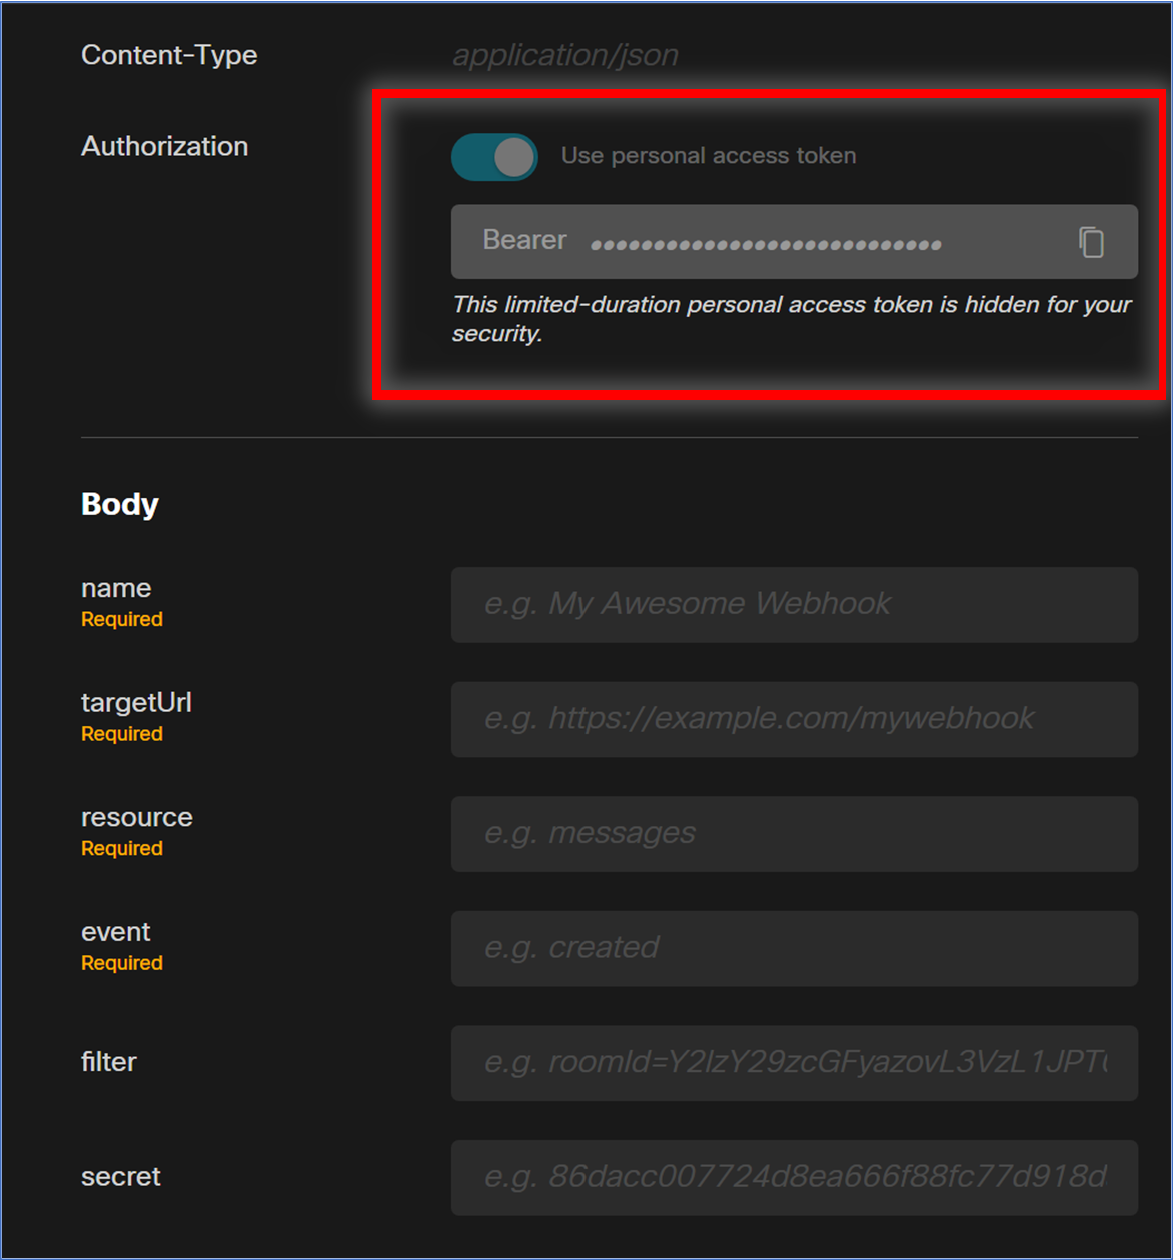
The remaining parameters you need are the webhook name, targetUrl, resource, event, filter, and secret. See the Create a webhook documentation for further reference on each.
For the targetUrl we will need the messaging endpoint our bot will have once deployed in Azure. Take the name we have set for our bot in the pipeline variables to compose this URL. It will go like this:
https://[AzureBotName].azurewebsites.net/api/messages
Remember, [AzureBotName] is the value you set for the pipeline at the previous step of this tutorial.
For resource and event, use messages, and created, as suggested by the example.
Obtaining the room Id
One parameter we're going to need to talk to the bot is the room Id. Every chat in Webex happens in a room so the functional test uses this value to retrieve messages by room.
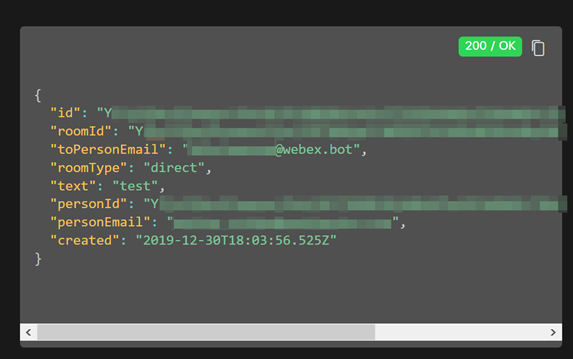
You can get the room Id in the response for creating a message https://developer.webex.com/docs/api/v1/messages/create-a-message. You don't need to have the bot deployed to Azure to get this, only the bot created in Webex.
Send any test message to it and target the bot through its user (the email @webex.bot. Set this as the toPersonEmail field). The response will bring you the room Id:
Create an Integration
The personal access token you are given in the previous step is only for developing and should not be used in a production environment, since it expires every 12 hours. So for having the Azure pipeline running we need to get a better token. We will get this token from a Webex Integration we will create.
We should be able to create an Integration from the same menu where we created our bot in Webex
The process is pretty straightforward and will require name, email, icon, description, redirectUri(s), and scopes.
For scopes, tagging spark:all should be enough. For the redirectUri(s) add any https://[url] you wish to be redirected to.
Get the RefreshToken value
Once you finish creating your Integration, you will be given a Client ID and a Client Secret. Copy and store both.
You will also be presented with something like this:
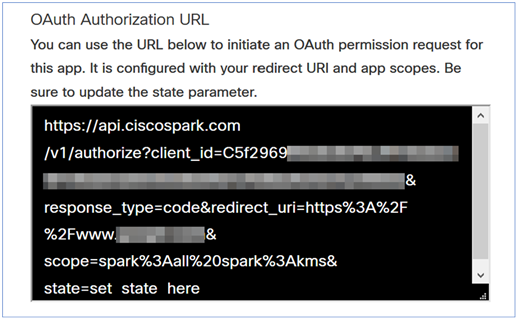
Copy and paste that URL into a browser (you can set any state for the set state here value). That will take you to the URL you set as a redirection URI where at the address bar you will see
http://[YOUR_REDIRECT_URL]/?code=[CODE]. Copy the value at [CODE]. This is your authorization code.
You'll need now to make a POST request to https://api.ciscospark.com/v1/access_token with the content type as x-www-form-urlencoded with the following parameters:
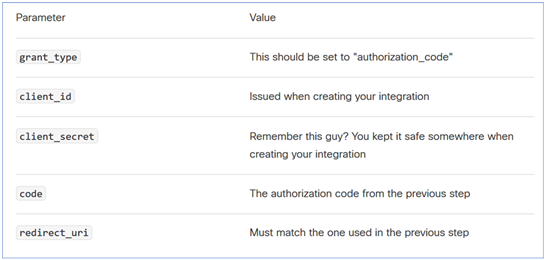
The Webex REST API will then return a payload like the following (picture taken from Webex's site):
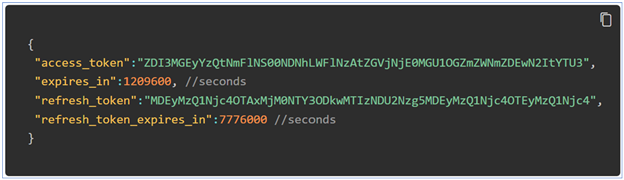
This includes an access_token. That's the kind of token we need to use for the Azure pipeline, since it will allow us to send messages to the bot. It has a validity of 90 days.
The payload will also include a refresh_token that can be used to get a new token once the 90 days time passed (or earlier).
While the access_token will be valid for 90 days, you don't need to wait that long to request a new access token. As a matter of fact, in order for the access token not to have to be manually re requested after 90 days, the functional test requests a new access token (using the provided refresh_token) every time it runs.
Fill the RefreshToken, WebexIntegrationClientId, and WebexIntegrationClientSecret in the pipeline with the refresh_token, Client ID, and Client Secret values obtained in this step.
Changed projects
- Adapters
[channel adapters]