Useful tips when navigating through your repository.
Have you ever worked in a repository with a lot of history? Perhaps you've had to track down related issues and pull requests in the past, or you've had to find who committed a particular change. If you've ever found yourself in any of these situations, you'll know how important it is to navigate your workspace.
- Who is this for: Developers, GitHub users, users new to Git, students, managers, and teams.
- What you'll learn:
- Find relevant issues and pull requests.
- Search history to find context.
- Make connections within GitHub to help others find things.
- What you'll build: Repository with existing commits, duplicated issues, and a content defect to be fixed.
- Prerequisites: Before you take this course, you may want to go through the GitHub Quickstart introduction on GitHub Docs and Introduction to GitHub course on GitHub Skills.
- How long: This course is three steps long and takes less than 15 min to complete.
- Right-click Start course and open the link in a new tab.
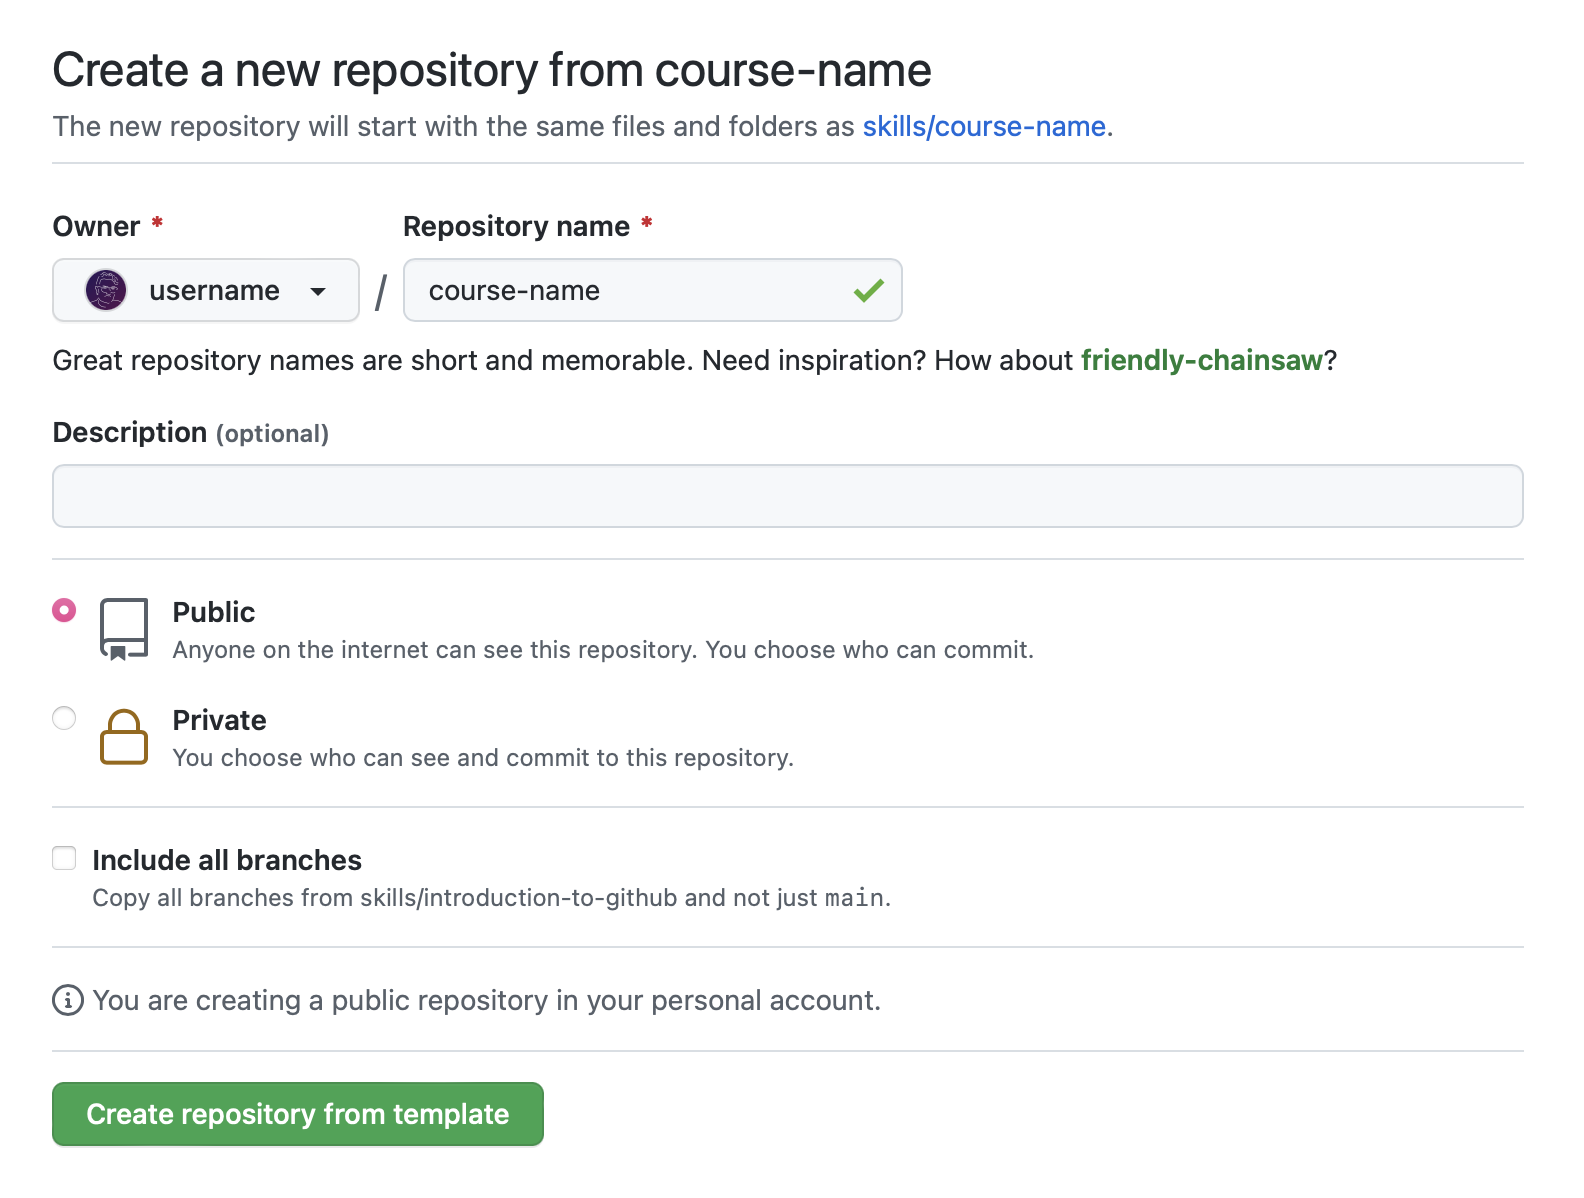
- In the new tab, follow the prompts to create a new repository.
- For owner, choose your personal account or an organization to host the repository.
- We recommend creating a public repository—private repositories will use Actions minutes.

- After your new repository is created, wait about 20 seconds, then refresh the page. Follow the step-by-step instructions in the new repository's README.
Welcome to the course 🎉
GitHub has special capabilities to help reference other information on GitHub. For example, when you reference another issue or pull request by number, that number will be hyperlinked. At the same time, a cross-reference is created in the linked issue or pull request. This two-way reference helps people track the relationship of information across GitHub.
With collaboraration from multiple team members, sometimes issues can be duplicated. In the above example, the new issue #8346 is a duplicate of a previous issue #8249. The cross-reference ability allows you to track these duplications and close issues when appropriate.
When you link to another issue, a reference within GitHub is automatically created. In fact, you don't even need to include the full link. If you were to type #5 within a comment, that would turn into a link to issue or pull request number 5.
When you want to create a crosslink, start typing the title of an issue or pull request directly after you type the # symbol. GitHub will suggest issues or pull requests that will link to the right place. To learn even more, check out the Autolinked References and URLs article.
- Navigate to the issue #1 (Welcome)
- Type "Duplicate of #2" as a comment and close issue #1
- Wait about 20 seconds then refresh this page for the next step.
Thanks for the duplicate note 👋
An important part of version control is the ability to look into the past. By using git blame, and finding the story behind a commit, we're able to do more than blame people for code. We're able to see the story around why a commit was made. What is the associated pull request? Who approved the pull request? What tests were run on that commit before it was merged?
The obvious reason to find things in history is to know about the history. With issues and pull requests, we see a more complete story about the history, not just the bare minimum.
git blame is a Git functionality that shows what revision and author last modified each line of a file. Information like who made a commit, when, and even why can be found this way. If you aren't sure who introduced certain changes to a file, you can use git blame to find out. While git blame sounds rather accusatory, this can be used to understand the context around decisions.
A SHA is a reference to a specific object. In this case, it's a reference to a commit. On GitHub, you can look at a specific commit to see the changes introduced, by whom, and if they were a part of a pull request.
- Navigate to the Code tab of your repository
- Tip: you may have previously created your repository in a new tab
- Click
docsto navigate into the/docsdirectory - Click
_sidebar.mdto view the file - On the top of the file, click Blame to see the details of the most recent revision
- Click the commit message,
add sidebar to documentationto see the commit details - Copy the first seven characters of the SHA (the first 7 characters of the 40 character hexadecimal string listed after
commit) - Comment on issue #2 by adding the SHA from step 6 as a comment text and click on "Comment" button
- Wait about 20 seconds then refresh this page for the next step.
Great job finding that commit ❤️
Thanks for finding that commit! We now know that the sidebar was indeed added, and it was done in that commit. Let's see if we can dig a little deeper to find out if any planning or conversation, using comments, occurred around this change.
As we've already seen, conversations in issues and pull requests can reference other work, but the amount of context goes much further than crosslinks. Remember, Git is version control! For example, the commit that you found in the last step is connected with much more information such as:
- Who made the commit.
- What other changes were included.
- When the commit was made.
- Which pull request the commit was a part of.
The pull request is important because it goes beyond knowing when a commit happened. You can know why a commit happened. Finding history is not about blaming anyone, but about seeing the bigger picture. Why were decisions made? Who was involved? What were the build outputs and test results for each commit? Who requested changes, and who approved them?
When you're looking at a commit on GitHub, you can see a lot of information. From this view, you can also find a link to the pull request in which the commit was created. We'll use this in the next step.
- In the main branch Edit the
docs/_sidebar.mdfile. - Correct the spelling of the reference
(doc-references__.md)on line 4 by changing it into(doc-references.md). - Select or create a new branch
fix-sidebarfor this commit and start a pull request. - Make sure that main is selected for base: and fix-sidebar for compare:.
- Using the Assignees section on the right side, assign yourself to the pull request.
- In the PR comment add 'Closes #2' and autolink issue #2.
- Click Create pull request and wait about 20 seconds.
- Merge this pull request.
- Delete the branch 'fix-sidebar'.
- Refresh this page for the next step.

In this course, you've learned a lot about finding and sharing information. Within a GitHub repository, you can find history about what changes were made, and more importantly, why changes were made.
You can enable GitHub Pages and see docs/index.html as a website!
- Replace
USERNAMEwith your GitHub username andREPONAMEwith your GitHub repository name indocs/index.html. - Under your repository name at the upper right, click ⚙️ Settings.
- Then on the lower left, click Pages.
- In the GitHub Pages section, select
mainin the Select branch drop-down menu and/docsin the Select folder drop-down menu. - Click the Save button.
- Wait about 30 seconds then refresh the page. When you see "Your site is published at ...," you can click on the link to see your published site.
Check out these resources to learn more or get involved:
- Are you a student? Check out the Student Developer Pack.
- Take another GitHub Skills course.
- Read the GitHub Getting Started docs.
- To find projects to contribute to, check out GitHub Explore.
Get help: Post in our discussion board • Review the GitHub status page
© 2022 GitHub • Code of Conduct • MIT License

