Getting started
Once you have installed the application, simply point your browser to http://localhost/ona or appropriate link. You will be presented with the ONA "desktop" which should look something like this:
At the top of the desktop you will see the main bar. This is similar to task bars of many OSes. I'll describe each element from right to left:

- Logout button. Click this to log out of the system, reverting the current user to the "guest" user.
- User info icon. Click this to display user details for the currently logged in user.
- Current user/change user box. This box displays the current user and allows you to log in as a different user by clicking and providing a username and password to switch to.
- System Message icon. If it is visible, it indicates a system message is available. Click to view the message(s). These messages are added via the command line and generally will not show up in most systems as it is a rarely used feature.
- The next section, up to the small vertical line, is the task bar. It currently has two windows displayed in it. They are "Add Subnet" which is a minimized box, and "Search Results" which is active, as indicated by the lightning bolt on the icon.
- The green arrow icon. This is simply the execute quick search button.
- Quick search input box. You can type in quick searches here. It will search for MAC addresses, DNS names, IP addresses etc. You will see updated hints selected from the database as you type in this field.
- The Search icon. Click this to bring up the advanced search dialog and search results.
- The Menu button. This is the primary menu of options. Clicking here will bring up further tasks to perform. It is a context aware menu and may have different options available depending on the workspace you are on. It is also aware of permissions so it may not show certain options depending on your login status and privileges.
The section immediately below the desktop bar is called the trace bar. It keeps a breadcrumb trail of where you have navigated within the system. Since this is an AJAX interface and the URL does not change as you navigate, you will be unable to click the browsers back button. The trace bar serves as an enhanced replacement for the back button. If you click the word "Trace:" it will clear the trace bar in the event it gets too long to deal with.
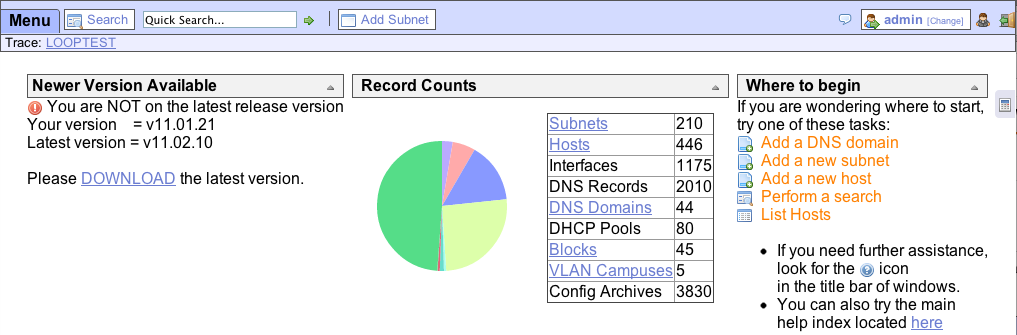
The section immediately below the trace bar is called the workspace. It starts out showing basic information about the system on what we call the desktop. Some plugins will display a box of information on this desktop as a global information point. The default items are pictured:
- If a newer version is available, a message will display telling you about it. If you are on the current version this box will NOT appear.
- Record counts simply gives a running total of the various high level types of records.
- The last section gives a list of common tasks to start with. as well as links to documentation.
- There is some other information you may want to review on the Basic Concepts page.
- To make any changes to data you will need to first log in as
adminwith a password ofadmin. By default you are connected as theguestuser with view only access. Default guest access can be disabled in theAdmin->Manage system configmenu. - You can define new users as required in the
Admin->Manage usersmenu. - You can define new security groups as required in the
Admin->Manage groupsmenu. - As suggested in the Where to begin section, the first task you should perform is adding any additional DNS domains you have. A DNS domain is required for adding any hosts to the system. An initial default DNS domain should have been configured during the install procedure so you have at least one in the system at the start.
- In order to add any hosts to the system you must create subnets to place hosts into.
- Now that you have at least one subnet and DNS domain, you can now start creating hosts and interfaces.
- Go to the Common Tasks page for more information.