This application allows a user to send or receive morse code messages from one Micro:Bit device to another using only cables. There is an option to send with, or without encryption on the transmission of characters.
(This information is copied from the Assignement brief found on Blackboard). Implement a simple communication protocol that transmits data between 2 BBC Micro:bit devices, using GPIOs.
Your solution should be implemented using C++.
Your solution must be committed in UWE's Gitlab. It will naturally be time stamped and you must be careful to not make commits after the submission deadline.
The basic protocol, defined below, is Morse code, however, implementing these bare requirements will enable you to reach a maximum of 70%. To get beyond the 70% your protocol should be more, for example you might choose to implement the transmission of characters messages that is encrypted with a simply cypher.
Your solution's source code should follow a coding convention, it should be well commented, and include a README.md on how to build it and what and how to use your solution.
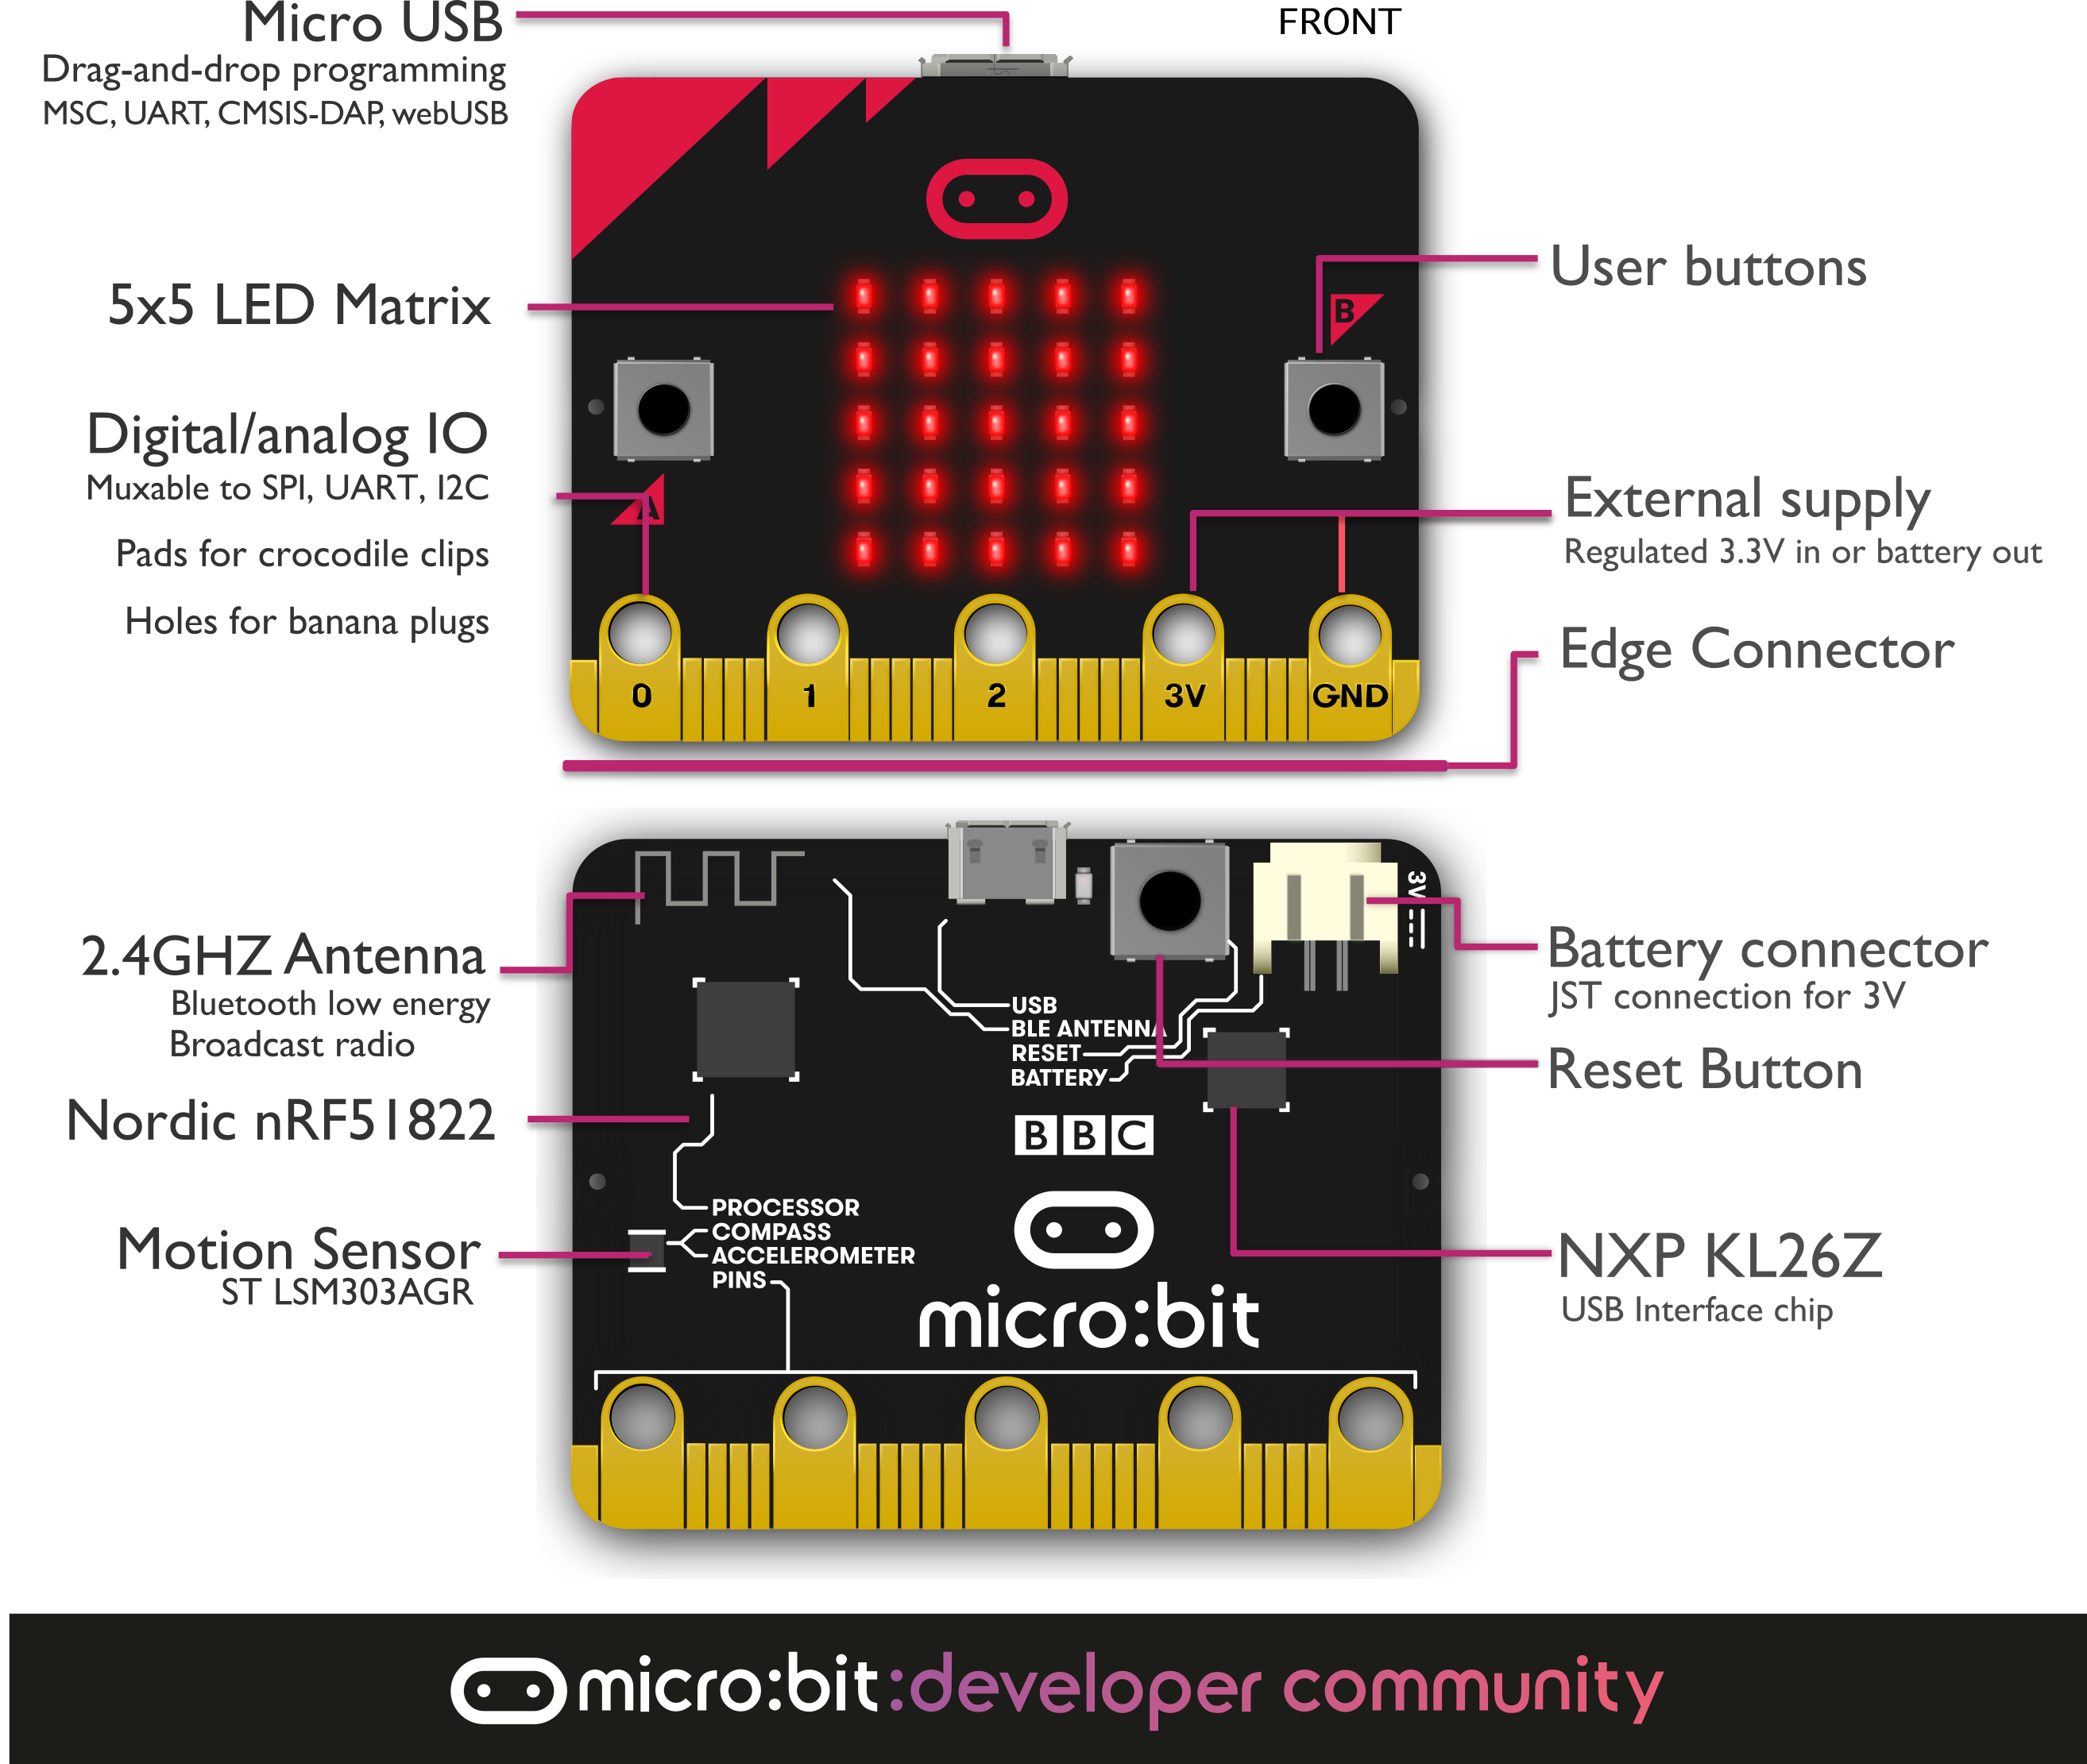
The application will only work on a BBC Micro:Bit. The diagram below shows the button and pin positions, which may be of use when installing and using the application.
In order to run this application, you will need the following hardware/software:
- At two BBC Micro:Bits, two cables with crocodile clip attachments at both ends and a Micro USB cable (you can purchase one from Amazon, for example, https://tinyurl.com/ycs96p9e)
- A running copy of this virtual machine: https://tinyurl.com/ya59un4m You can get login credentials from Blackboard (University of the West of England)
-
Open a Terminal window within the VM you've downloaded (see Prerequisites, above).
-
cdto the folder you wish to store the code for the game -
git clone https://gitlab.uwe.ac.uk/p3-goddard/ufcfvk-15-2-iot-challenge-2.git -
cd ufcfvk-15-2-iot-challenge-2/application_files/ -
yt target bbc-microbit-classic-gcc -
yt build -
Connect your Micro:Bit via USB to your computer.
-
cp build/bbc-microbit-classic-gcc/source/iot-morse-code-combined.hex /media/student/MICROBIT -
Remove the Micro:Bit and repeat steps 7 and 8 for the second Micro:Bit
-
Connect each Micro:Bit to a power source.
-
Connect one of your cables to the Pin 1 position on both devices.
-
Connect the other cable to the Ground position on both devices.
Now you are ready to send some Morse Code! See App Operation for instructions on how to send and receive messages.
Please ensure that the devices are connected appropriately, as per the above Installation instructions.

Note: The application loops indefinitely to ensure that multiple messages can be sent and received. However, this state diagram shows the sending/receiving of one message and the option to terminate instead of sending a new message. This is achieved via powering off.
Notes: Use only Button A for input.
Holding Button A for lengths of time produces the following inputs:
500ms = dot
1000ms = dash
2000ms = # (character end)
5000ms = @ (message end)
For sending and receiving:
-
Ensure that both micro:bits are connected, have the correct software installed and powered-on. See the Hardware How-To.
-
Pick the micro:bit you wish to send from (either can be used at this stage). The following steps apply to sending only. The receiving device will display the data received.
-
You will be prompted whether you want encryption or not.
a. Enter -- for Yes and .. for No b. Enter @ to reset and try again. c. Enter #
-
You will now be prompted to enter a message.
-
Enter the sequence of dots and dashes for the letter you wish to broadcast. (e.g. .-)
-
Enter # to confirm that the character has finished (e.g. once .- has been entered, press # to confirm that this is the end of the sequence)
-
Repeat steps 5 and 6 until the message has been completed.
-
Enter @ to signal the end of message.
-
The message that has been sent will appear on the screen.
-
The application automatically restarts on both micro:bits. Start again from step 2 if you want to send another message.

This class stores the binary tree for the Morse Code.
Variables:
- Tree * dot; //Pointer to the dot/left node in the tree
- Tree * dash; //Pointer to the dash/right node in the tree
- char c; //the human-readable character (e.g. 'A')
- std::string enc_morse_code; //the encoded morse code string sequence for the above char
Functions:
- Tree() //create a new Tree node setting everything to null
- insert(Tree* tree, char c, std::string morse_code, std::string enc_morse_code) //insert new data into the tree, creating a new leaf if needed.
- find(Tree* tree, std::string morse_code, std::string* enc_morse_code) //take the morse code string sequence and find the related human-readable character, and encrypted morse code string
Variables:
- enum Role //whether the device sends or receives
- enum Time_value //amount of time that represents each button inputable character
- std::string mc_character; //stores the morse code string sequence
- std::string message; //The entire message per broadcast (e.g. "HELLO")
- bool broadcasting; // Whether the user has finished their message or not
- int role; //whether the device is marked to send or receive
- bool encrypt_message; //whether the message is encrypted or not
- bool pressed; //whether the button is pressed or not. Used for sending (as this devices button) and receiving (as the sending devices button / pin input)
Functions:
- This class is responsible for the operation of the Morse Code application as a whole.
- Interface() //init the MicroBit object to allow use of the specific device functions at runtime
- Interface::init() //set the default values for use within this application. This is called in main and after each successfully broadcasted message (to allow a further message to be sent)
- error(ManagedString err_msg) { //display error message and pause.
- mc_setup_next_char(char user_input, Tree* tree) // Handles the end of a morse code string, e.g. .- is the letter A. // The info about each individual letter needs storing and, if applicable, sending
- store_user_input(char user_input, Tree* tree) // Stores the user input thus far (whether from button, or Pin)
- print_message() { //loops through the message vector that's been built and prints a character at a time
- encrypt(char* c) //operates a shift 2 policy //e.g. A becomes C, X becomes Z, 0 becomes 2, etc //Need to manually override due to ASCII numbering. //In ASCII, for example, 9 + 2 = ;
- decrypt(char* c) //Reverses encryption. //See notes in void Interface::encrypt(char* c) for details of manual override
- send(char* c) //sends individual character //converts each character (. - # @) into a period of time that's defined in the header file //sends a high value (1) for the period of time specificied. //to ensure that the receiving device can tell the difference when send is called multiple times, we sleep for 1 second between sends
- build_tree(Tree* tree) //start inserting letters and corresponding morse code into the tree
- run() // The main function that is responsible for interaction with the user and controlling the flow of events
The encryption used is a simple Caesar Cipher operating a shift of 2 (e.g. A->C, B->D, ... Y->0, Z->1, 0->2, ... 8->A, 9->B, etc.) The sending user decides whether encryption is used and lets the receiving device know that this is the case. Regardless of whether encryption is switched on or not, the application operates in exactly the same way except for applying a shift of 2 when sending. The boolean storing whether encryption is enabled, or not, is reset at the end of each message broadcast, thus allowing the user a choice to send one message encrypted and the next not, etc. The details of how to send is included in the App Operation, above.
Lancaster University (2018) micro:bit runtime. Available from: https://lancaster-university.github.io/microbit-docs/ [Accessed 11 February 2019].
Cranbury Scouts International Morse Decoding Tree. Available from: http://www.cranburyscouts.org/MorseTree.htm [Accessed 11 February 2019].
Micro:bit Educational Foundation (2018) Hardware. Available from: Hardware [Accessed 11 February 2019].