Install
- Firmware file from the Releases page.
Use the version without
swein the file name for stock hardware, and withswefor FS-i6 with added SwE switch. - FlySky Updater, which is bundled with the firmware release, or you can get it from the mhils' repository. Put it to the same directory as the firmware file.
- USB-to-RS232/TTL interface. Any FTDI FT232RL-based board will do.
The mini-DIN connector on the back of the FS-i6 has GND on the ring. In addition to that you will need the lower two pins: the Tx and Rx for firmware upgrade. Connect these two pins and the GND ring to the FT232 interface as described.
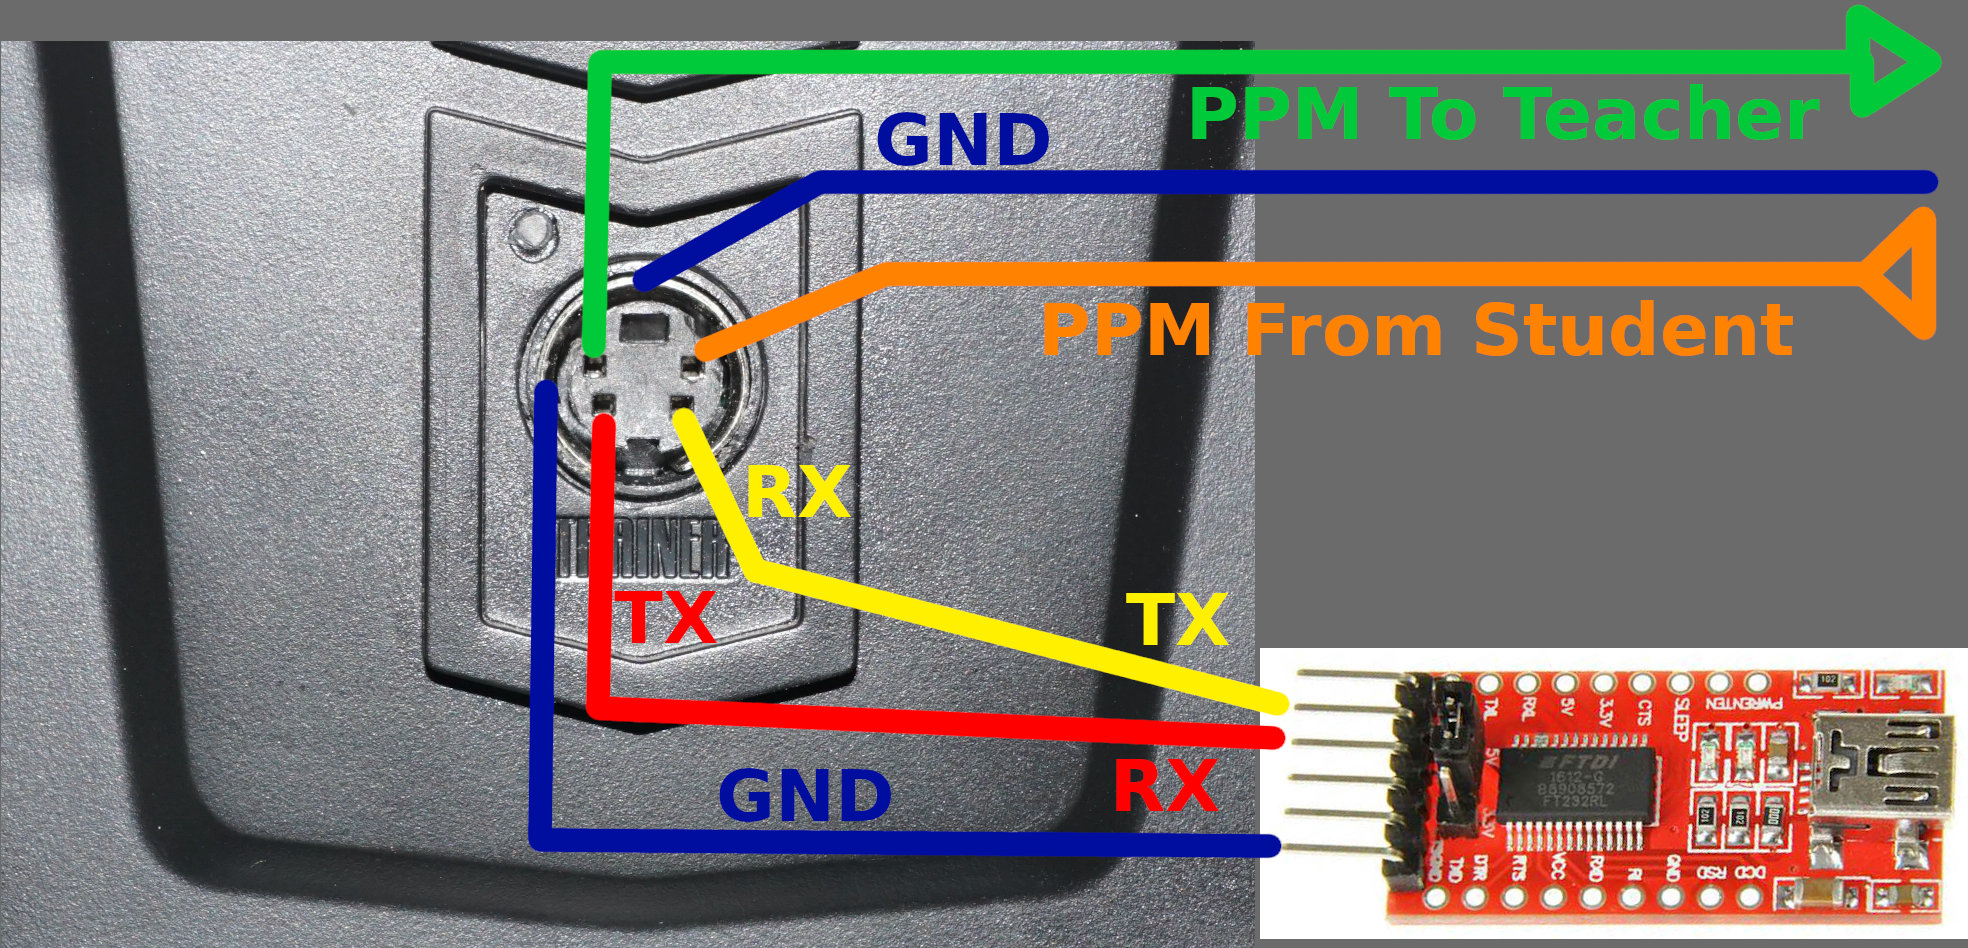
The upper two pins are PPM in and PPM out for Teacher-Student cable. Do not connect these for firmware upgrade.
The FT232RL board has to be plugged to the USB port of your computer, of course.
There are two ways to upload the firmware to FS-i6:
- In the main menu, go to
System⭢Firmware Update(it is on the second page of theSystemmenu); SelectYesandOK. - When something goes wrong, it is also possible to use the following:
- switch the FS-i6 off
- push the trims of the left stick rigthwards and downwards, respectively
- while holding the trims in that position, switch the FS-i6 on
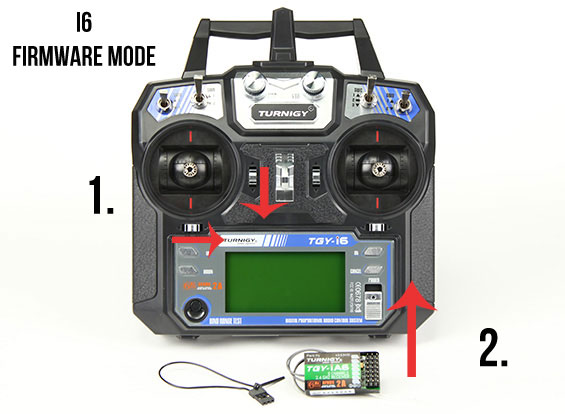
(image courtesy mhills' updater repository)
On Windows, double click on the updater.
Alternatively, the updater can be run from the command line:
./flysky-updater-win64.exe --port COM3 --image fs-i6_updater_MM_DD_HH_MM.bin
On Linux, the command line is similar (run it as root):
./flysky-updater-linux64 --port /dev/ttyUSB0 --image fs-i6_updater_MM_DD_HH_MM.bin
The installed firmware version and date can be verified
in the System ⭢ Firmware ver. menu.
After following the above instructions, you should have the new firmware installed. When upgrading from the stock firmware, the previously configured models need to be configured again. When upgrading from the earlier FlyPlus firmware versions, the set up should be preserved. But as always, verify that the models are set up correctly before flight!
For upgrade to 1.7.6 from earlier versions, the configuration added by FlyPlus features gets overwritten. This means it is necessary to set up the following features again:
and maybe some other as well, sorry.
It is also possible to flash the firmware with an Arduino board with the FT232 serial chip, such as Arduino Nano. It is just necessary to keep the ATmega MCU out of way by holding the RESET pin to zero. Follow this video tutorial. (Thanks @TheUNkilled123 for the link).