Repository navigation
Customization
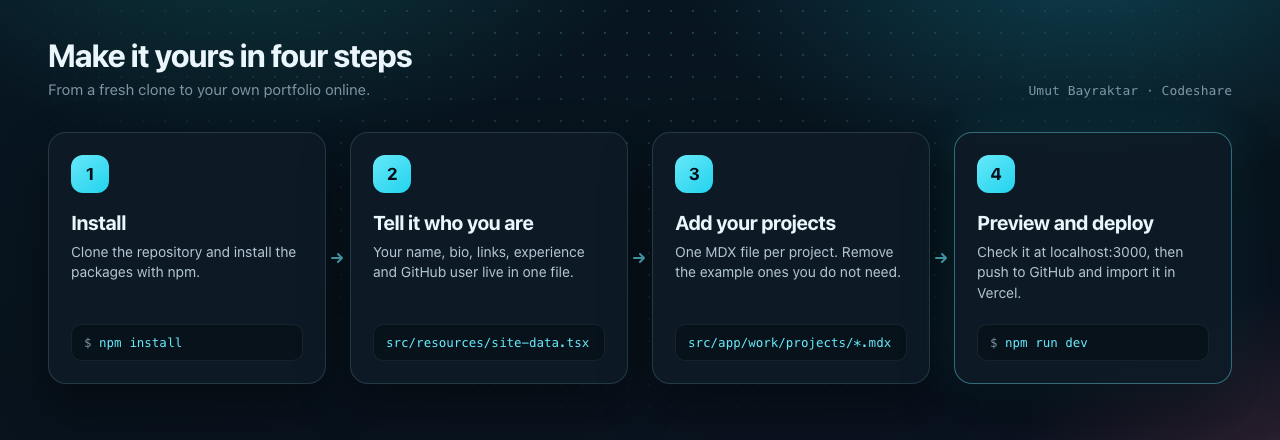
The repository is Umut Bayraktar's live portfolio, so it arrives full of his details. This page walks you through replacing them with yours, in the order that makes sense. Keep npm run dev running while you work; the browser updates as you save.
In src/resources/site-data.tsx:
meta: {
  baseURL: "https://your-domain.com",
  // ...
},
Use the address your site will have, without a trailing slash. It is used for metadata, sitemap.xml, robots.txt, the RSS feed and for loading your avatar into generated share images. If you do not know it yet (for example before your first Vercel deploy), come back and change it later.
Still in site-data.tsx, edit the person block:
person: {
  firstName: "Ada",
  lastName: "Example",
  name: "Ada Example",
  role: "Frontend Developer",
  avatar: "/images/avatar.jpg",
  email: "you@example.com",
  timezone: "Etc/UTC",
  languages: ["English"],
  biography: "One or two sentences about you. Used as the meta description of Home and About.",
  // phone, website and address are not shown anywhere at the moment
},
Then replace the picture:
- Save your photo or logo as
public/images/avatar.jpg(square works best; the example is 400 × 400). - The same file is also the browser tab icon and the Apple touch icon (
src/app/layout.tsx). There is also asrc/app/favicon.ico; replace it too if you want a different icon.
hero: {
  headline: "Frontend Developer building calm, fast interfaces",
  subline: "I design and build web apps with **React** and **Next.js**.",
  // ...
},-
**bold**in the subline becomes bold text. - The example subline contains tokens such as
%beatra.users%. These pull the author's product numbers from codeshare.me. Remove them from your text, or set up your own source (see Live numbers). -
hero.featuredis a small badge above the headline. Turn it on withhome.featured.display: trueinsrc/resources/content.tsx.
social: [
  { name: "GitHub", icon: "github", link: "https://github.com/your-name" },
  { name: "LinkedIn", icon: "linkedin", link: "https://linkedin.com/in/your-name" },
  { name: "Email", icon: "email", link: "mailto:you@example.com" },
],
They appear as buttons on About and as icons in the footer. icon must be one of the keys in src/resources/icons.ts (the list is on Configuration). To add a new icon, import it from react-icons in that file and add it to iconLibrary:
import { FaDribbble } from "react-icons/fa6";

export const iconLibrary: Record<string, IconType> = {
  // ...existing icons
  dribbble: FaDribbble,
};In site-data.tsx, under about:
| Key | What to put there |
|---|---|
introDescription |
A paragraph about you |
experiences |
Jobs or projects: company, timeframe, role, achievements (a list of sentences) |
studies |
Schools or courses: name, description
|
technical |
Skill groups: title, description, tags (each with a name) |
To hide a section, or rename its heading, edit about in src/resources/content.tsx:
studies: {
  display: false,       // hide the section
  title: "Education",   // or rename it
  // ...
},
The "Schedule a call" pill is off by default. To use it, set about.calendar.display: true and put your booking link in about.calendar.link (also in content.tsx).
Delete the example projects you do not need and add your own. This has its own page: Adding Projects.
gallery in site-data.tsx is a list of image paths:
gallery: [
  "/images/gallery/one.jpg",
  "/images/gallery/two.jpg",
  "/screenshots/my-project",
],- Put your own files in
public/images/gallery/(any folder underpublic/works). -
/screenshots/<slug>shows the live screenshot of one of your projects. - Images from another website need that host in
images.remotePatternsinnext.config.mjs.
To drop the gallery entirely, set "/gallery": false in routes.
github: {
  username: "your-github-name",
  highlight: ["best-repo", "second-best-repo"],
  description: "Things I have built and shared.",
},
Pinned repositories are read from your GitHub profile, so pin your best work there. highlight is only used if that fails.
In src/resources/once-ui.config.ts:
const routes: RoutesConfig = {
  "/": true,
  "/about": true,
  "/work": true,
  "/blog": false,
  "/gallery": true,
  "/github": true,
};
false removes the page, its header button and its sitemap entry (case study URLs stay in the sitemap even when /work is off). The header only has buttons for these six paths, so a new route needs its own button in src/components/Header.tsx.
Also in once-ui.config.ts:
const style: StyleConfig = {
  theme: "system",
  neutral: "gray",
  brand: "cyan",
  accent: "red",
  solid: "contrast",
  solidStyle: "flat",
  border: "playful",
  surface: "translucent",
  transition: "all",
  scaling: "100",
};-
Colours: change
brand,accentandneutral. For your own colour scale, usecustomand define the variables insrc/resources/custom.css(it contains a commented example, generated at once-ui.com/customize). -
Corners:
borderisrounded,playfulorconservative. -
Size:
scalingfrom90to110. -
Background: in
effects, the dots are on by default. Trygradient.display: trueorgrid.display: true. -
Fonts: swap
Geist/Geist_Monofor any other font fromnext/font/googlewhere the fonts are imported in that file (afterprotectedRoutes).
All the allowed values are listed on Configuration.
The footer text is written directly in src/components/Footer.tsx:
© {currentYear}{" "}
<a href="https://github.com/umutxyp" style={{ color: "inherit" }}>
  umutxyp
</a>
Change the link and the name to yours. The social icons next to it come from social.
-
Newsletter: set
newsletter.display: true, put your Mailchimp form URL inmailchimp.action(once-ui.config.ts), and copy the hidden fields from your own Mailchimp embed code intosrc/components/Mailchimp.tsx. -
Share image for Home: add
public/images/og/home.jpg.content.tsxpoints to that path, but the file is not in the repository. - Password pages: see Pages and Features.
Before you publish, search the project for umutxyp, Umut and codeshare and check each hit. The places you will find are:
| File | What to change |
|---|---|
src/resources/site-data.tsx |
Everything (domain, person, hero, social, about, gallery, GitHub) |
src/resources/content.tsx |
about.calendar.link, page descriptions that mention the author's products |
src/resources/once-ui.config.ts |
sameAs links (not shown on pages, but keep them correct) |
src/app/work/projects/*.mdx |
The example projects |
public/images/ |
avatar.jpg and the project covers |
src/components/Footer.tsx |
Name and link |
src/lib/live-stats.ts |
The codeshare.me source and its User-Agent text, if you use live numbers |
next.config.mjs |
The /work/code-share-marketplace redirect |
.env |
The committed PAGE_ACCESS_PASSWORD. Set your own in .env.local (or on your host) instead |
package.json |
The package name (umutxyp-portfolio); run npm install afterwards so package-lock.json matches |
README.md |
The author's description, links and contact details |
SECURITY.md, .github/CODEOWNERS
|
The author's repository link and GitHub user for security reports and reviews |
LICENSE |
Keep the original notice; you may add your own copyright line for your changes |