Quick guide for setting up this example. Unity version built in is 2020.3.4f1 but will most likely work with older versions.
This is a modified version of the Unity client from this wonderful tutorial https://www.youtube.com/watch?v=uh8XaC0Y5MA&t=8s. The main change I added was rooms, also input is not sent to the server we send position and rotation here. I did this because the application we plan on using this for is training and likely won't have people cheating.
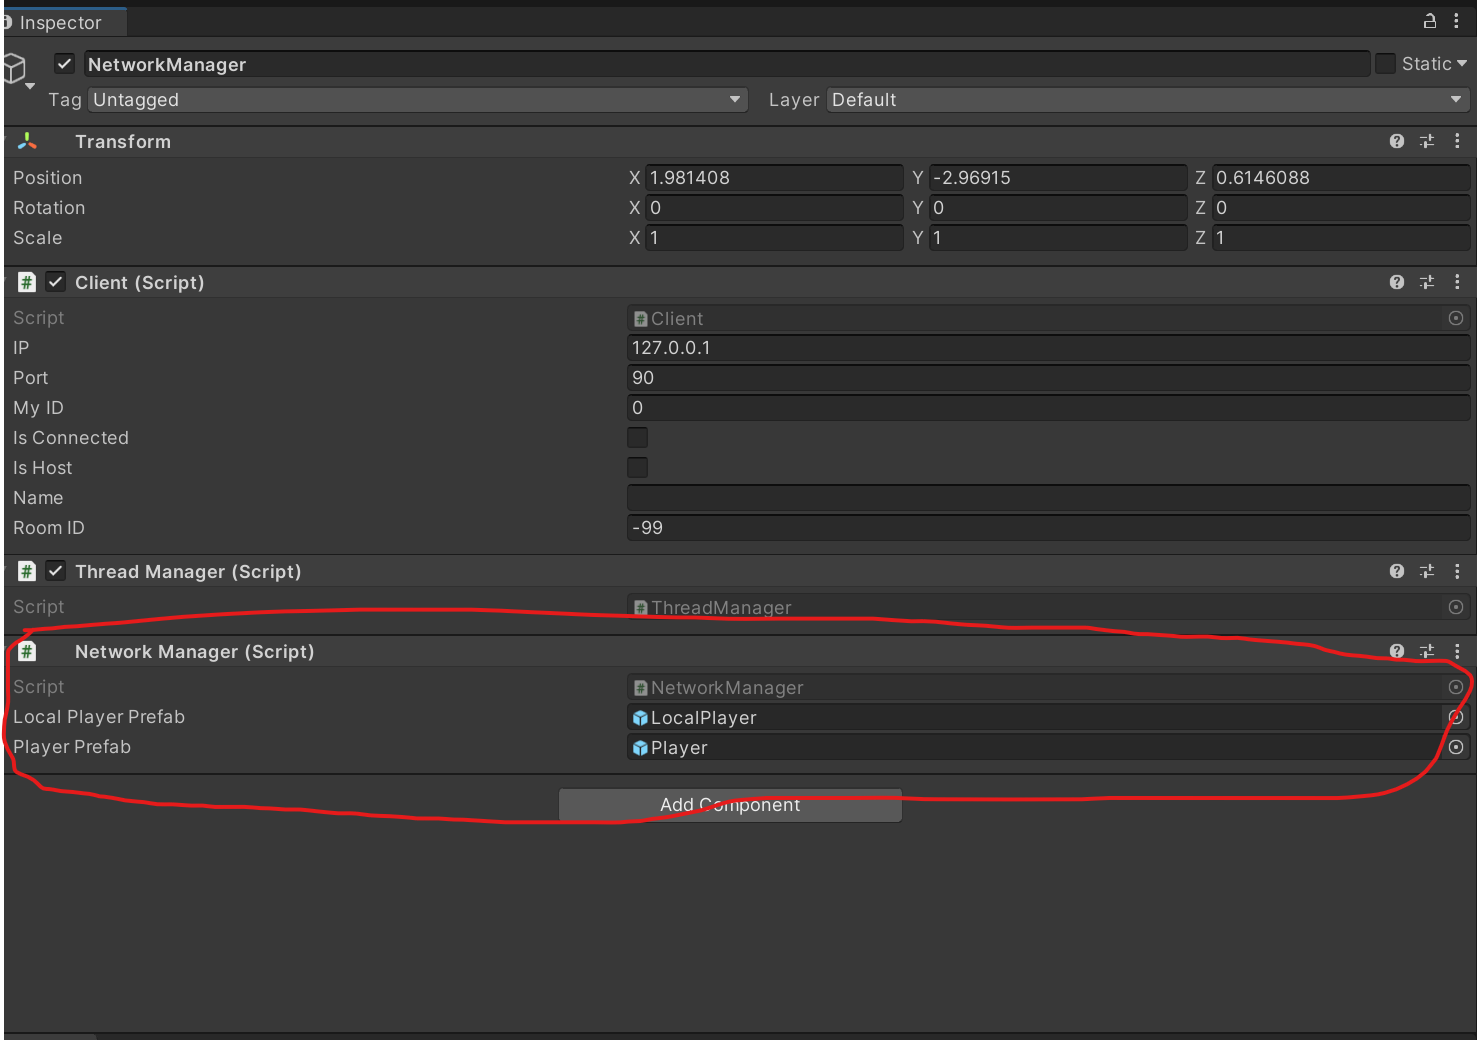
First pull the server and follow the guide for setting it up from here https://github.com/CanadianADLlab/UnityNetworkingServer. Now just open the MenuScene and go to the networking manager
gameobject and configure the port and ip to match the server you have running.

From there just run the scene, make a room and then join it on another build for the networking example to work. There's not a whole lot going on here it will just spawn an instance of the players in the room and there's a cube they can both push around and it will be visible over the network. The whole idea is to keep this as simple as possible to be able to use as a template for other future projects. The main two scripts responsible for tracking objects with the server and the NetworkObject and the Network Character which I'll cover later.
I just want to outline here how to change and modify things to work for your own projects, not like a super in depth guide of how networking works.
The scene that gets loaded into after joining a room is a public string called levelName under ClientHandle.cs change this to load into whatever scene you want after joining.
So the scene the players connect to in this example is called main and it is just a plane and 3 cubes, it can be whatever you want just make sure it is the same layout for everyone using.
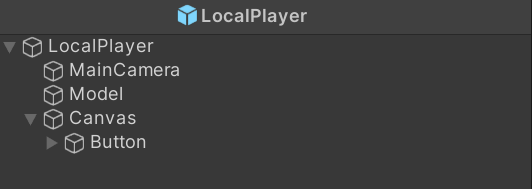
If you want to make your own player prefab just remember that a local player prefab must have PlayerManager and NetworkCharacter attached to it, and a player prefab will need just the PlayerManager script attached.
The NetworkCharacter is responsible for telling the server and the other people in the room what your position and rotation is. And the PlayerManager handles basic player information and also handles lerping the other networked players.
The Menu Scene contains a GameObject called NetworkingUI containing all the different UI widgets for connecting to and joining rooms. You can change around the UI but if you want it to work without modifying the code make sure you set all the public objects there and follow the flow of how it originally worked.
Well this example project is pretty bare bones so for some reason you might need to modify or completely write a new network call. An example of something not included here would be maybe an on click event would be activated on one client but you want it to activate for everyone so you would have to write a call to the server for that. The example explained below is sending an integer value to the server who then sends it back to the other clients. The clients then print the value but you could have then trigger an event or something.So if you want to write a custom function that sends something different than what is already here I'll explain the process.
For this to work correctly both the client and the server will have to be modified, client sends it and the server has to figure out what to do with that data and who to send it to.
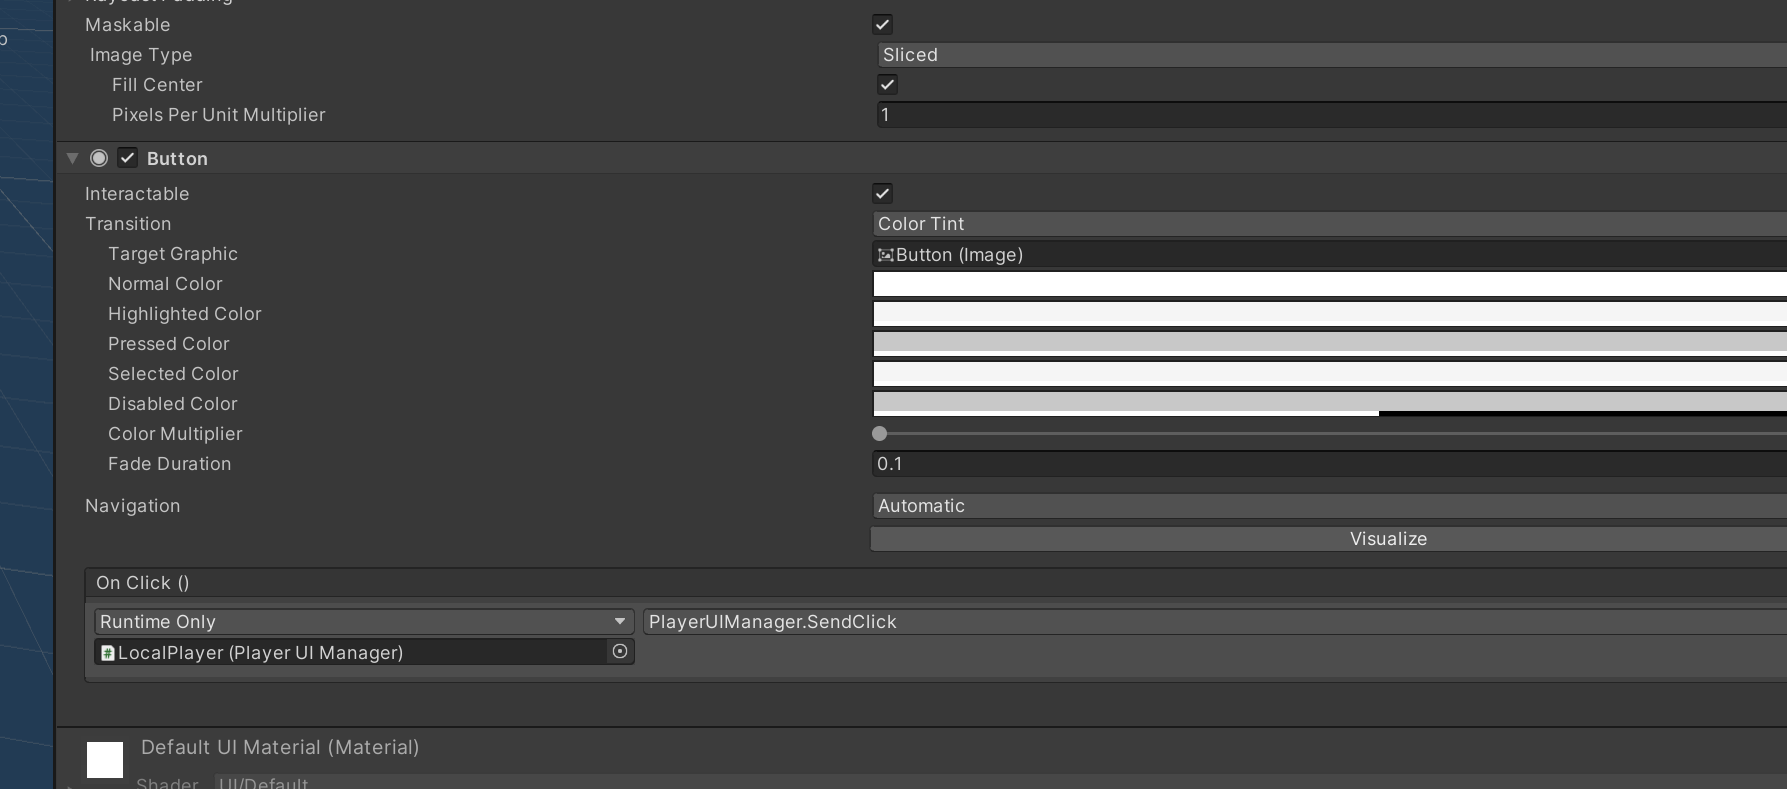
This example function will just be a button pressed that sends an int to the server who then sends it back to every client in the lobby. Let's add the button to the local player that we can click, so under the localPlayerPrefab add a Canvas and a button under that.
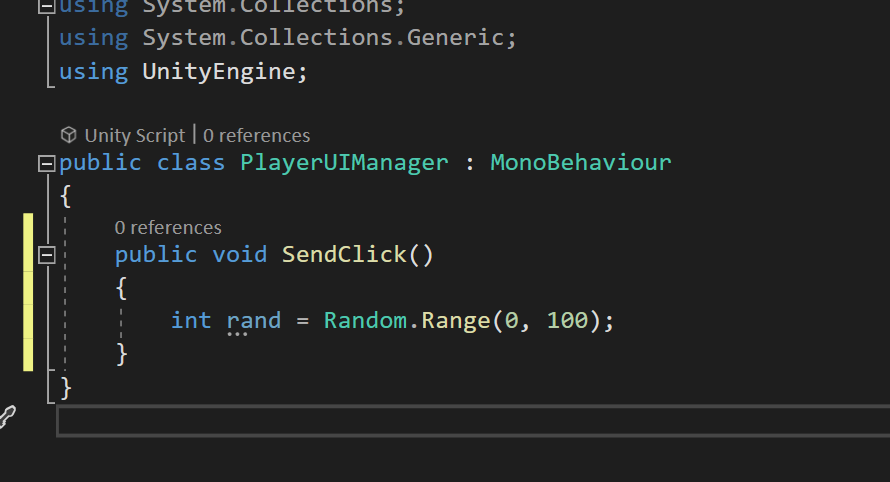
From there we are going to create a script called PlayerUIManager and attach it to the root of the localplayerprefab. This will just contain the click event.
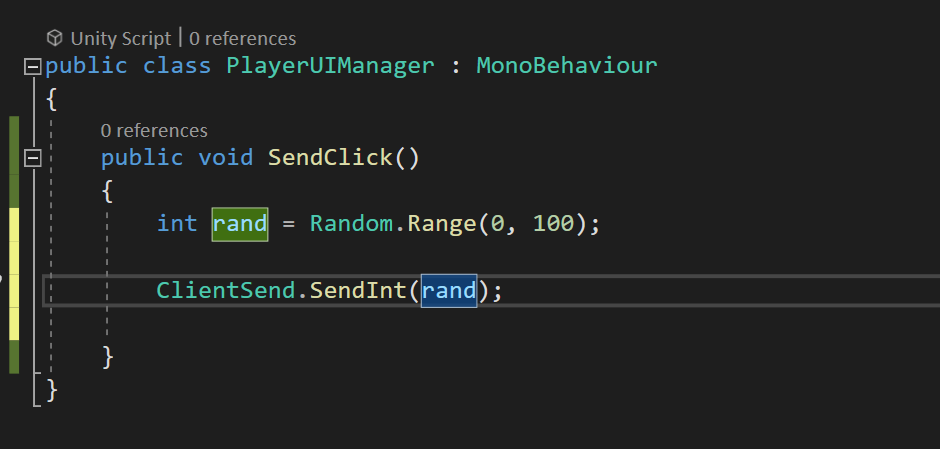
Now write a public function that generates a random int.
Now set the button under the UI to call that event
Okay now the front end is set up so let's modify the SendClick() event to actually send that int to the server.
Open up packet.cs in the unity project and add intRespond to the ServerPackets enum and intSend to the ClientPackets enum.

Now open up the server code if you haven't pulled it you can do so from here https://github.com/CanadianADLlab/UnityNetworkingServer and paste the enums over top of the same
enums in the packets.cs file on the server.
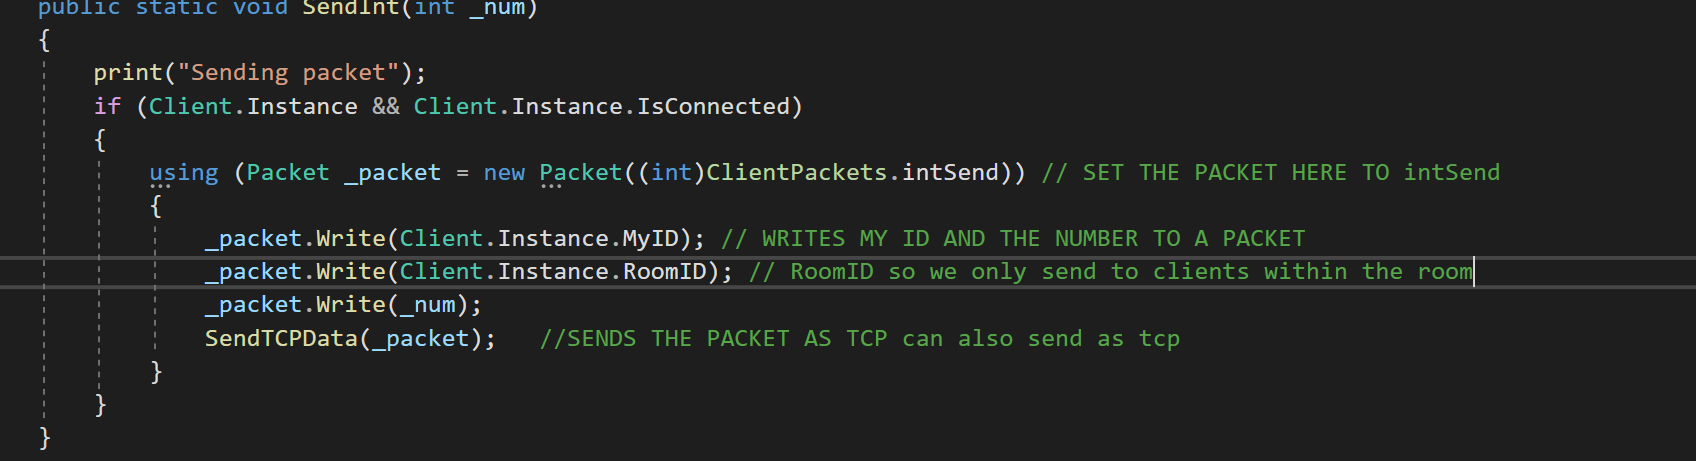
Next in the client unity project add a function called SendInt(int _num) to the ClientSend.cs script (copy the screenshot below).
Back in the SendClick() function in the PlayerUIManager add the line ClientSend(rand); (or send any int with it doesn't matter for this)
Okay the next few changes we have to make are on the server side so open up the server code and let's deal with what happens when we receive a packet.
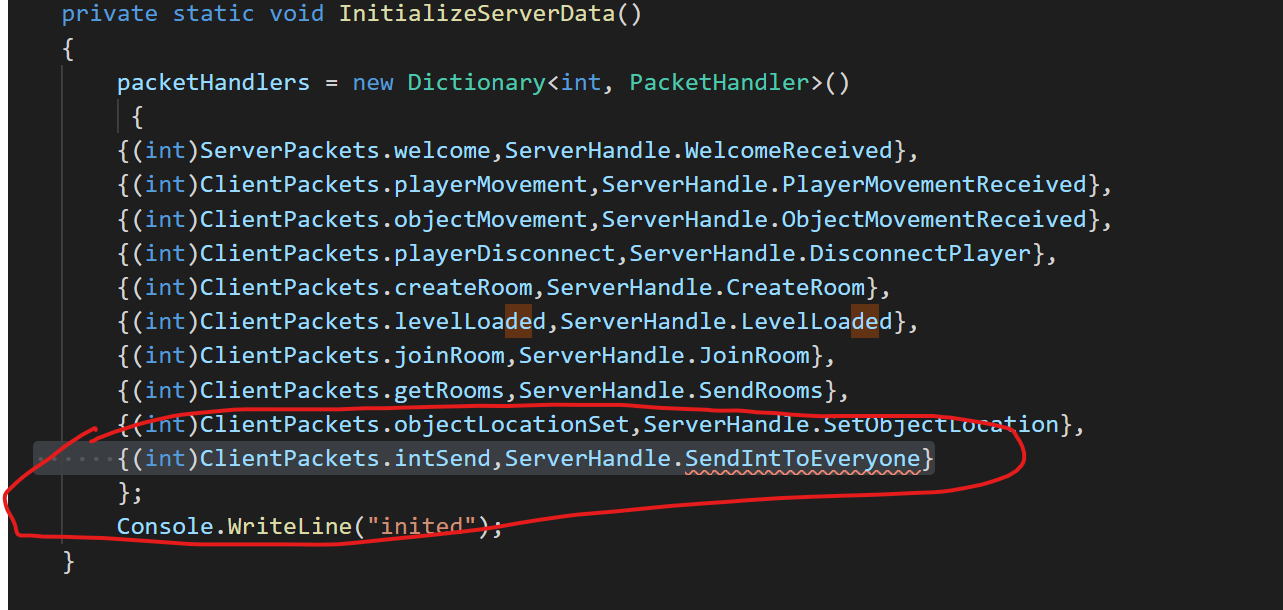
In the server.cs we need to add a line to the InitializeServerData() function, add {(int)ClientPackets.intSend,ServerHandle.SendIntToEveryone} to the packetHandlers,
basically this just tells the server when that ClientPackets.intSent value is received it will call the function ServerHandle.SendIntToEveryone.
There is an error because the function is still yet to be added to the ServerHandle which we will do next.
Now inside ServerHandle.cs add this function, it just tells the ServerSend.cs to send the int to everyone. The ServerSend.SendIntToEveryone will be underlined because we
have yet to add it. Also make sure the _packet.read functions are in the same order as they were sent. If you send an int,int,and a string for example it will have to read in the same order they were written on the client side.
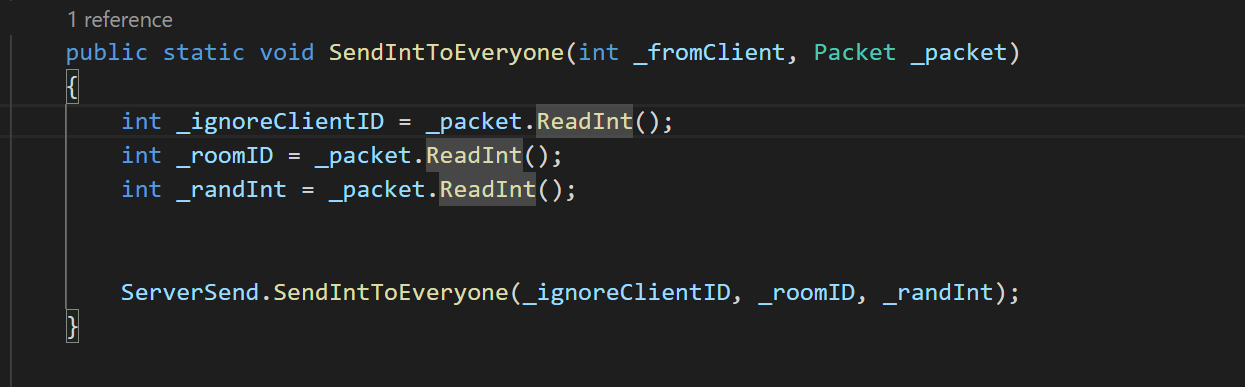
Now let's write the SendIntToEveryone function, all we need to do is write that random int to a package and then call SendTCPDataToAll (copy screenshot below)
, also if you wanted to send to a specific client you can use SendTCPData and specify the clientid to send to, and if you want to use udp just change the TCP to UDP like SendUDPDataToAll.

Okay now let's go back to the client side unity project and handle the data for this example let's just log the received value.
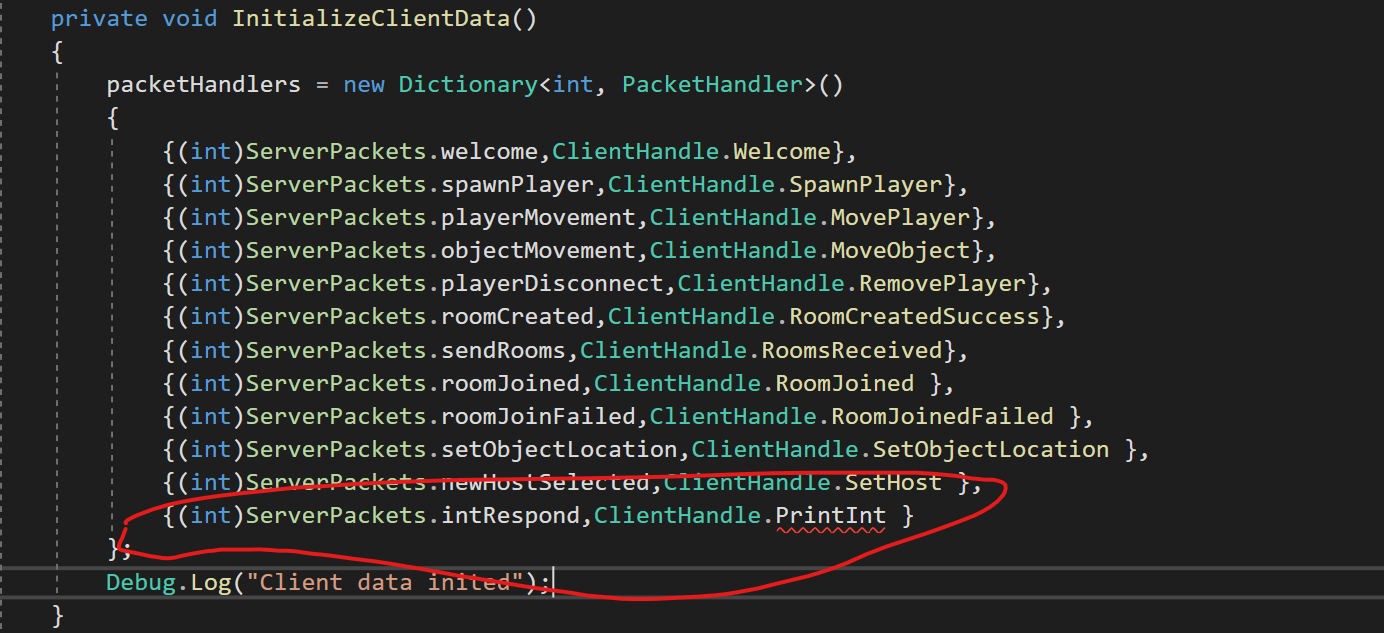
First go to the InitializeClientData() in the Client.cs file and add {(int)ServerPackets.intRespond,ClientHandle.PrintInt } to the packetHandlers this will just call
the PrintInt function for the client.
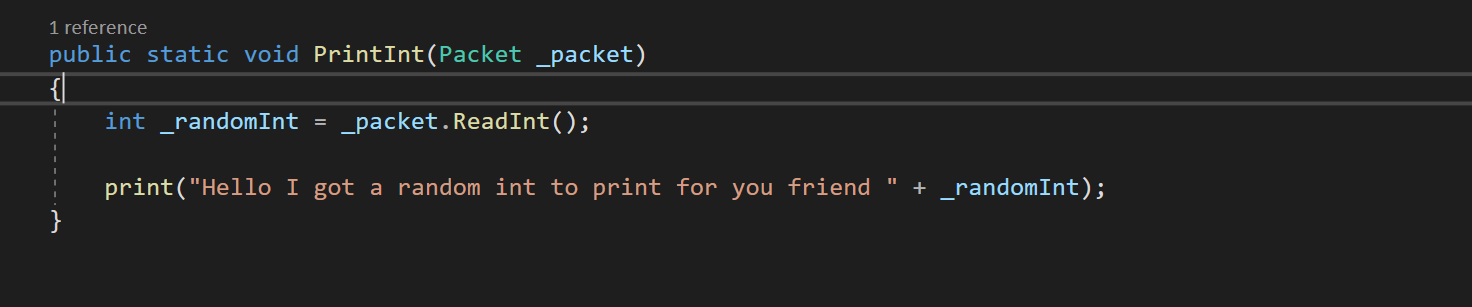
Finally make the function PrintInt inside the ClientHandle.cs class. Once again make sure the _packet.read functions are in the same order as they were sent.
Now make a build of the project, run the server connect via the Unity editor (so we can see the print) and connect via the build as the other player. On the build click the button and you should see a random int locked in the editor. The gif is low quality but it's just showing the button being pressed on one client and the other client in the unity editor seeing the int.
