Author:
Eleana Polychronaki
Platform:
Unity 2019.3
Resources:
- Unity Manual (2019.3)
- Unity Scripting API (2019.3)
- Unity Learn
- Microsoft .Net C# Documentation
- Geeks For Geeks
Basic Excercises:
- My First Scene - MeshFilter & MeshRenderer
- My First Simple App
- My First Custom Component
- My First Game Manager
- My First UI
Intermediate Exercises:
This repository provides a guide for the basics of Unity3D and various links to online resources for self-learning.
introduction
level 1 (exercises 1 & 2)
level 2 (exercises 3 & 4)
level 3 (exercise 5)
- Unity UI
Unity is a cross-platform game engine created by Unity Technologies. It can be used to create both 2D and 3D games, as well as, simulations, immersive experiences and a variety of other apps. Although it is originally a tool to make games it is being used in a variety of other industries including film, engineering, architecture and construction.

The first time you open Unity there is a list of things you need to look into. The first step will be to familiarize yourself with the user interface and more specifically what are the components that constitute it. Make sure you understand your distinct workspaces: the project window, the hierarchy window, the inspector window, as well as the scene view and the game view.
The next thing you need to remember is that Unity can produce applications that run in a variety of platforms. According to your desired target platform, you might need to pay special attention to some of the project settings. If you know what platform you are building for, make sure you set it as target at the begining of your project and then configure the corresponding settings.
The project settings are a variety of settings that give you the opportunity to customize your project. When you select the target platform of your project the default settings that go with it are quite balanced to get you started, however you might wanna adjust a few things according to your specific needs. The most common settings to adjust are the player settings, the quality settings and the physics settings.
An Asset is a representation of any item you can use in your Project. Such items can either be imported into Unity after having being created in another software/platform or they can be provided from or created within Unity.
The Gameobject is the most important concept in Unity as all objects in your game are gameobjects. However the gameobjects are nothing on their own. They need to be described by a set of properties that define what they are (characters, lights, UI elements) and what they can do. These properties are called componets and different combinations of them constitute discrete kinds of gameobjects.
Componets are the functional pieces of Unity that make things happen. Every Gameobject is in essence a container for components that will define its being and behaviour. The most essential component is the transform component. That is because this component defines the existence of a gameobject in space. It gives information about its location, rotation and scale, without such information the gameobject would not exist at all. For this reason every gameobject has a tranform component attached upon creation. Other than that, unity provides a wide variety of components that you can use, however it is quite common to create your own custom components using scripts.
Sometimes it is useful to link different gameobjects together. The constraints are a set of components and methods that enable this linking. The most popular constraints are the parent and the look at.
- Prefabs
When you have configured and customized a gameobject, adding components and properties according to the needs of your project, Unity gives you the opportunity to store that particular gameobject as an asset. This particular type of asset is called a Prefab. Prefabs are very useful because not only do they allow you to easily generate numerous instances of the same object, but also all of the instances hold a reference to the original prefab. In this way if you change something in the original, all instances will change accordingly.
The scene represents somewhat of a level in your game. It contains all the elements that define your project for this specific level: gameobjects, environments, UI elements, special effects etc. One Unity project can contain main scenes, but you only have one active scene at a time on which you can work. However, your built app can contain a sequence of scenes that the player/user movers through. Every scene has by default a camera and a light. These are the essential elements that you need to get started.
- Camera
The camera is a gameobject that is responsible for what the player/user sees in the app. For this reason you need at least one active camera gameobject on your scene. You can have an unlimited number of cameras in one scene and you can set them to render various things.
- Lights
In order to calculate the shading of a GameObject that is affected by lighting, Unity needs to know the intensity, direction, and color of the light that falls on it. Lights will be further explained in the rendering section of this document.
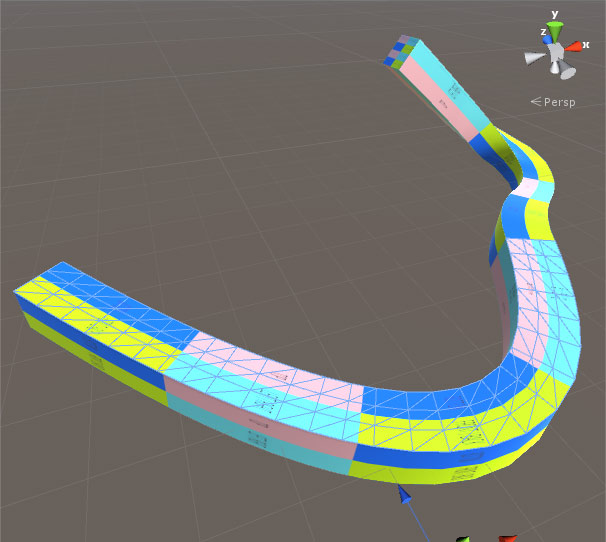
The main graphics primitive that Unity uses in order to render geometry is the mesh. In order to actually see a geometry in your game you need to attach two components to your gameobject, the mesh filter and the mesh renderer. The first is responsible for holding the mesh data of your model and provide it to the second, which will in turn be responsible for actually rendering the geometry in your screen. see more
When importing geometries from other software, depending on their format, Unity automatically creates an asset that holds the necessary information (mesh, materials, colors) and creates a gameobject that already has the corresponding mesh filter and mesh renderer components attached. You have the opportunity to change some of the geometry properties when importing it through the import settings window.
Unity, as most game engines, has its own inherent physics engines. Essentially, what a physics engine is responsible for simulating the motions and reaction of objects as if they existed in an environment of real-world and were constraint by the actual laws of physics. In other words, such engines provide approximate simulations of certain physics systems as they would work in the real-world. These systems can vary from the basic rigid and soft bodies dynamics to more complex systems such as fluid dynamics.
Two of the most significant components in unity physics are:
Rendering is the automated process that enables us to see things in our game. It is the process of transforming a 3D geometry into a 2D image that we are able to see on our screen. Many factors and processes are involved into rendering and there are more than one rendering techniques. It is important to understand the main logics behind the process. Because Unity, as most game engines, implements real-time rendering, it uses rasterization as it is one of the fastest and lighter rendering techniques.
Other than meshes, which are the basic graphics primitives of Unity defining the shapes of objects, similarly important are:
Please check the following unity rendering tutorial.
End of Level 1, Exercises 1 & 2
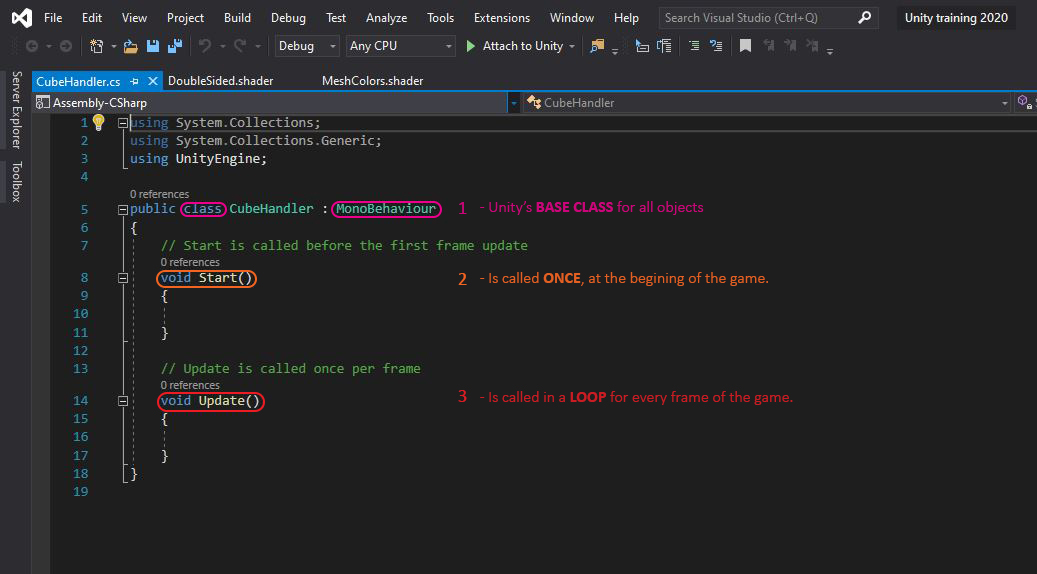
Appart from using unity's built-in components, you have the ability to create your own custom components through C# scripts. After you have created and edited your script to fit your needs, just like other Components often have properties that are editable in the inspector, you can allow values in your script to be edited from the Inspector too. (see exercise 3) Other than the Inspector, you can modifying Component properties to manipulate GameObjects through scripts as well. The difference, though, is that a script can vary a property’s value gradually over time or in response to input from the user.
Unity provides a series of methods through which you can easily check if various inputs of your computer (and other devices) have been interacted with. Such devices can be your mouse position, the mouse buttons as well as any key in your keyboard.

Another popular way of triggering things in Unity is to detect the interaction of the user with the scene's gameobjects. This is possible through raycasting. The way this works is by casting a ray from a certain position in space towards a certain direction and for a set distance and checking if this ray hit any collider objects. The raycast itself is a boolean which means it returns true or false depending on whether it found a collision, but it also allows access to other properties of the collison through the Raycasthit such as the hitting point, the distance form the origin etc.
It is very common in Unity projects to create one or more Game Managers. These are usually empty gameobjects that have custom components which hold and handle general game information and are responsible for performing some global actions. see more in excercise 4.