VS2019环境下freeglut环境的配置 #2
Description
现网络上有很多关于OpenGL的环境配置中都安装了glut,但glut已经超过20年没有更新,现在基本选择配置freeglut
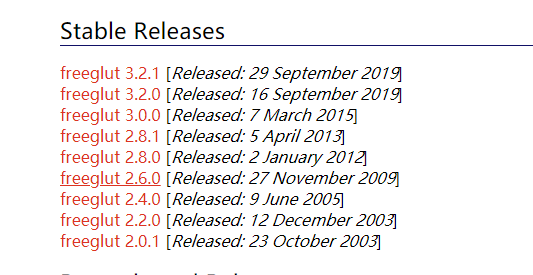
1. 下载freeglut源码
网址:http://freeglut.sourceforge.net/
选择最新版本下载,注意下载完成后并不能直接使用,需要我们自己编译源码
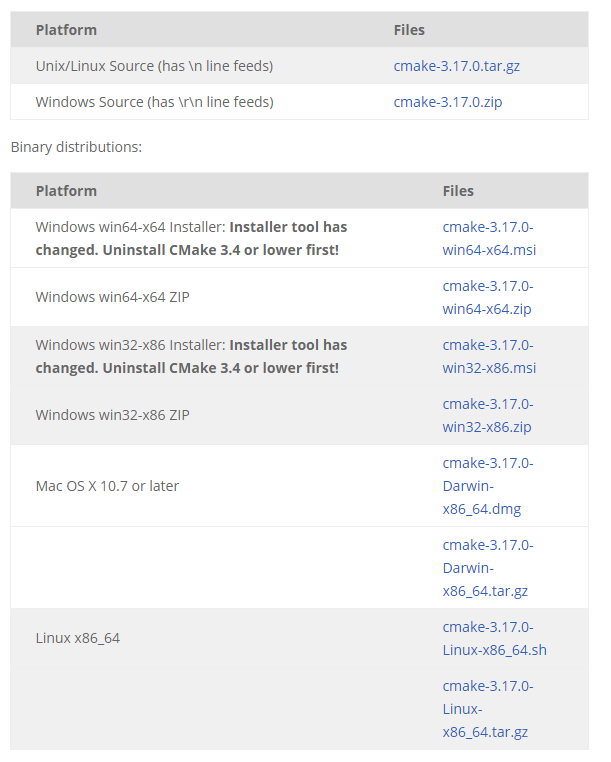
2. 下载CMake来编译freeglut
网址:https://cmake.org/download/
选择自己所在平台,下载最新版本,若装过CMake较低版本建议先卸载旧版本。
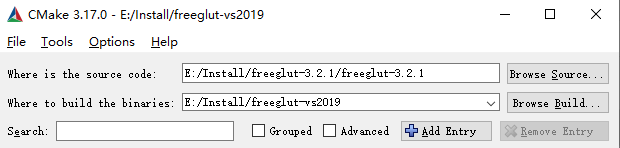
装好后的CMake如下:

where is the source code选择解压FreeGLUT后的目录。
where to build the binaries是即将生成的文件存放的路径,建议单独建一个文件夹存放。
选择完毕后显示如下:
选择Configure中vs版本,点击Finish

点击Generate
完成后去设定存放的文件夹中,用vs2019打开freeglut.sln
此时分别选择Debug和Release模式生成解决方案

3. 配置freeglut
- 将E:\Install\freeglut-3.2.1\freeglut-3.2.1\include中的GL文件夹复制到VS2019的安装目录下的VC文件的include文件夹
这里我看网上的许多教程include的路径默认为C:\Program Files (x86)\Microsoft Visual Studio 14.0\VC\include
可能是vs版本的原因,2019并不能根据这个路径找到include文件夹,这里vs2019的默认vc路径为:

找到include文件夹,粘贴 - 打开CMake生成目标文件夹的bin\Release\freeglut.dll和bin\Debug\freeglutd.dll移动到拷贝至C:\Windows\system32与C:\Windows\SysWOW64目录下
- 打开CMake生成目标文件夹lib\Release\freeglut.lib、freeglut_static.lib和lib\Debug\freeglutd.lib、freeglut_staticd.lib并移动到C:\Program Files (x86)\Microsoft Visual Studio\2019\Community\VC\Tools\MSVC\14.25.28610\lib\x64目录下
注意这里vs2019的路径也与其他vs版本不同
4. 测试
创建空白的console工程,创建C++文件,拷入如下代码:
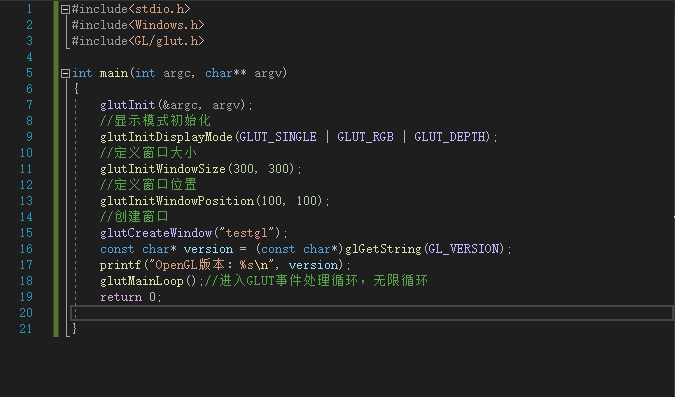
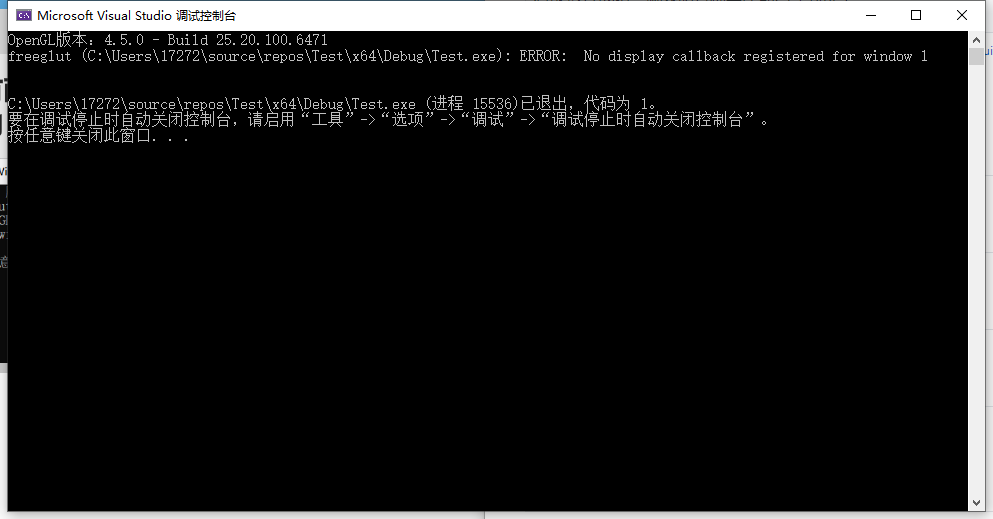
这个函数没有画图,只是写了一串字符串——OpenGL的版本
若能运行成功,就表明各种类库都已经到位了
需要注意的是:
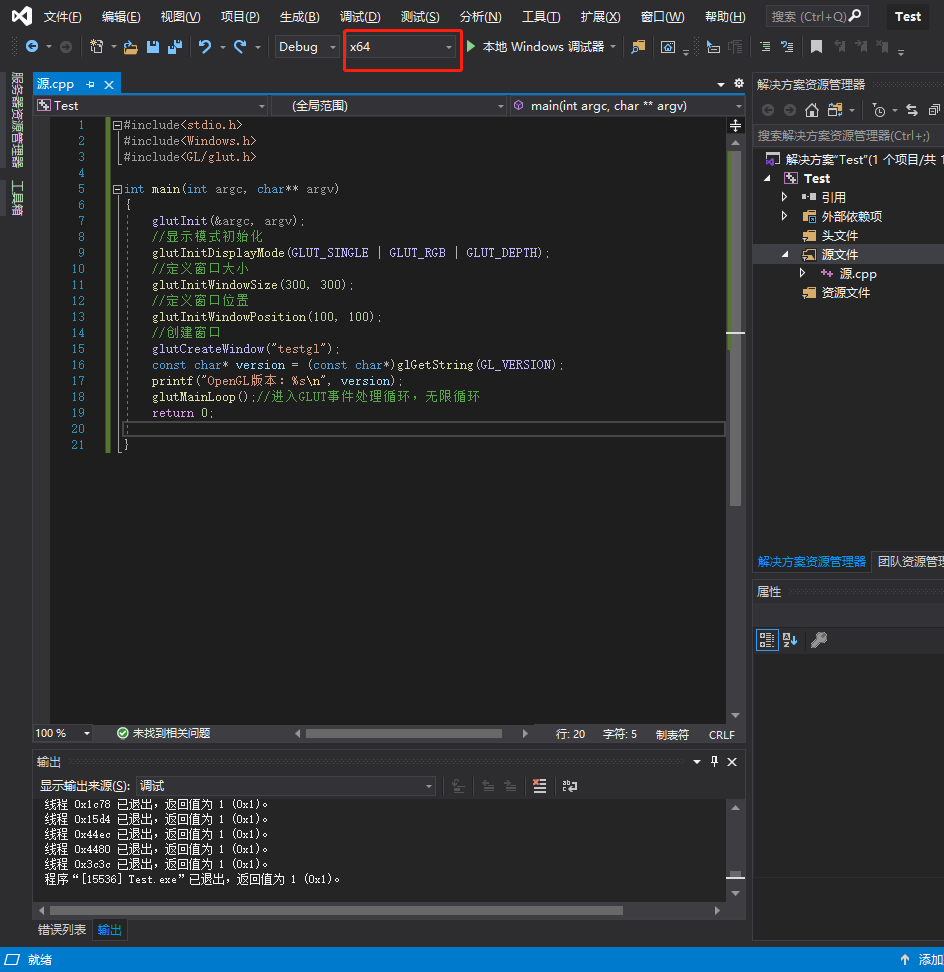
这里一定要选成64位的,因为复制到的文件夹都是64位的,如果选成86位的运行不成功。