This article is a complete guide on how to use the LinkedIn API with Python
Welcome, this article covers how to use the LinkedIn API with Python. Following this, you will learn how to get your OAuth Credentials, authenticate the API using OAuth 2.0 and create LinkedIn posts. You should understand that the LinkedIn API is limited to users with basic access and you can follow this article to learn how to make simple posts automation to your LinkedIn public profile.
As stated this API provides basic access for users, the parameters as follows
w_member_social : With this, an authenticated user can post, comment and like posts
r_emailaddress : To retrieve your email address
r_liteprofile : To retrieve your LinkedIn user profile.
You can't do anything else without requesting partner access, which is quite difficult to get
If you are ready to get started, follow right along.
To use the LinkedIn API, the first step is to create an app in the LinkedIn Developer Tool. Remember you need to have a LinkedIn account before you decide to use the API. You can create your LinkedIn account here
STEP 1: Creating the App
- Visit the LinkedIn Developer Tool and click on “Create app”.
- Add Your App name, Company Page URL/Name and Logo.
- Click on “Create App” button.
STEP 2: Verifying the App
- In your App settings, Click on “Verify”.
- Click on “Generate URL”.
- Copy the generated URL in your browser while connected to your Linkedin Account.
- Go back to the verification page and click on “I’m done”.
STEP 3: Setting up the Redirect URI
The redirect URI will be used to define which URL the token will be sent to. The redirect URI is important because setting this up to a live site could let an attacker get access to your token. For the purpose of this article,we will set this up to our local computer(localhost).
- In the OAuth Tab, go to OAuth 2.0 settings.
- In the Authorized redirect URLs for your app, add http://localhost:8080 (It might not be 8080 depending on your configuration so make sure to confirm).
- Copy your configuration information and save it in a
credentials.jsonfile that looks like this:
{
  client_id: "########",
  client_secret: "########",
  redirect_uri: "http://localhost:8080"
}
STEP 4: Request App Products
- In your App settings, Go to products and ask for permissions to Share on LinkedIn, Sign-in with LinkedIn and Marketing Developer Platform.
Most likely, your request for Marketing Developer Platform will not get approved, limiting you to a very few features of the API. But not to worry, you will still be able to use features stated above.
Disclaimer: This article covers what you can do with the LinkedIn API without the LinkedIn Marketing Product
If that you have all the necessary credentials required to authenticate and use the LinkedIn API, you can proceed to using OAuth 2.0 to authenticate your build and use the API. OAuth 2.0 is an authorization framework that enables applications — such as Facebook, GitHub, and LinkedIn to obtain limited access to user accounts on an HTTP service. It works by delegating user authentication to the service that hosts a user account and authorizing third-party applications to access that user account. In this article, you will learn how to authenticate the LinkedIn API using OAuth 2.0. There are code guides that you can follow starting from this section.
STEP 1: Importing Libraries
To run the OAuth 2.0 authentication you will need to install and import all these Python libraries: requests, random, string and json.
import json
import random
import requests
import string
STEP 2: Reading the LinkedIn Credentials
Now, let’s create a function that will read the credentials.json file that we have created in the previous section
def read_creds(filename):
    '''
    Store API credentials in a safe place.
    If you use Git, make sure to add the file to .gitignore
    '''
    with open(filename) as f:
        credentials = json.load(f)
    return credentials

creds = read_creds('credentials.json')
client_id, client_secret = creds['client_id'], creds['client_secret']
redirect_uri = creds['redirect_uri']
STEP 3: Authorizing The API
To authorize the API, you will need to generate a CSRF token to prevent cross-site request forgery.
The create_CSRF_token() function below creates a random string of letters to use as the CSRF Token.
def create_CSRF_token():
    '''
    This function generates a random string of letters.
    It is not required by the Linkedin API to use a CSRF token.
    However, it is recommended to protect against cross-site request forgery
    '''
    letters = string.ascii_lowercase
    token = ''.join(random.choice(letters) for i in range(20))
    return token
Then, the authorize() function says what it does. It will open the authentication URL. Once authorized, it will redirect to the redirect URI given (http://localhost:8080).
api_url = 'https://www.linkedin.com/oauth/v2'

def authorize(api_url,client_id,client_secret,redirect_uri):
    '''
    Make a HTTP request to the authorization URL.
    It will open the authentication URL.
    Once authorized, it'll redirect to the redirect URI given.
    The page will look like an error. but it is not.
    You'll need to copy the redirected URL.
    '''
    # Request authentication URL
    csrf_token = create_CSRF_token()
    params = {
        'response_type': 'code',
        'client_id': client_id,
        'redirect_uri': redirect_uri,
        'state': csrf_token,
        'scope': 'r_liteprofile,r_emailaddress,w_member_social'
        }

    response = requests.get(f'{api_url}/authorization',params=params)

    print(f'''
    The Browser will open to ask you to authorize the credentials.\n
    Since we have not set up a server, you will get the error:\n
    This site can’t be reached. localhost refused to connect.\n
    This is normal.\n
    You need to copy the URL where you are being redirected to.\n
    ''')

    open_url(response.url)

    # Get the authorization verifier code from the callback url
    redirect_response = input('Paste the full redirect URL here:')
    auth_code = parse_redirect_uri(redirect_response)
    return auth_code
STEP 4: Getting the Access Token
The authorize() function contains two functions that will need to be defined: open_url() that opens the login URL in the browser and parse_redirect_uri()that checks the redirect uri and extract the access token from it.
 def open_url(url):
    '''
    Function to Open URL.
    Used to open the authorization link
    '''
    import webbrowser
    print(url)
    webbrowser.open(url)

def parse_redirect_uri(redirect_response):
    '''
    Parse redirect response into components.
    Extract the authorized token from the redirect uri.
    '''
    from urllib.parse import urlparse, parse_qs

    url = urlparse(redirect_response)
    url = parse_qs(url.query)
    return url['code'][0]
A third function save_token() will be needed to save the access token to your credentials.json file. The save_token() function will make sure that you don’t need to log in every time you want to use the API.
def save_token(filename,data):
    '''
    Write token to credentials file.
    '''
    data = json.dumps(data, indent = 4)
    with open(filename, 'w') as f:
        f.write(data)
The last function headers() that creates the header that will be used in the request made to the API, but will not be used here, but later when querying the LinkedIn API.
def headers(access_token):
    '''
    Make the headers to attach to the API call.
    '''
    headers = {
    'Authorization': f'Bearer {access_token}',
    'cache-control': 'no-cache',
    'X-Restli-Protocol-Version': '2.0.0'
    }
    return headers
STEP 5: Combining All Functions
Now that all necessary functions have been created, you can proceed to create a function to run the entire script.
The logic behind the auth() function goes like this:
- Run the Authentication.
- The first time the function runs, the browser opens asking you to authenticate.
- You will have to manually paste the redirect URI in the prompt.
- The URL will be parsed to extract the access token.
- It will save the access token
- Next time, it will use the access token instead of asking you to authenticate
def auth(credentials):
    '''
    Run the Authentication.
    If the access token exists, it will use it to skip browser auth.
    If not, it will open the browser for you to authenticate.
    You will have to manually paste the redirect URI in the prompt.
    '''
    creds = read_creds(credentials)
    print(creds)
    client_id, client_secret = creds['client_id'], creds['client_secret']
    redirect_uri = creds['redirect_uri']
    api_url = 'https://www.linkedin.com/oauth/v2'

    if 'access_token' not in creds.keys():
        args = client_id,client_secret,redirect_uri
        auth_code = authorize(api_url,*args)
        access_token = refresh_token(auth_code,*args)
        creds.update({'access_token':access_token})
        save_token(credentials,creds)
    else:
        access_token = creds['access_token']
    return access_token
STEP 5: Running the Function
To run the function, call the auth() function using the path to your credentials.json file.
if __name__ == '__main__':
    credentials = 'credentials.json'
    access_token = auth(credentials)
The if name equals main line checks whether you are running the module or importing it. If you are importing it, auth() will not run.
Now you can run your lknd_oauth.py script that was just created by running it in the command-line as shown below
$ python lknd_oauth.py
Below is a breakdown of the result:
-
Browser opens asking you to login to Linkedin
-
The prompt asks you to "Allow the App"
-
You will be redirected to a page that can’t be reached. This is normal because you are not running this on a server. Simply copy the localhost:8080/?code... url in the URL/Search bar in the browser.
-
Copy the URL in your Script. Your access token is found right after the
?code=parameter and before the&stateparameter. You could then add the access token to yourcredentials.jsonfile.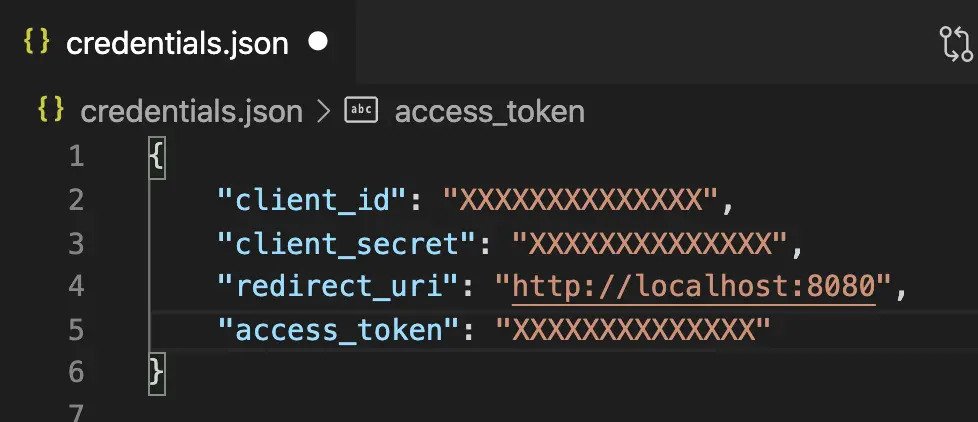
-
Save your
credentials.jsonfile. With your access token now available, you are ready to use the LinkedIn API. The entire OAuth script should look like this:
#!/usr/bin/env python

import json
import random
import requests
import string

def auth(credentials):
   '''
   Run the Authentication.
   If the access token exists, it will use it to skip browser auth.
   If not, it will open the browser for you to authenticate.
   You will have to manually paste the redirect URI in the prompt.
   '''
   creds = read_creds(credentials)
   print(creds)
   client_id, client_secret = creds['client_id'], creds['client_secret']
   redirect_uri = creds['redirect_uri']
   api_url = 'https://www.linkedin.com/oauth/v2'

   if 'access_token' not in creds.keys():
       args = client_id,client_secret,redirect_uri
       auth_code = authorize(api_url,*args)
       access_token = refresh_token(auth_code,*args)
       creds.update({'access_token':access_token})
       save_token(credentials,creds)
   else:
       access_token = creds['access_token']
   return access_token

def headers(access_token):
   '''
   Make the headers to attach to the API call.
   '''
   headers = {
   'Authorization': f'Bearer {access_token}',
   'cache-control': 'no-cache',
   'X-Restli-Protocol-Version': '2.0.0'
   }
   return headers

def read_creds(filename):
   '''
   Store API credentials in a safe place.
   If you use Git, make sure to add the file to .gitignore
   '''
   with open(filename) as f:
       credentials = json.load(f)
   return credentials

def save_token(filename,data):
   '''
   Write token to credentials file.
   '''
   data = json.dumps(data, indent = 4)
   with open(filename, 'w') as f:
       f.write(data)

def create_CSRF_token():
   '''
   This function generate a random string of letters.
   It is not required by the Linkedin API to use a CSRF token.
   However, it is recommended to protect against cross-site request forgery
   For more info on CSRF https://en.wikipedia.org/wiki/Cross-site_request_forgery
   '''
   letters = string.ascii_lowercase
   token = ''.join(random.choice(letters) for i in range(20))
   return token

def open_url(url):
   '''
   Function to Open URL.
   Used to open the authorization link
   '''
   import webbrowser
   print(url)
   webbrowser.open(url)

def parse_redirect_uri(redirect_response):
   '''
   Parse redirect response into components.
   Extract the authorized token from the redirect uri.
   '''
   from urllib.parse import urlparse, parse_qs

   url = urlparse(redirect_response)
   url = parse_qs(url.query)
   return url['code'][0]

def authorize(api_url,client_id,client_secret,redirect_uri):
   # Request authentication URL
   csrf_token = create_CSRF_token()
   params = {
       'response_type': 'code',
       'client_id': client_id,
       'redirect_uri': redirect_uri,
       'state': csrf_token,
       'scope': 'r_liteprofile,r_emailaddress,w_member_social'
       }

   response = requests.get(f'{api_url}/authorization',params=params)

   print(f'''
   The Browser will open to ask you to authorize the credentials.\n
   Since we have not setted up a server, you will get the error:\n
   This site can’t be reached. localhost refused to connect.\n
   This is normal.\n
   You need to copy the URL where you are being redirected to.\n
   ''')

   open_url(response.url)

   # Get the authorization verifier code from the callback url
   redirect_response = input('Paste the full redirect URL here:')
   auth_code = parse_redirect_uri(redirect_response)
   return auth_code

def refresh_token(auth_code,client_id,client_secret,redirect_uri):
   '''
   Exchange a Refresh Token for a New Access Token.
   '''
   access_token_url = 'https://www.linkedin.com/oauth/v2/accessToken'

   data = {
       'grant_type': 'authorization_code',
       'code': auth_code,
       'redirect_uri': redirect_uri,
       'client_id': client_id,
       'client_secret': client_secret
       }

   response = requests.post(access_token_url, data=data, timeout=30)
   response = response.json()
   print(response)
   access_token = response['access_token']
   return access_token

if __name__ == '__main__':
   credentials = 'credentials.json'
access_token = auth(credentials)STEP 1: Importing Packages
Before importing the packages, install request via your Commmand line using:
$ pip install requests
In a new python file, you can now import requests and the auth() and headers() functions from the lknd_oauth module that was previously created.
import requests
from lknd_oauth import auth, headers
STEP 2: Making the Request
Make a GET request to the Profile API using the https://api.linkedin.com/v2/me url. You will need to pass the headers to the function using the headers() function from lknd_oauth.
def user_info(headers):
    '''
    Get user information from Linkedin
    '''
    response = requests.get('https://api.linkedin.com/v2/me', headers = headers)
    user_info = response.json()
    return user_info
STEP 3: Authorizing the API
Now it is time to authorize the API.
credentials = 'credentials.json'
access_token = auth(credentials) # Authenticate the API
STEP 4: Creating the Headers
The headers() function from lknd_oauth.py will create the headers to pass to the GET request to authorize the API call.The headers have this structure:
{'Authorization': 'Bearer <ACCESS_TOKEN>',
 'cache-control': 'no-cache',
 'X-Restli-Protocol-Version': '2.0.0'}
STEP 5: Running the Code
if __name__ == '__main__':
    credentials = 'credentials.json'
    access_token = auth(credentials) # Authenticate the API
    headers = headers(access_token) # Make the headers to attach to the API call.
    user_info = user_info(headers) # Get user info
    print(user_info)
The if name equals main line checks whether you are running the module or importing it. If you are importing it, user_info() will not run.
The full code should look like this:
import requests

from ln_oauth import auth, headers

def user_info(headers):
    '''
    Get user information from Linkedin
    '''
    response = requests.get('https://api.linkedin.com/v2/me', headers = headers)
    user_info = response.json()
    return user_info

if __name__ == '__main__':
    credentials = 'credentials.json'
    access_token = auth(credentials) # Authenticate the API
    headers = headers(access_token) # Make the headers to attach to the API call.
    user_info = user_info(headers) # Get user info
    print(user_info)
If this does not work, you might have a problem with your access token permissions. In that case, you can find out by using the Token Inspector.
By now, you should have extracted your user information using the LinkedIn API and Python.
In this section, you will learn how to use the LinkedIn API and Python to make a text post, a link post, and a link post with a mention to a company page.
STEP 1: Preparing the Request
To prepare the API call, there are a few setting up required, which include;
- Importing Packages
Before importing the packages, install request via your Commmand line using:
$ pip install requests
In a new python file, you can now import requests and the auth() and headers() functions from the lknd_oauth module that was previously created.
import requests
from lknd_oauth import auth, headers- Authentication
Before making the request, you need to authorize your credentials and attach the access token to the header of the GET request.
credentials = 'credentials.json'
access_token = auth(credentials) # Authenticate the API
headers = headers(access_token) # Make the headers to attach to the API call.- Getting Your User ID
Similar to how user_info() was created from the get_user_info.py module that we created for the getting user information with the LinkedIn API.
def user_info(headers):
    '''
    Get user information from Linkedin
    '''
    response = requests.get('https://api.linkedin.com/v2/me', headers = headers)
    user_info = response.json()
    return user_info

# Get user id to make a UGC post
user_info = user_info(headers)
urn = user_info['id']- Define Your Personal URN and API URL
In your request, you need to define who you are, by providing your URN.
urn:li:person:<your-user-id>We have extracted the user ID from the user_info() function.
author = f'urn:li:person:{urn}'The API URL defines which API you want to use. In this case, we are using the UGC API, which replaces the Shares API. We are going to use only the ugcPosts URL in this article.
api_url = 'https://api.linkedin.com/v2/ugcPosts'STEP 2: Making a Simple Text Post
To prepare the body of your request to make a text post, you will need the author, your URN from the previous step, and the message that you want to share.
The Message of your Post
The message is the text associated with your post. The maximum length of your message for a UGC post is 1300 characters.
message = 'Preparing a LinkedIn Bot'The body of the request
To share an organic post, you will be using com.linkedin.ugc.ShareContent
post_data = {
    "author": author,
    "lifecycleState": "PUBLISHED",
    "specificContent": {
        "com.linkedin.ugc.ShareContent": {
            "shareCommentary": {
                "text": message
            },
            "shareMediaCategory": "NONE"
        }
    },
    "visibility": {
        "com.linkedin.ugc.MemberNetworkVisibility": "PUBLIC"
    }
}
Share the Post to LinkedIn
This set-up is public, which means that anyone on the LinkedIn Platform will be able to view this share. The request needs the api_url, the authenticated headers and the post_data to run.
if __name__ == '__main__':
    r = requests.post(api_url, headers=headers, json=post_data)
    r.json()
If your request is successful, it will return a 201 Created response, and the post will be identified by the X-RestLi-Id response header.
The if name equals main line checks whether you are running the module or importing it. If you are importing it, requests.post() will not run.
STEP 3: Make a Link Post
Keeping all the code from Step 1, you will modify the post_databody to add media to the ShareContent.
message = '''
Interested in automating LinkedIn using #Python and the LinkedIn API?
Read this in-depth article post I wrote.
'''
link = '[https://www.jcchouinard.com/how-to-use-the-linkedin-api-python/](https://dev.to/abubakardev)'
link_text = 'Using the LinkedIn API Python Library'

post_data = {
    "author": author,
        "lifecycleState": "PUBLISHED",
        "specificContent": {
            "com.linkedin.ugc.ShareContent": {
                "shareCommentary": {
                    "text": message
                },
                "shareMediaCategory": "ARTICLE",
                "media": [
                    {
                        "status": "READY",
                        "description": {
                            "text": message
                        },
                        "originalUrl": link,
                        "title": {
                            "text": link_text
                        }
                    }
                ]
            }
        },
        "visibility": {
            "com.linkedin.ugc.MemberNetworkVisibility": "CONNECTIONS"
        }
    }
Execute the Request.
if __name__ == '__main__':
    r = requests.post(api_url, headers=headers, json=post_data)
    r.json()
STEP 4: Sharing a Link Post and mentioning a company
Find the Company URN
Finding any LinkedIn company ID is easy. Go to the company page on LinkedIn and click on “See all X employees on LinkedIn“. The company ID is in the URL after the “?facetCurrentCompany=%5B” parameter.
Add the company ID to the mention_id variable.
mention_name = 'iPullRank'
message = f'Watch Michael King from {mention_name} with Hamlet Batista at Ranksense talk about Automated #SEO Testing'
mention_id = '9280143'
mention_urn = f'urn:li:organization:{mention_id}'
link = 'https://www.crowdcast.io/e/webinar-automated-testing'
Find Where the Mention is
We will create a function called find_pos() to find where the mention_name starts in the message.
def find_pos(mention_name, message):
    '''
    Find position of mention_name in the message
    '''
    index = 0
    if mention_name in message:
        c = mention_name[0]
        for ch in message:
            if ch == c:
                if message[index:index+len(mention_name)] == mention_name:
                    return index
            index += 1
    return -1
Then, we will check the length of the mention_name, that we will also need to mention the company.
len_uname = len(mention_name)
start = find_pos(mention_name, message)
Create the Body of the Request
Now, we will create the body of the request adding attributes to the shareCommentary object. Then length, start, value and com.linkedin.common.CompanyAttributedEntity are required to mention a company.
post_data = {
    "author": author,
        "lifecycleState": "PUBLISHED",
        "specificContent": {
            "com.linkedin.ugc.ShareContent": {
                "shareCommentary": {
                    "attributes": [
                        {
                            "length": len_uname,
                            "start": start,
                            "value": {
                                "com.linkedin.common.CompanyAttributedEntity": {
                                    "company": mention_urn
                                }
                            }
                        }
                    ],
                    "text": message
                },
                "shareMediaCategory": "ARTICLE",
                "media": [
                    {
                        "status": "READY",
                        "description": {
                            "text": message
                        },
                        "originalUrl": link,
                        "title": {
                            "text": message
                        }
                    }
                ]
            }
        },
        "visibility": {
            "com.linkedin.ugc.MemberNetworkVisibility": "CONNECTIONS"
        }
    }

if __name__ == '__main__':
    r = requests.post(api_url, headers=headers, json=post_data)
    r.json()
Run the Code Now the time to run the code.
if __name__ == '__main__':
    r = requests.post(api_url, headers=headers, json=post_data)
    r.json()
If you followed this article from start to finish while working on creating a build, you should have successfully automated post sharing using the LinkedIn API with python.