1. Initial Setup
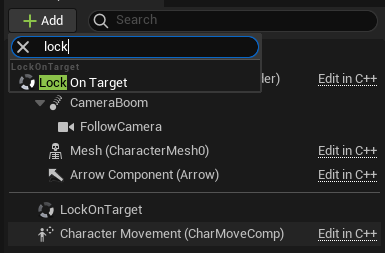
- Add the
LockOnTargetComponentto your character.
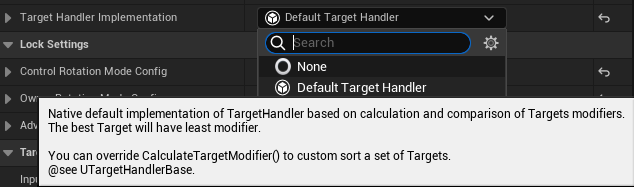
- Set the
DefaultTargetHandlerto the TargetHandlerImplementation.
- Set the
LazyInterpolationModein the ControlRotationModeConfig.

3.1 (Optional) If you want to move the focus point from the center of the screen.
- Change the
OffsetRotationin the LazyInterpolationMode->BaseConfig.

- Change the
CameraRotationOffsetForCalculationsin the DefaultTargetHandler->DefaultSolver to the opposite value.

- Update the Character's input.
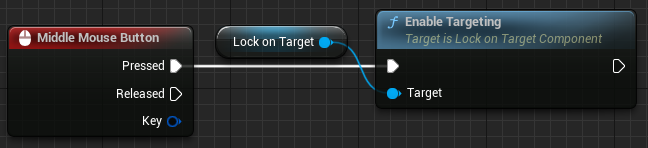
- Capturing and releasing the Target:
- Switching the Target with the axis input:
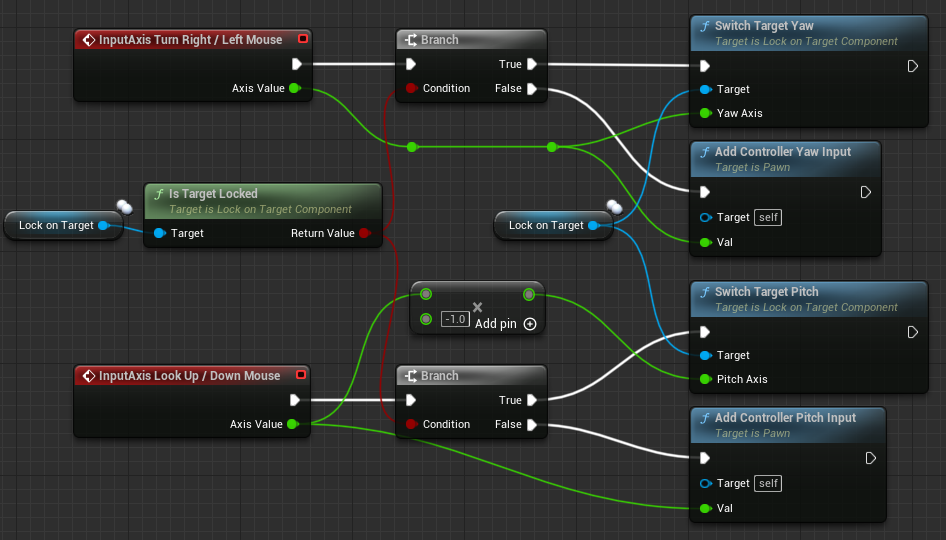
Note that the raw input is processed in the component, you don't need to setup any EnhancedInput features.
Perhaps in future updates the input will be processed via the EnhancedInput.
- (Optional) Strafe movement.
Add the OnTargetLocked/Unlocked events from the LockOnTargetComponent:
Disable bOrientRotationToMovement if used.
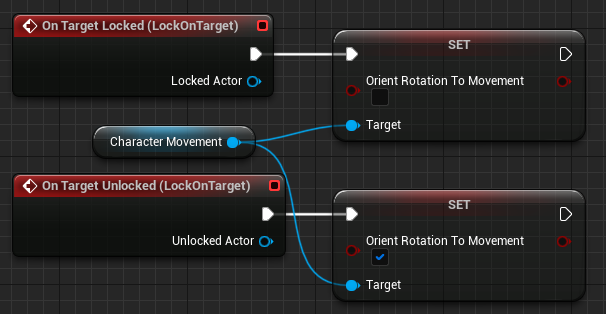
There are two possible ways next:
-
When using the
LazyInterpolationMode, the rotation offset in any RotationMode or the Character is looking in the wrong way:- Fill the
OwnerRotationModeConfigwith the InterpolationMode or RotationModeBase.

- Choose the proper axes in the BaseConfig.

- Fill the
-
Otherwise:
- Clear the OwnerRotationModeConfig if it is set.

- Set the bUseControllerRotationYaw in the APawn subclass or the bUseControllerDesiredRotation in the UCharacterMovementComponent.
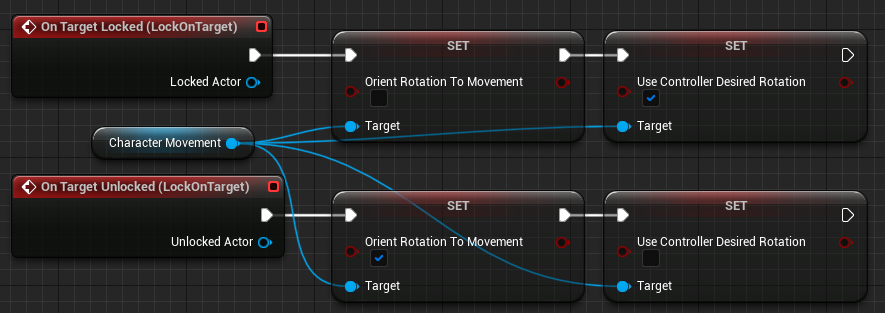
- Clear the OwnerRotationModeConfig if it is set.
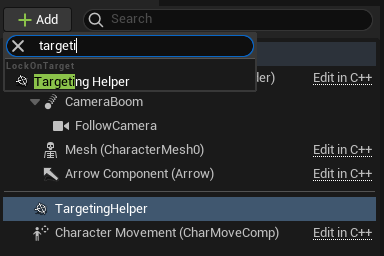
- Add the
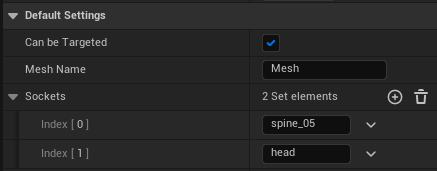
TargetingHelperComponentto the Target.
- Change the None socket to the desired. None socket is only used for the RootComponent. (Note that the Sockets aren't validated.)
- Change the MeshName to the desired (if there're multiple Meshes, otherwise the first MeshComponent will be used).