Github was used to create a new repository called 'Data-Collection' where changes will be tracked. Different feature branches will be created for each independant feature added and this will be merged into the main branch using 'git merge ' whilst on the main branch. Therefore, no new feature should be added on the main branch, rather on the newly created branches, merged before deleting the new branch.
Before moving into the coding for a scraper, I had to select a website where I would gather information from. I chose a website that would be associated with items which I show interest in. For such a website, I selected the 'MyProtein' site as the layout is simple and clear.

The items sold on the website is also an interest of mine
This milestone was the beginning of the coding for the scraper. To allow python access to the chromedriver to control chrome, the Selenium library must be imported. The first step is to get onto the website using driver.get() 
This is added as part of the initialiser in the Scraper class so that it is initialised everytime an instance of the class is created.
When first arriving on the website, the first obstacle is to bypass the cookies and sign up page. This is done using a click feature inside the Selenium library and waiting for the 'x' button and 'accept cookes' button to show on the html before clicking.

By observing the html of the website, I identified that the buttons on the page are part of a container with a specific xpath so a for loop can be used to access each individual button:

Using the driver.get() method again, my code allows access to each of the button links and the same method (used to get the button links) is repeated to get the links of all products in each button.
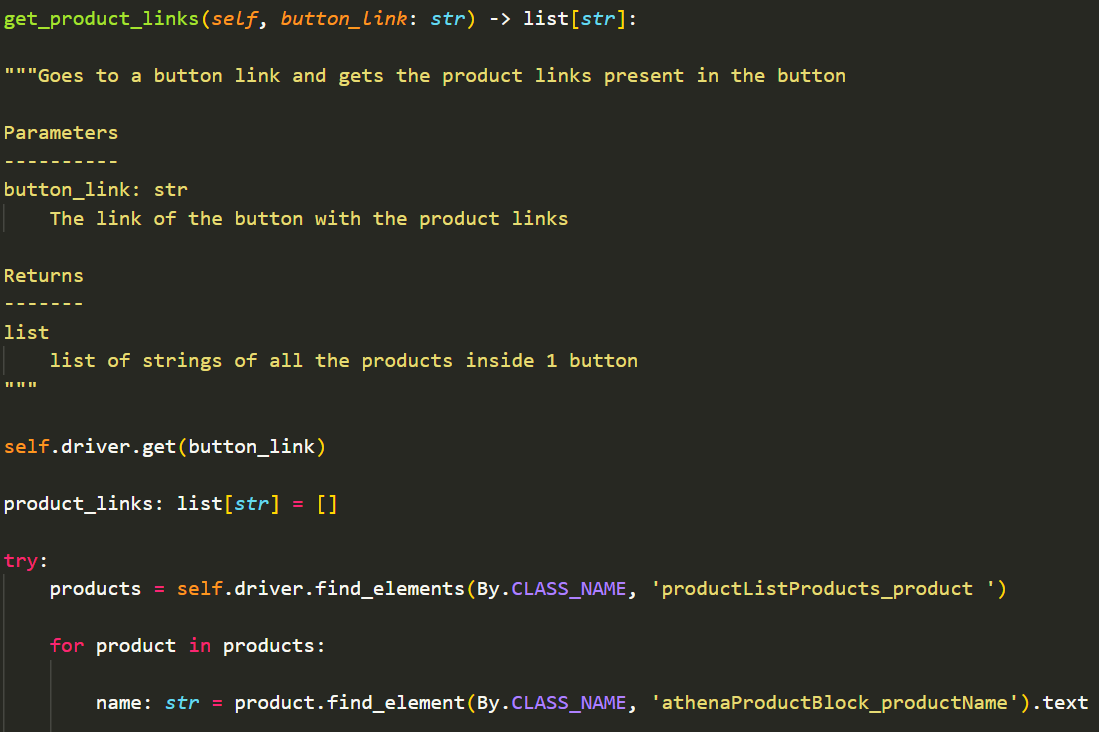

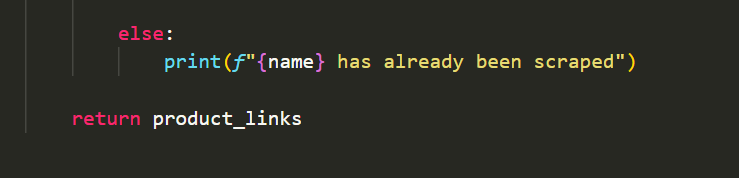
These are used to get the product links in each button, whilst
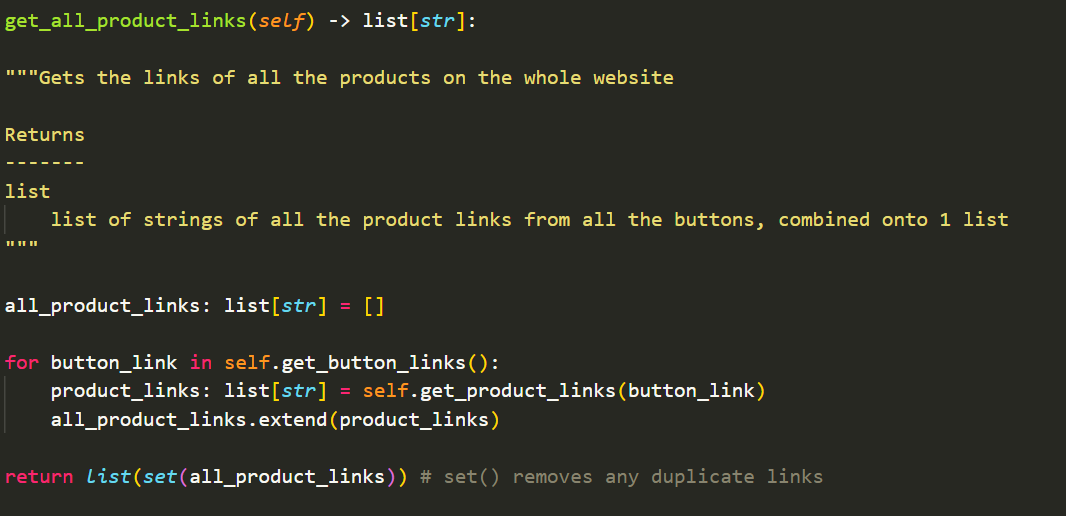
This repeats the process for all the buttons on the site.
This milestone involves the gathering of specific information and identification for each product which I plan to scrape.

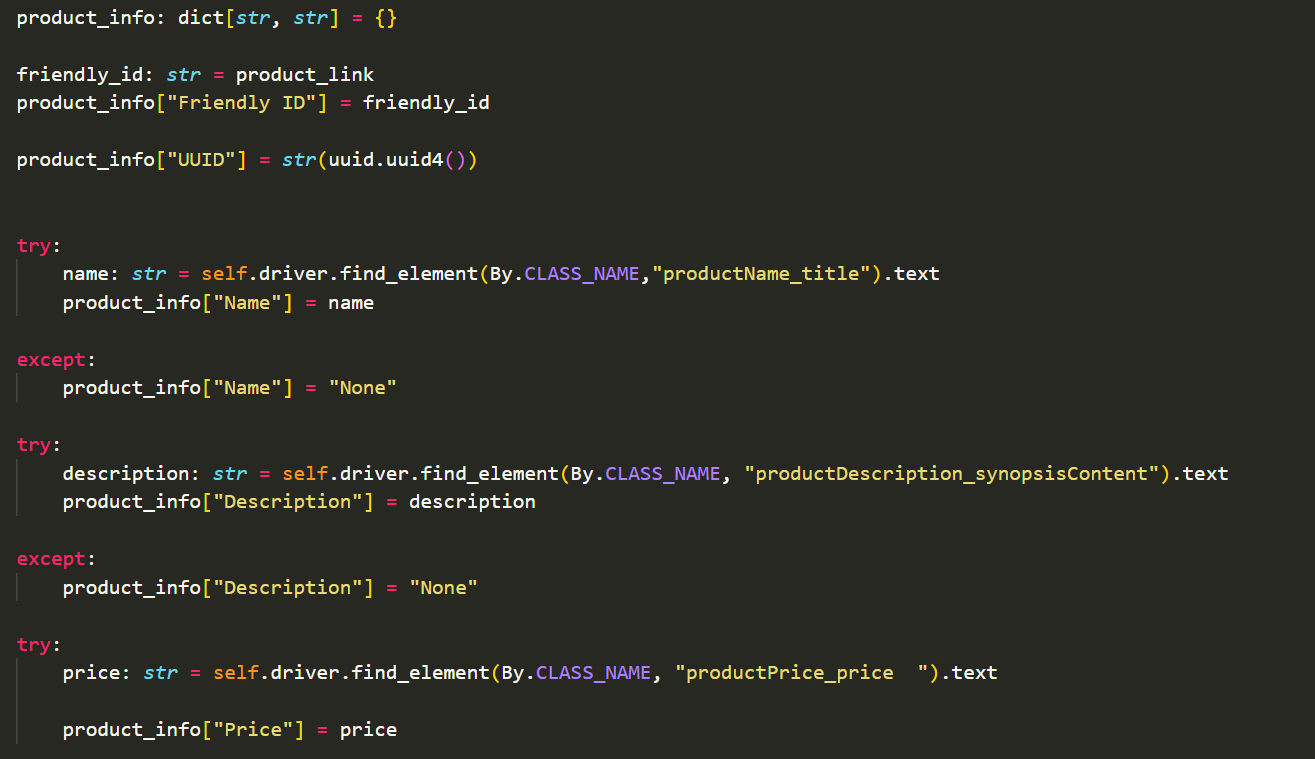
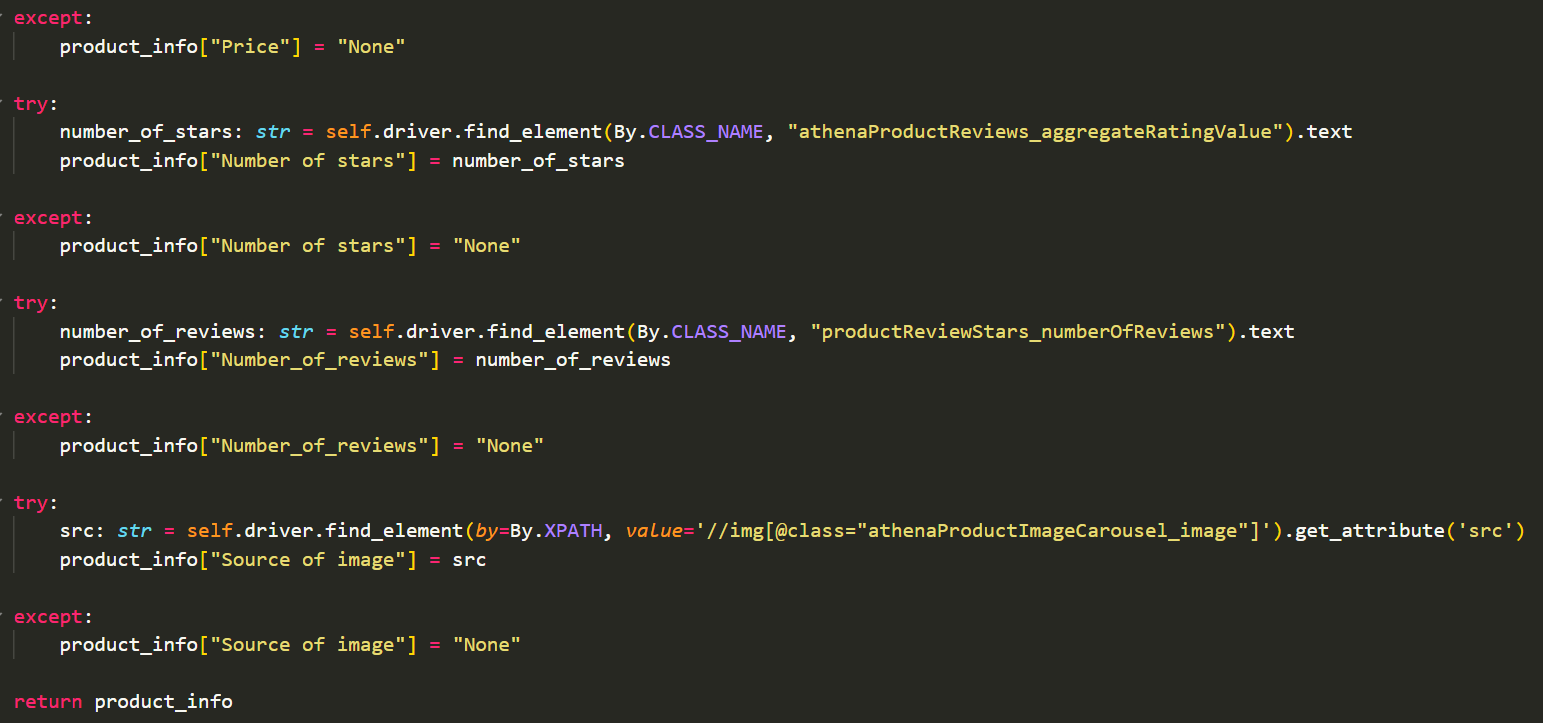
This method scrapes each product link obtained before the scrape_all_products() method repeats this process for all the product links

Therefore, my code gathers the links of all items first and then scrapes each link rather than scraping as the links are gathered.
As part of the milestone, image data had to ge gathered and this was done by scraping each product for their image source. The source is the link for the image.

I decided to use the product link as the friendly id for each item because this is unique and deterministic given the website. Unfortunately, the website didn't contain its own product id for each item which would make a better friendly id. Using the uuid module, I was able to generate a uuid for each of the items which I scrape.
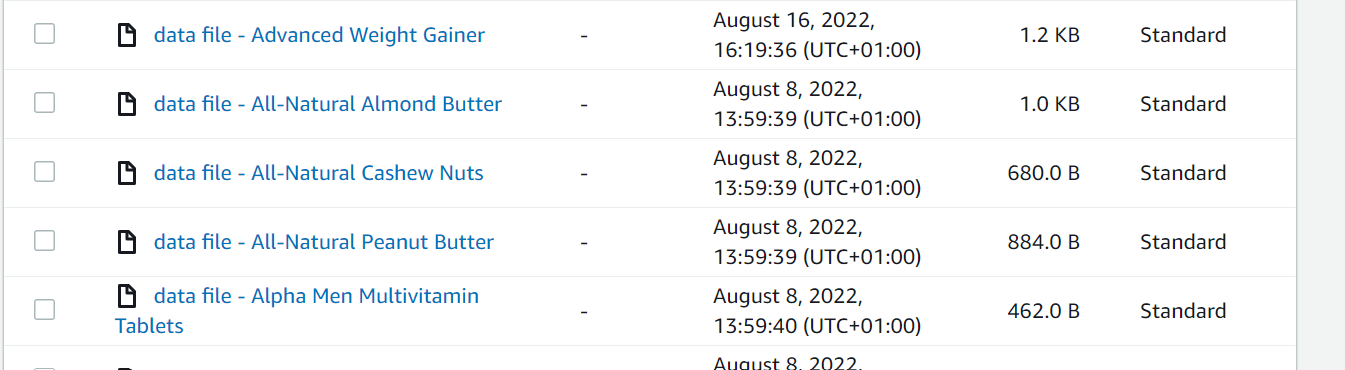
All the data scraped is stored inside a dictionary and stored locally onto a .json file on my local drive using the os module in python. The script should create a directory named with each of the item names and these are created inside the 'raw_data' directory.

json.dump() method from the json module converts the python dictionary into the .json file stored inside each item directory.
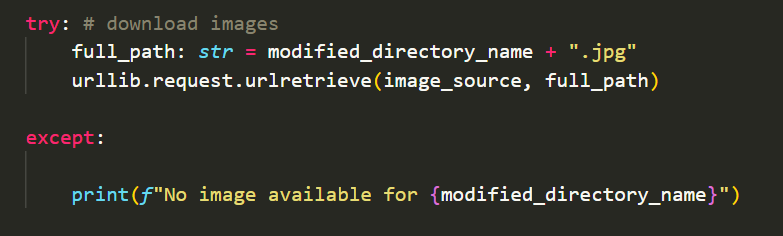
Within the same method of storing json files, the urllib.request module is imported and used to download the image data and stores this as a .jpg inside the same directory as the .json file.
This milestone taught me the importance of refactoring code to make it run more efficiently and have less demand on computer resources. To do so, I ran through the code and checked for features such as nested loops which are more demanding to run and unneccessary try/except blocks.
I also improved the structure of my working directory by creating two separate directories 'project' for my scraper.py and 'test' for unit testing. A setup.py file is also added to the main directory and using the setuptools module, I wrote the setup requirements which allows the scraper.py and test_scraper.py to run each other without having to be in the same directory.
The test_scraper.py uses the unittest module to test the different methods inside my scraper.py to ensure the methods give the expected outcome and in other cases, would help identify if any exceptions are being ignored.
An example is testing whether a method returns the expected type.
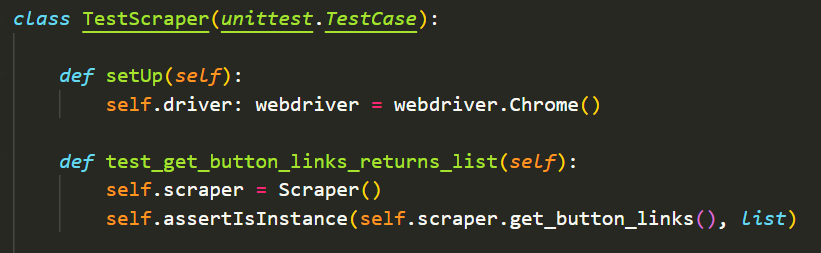
The setUp() method runs before every unit test and the follow up method ensures that the method being tested returns my expected type of a list.
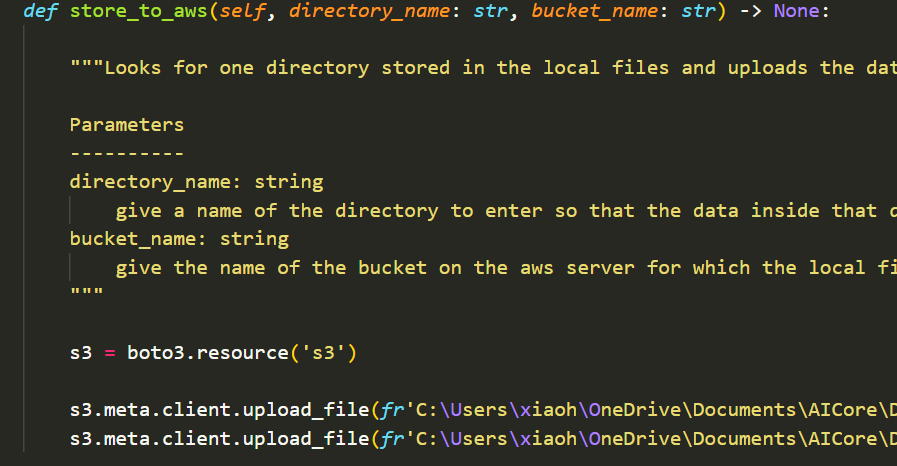
This milestone walked me through the storing of infomration onto a cloud service. In this case, Amazon RDS and the S3 bucket. Using the boto3 library, I stored the .json dictionaries for each item and their .jpg image onto the aws S3 bucket in their own folders and this would happen as I ran the method.
Another method was also added and this used postgres and the library of psychopg to upload my scraped data into a postgres table where I can then query using SQL.
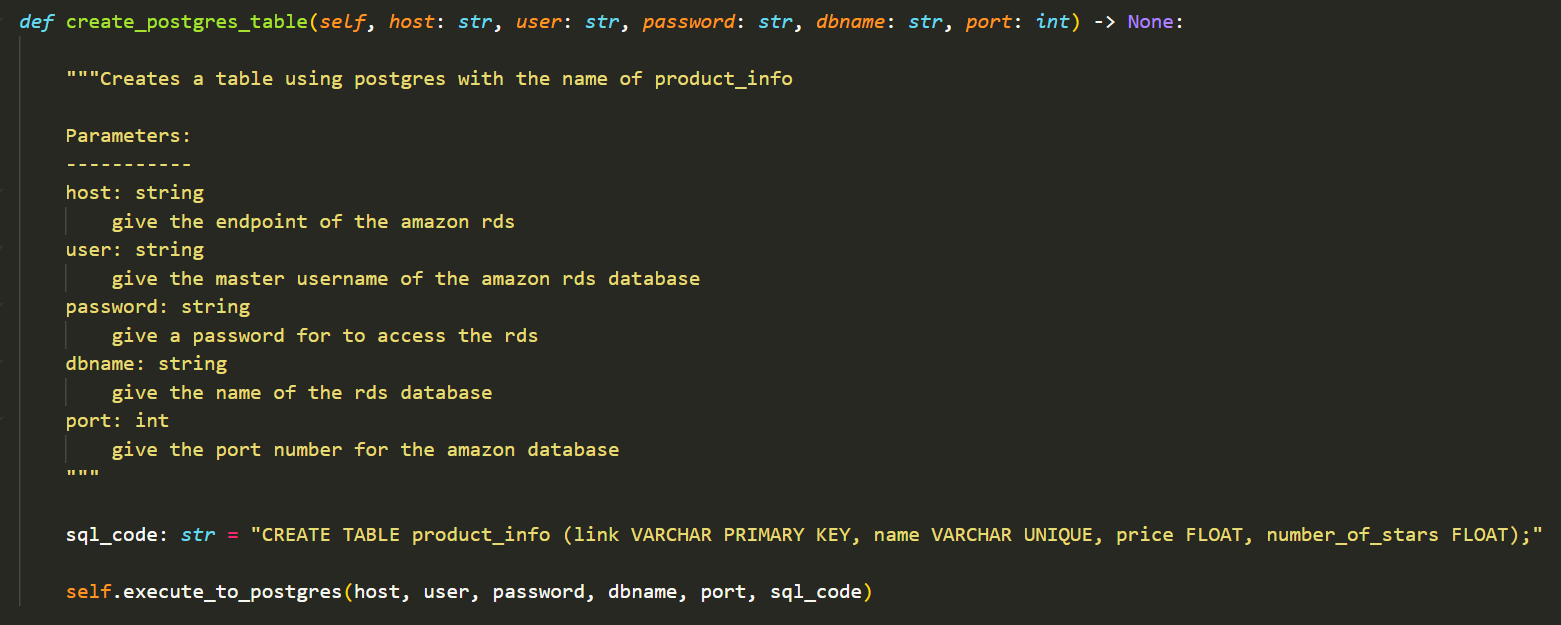
This creates a postgres table names 'product_info.
The script then goes into my local files and converts the .json data back into a dictionary.

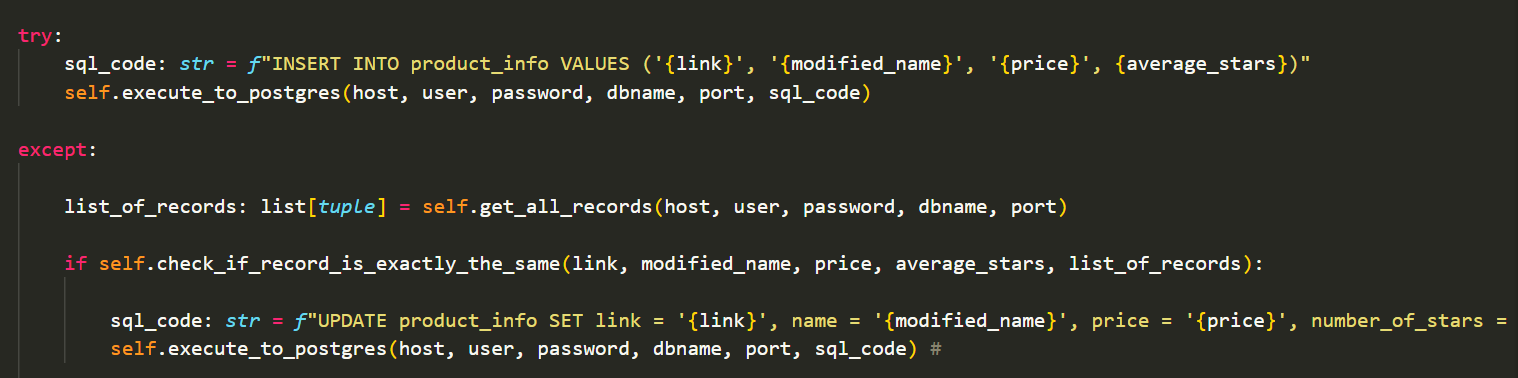
This block of code then uploads the data as a record to postgres in the form of a table.
This milestone required me to do a final refactoring of my code before containerisation in the next milestone. The other major part of the milestone involves the prevention of my code from rescraping. The way I've done this is by creating methods to prevent rescraping and uploading the exact same records to postgres.
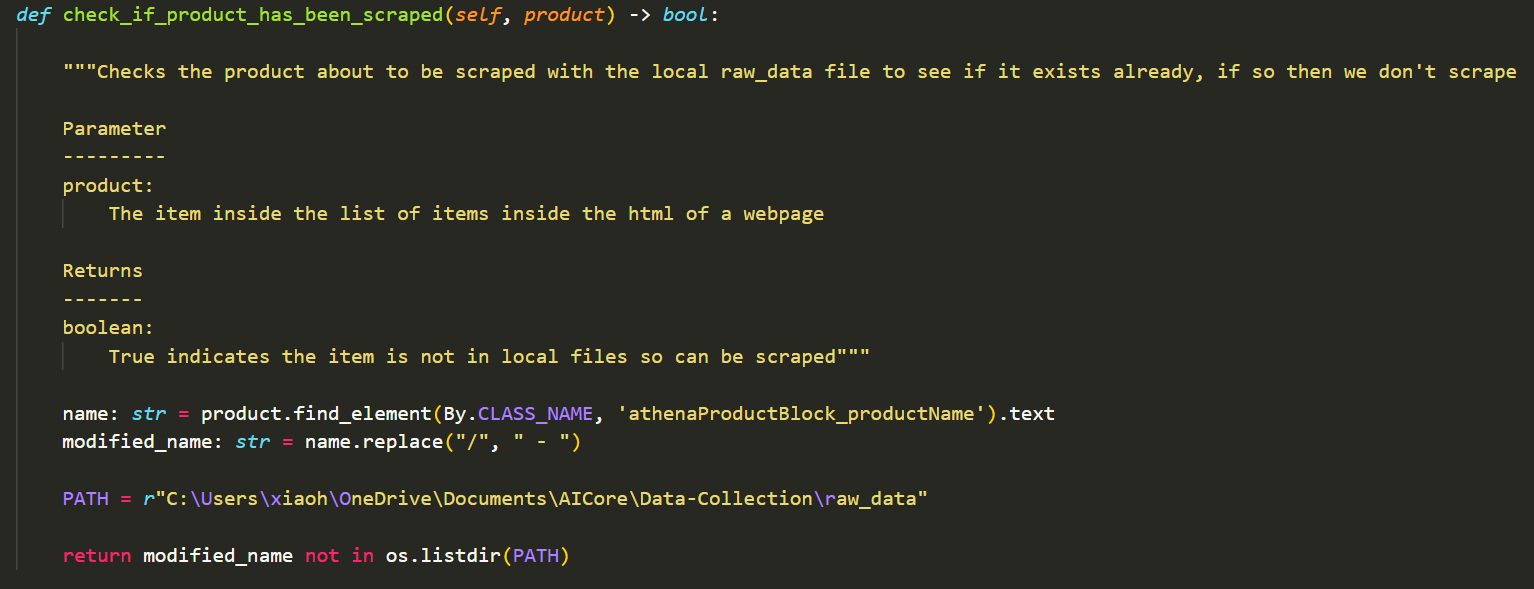
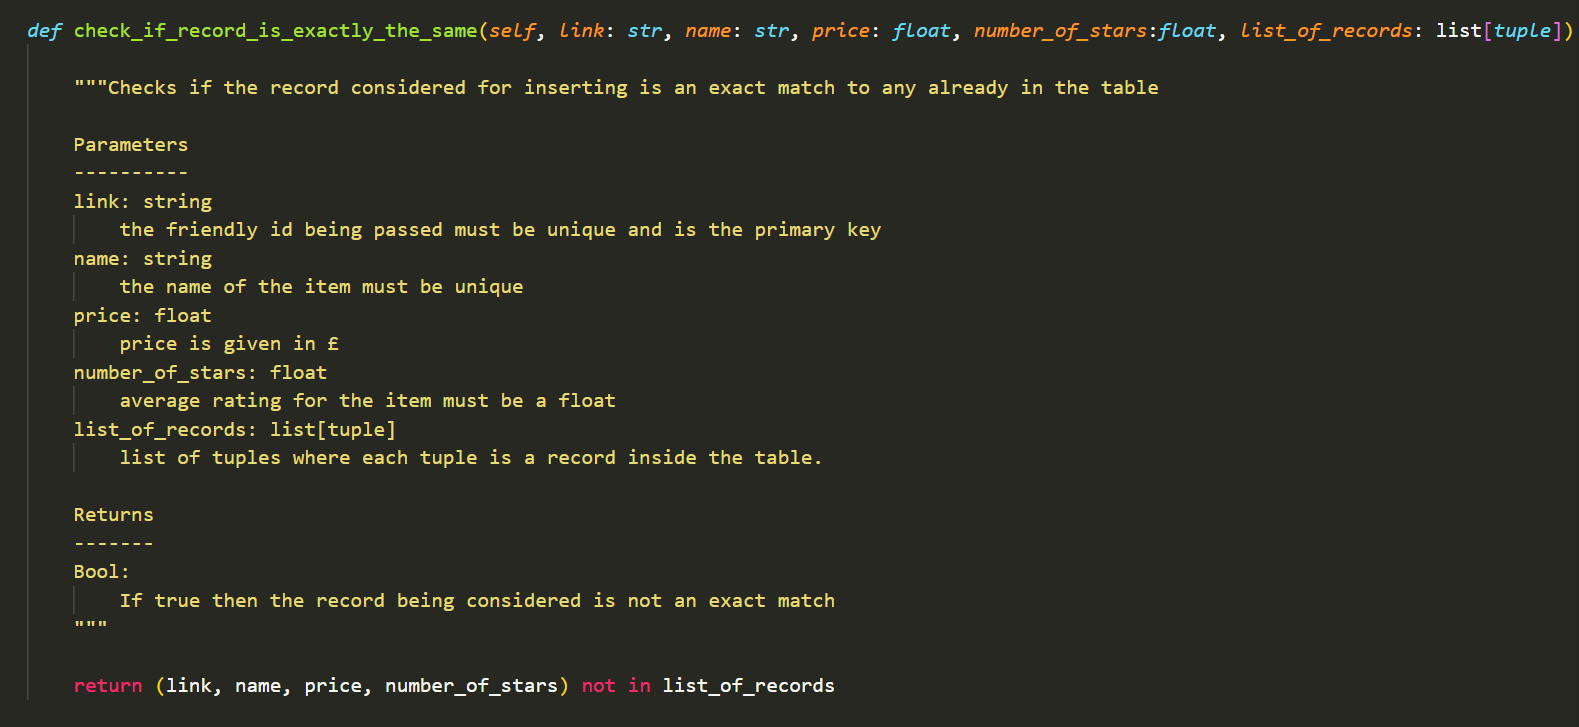
Checking for rescraping checks against my local directory to see if the product is already present. Whilst checking if record exists checks against the postgres database and compares to see if the records are exactly identical. If they are exactly identical then no action is taken, if the product id is different to all the pre-existing records, then the new record is added. However, if the product id already exists but the record is not an exact copy, then it replaces the old record with the updated.
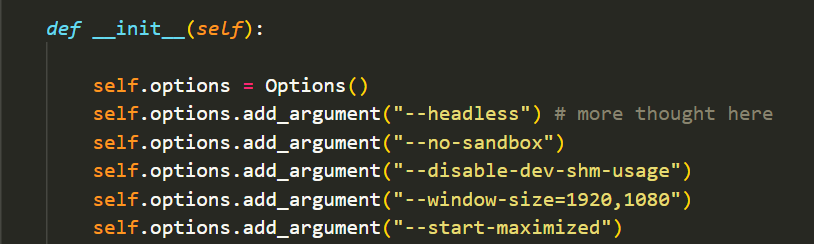
This milestone taught me how to containerise my code so that others can access it with all its dependancies simply by getting it off dockerhub. The first step was to ensure that I could run the scraper in headless mode without the chrome browser opening. I added this in the initialiser.
Once confirmed,I created a docker file which would run commands to gather the dependancies that were required for the scraper to run. This information was gathered from a requirements.txt file I created.
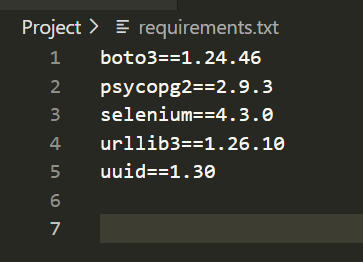

Using the docker file, I would then build the image for the the scraper and push this to Dockerhub. This way anyone can access my image from the dockerhub and use the application.

I then used aws to create an EC2 instance to run my scraper using the resources of another computer.  This required me to make a keypair and make it private along with a security group that would allow ssh port 22 connection from my pc.
Using the ssh command, I could connect to the EC2 instance

This milestone taught me how to use prometheus to monitor my applications using a prometheus.yml file.
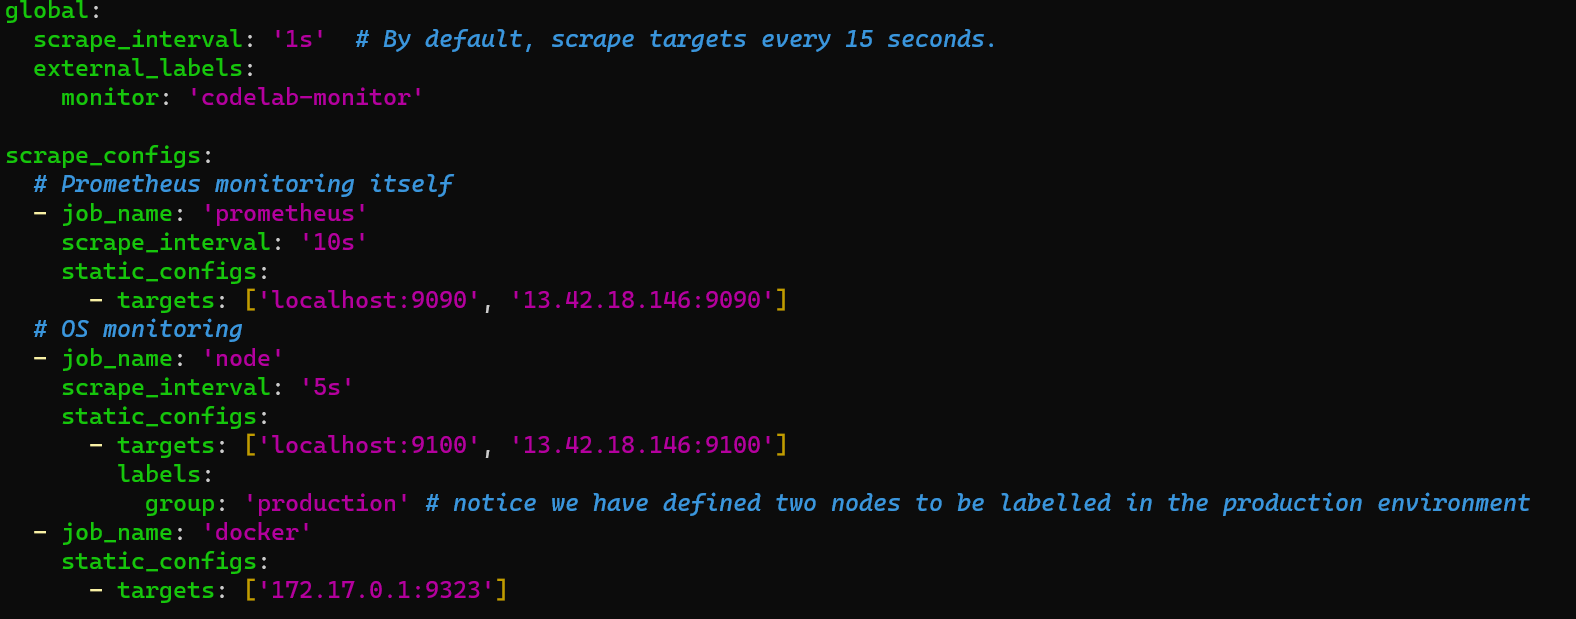
The file instructs prometheus on the jobs that it needs to monitor and with localhost:9090, I can monitor the metrics of prometheus itself, node-exporter and docker as it runs the container for my scraper.
The metrics can be displayed visually and more aesthetically using grafana on localhost:3000. These metrics are displayed graphically through a grafana dashboard.
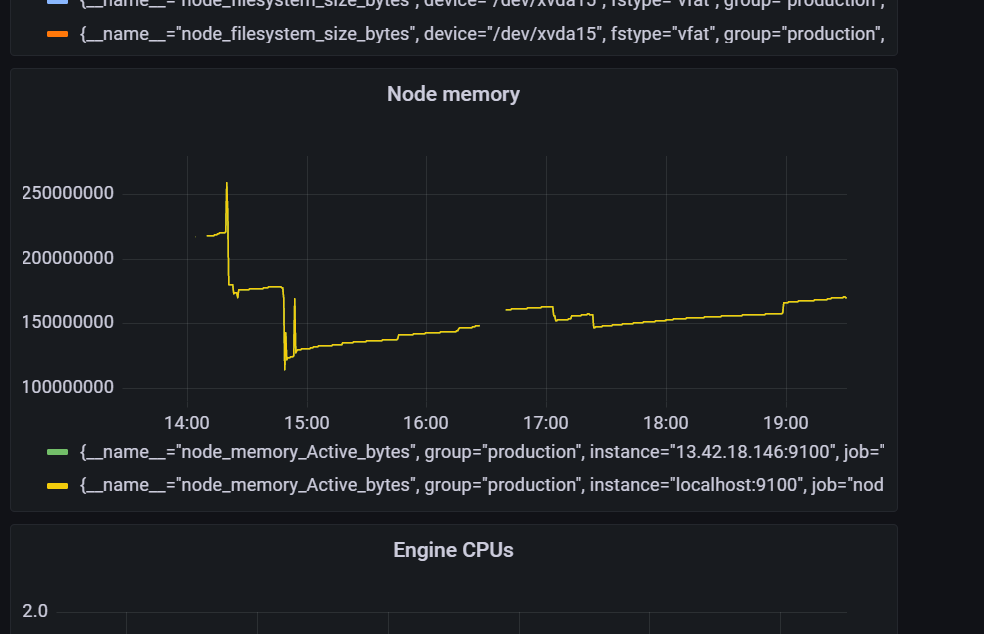

These are two examples of the metrics that are available.
This short and final milestone has involved the use of Github actions to push my containers onto dockerhub when a push request is made to Github.
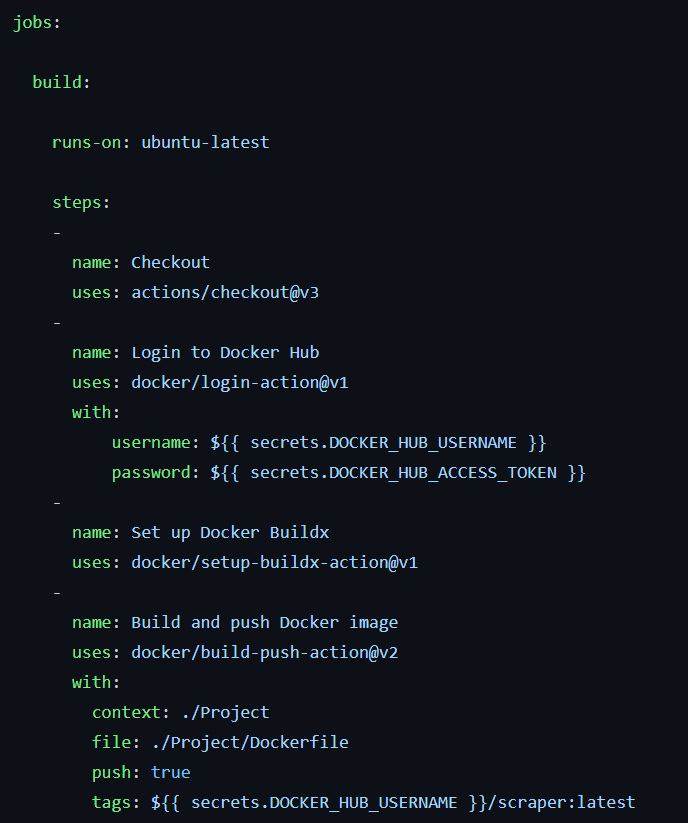
The jobs in Github are written and shown.