Repository navigation
Examples
Home > Examples
Contents: Shared Flow · Return a result · Sequential · Debounce
Complete the first named-Flow test. Use Advanced Flow, matching names, and matching card sizes. Save the Flows before running them normally; editor-only tests can introduce extra timing and may not represent a real triggered run.
Connect an error path to a visible notification. First use harmless notifications, not an important alarm or a device that could cause damage.
Create one 1-size receiver named:
room-message
Connect its Text 1 tag to a notification's message.
For each real button or sensor trigger, add a 1-size Start Flowcard action:
- Triggername: room-message
- Text 1: that trigger's useful text tag, or a short message you choose
- Wait to Finish: checked for the first test
Button A -> Start room-message, Text 1 = "Button A"
Button B -> Start room-message, Text 1 = "Button B"

room-message receiver
  -> notification message <- receiver's Text 1
Expected result: each button uses the same receiver but passes its own message. This avoids trying to read a tag from the wrong original trigger branch.
Based on the community explanation of multiple trigger branches.
- Create a 1-size receiver named demo-return with Default execution.
- Connect it to the 1-size Return action. Its formatted text begins Return to.
- Connect the receiving trigger's Return ID tag to the Return card's Return ID field.
- Set returned Text 1 to
Result ready., Number 1 to 7, and Yes/No 1 to checked. - Create a sender with Start → 1-size Start Flowcard, name demo-return, and Wait to Finish explicitly checked.
- After that starter, add a notification using the starter's Text 1 output.
- Save both and run the sender.
Sender: Start demo-return, wait checked
  -> notification <- starter's returned Text 1

Receiver: demo-return started
  -> Return to <- receiver's Return ID
       Text 1 = Result ready.
       Number 1 = 7
       Yes/No 1 = checked
Expected result when your Flow engine waits for the receiver: the sender's notification says Result ready., and its returned Number 1 is 7 and Yes/No 1 is true.
If results stay empty, check Return ID, waiting, and firmware behavior. The Return card does not itself end the receiver; put it last for a clear result.
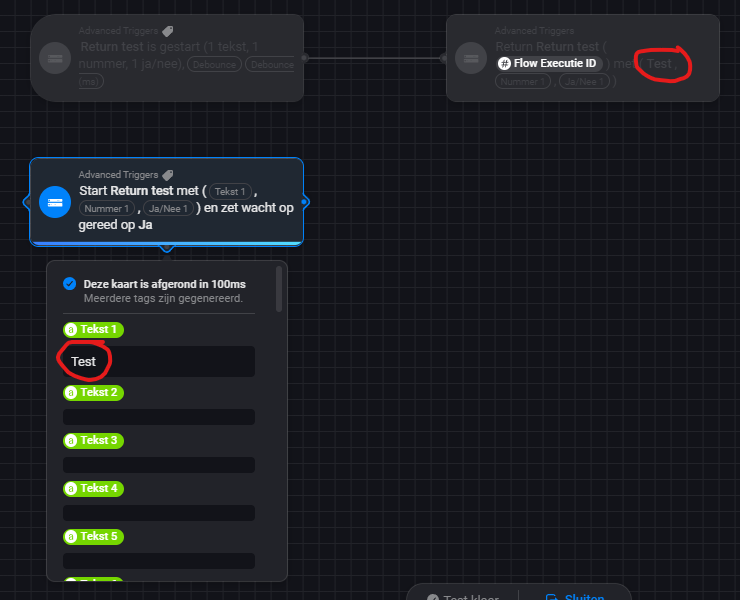
Developer screenshot from the 2022 return-value announcement. Notice the circled Test value appearing on the starter's Text 1 output; our written example uses Result ready. instead. Older labels may mention a Flow Execution ID or an event name; the current required connection is the trigger's Return ID tag, as described above.
- Create a 1-size receiver named demo-queue.
- Set Execution to Sequential.
- Connect it to a notification containing its Text 1, followed by a one-second delay.
- Add three starter actions in separate test branches, all named demo-queue, with Text 1 values A, B, and C.
- Request them in that order, with a small gap between requests.
- Save and run normally.
Expected result when your engine waits for receiving Flows: A, then B after A's receiving branch completes, then C after B completes. The requests must actually arrive in that order; parallel branches are not a guarantee of A/B/C arrival order.
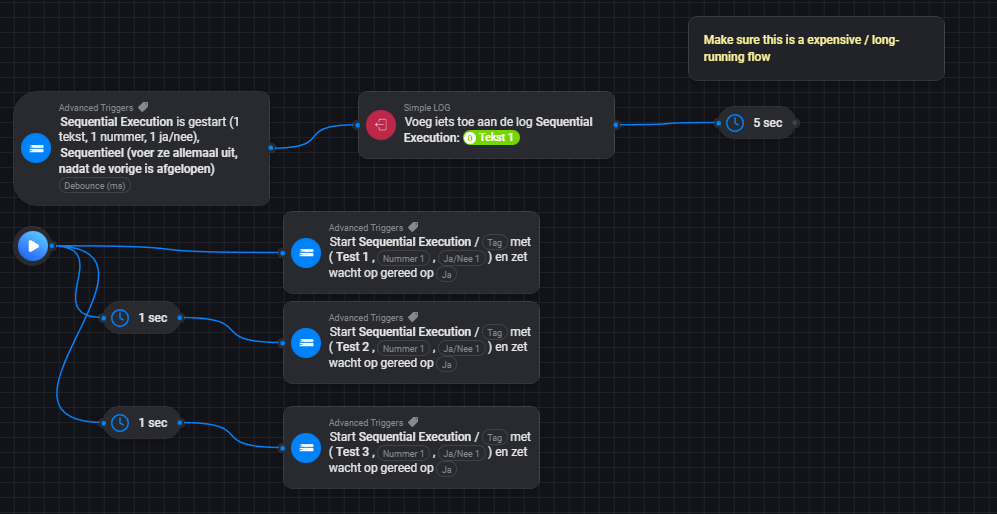
Developer screenshot from the 2022 sequential example. It uses Simple Log and a five-second receiver delay; the quick test above uses notifications and a one-second receiver delay. Current labels and Homey timing may differ. Essential steps are written above.
For recording the order in a log, follow Simple Log's first-entry setup and sequential logging example. A log timestamp shows when a card logged its text, not when a physical speaker finished.
- Create a 1-size receiver named demo-latest.
- Set Execution to the option that executes the last one waiting.
- Set Debounce (ms) to 1000.
- Connect the receiver's Text 1 to a notification.
- Send A, B, and C within the first second.
Expected result: around the first interval boundary, C is the selected waiting request and the earlier requests are skipped. Do not send the starters as a waiting chain if you want a burst; that chain would wait between requests.
See the exact fixed-window behavior. The original debounce explanation includes older visual examples; avoid importing a historical template without checking its cards and your firmware.