The objective of this project is to show how we can automate some of the common machine learning tasks using the tools provided by Microsoft Azure. We will focus specially in the automatated creation of Machine Learning models using AutoML and the designing of ML pipelines, which can include any amount of data handling steps like processing of data sets, auto ML operations, publishing of models, etc.
We will see as well how a model trained with AutoML can be published as a web service and consumed used the endpoint URL provided by Microsoft Azure. In our case we will use an ACI to publish our model. This makes the web service available for anyone who we share the authentication key with.
Regarding the pipeline to be developed, we will also publish it to create an endpoint which can be used by others who could work on our project. This reflects the ability to easily automate a series of ML tasks in the Azure environment. Any person that we authorize will be able to use their version of their data set to train automatically many ML models. It would be able to further expand the pipeline to publish the models or do some other ML ops like cleaning data.
The following diagram shows a summarized process of how a model can be created and published using AutoML
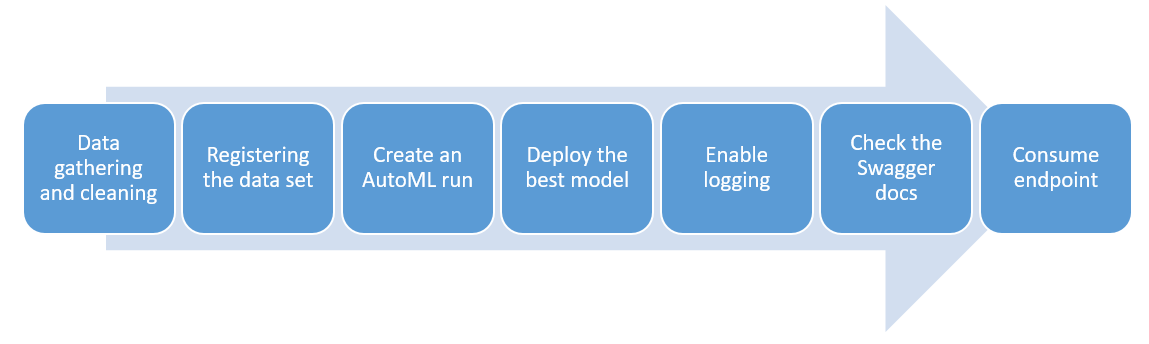
- Data gathering and cleaning: Normally we would have to gather the data related to our ML project and perform some analyse using visualisations or statistical quantities. For this project we are provided with the curated data.
- Registering the data set: Since we want to use Microsoft Azure for our ML operations we have to publish our data set in a data store on our ML studio
- Create an AutoML run: Using the AutoML tab from the ML studio we can easily create a run by selecting our registered data set and chossing a previously created compute instance (can be a cluster). Here we have to specify which kind of task we are dealing with (classification, regression) and which part of the data should be used as an objective. The quantity to be optimized on should also be selected (accuracy, AUC, error, etc)
- Deploy the best model: When completed we can see the whole list of models that the AutoML created. We can publish any of them by exploring it and selecting the "publish" option on ML studio; here we can select on which platform we can to publish the model, either AKS or ACI. This will provide us with an endpoint URL for consume
- Enable logging: We can communicate to our deployed model using python and enable the logging of application insights. These provide feedback on the funcionality of our model API
- Check the Swagger docs: Microsoft Azure provides by each deployment of a mode a .json file with documentation for Swagger. We can launch a local Swagger instance and provide it with access to this .json in order to see information regarding the methods of our endpoint (GET and POST requests layout)
- Consume endpoint: Finally we can send POST requests to our API using the layout of Swagger and a data load. If we do it right we should get a response
To create, publish and consume a pipeline we can define the following steps:
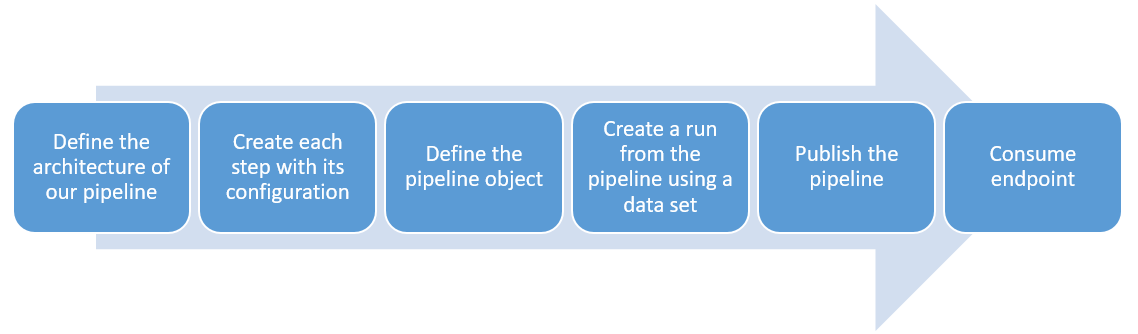
- Define the architecture of our pipeline: The first thing to do is to have a clear view on what our pipeline should do, i.e., to know which is the process that we want to automate. We can do this using a diagram of the ML steps that should be performed
- Create each step with its configuration: After having a clear picture of the pipeline, we can define each step on the Azure SDK using the different available classes. This should be configured accordingly to what is needed.
- Define the pipeline object: Having defined each of the steps we can define the pipeline object using the list of steps
- Create a run from the pipeline using a data set: With the pipeline object available we can submit a run to an experiment by using an available data set
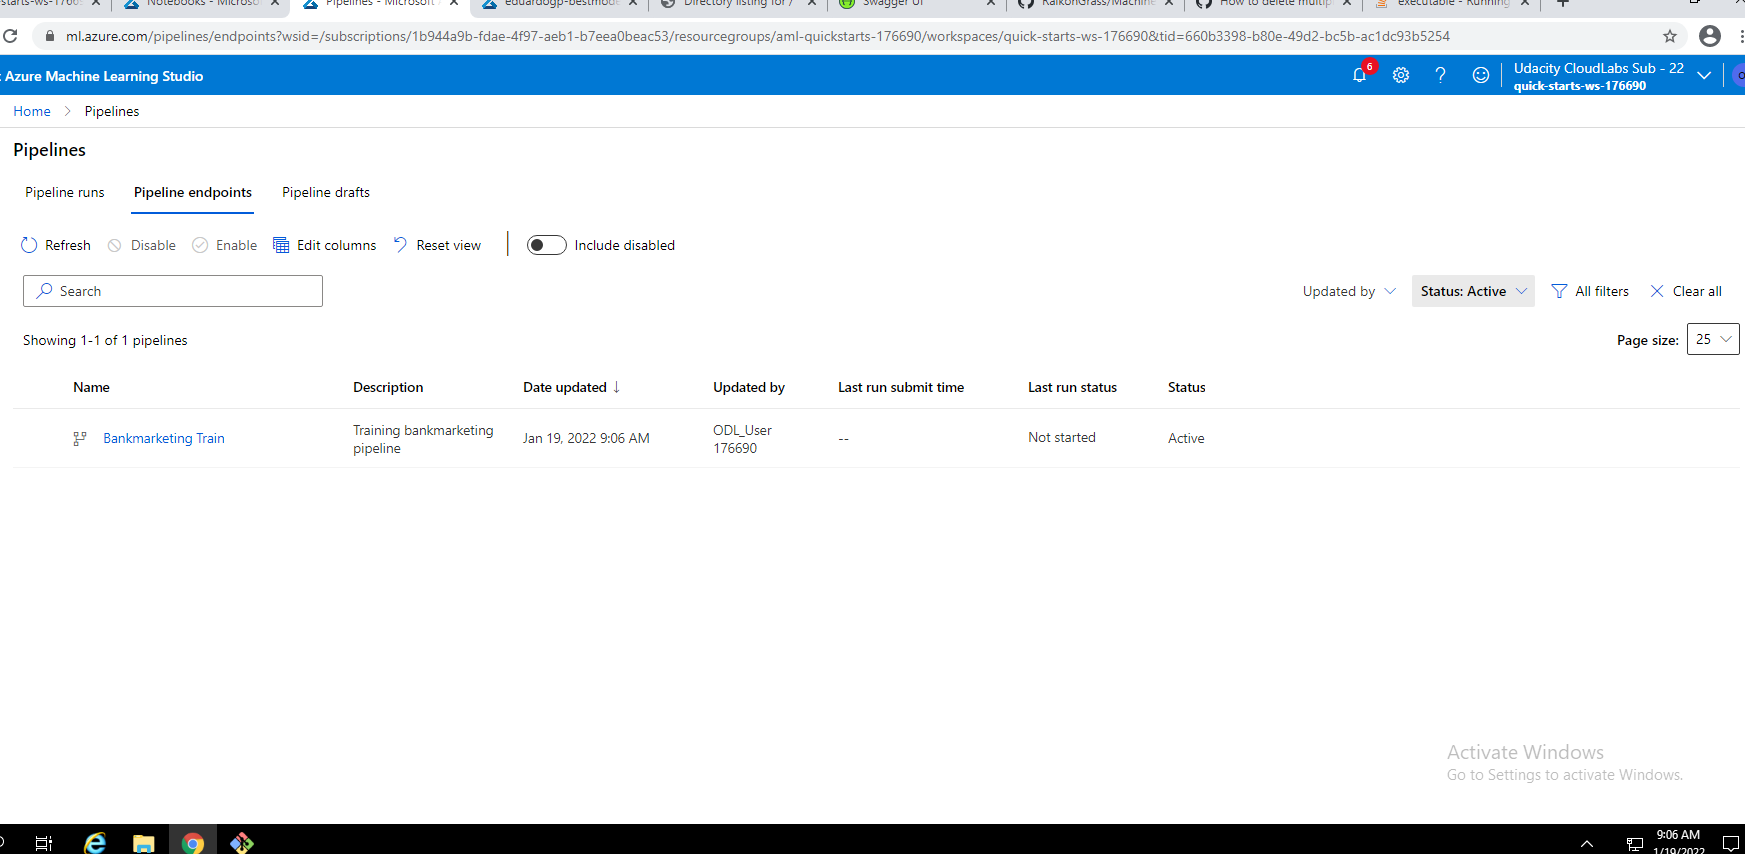
- Publishing the pipeline: If everything worked fine we can publish the pipeline for consumption. This can be done on the ML studio or in Azure SDK. This will provide an endpoint, just like when publishing a model
- Consume endpoint: We can proceed to consume the endpoint of the pipeline
-
Register the data set: To register the set on ML studio we just need to upload our .csv file using the Data sets tab

-
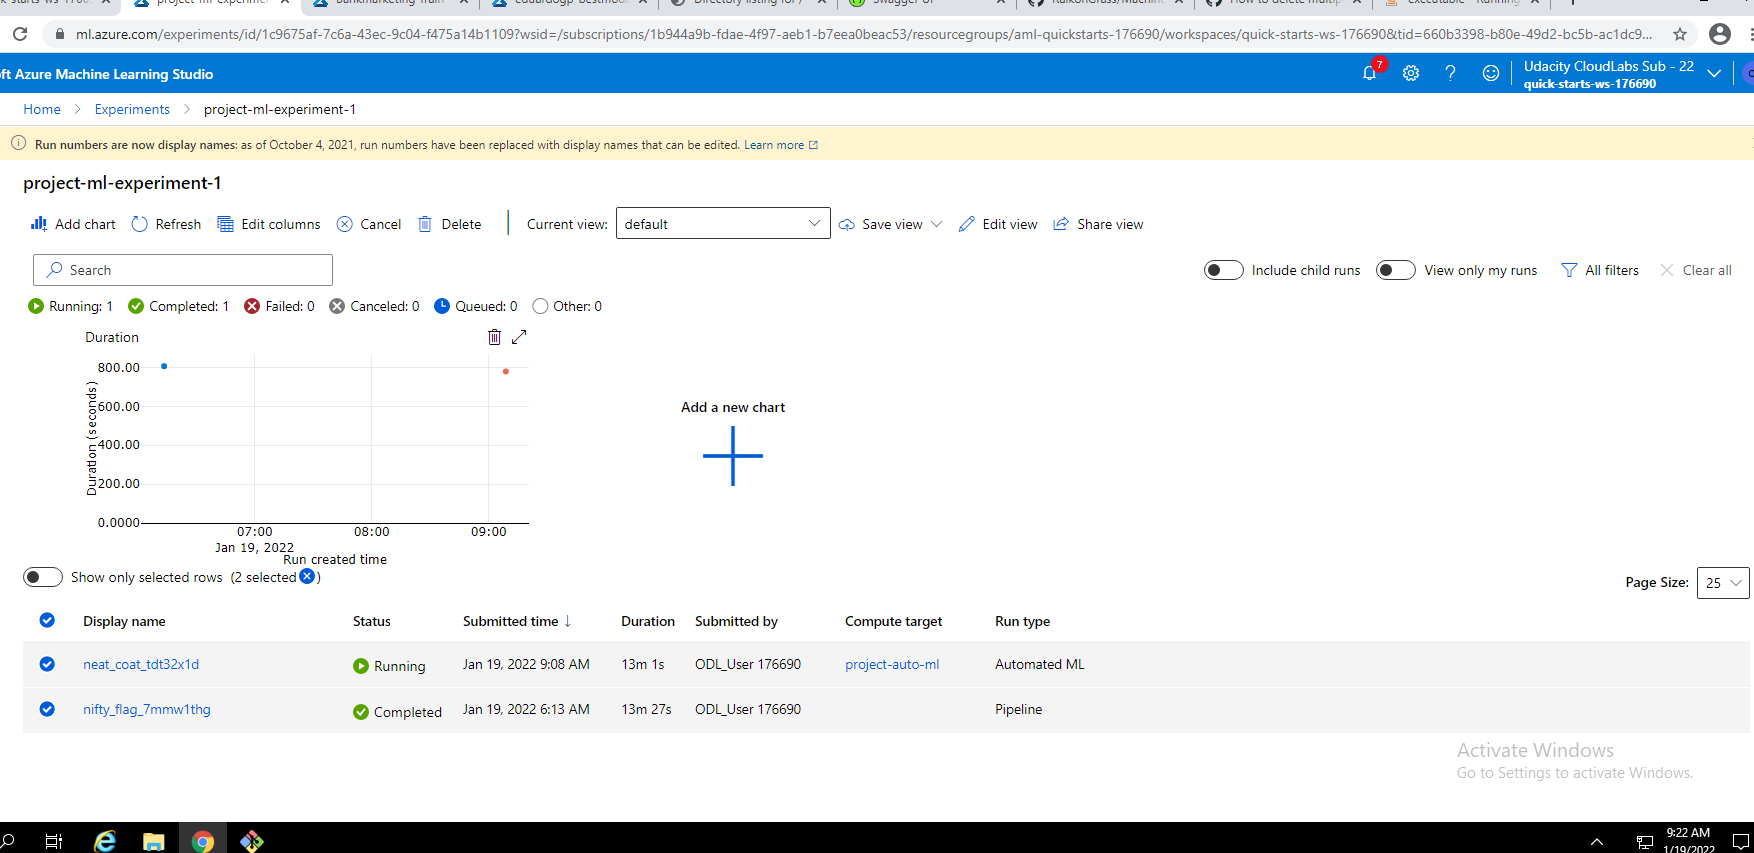
We can start a run of AutoML using the AutoML tab and the registered data set. Here we should also define a compute instance to use. After completion we can check the experiments to see our runs:
-
The models created by AutoML can be accessed by exploring the run. We can select the best model from the list and see its accuracy, explanation, etc

-
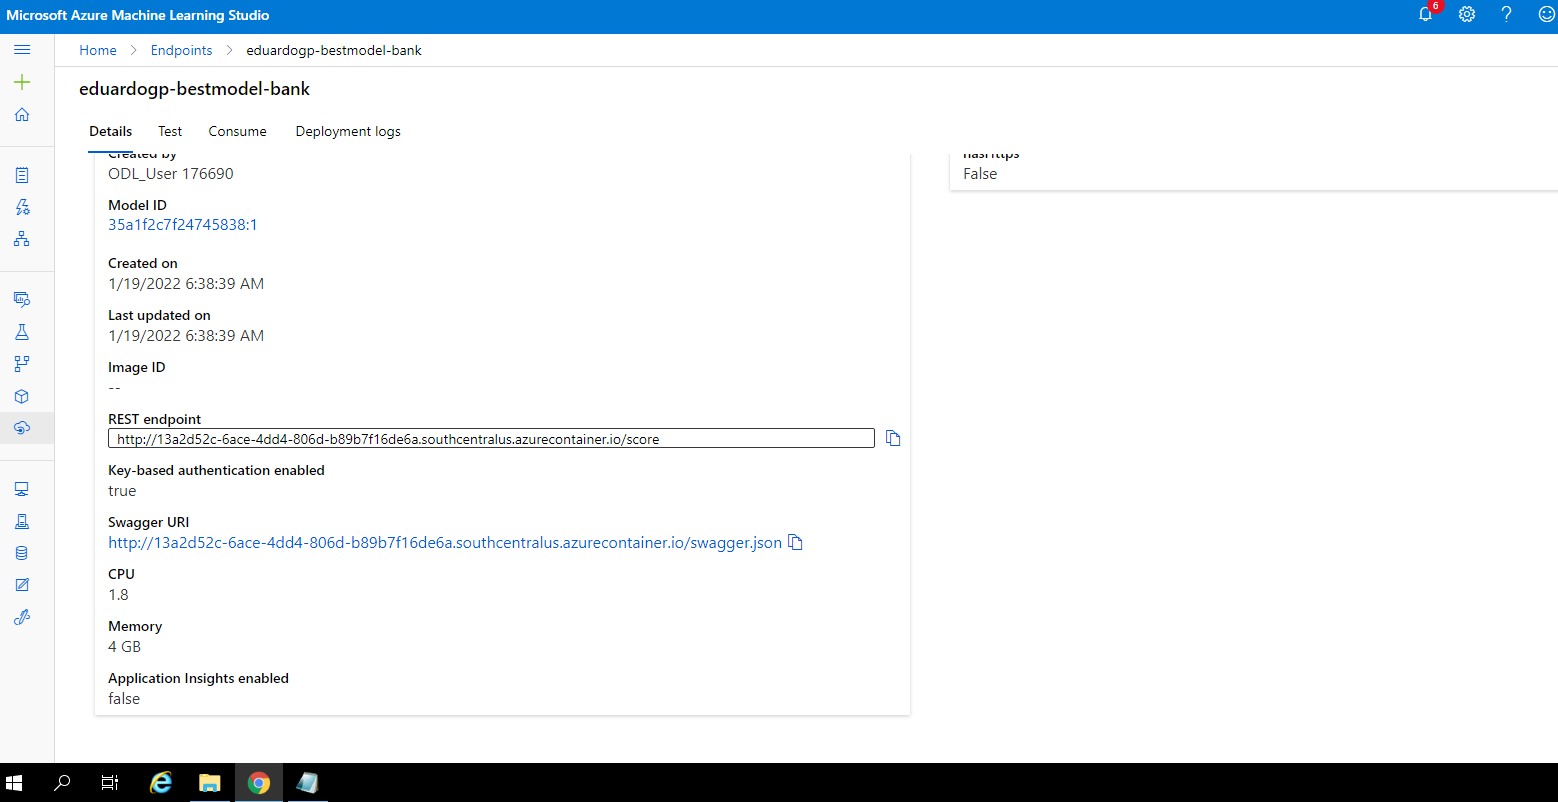
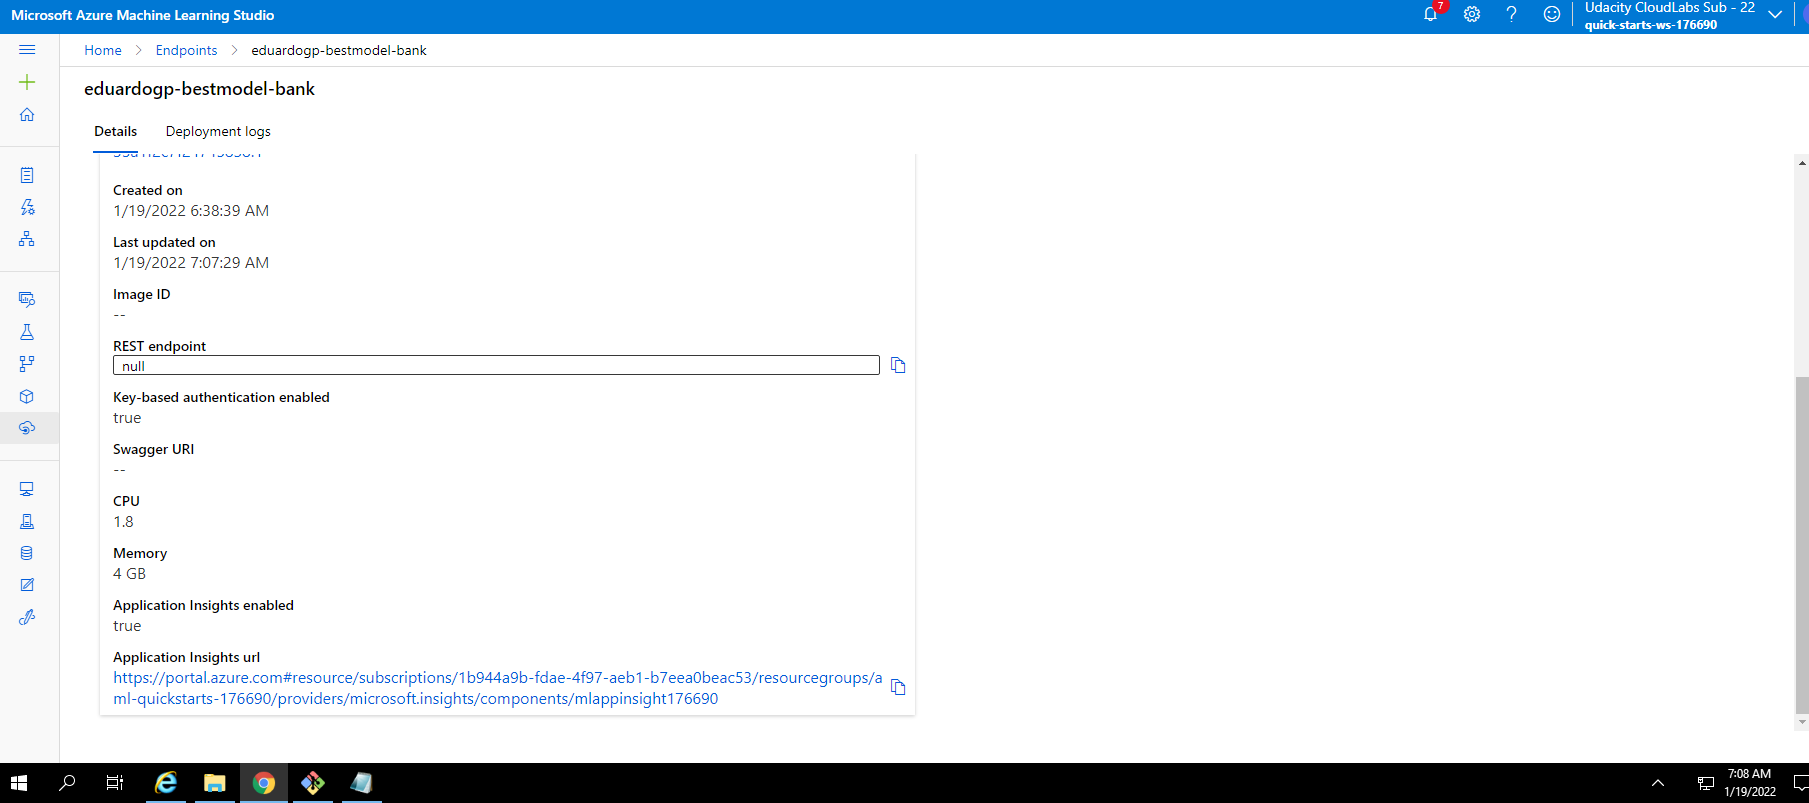
The deployment of the model can be done in the same tab. In this project we used a ACI with enabled authorization
-
We can enable the logging of insights on this same tab or do it progammatically using python: Before:
 After:
 Loggings:

-
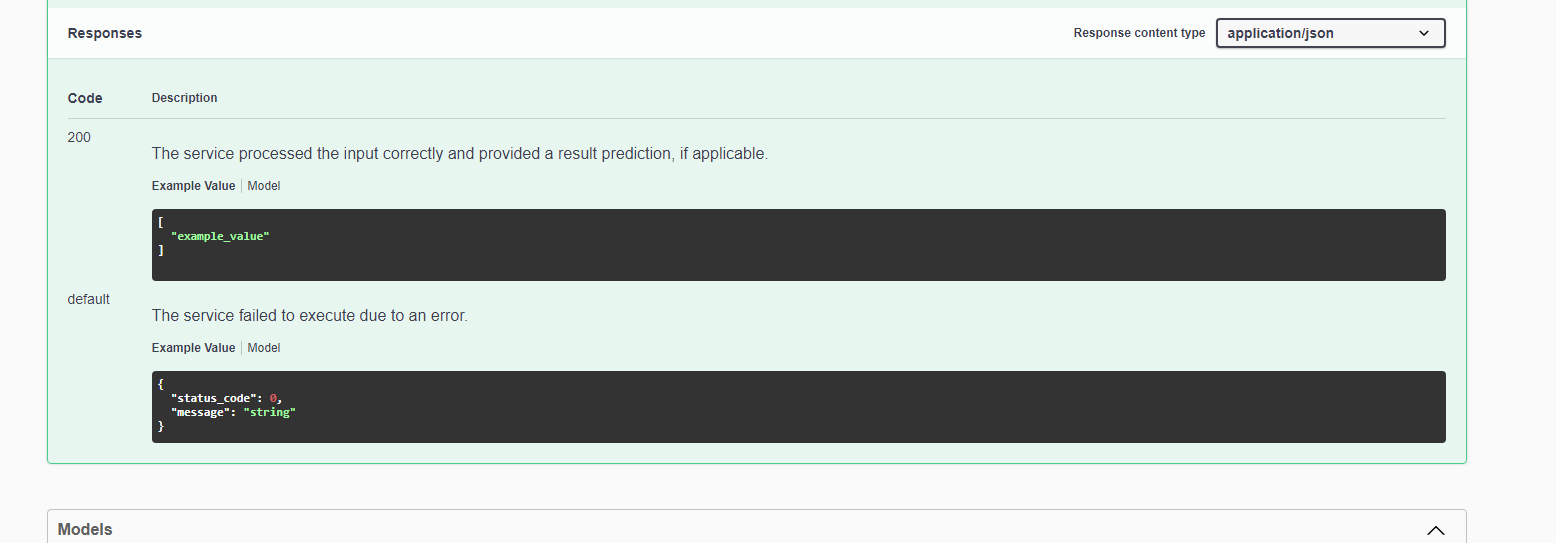
It is always useful to check the generated Swagger documentation. We can run an instance of Swagger and give it access to the generated .json. Here we can see the methods available for our model and the expected responses:

-
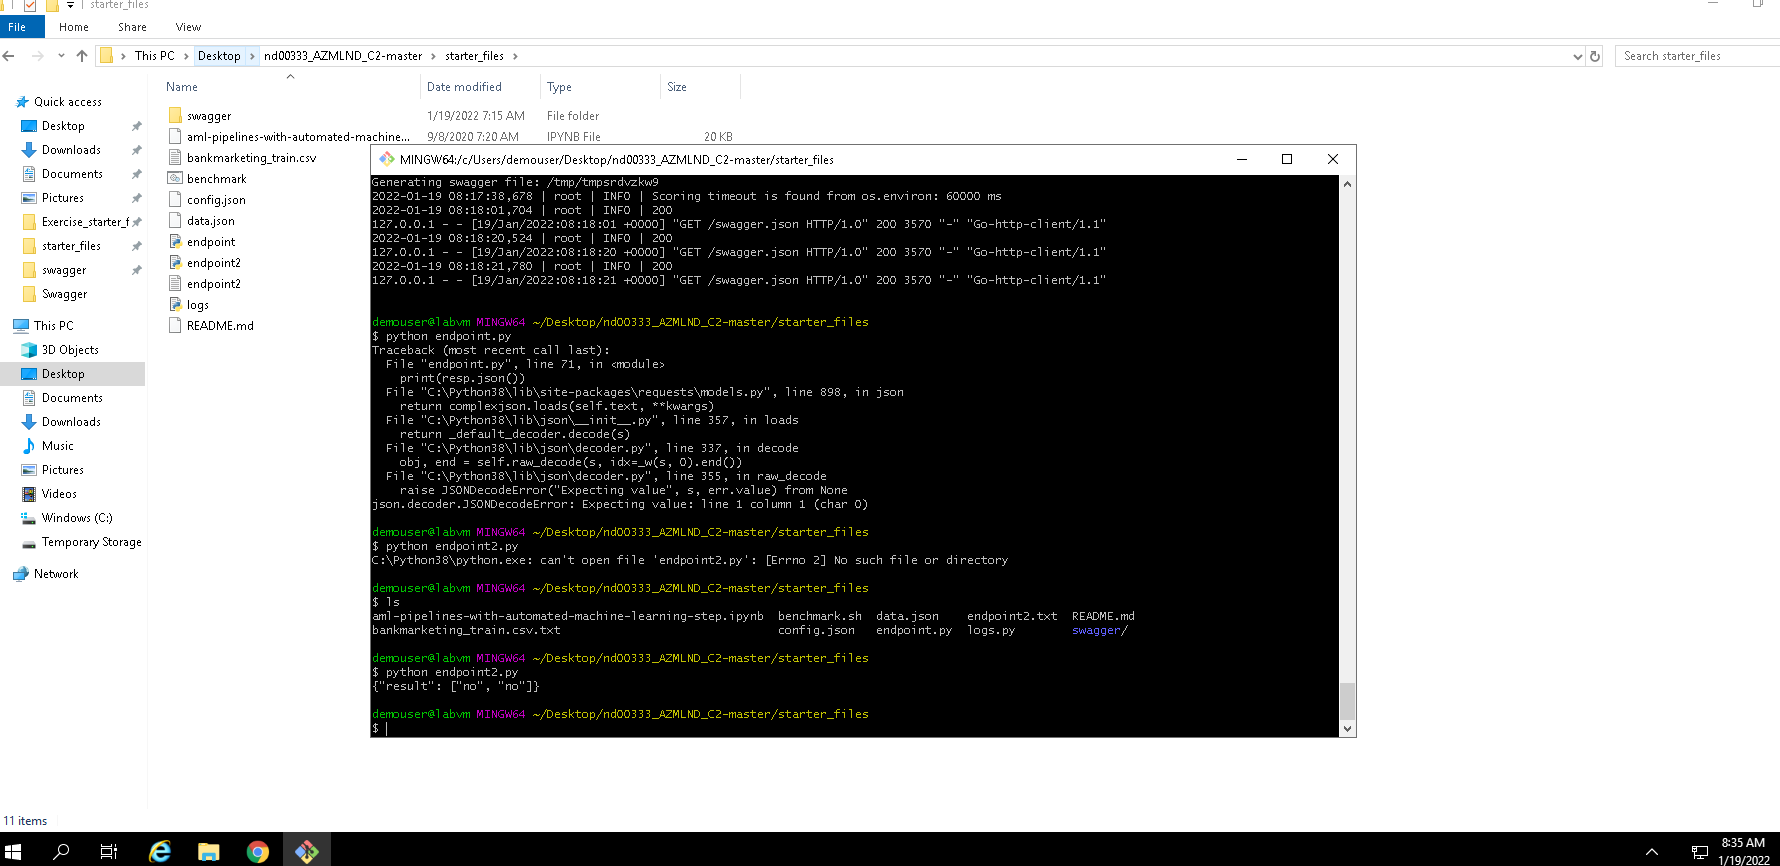
Having published the model we can communicate with it using the URL of the endpoint and the generated access key. From the swagger documentation we get to know how we should send the data load to the API. If everything runds smoothly we can see something like this:
-
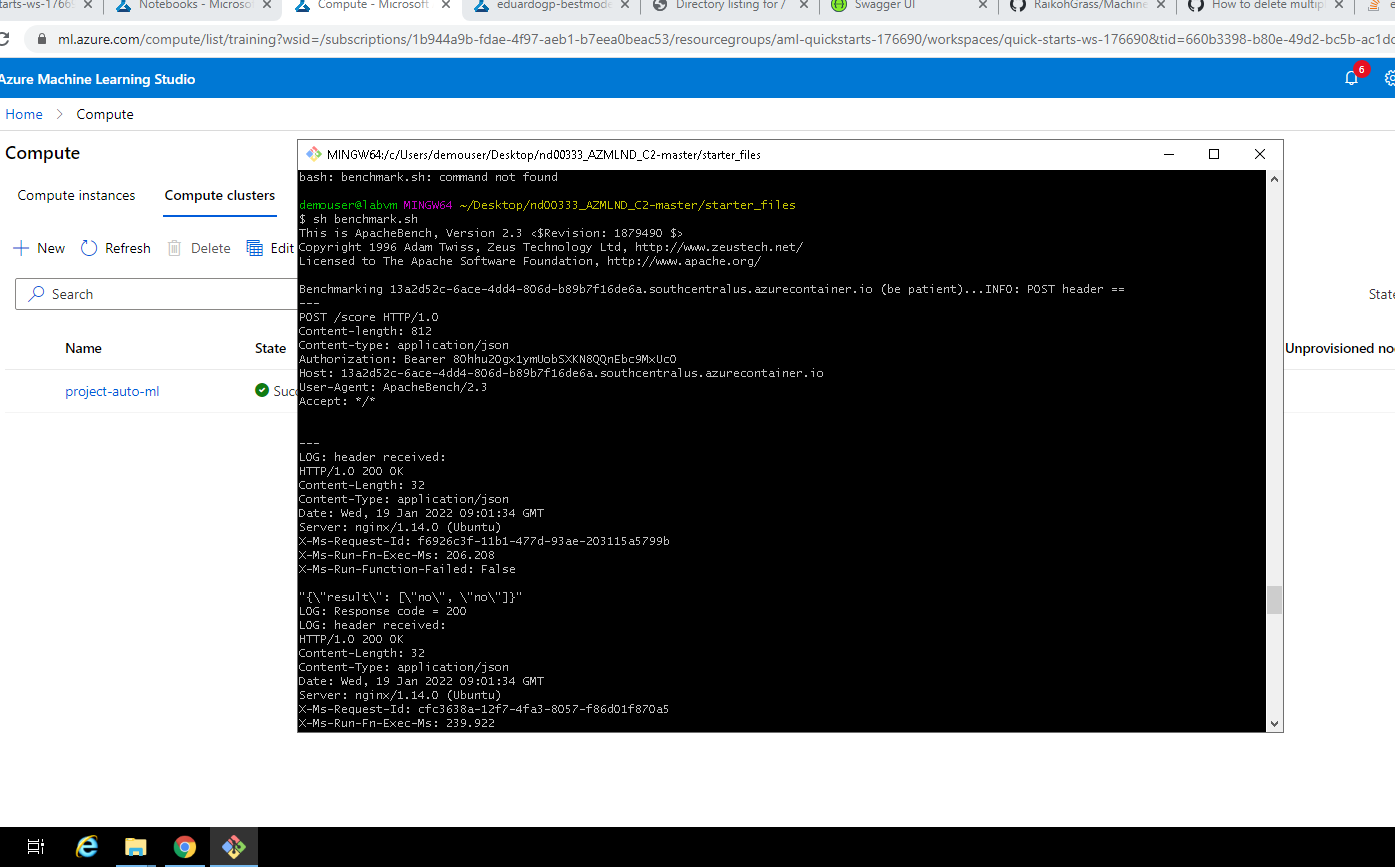
We can also testbench our API by using Apache testbench. Here we can define a data load and send it multiple times to check the response times and if any time outs arise
-
Using the steps defined in the diagram above we can define and puslih a pipeline that uses autoML to generate a model from our data:
Run using our pipeline:
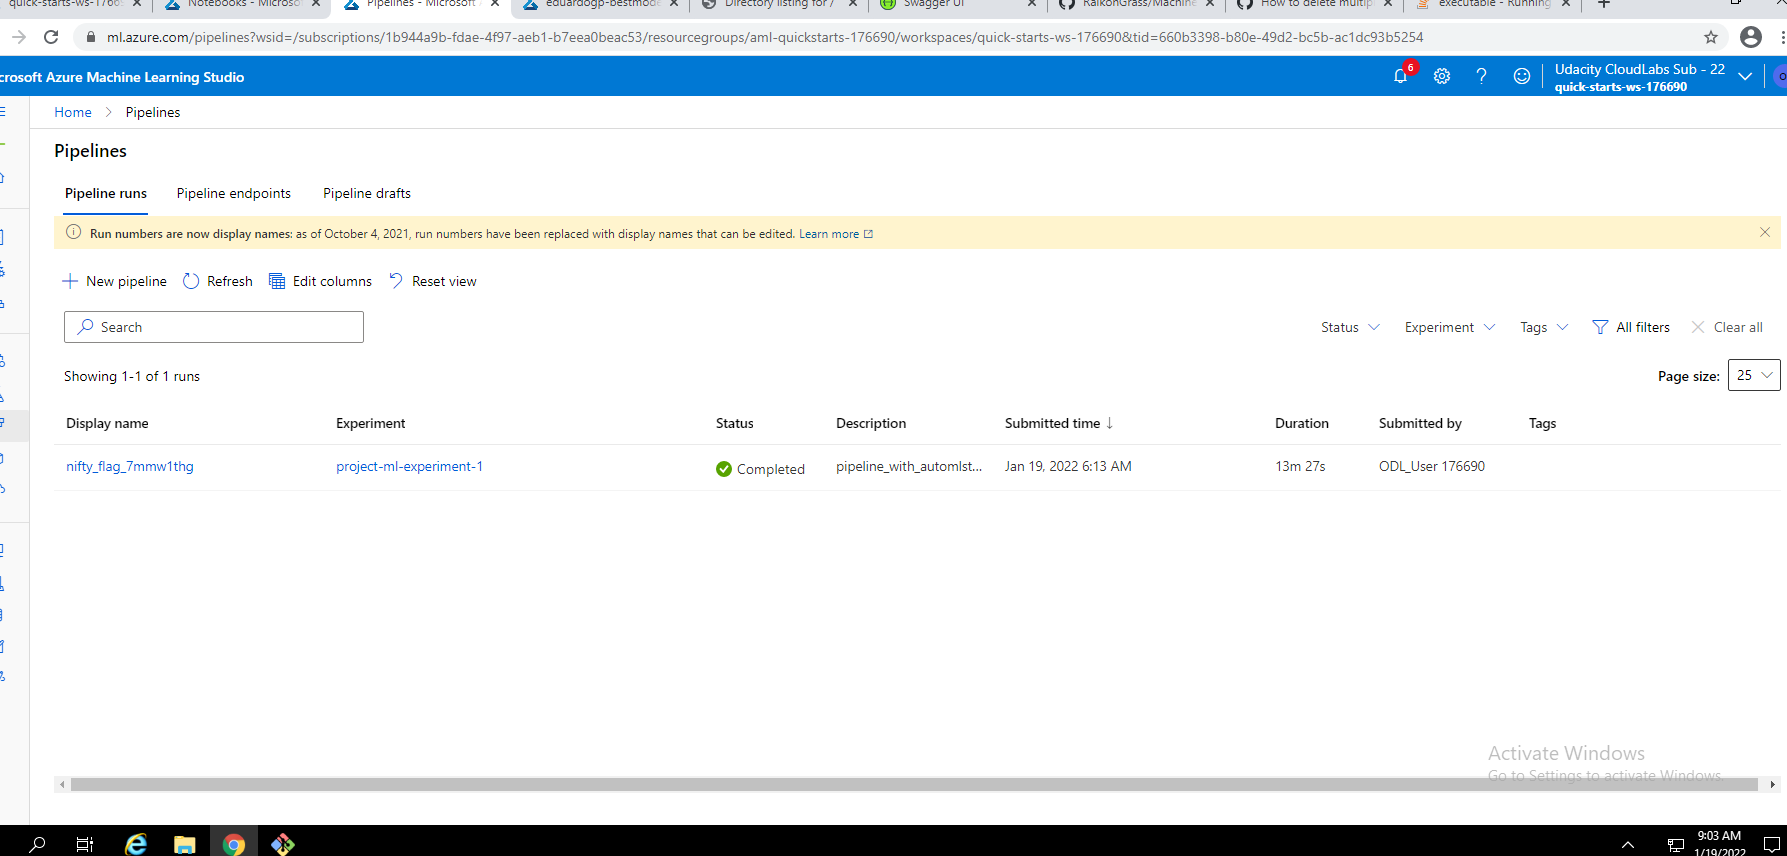
Details while running the pipeline run:

Published pipeline overview:

Link to my video: https://youtu.be/vvzYhFkSuf4
- An improvement to the pipeline would be to make possible for the use to select the optimization criteria for the AutoML run by using an input parameter. This way we could train multiple models using different optimized measures and compare them to see which satisfy our needs.
- In general there are many parameters which could be added as an input of the pipeline endpoint to customize the user´s run. For example being able to add restriction to models for the AutoML trainer, the variable which should be predicted, or the time before a timeout. Another add-on would be to include a data processing step based on a pre-written script. This would save the user time by checking the validity of the input data and making sure that the data structure is the correct one for the endpoint of the model. Preventing an autoML run with wrong data saves a lot of time and compute resources.
I think some people can get lost when trying to send a data load to the API. The files provided as data load use a different order for the input, which will result in an error when the service try to process the data.