AWS Route53 DNS Automation to the TCPWave IPAM is the intended scope of this article. This automation helps add or delete hosted zone resource records to TCPWave IPAM whenever the resource records receive an update in the AWS Route53.
To achieve this, we will be utilizing the capability of AWS functionalities namely Cloudtrail, Cloudwatch, S3 and Lambda function. A cloudtrail is created to log the events to cloudwatch which are stored in S3 bucket. A cloudwatch rule is created to trigger a Lambda function when it sees Route53 resource record change related events in the logs. Lambda function has the node js code to connect to IPAM and add/delete resource records through secure rest API invocations.

The following section explains the setup in TCPWave IPAM and AWS required for the automation.
The server(appliance) certificate and client(user) certificate must be uploaded to IPAM to enable SSL authentication for rest API access from AWS Lambda. Self-signed certificates are provided for quick set up. The commands used to create self-signed certificates are provided in step 3.
      a. Navigate to Administration --> Security Management --> Appliance Certificates.
      b. Click Import and a dialog opens.
      c. Browse Certificate File (rootCA.crt), Private Key File(rootCA.key).
      d. Enter Private Key Password(abc123), Certificate Storage Password (default password will be provided on request. This password can be changed by clicking Change                  Storage Password in the same page).
      e. Select Trust CA and upload the certificate.
      f. Restart tims service.
    a. Navigate to Administration --> Security Management --> User Certificates.
    b. Click Import and a dialog opens.
    c. Browse Certificate File(client.crt) and select twcadm as Associated Admin.
    d. Click Ok and import the certificate.
    e. Restart tims is not needed.
     openssl genrsa -des3 -out rootCA.key 4096
     openssl req -x509 -new -nodes -key rootCA.key -days 1024 -out rootCA.crt
     openssl genrsa -out client.key 4096
     openssl req -new -key client.key -out client.csr
     openssl x509 -req -in client.csr -CA rootCA.crt -CAkey rootCA.key -CAcreateserial -out client.crt -days 500
Note: Select region as N.Virginia because Route53 logs events to cloud trail created in this region.
-
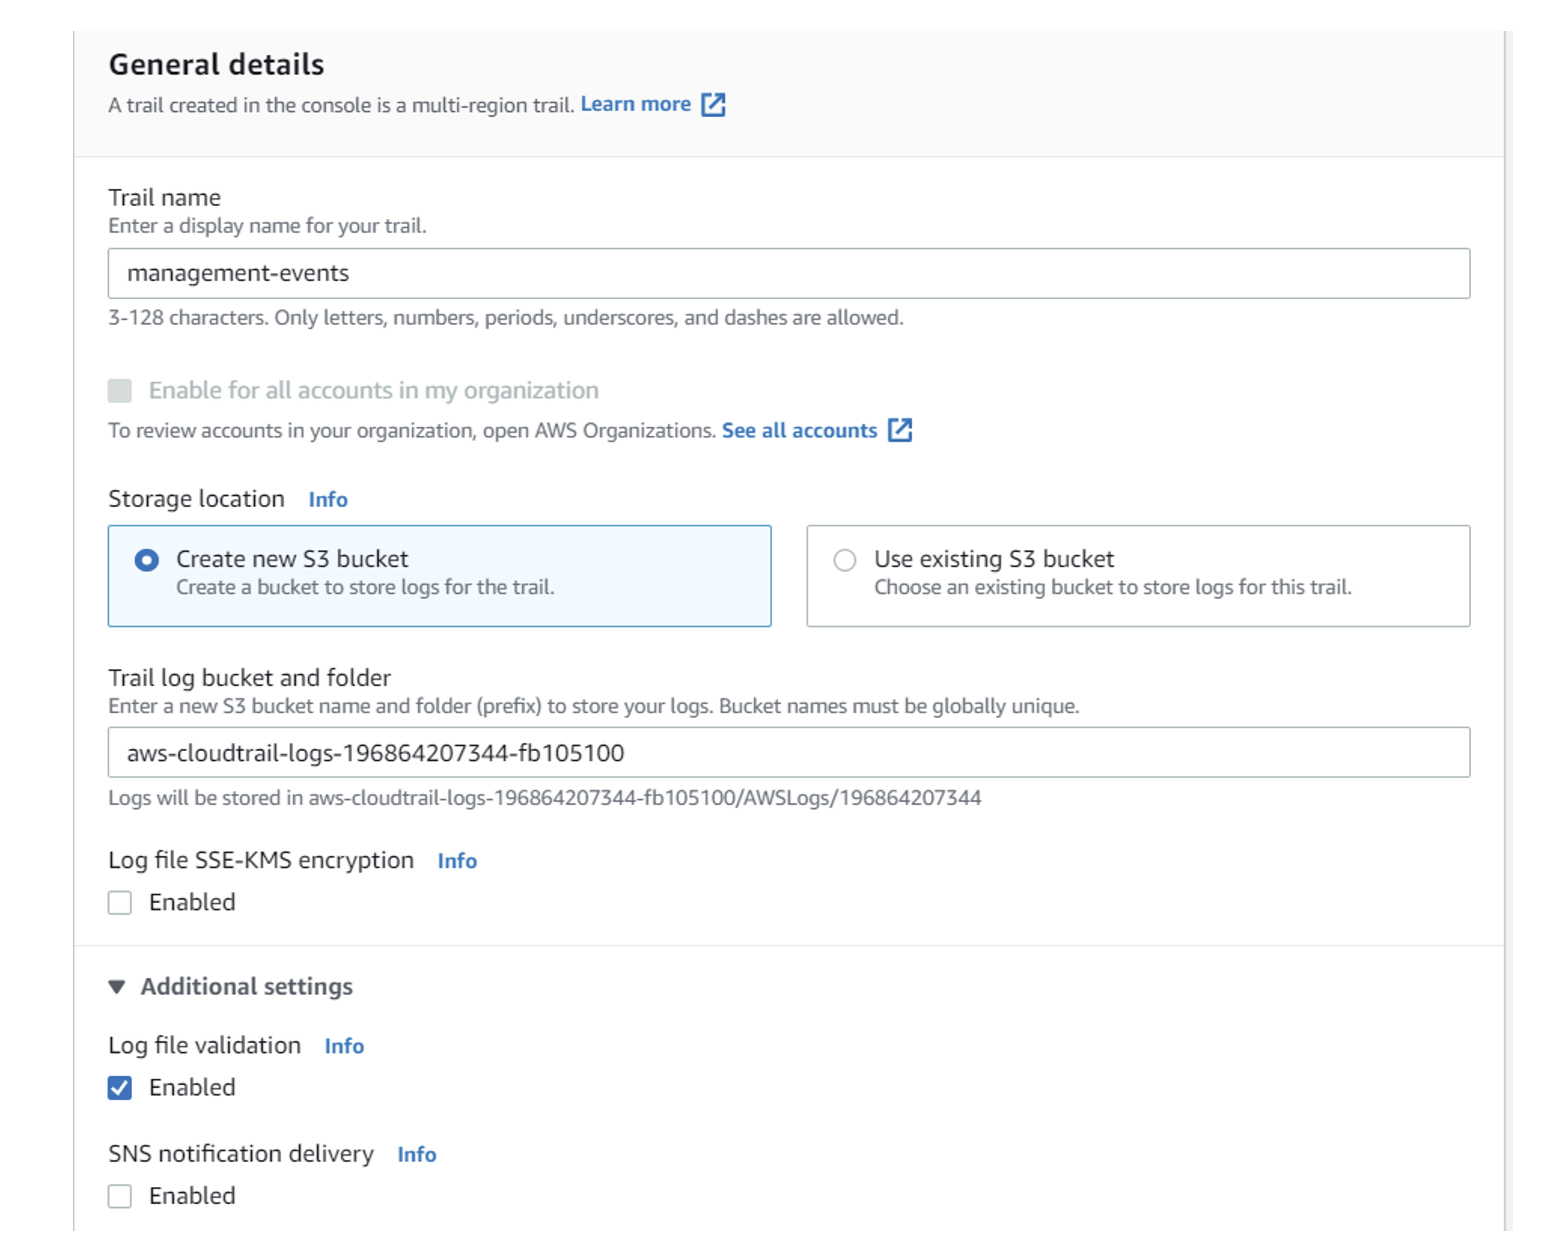
Open CloudTrail service and create a trail. Cloudtrail writes the change events to cloudwatch logs. These logs are stored in S3.
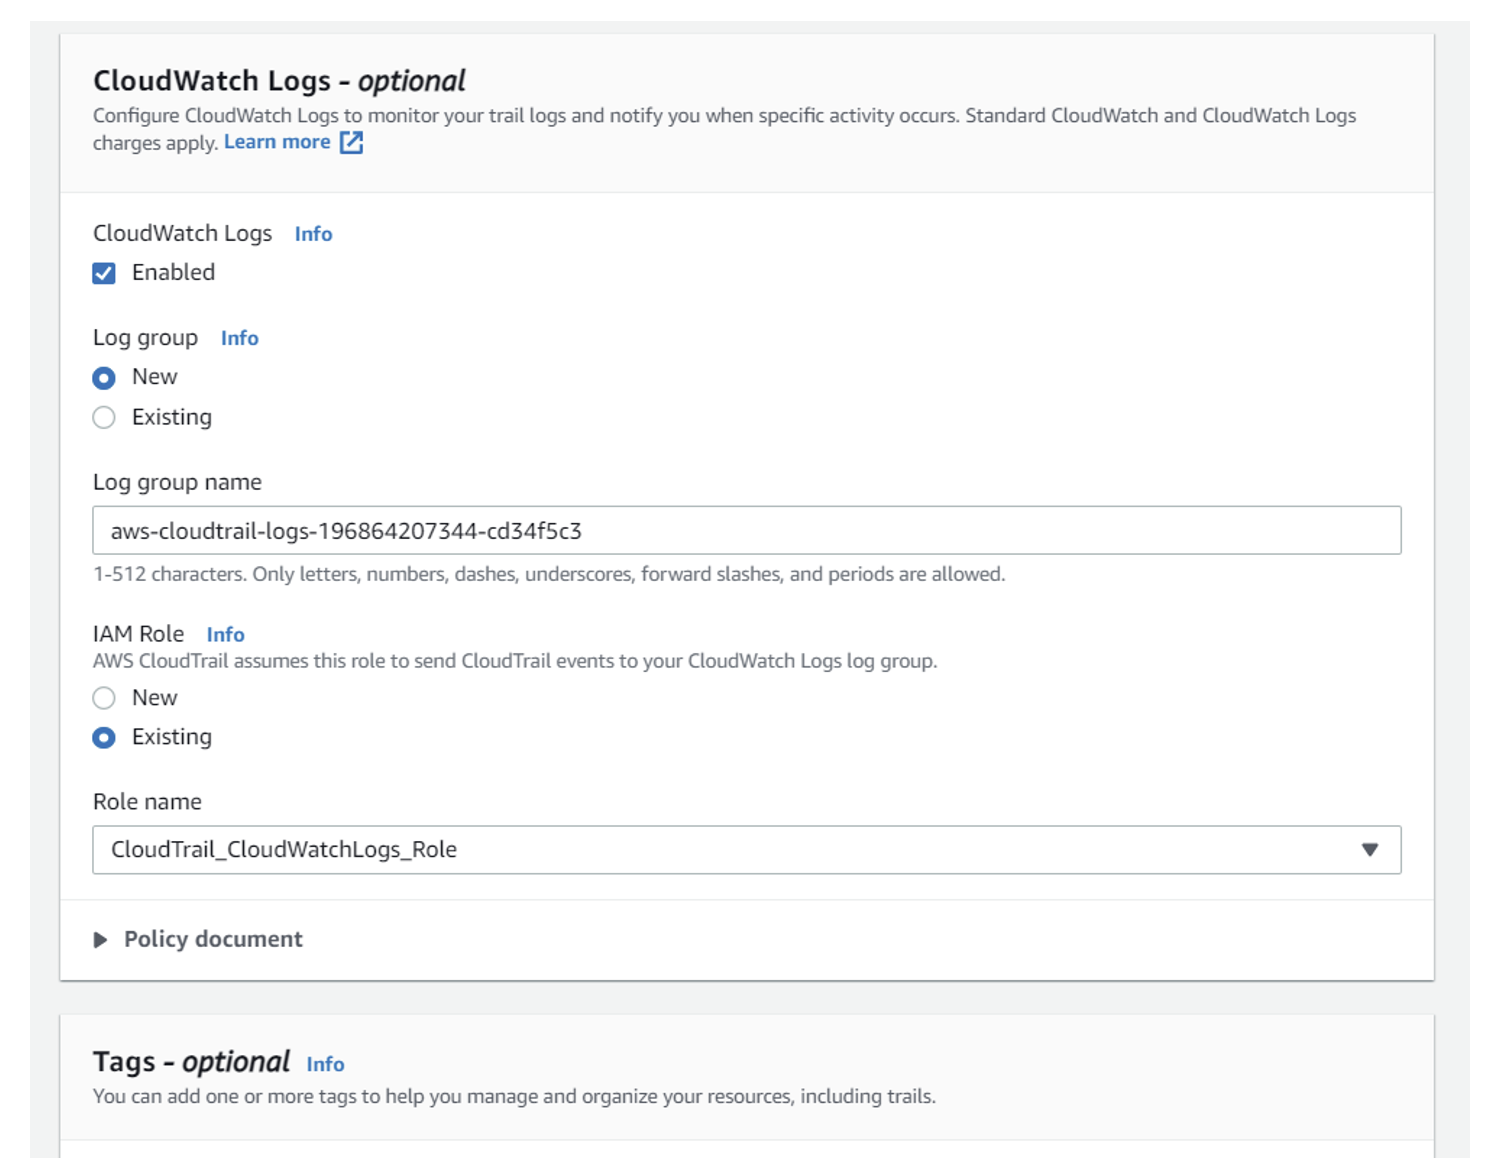
a. Trail name: Enter a Trail name.
b. Storage location: Select Create new S3 bucket or Select existing one. Disable the Log file SSE-KMS encryption if not needed.
c. Cloudwatch Logs: Enable cloudwatch logs. Enter a log group name or keep the default. Select IAM role as Existing and choose  CloudTrail_CloudWatchLogs_Role.
d. Click Next.
e. Click Next. Click Create trail.
-
Create a Lambda function in N.Virginia region. This function has the node js (14.x version) code that takes input from cloudwatch rule (will be created in the next step) and invokes rest API of TCPWave IPAM to add or delete the resource record based on the action(add/delete), using SSL authentication using certificates.
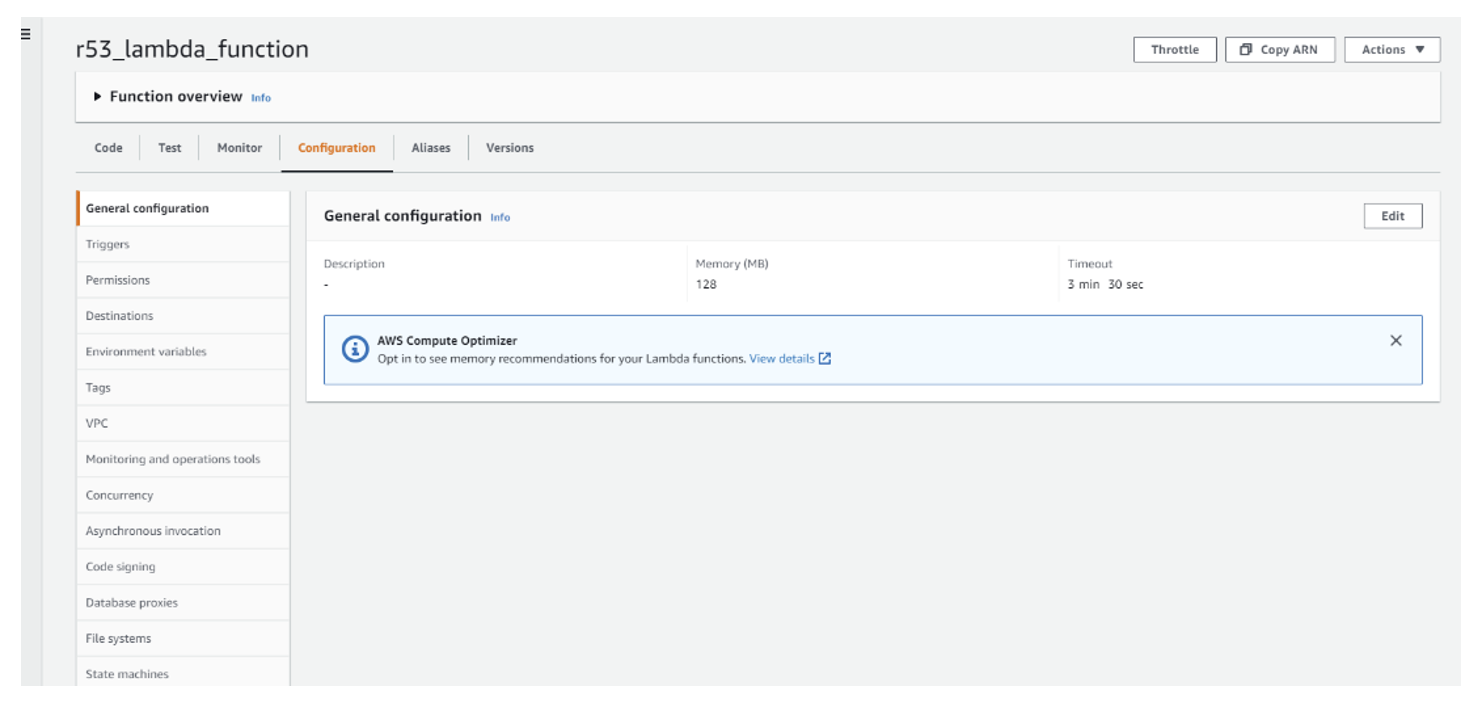
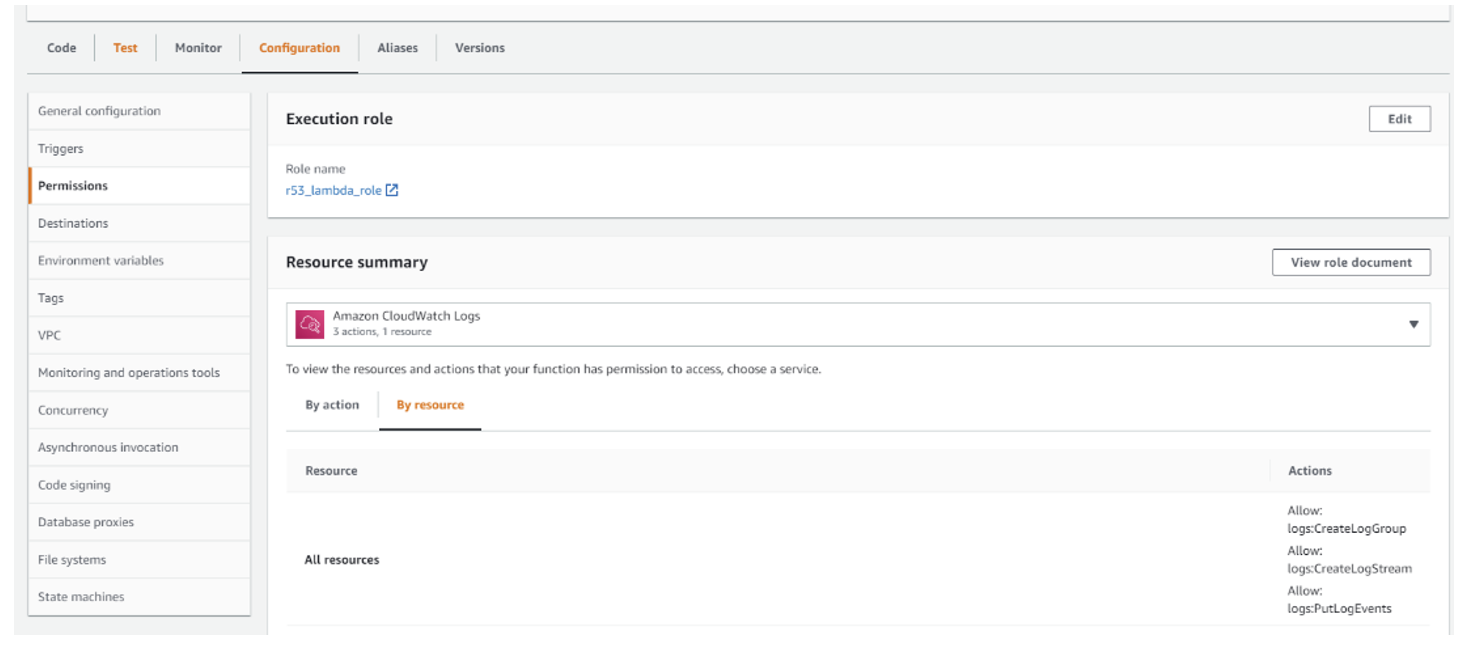
a. Before creating the Lambda function, create an IAM role with the permissions: AmazonRoute53ReadOnlyAccess and AWSLambdaBasicExecutionRole.
b. Open the service Lambda and click Create function.
c. Function name: Enter a name.
d. Runtime: Select Node.js 14.x.
e. In Permissions section, expand Change default execution role, choose Use an existing role and select the IAM role created previously.
f. Click Creation function.
g. Open the function to make few configuration changes and add code to it.
h. Under Configuration tab, select General Configuration and click Edit in that section.
i. Change Timeout to 3min and 30sec and click Save.
j. Under Code tab, Select .zip file option from Upload File dropdown. Browse the r53_function.zip file provided. Click Save and click Ok.
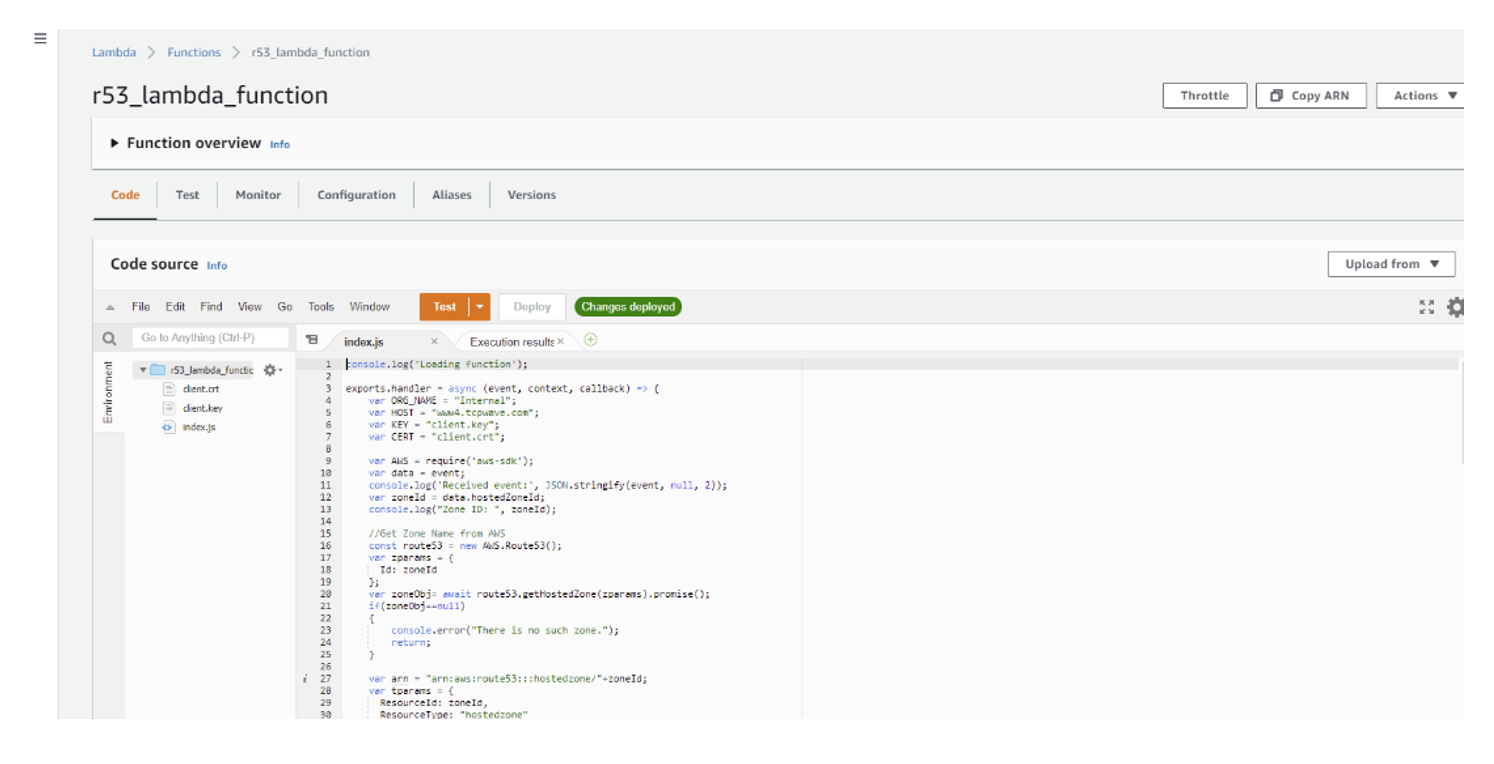
Important: There are few modifications to be done in the code to make it work.
a. The below code snippet initializes the default organization of the zone in the IPAM and the IPAM hostname. Change these settings and click Deploy.
   var ORG_NAME = "xxxxxx";
   var HOST = "xxx.xxxx.xxx";
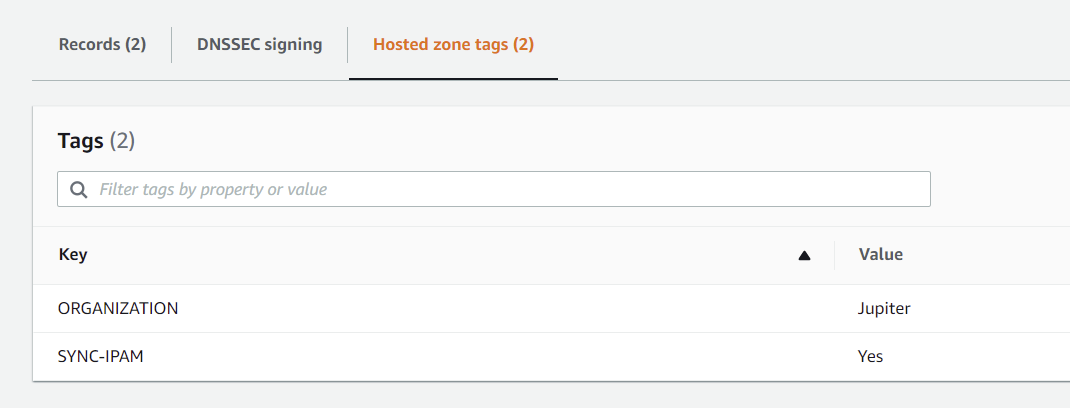
Note: If the zones are distributed across different organizations in the IPAM, in such case, this code has capability to get the organization information from the tag ORGANIZATION added for the hosted zone in Route53. If this tag is not present, default ORG_NAME will be taken.
The zone changes will be reflected in the IPAM only when a tag with name SYNC-IPAM is present and has the value as Yes for the zone.
-
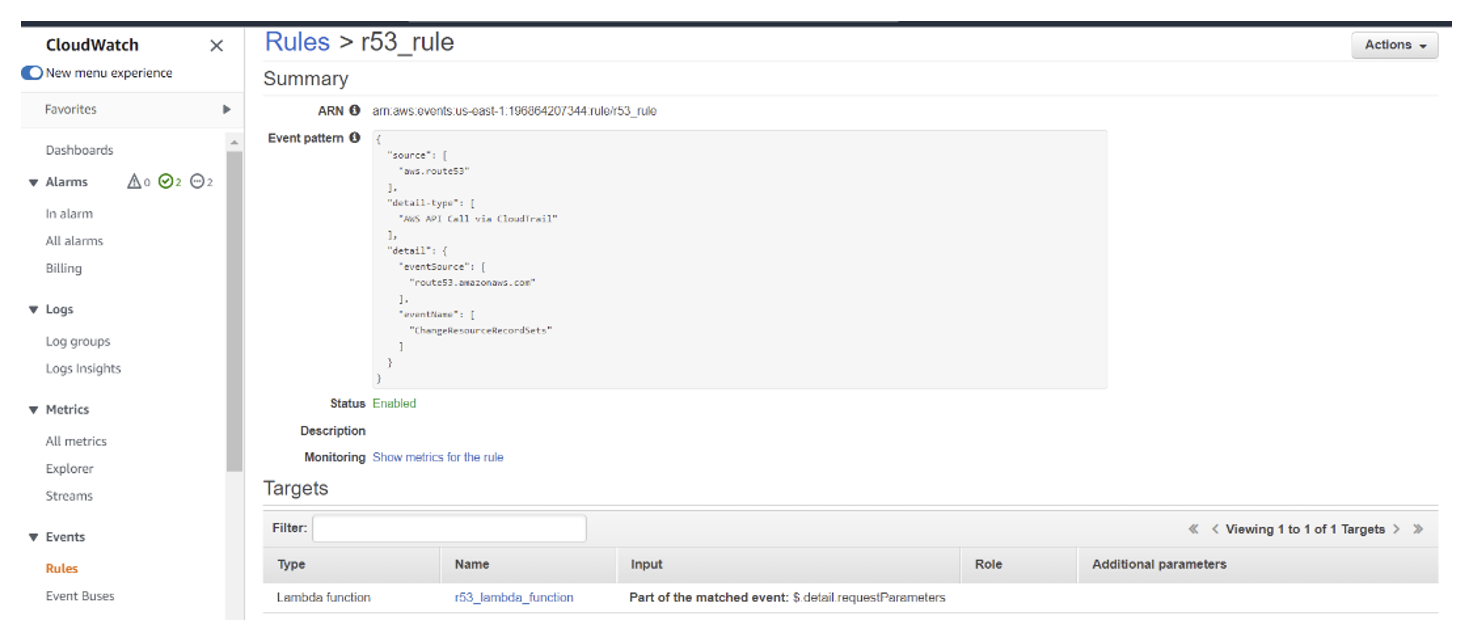
Create a cloudwatch rule that can trigger the above Lambda function when Route53 resource record changes take place.
 a. Open Cloudwatch service and click Create rule.
 b. Choose Event Pattern in the Event Source section.
 c. Service Name: Select Route53.
 d. Event Type: Select AWS API Call via CloudTrail.
 e. Choose Specific Operation(s).
 f. Enter ChangeResourceRecordSets in the text box of Specific Operation(s).
 g. Click Add Trigger.
 h. Select Lambda Function as trigger.
 i. Function: Select the  Lambda function created previously.
 j. Expand Configure Input and choose Part of the matched event.
 k. Enter $.detail.requestParameters in the text box.
 l. Click Configure details.
 m. Enter Name and Description and click Create rule.
After doing the above set up, check the logs to see if the set-up is successful and the rest API calls are invoked to IPAM or not. To do that, open and verify AWS Cloudwatch -> Log groups -> (Log with the Lambda function name).
On the IPAM end, check the log by navigating to Infrastructure Management -> Performance Management -> IPAM Statistics -> Logs. Select the IPAM appliance that is given in the Lambda function, select IPAM Webserver Log and click Generate.
Note: Make sure that the hosted zone where the resource records are updated is present in the IPAM before validating the set up.
    {
            "Comment": "CREATE",
             "Changes": [ {
                         "Action": "CREATE",
                        "ResourceRecordSet": {
                            "Name": "www.newrrtest.com",
                                "Type": "A",
                                 "TTL": 300,
                              "ResourceRecords": [{"Value": "10.0.0.1"}]
                        }}
                        ]
      }
      {
            "Comment": "CREATE",
             "Changes": [ {
                        "Action": "CREATE",
                        "ResourceRecordSet": {
                             "Name": "ipv6.newrrtest.com",
                             "Type": "AAAA",
                              "TTL": 300,
                              "ResourceRecords": [{"Value": "5000::1"}]
                       }}

                         ]
     }
     {
            "Comment": "CREATE",
             "Changes": [ {
                        "Action": "CREATE",
                        "ResourceRecordSet": {
                             "Name": "ftp.newrrtest.com",
                             "Type": "CNAME",
                              "TTL": 300,
                              "ResourceRecords": [{"Value": "www.newrrtest.com."}]
                       }}
                        ]
    }
    {
            "Comment": "CREATE",
             "Changes": [ {
                        "Action": "CREATE",
                        "ResourceRecordSet": {
                             "Name": "mail.newrrtest.com",
                             "Type": "MX",
                              "TTL": 300,
                              "ResourceRecords": [{"Value": "10 www.newrrtest.com."}]
                       }}
                        ]
     }
     {
            "Comment": "CREATE",
             "Changes": [ {
                        "Action": "CREATE",
                        "ResourceRecordSet": {
                             "Name": "srv.newrrtest.com",
                             "Type": "SRV",
                              "TTL": 300,
                              "ResourceRecords": [{"Value": "10 5 80 www.newrrtest.com."}]
                       }}
                         ]
       }
By following the above steps, AWS Route53 resource record changes will be automatically updated in the TCPWave IPAM without the need of manually doing Sync in the IPAM.
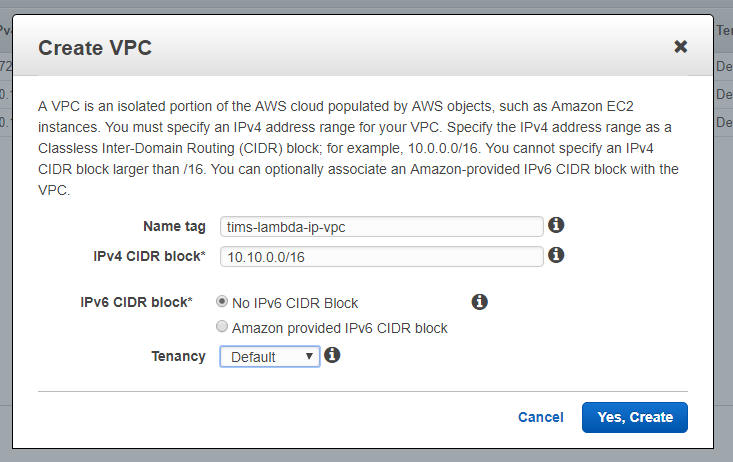
As AWS Lambda provides serverless computing, it doesn’t use static IP Address. So third-party services cannot whitelist the IP as it changes quite frequently. To solve this security concern below are the steps provided to assign a VPC with elastic IP to Lambda function. Once the below set up is done, all the traffic from Lambda service will be NAT’ed to the elastic IP Address. This elastic IP can be white listed by third party vendor.
Head over to your AWS VPC dashboard and click on over to list of VPCs. Click on the Create VPC link and enter in a name and CIDR block for the VPC.
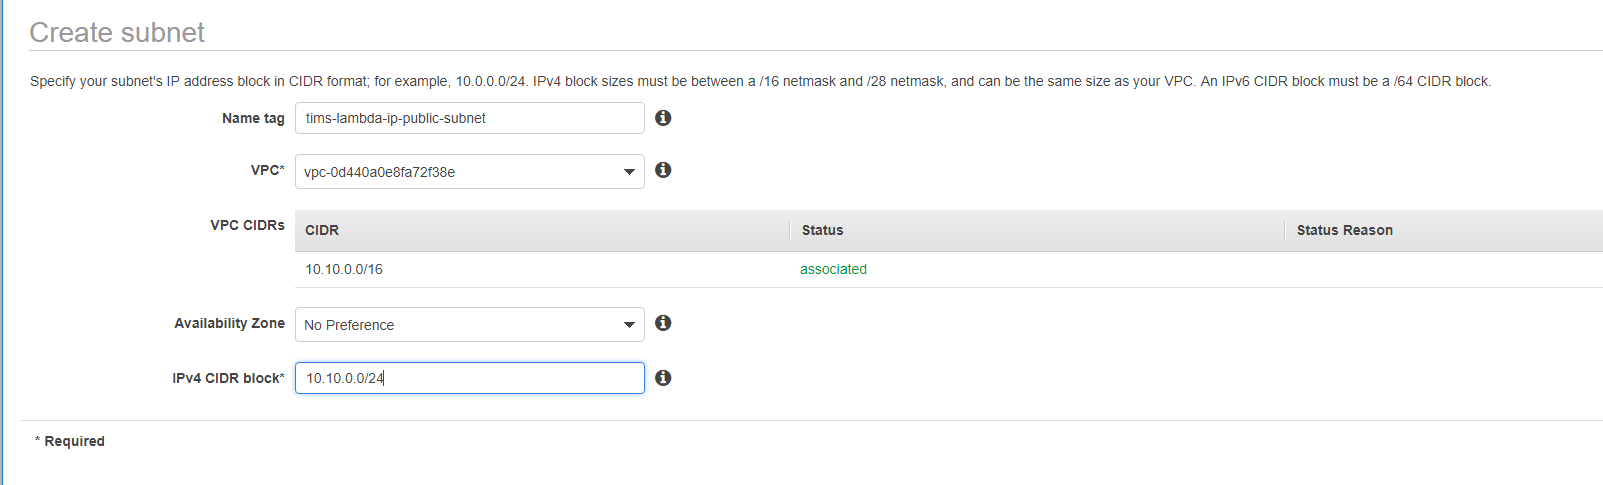
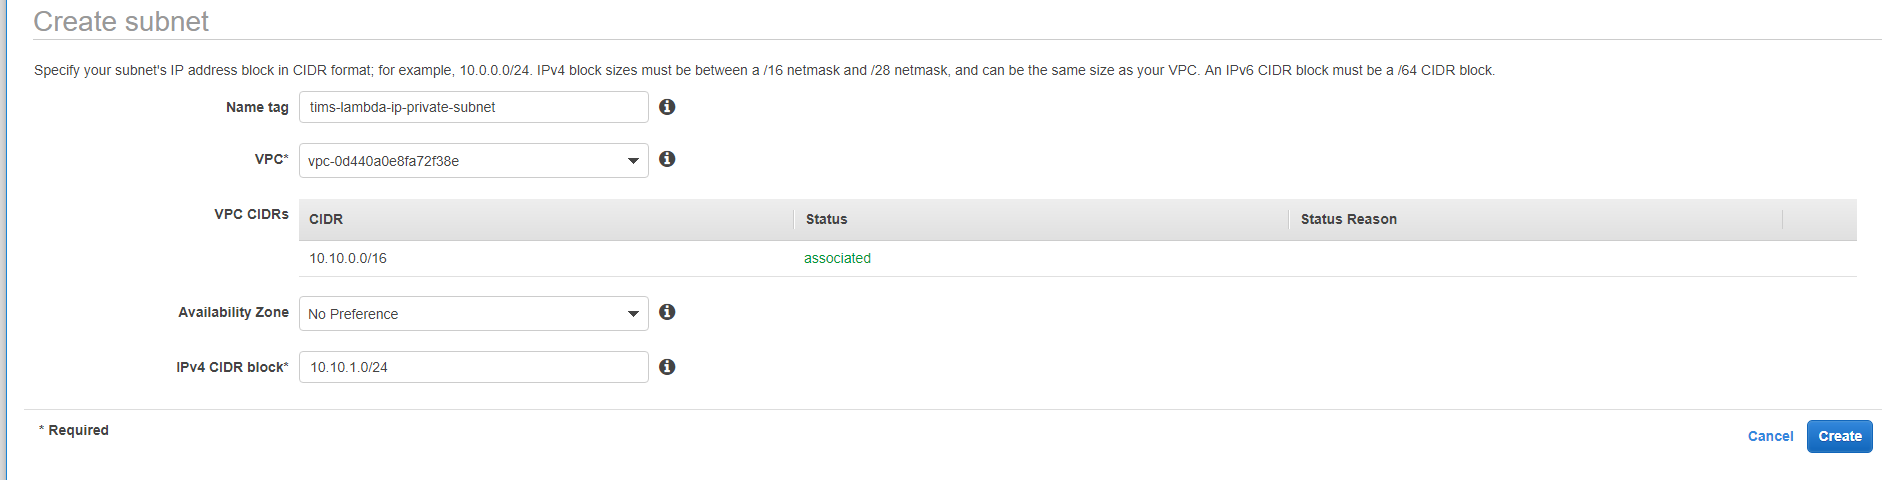
Go to the Subnets page and create two subnets. One public and one private as shown in below two screenshots.
Head over to the Internet Gateway view, click on Create Internet Gateway and tag it with a descriptive tag.
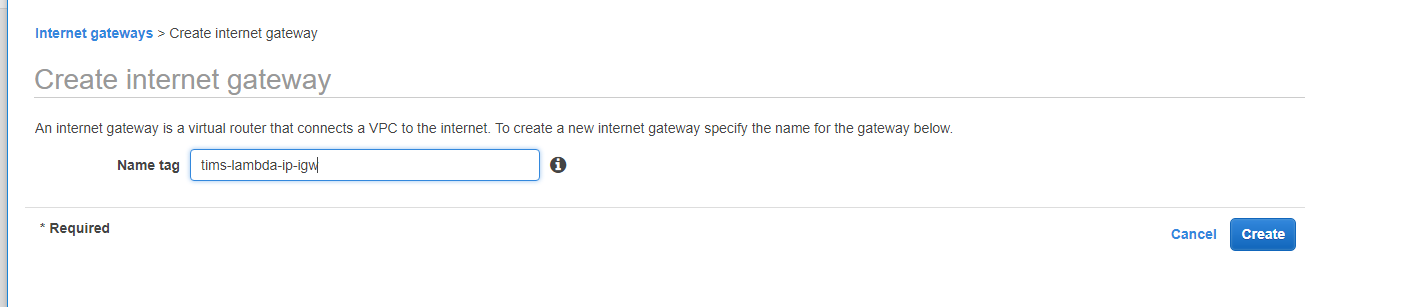
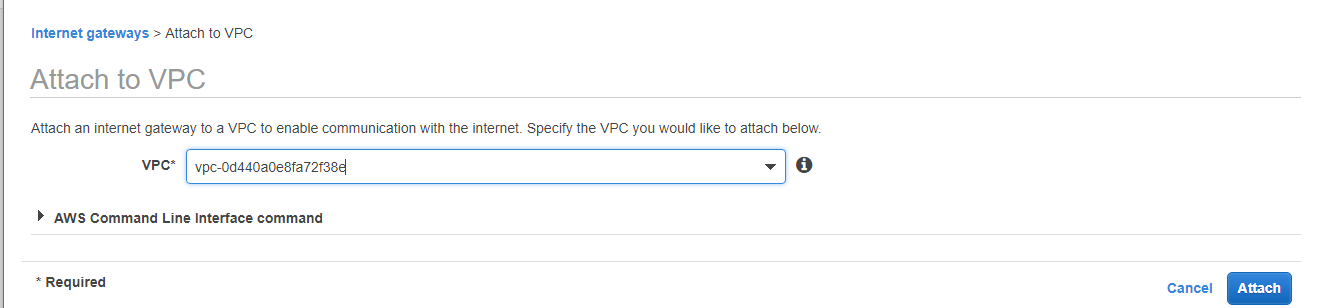
Then, click on new internet gateway, and click on Attach to VPC, to attach it to newly created VPC.

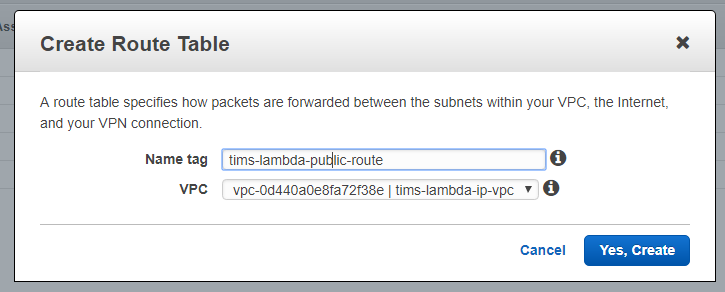
Now head over to our Route Tables view and click on Create Route Table, giving it a descriptive tag and linking it to the VPC.
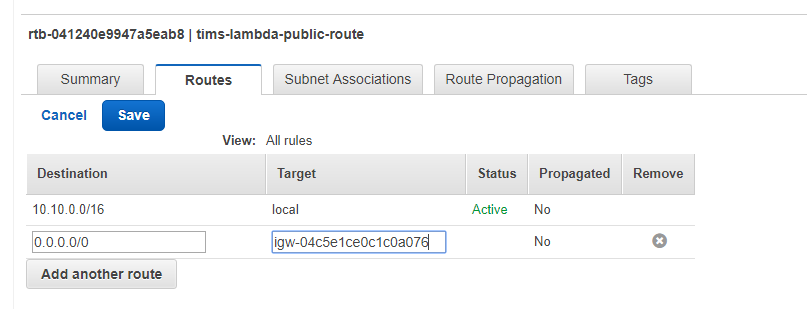
Then edit this route to point it to new internet gateway. Click on the new route, click on the Routes tab, and click edit. Then add a new route, and set all traffic (0.0.0.0/0) to target our internet gateway and save it.
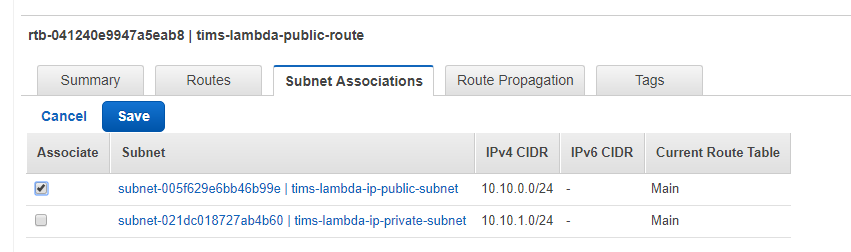
Now, click on Subnet Associations tab, click edit and, by ticking the check box by your public subnet and clicking Save, you will associate this new route to your public subnet.
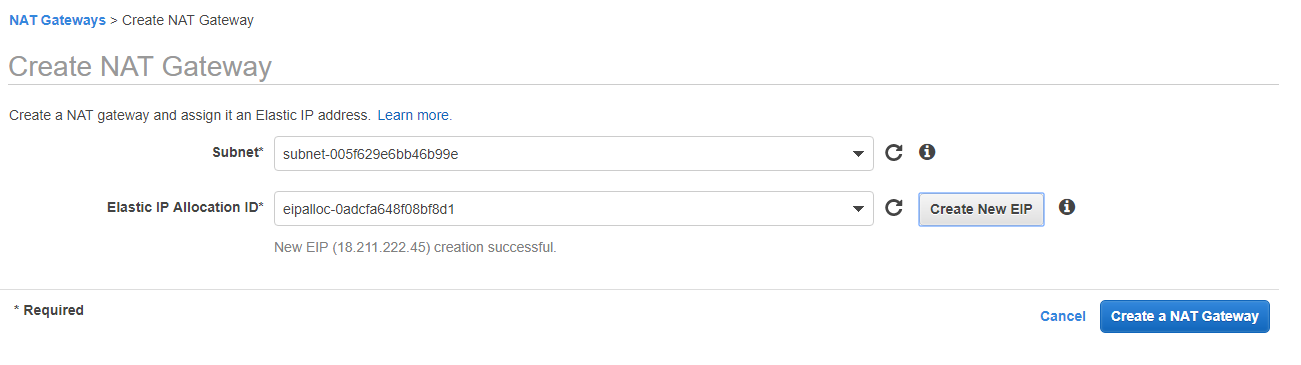
First, take note of your public subnet’s id. Head over the NAT Gateway view and click on Create NAT Gateway. On the creation screen go ahead and paste in your subnet id and click on “Create New EIP.” Elastic IP will be created as below.
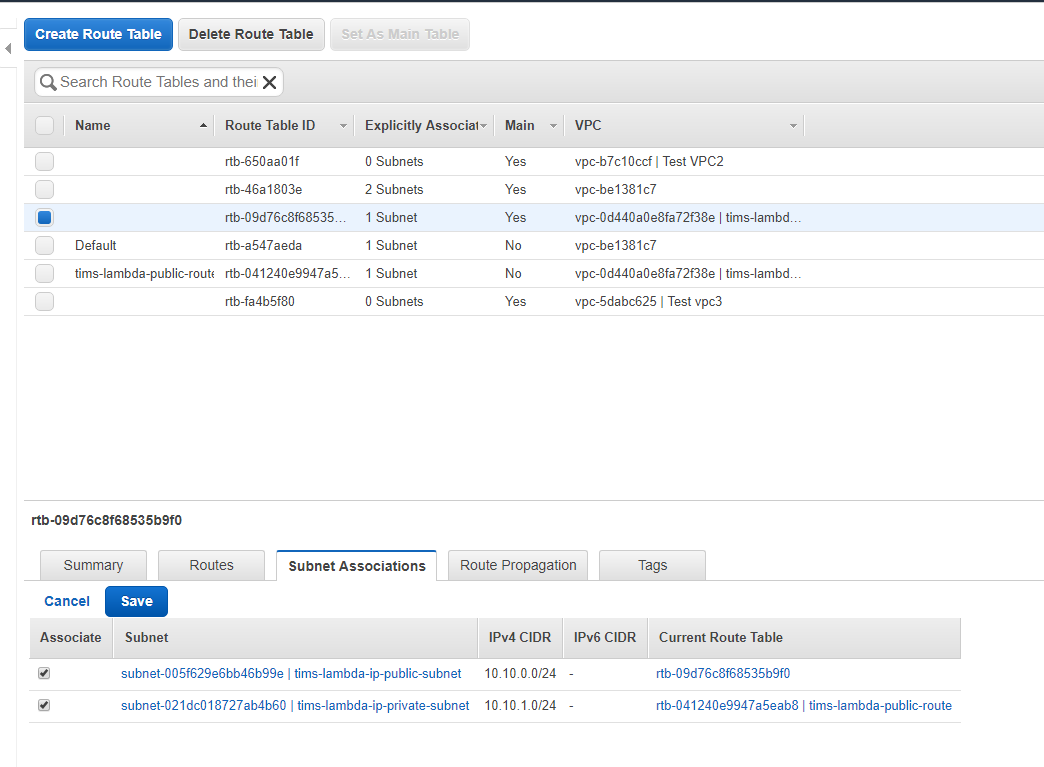
On the confirmation screen copy nat instance id and go back and edit the default route created when new VPC is created. Click on the default route (you will see the Main column for that route says Yes), click on the Routes tab, and click edit. Then add a new route, and we will set all traffic (0.0.0.0/0) to target nat instance id and save it.

Now, click on Subnet Associations tab, click edit and, by ticking the check boxes by public and private subnets and clicking Save, you will associate this new route to the subnets.
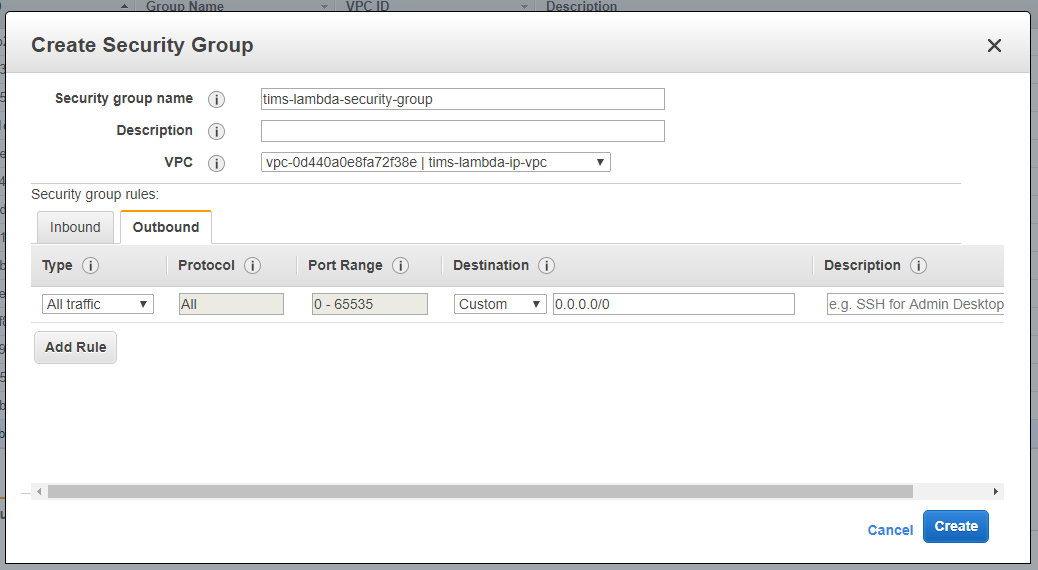
Create new security group as below from Security groups page in EC2 service.
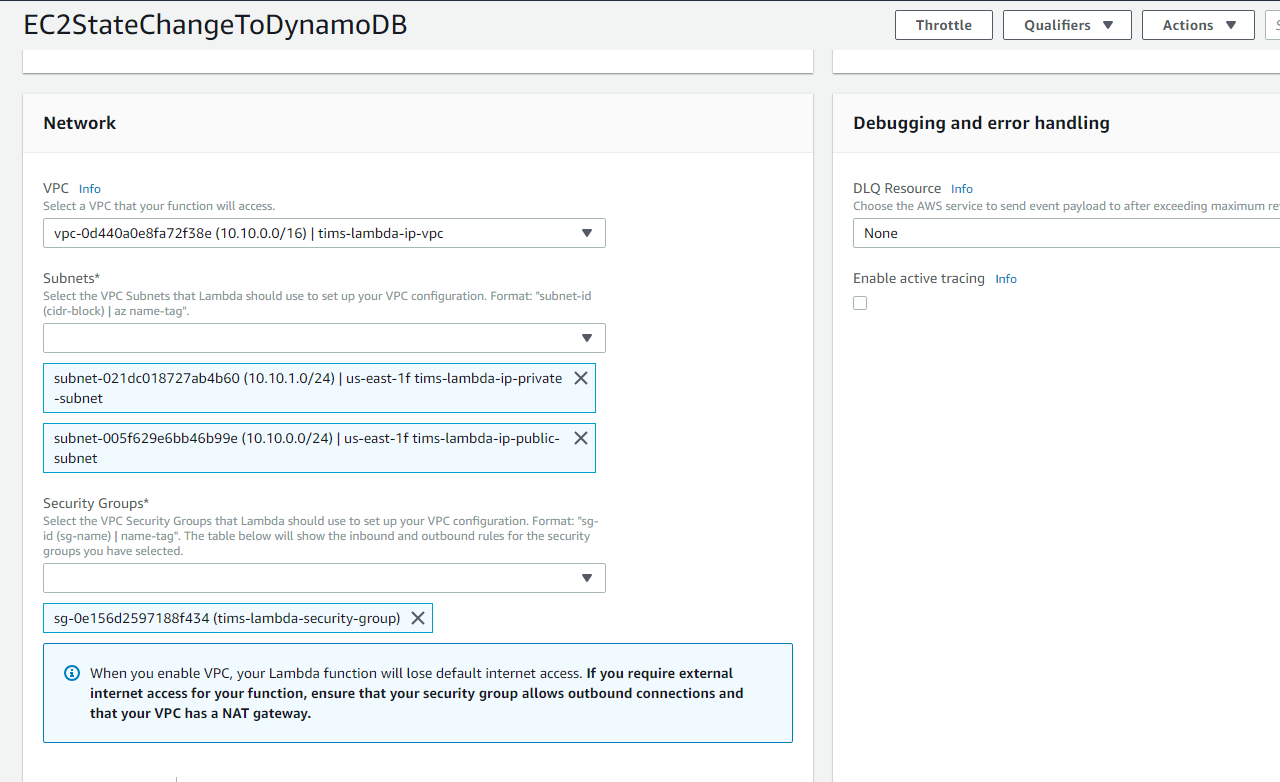
Now, assign the newly created VPC, subnets and security group to the Lambda function as below.