"This project implements a lightweight server for the Raspberry Pi 3 B+ and a keyboard emulation (HID) RFID reader, enabling communication with clients. Built using Python Flask and the Endev library, it facilitates secure port communication between the server and one or more clients. The system integrates an SQLite database for user management and includes a web interface for data visualization. Designed for study purposes, it is easily upgradable for expanded functionality and designed in Slovenian Language."
- two or more RaspberryPi's 3 b + if you need. or any other model 'listed below' could work two,
- 2x Micro USB Adapter for power for the RaspberryPI
- A PC or an laptop with 2 or more USB gen 3.0 or gen 2.0 ports for the main power to RPi (If you dont have an alt. PC Laptop, use Phone USB A adapterand plug it into power) But at least laptop reccomended for SSH
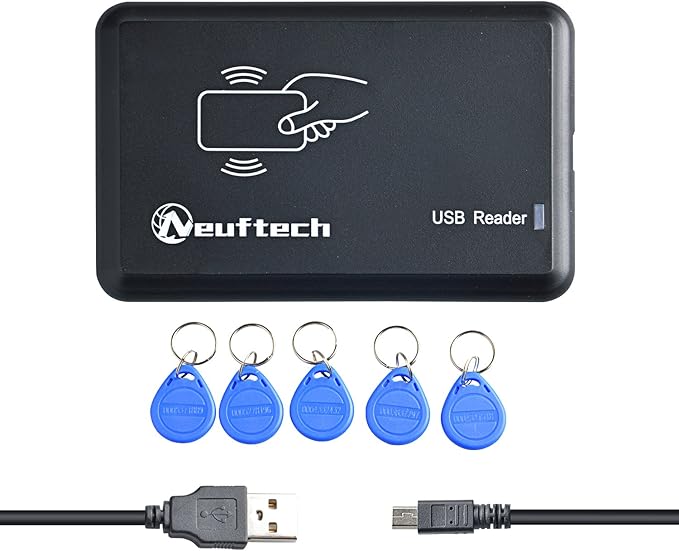
- one or more Neuftech, or any other Keyboard in interface USB Emutation(HID) RFID Reader Cable comes included. Link(below)
- An USB A/bluetooth keyboard and a bluetooth/USB A mouse.
- An Installation Media(USB flash drive/s or an micro SD card/s, maybe you will need the micro SD card reader and adapter to connect Micro SD card into it. Link(below)
- An External Monitor (if you Have an PC),
- An HDMI Cable or two,
- Recommended SSH protocol or tool Putty etc.. (I will use Putty).
Get the ISO file Here and plug the instalation media into your PC or laptop etc. When the Imager will download open it and select an RPi Model, RPI OS and your usb drive. Then click Next, edit settings(edit settings on your preferences)", than yes, and yes and then it will start the download for your ISO file. Full step guide how to install RPi OS
Plug both power w Micro USB and display with HDMI out your monitor and the mouse and keyboard in the RPi. Install your operating system, and connect RPi to your LAN network (I reccomend that you remember the password because then you cant acces the RPi from SSH.)
Open terminal on the taskbar, and type:
ifconfigthen look at the IPv4 addres that resambles your IP exm. 192.168.0.xxx. (i reccomend that you write it down and decide whitch ip will be the RPi server and which one(or more) will be the client
On All RaspberryPi's Configure SSH by opening the terminal and typing
sudo raspi-configand then navigating to interface Options and enabling SSH protocol by selecting yes.
When you have all those steps enabled you can install Putty a free SSH client for windows Here.
When you installed Putty open it by pressing 🪟 + S on windows or ^ + S on linux and typing putty.
Then Putty Will open and you can type the Required IPv4 address of the writed down IPv4 address of RaspberryPi in your LAN network. exm. 192.168.0.yyy.
Then you will need to sign in with your existing username and password as you created on the RPi with the same IPv4 as that one that you connected via putty with.
When both username and password will be correct, ssh/putty will grant acces to your RPi's terminal. It will say something like this: raspberry2@raspberrypi:~ $
When you have putty connected to all RPi IP addresses of RaspberryPi's, and decided whitch RPi will be the server and whitch one(or more) the client, you need to create a virtual envroviement for your exm. server.py and
client1,2... file because RasberryPi OS comes with preinstaled python.
To check if you have Python just run:
python3 --versionor alternative:
python3 -V˛On the All RaspberryPi's run:
sudo apt-get updateWhen the update is finished run:
sudo apt install python3-venvto install VENV and then run:
python3 -m venv ~/venvto create your virtual envrovienment. Then you will need to activate your Virtual envrovienment by running this command:
source venv/bin/activate(do it on all RPi devices allso clients and connect to them via putty)
When your Virtual envrovienment is activated it will show like this (venv) raspberry2@raspberrypi:~ $. Now you can install Flask, requests, SQLITE and Endev library.
Run theese commands:
sudo apt-get updatepip3 install flask requests #This library is for the serversudo apt install python3-evdev #This library is for reading output from RFID readersudo apt-get install sqlite3 #this library is for required data base.That will install all of libraries that you need for this project.
When you created the virtual envroviement the directory venv appeared in your desktop exm. /home/username/.
If you have VENV still activated, and server Rpi selected run this command
nano server.pyIf not Activate it by running:
source venv/bin/activateon the server RPi via Putty and press enter.
You will create a new file named server.py in nano editor. Then paste RFID_server.py code from my repository.
When creating the file server.py and pasting the code in the file server.py, its time to assemble the app_route() for linking the path for the index.html page.
Pasting the code to server.py might be easy but please change the code that the server.py will funciton correctly:
- Please change the example IP of server
192.168.0.100to the existing IPv4 address of the selectedserverRaspberryPi - When the server RPi IP is choosed right, you can integrate
@app.route('/')inserver.pypath forindex.htmlwebpage.
# Other code
@app.route('/')
def home():
    conn = sqlite3.connect(DB_PATH)
    c = conn.cursor()

    # Active sessions
    c.execute("SELECT rfid, start_time FROM active_sessions")
    active = c.fetchall()
    active_info = []
    for rfid, start_time in active:
        c.execute("SELECT name FROM users WHERE rfid=?", (rfid,))
        user = c.fetchone()
        name = user[0] if user else "Neznan"
        active_info.append({'rfid': rfid, 'name': name, 'start_time': start_time})

    # Finished sessions
    c.execute("SELECT rfid, name, start_time, end_time, duration FROM sessions ORDER BY id DESC LIMIT 20")
    sessions = c.fetchall()

    conn.close()
    return render_template('index.html', active=active_info, sessions=sessions)
    # Hosting Port Code: if __name__ == '__main__': etc...
Write/save the file by pressing ^ + O on linux or ctrl + O on windows, and then quit nano editor by pressing ^ + X on linux or ctrl + X on windows.
In the opened terminal and VENV activated run this command to open nano once again:
nano add_user.pyin blank Nano editor paste the included code add_user.pyfrom the repository.
Code will look something like this:
# add_user.py
import sqlite3

rfid = input("Enter the RFID code: ")
name = input("Enter the user name: ")

conn = sqlite3.connect('rfid_system.db')
c = conn.cursor()
c.execute("INSERT OR REPLACE INTO users (rfid, name) VALUES (?, ?)", (rfid, name))
conn.commit()
conn.close()

print(f"User {name} added.")
Write/save the file by pressing ^ + O on linux or ctrl + O on windows, and then quit nano editor by pressing ^ + X on linux or ctrl + X on windows.
- Please be sure you have VENV still activated and then run theese commands to create an index.html file:
mkdir -p templatesand then create an index.html file by running this command:
nano templates/index.htmlThat will open an newly created index.html file in nano editor.
Simply paste the code from index.html from the repository to your index.html file in nano editor.
12. When pasting the code Write/save the file by pressing ^ + O on linux or ctrl + O on windows and quit nano editor and run:
python3 server.pyto ensure the server is running propperly.
check on what port are you and visit
http://<your_pi_server_ip>:5000 or http://localhost:5000
When you downloaded Endev library it said step 6. and connected via Putty on all RPi devices its time to discover the usb port that the Reader is connected to. In connected terminal type:
python3 -m evdev.evtestIt will show something like this:
---------------------------------------------------------------------------------------------------------------------------------
0   /dev/input/event0    vc4-hdmi                            vc4-hdmi/input0
1   /dev/input/event1    vc4-hdmi HDMI Jack                  ALSA
2   /dev/input/event4    Sycreader RFID Technology Co., Ltd SYC ID&IC USB Reader usb-3f980000.usb-1.1.2/input0       08FF20140315
When the output shows, find the port that the USB RFID reader is conected to and remember the /dev/input/event_number because you will need the /dev/input/event_number in your client.py code.
when you remembered the /dev/input...
When the dev/input/.. is remembered, you can start with client(or multiple) setup
Now you need to select the other RPi to be a client. If you have more RPi devices you will create multiple client1.py, client2.py etc... files as you will sign in via Putty.
Make sure to have VENV enabled and now create this files on each RPi separate, e.g. rp1 should be client1.py rpi2 should be client2 etc. by running this command:
nano clent1.py #that many client.py file as how much RPi devices(clients) do you have.#import code and start flask app
SERVER_URL = 'http://192.168.0.100:5000/rfid_event' # Change to the IP of the server.
DEVICE_ID = 'A' # Change to B,C,D,... for the next other clients.
RFID_INPUT_PATH = '/dev/input/event0' #change the right /dev/input/event.. path for USB RFID reader.
#other code..15. When changing theese parts of code you are allmost finished with the project and the last thing you will need to do is to start the both clients.
start them one by one by typing this command:
python3 client1.pypython3 client2.py #or 3,4,5 etc. according how many clients to you have