Source credits: www.secjuice.com
Virtual Private Network Server can be set up on the Raspberry Pi to provide anonymity and encryption among your data and browsing which safes guard your IP address, protects you from MiTM attacks and hides you from prying eyes. Easy to set up and worth protecting yourself from open internet connections, there are 100's of VPN providers on the market and really cheap for there services, choose one that supports OpenVPN to set up on the Raspberry Pi.
A good way to extend on the VPN Server is to turn the Pi into a TOR/VPN Router which is portable and can be plugged into anywhere, adding extra security when you're out in public. TOR is one of the easiest ways to browse the internet anonymously, but it can be very slow, some users switch beten TOR and VPN depending on what tasks they are doing.
The great thing about all of these projects is that tutorials can be found online with step by step instructions and videos covering the installation and configuration of these projects. These are my favorite five projects that you can do with a Raspberry Pi, but there are many more projects our there and new ones emerging constantly!

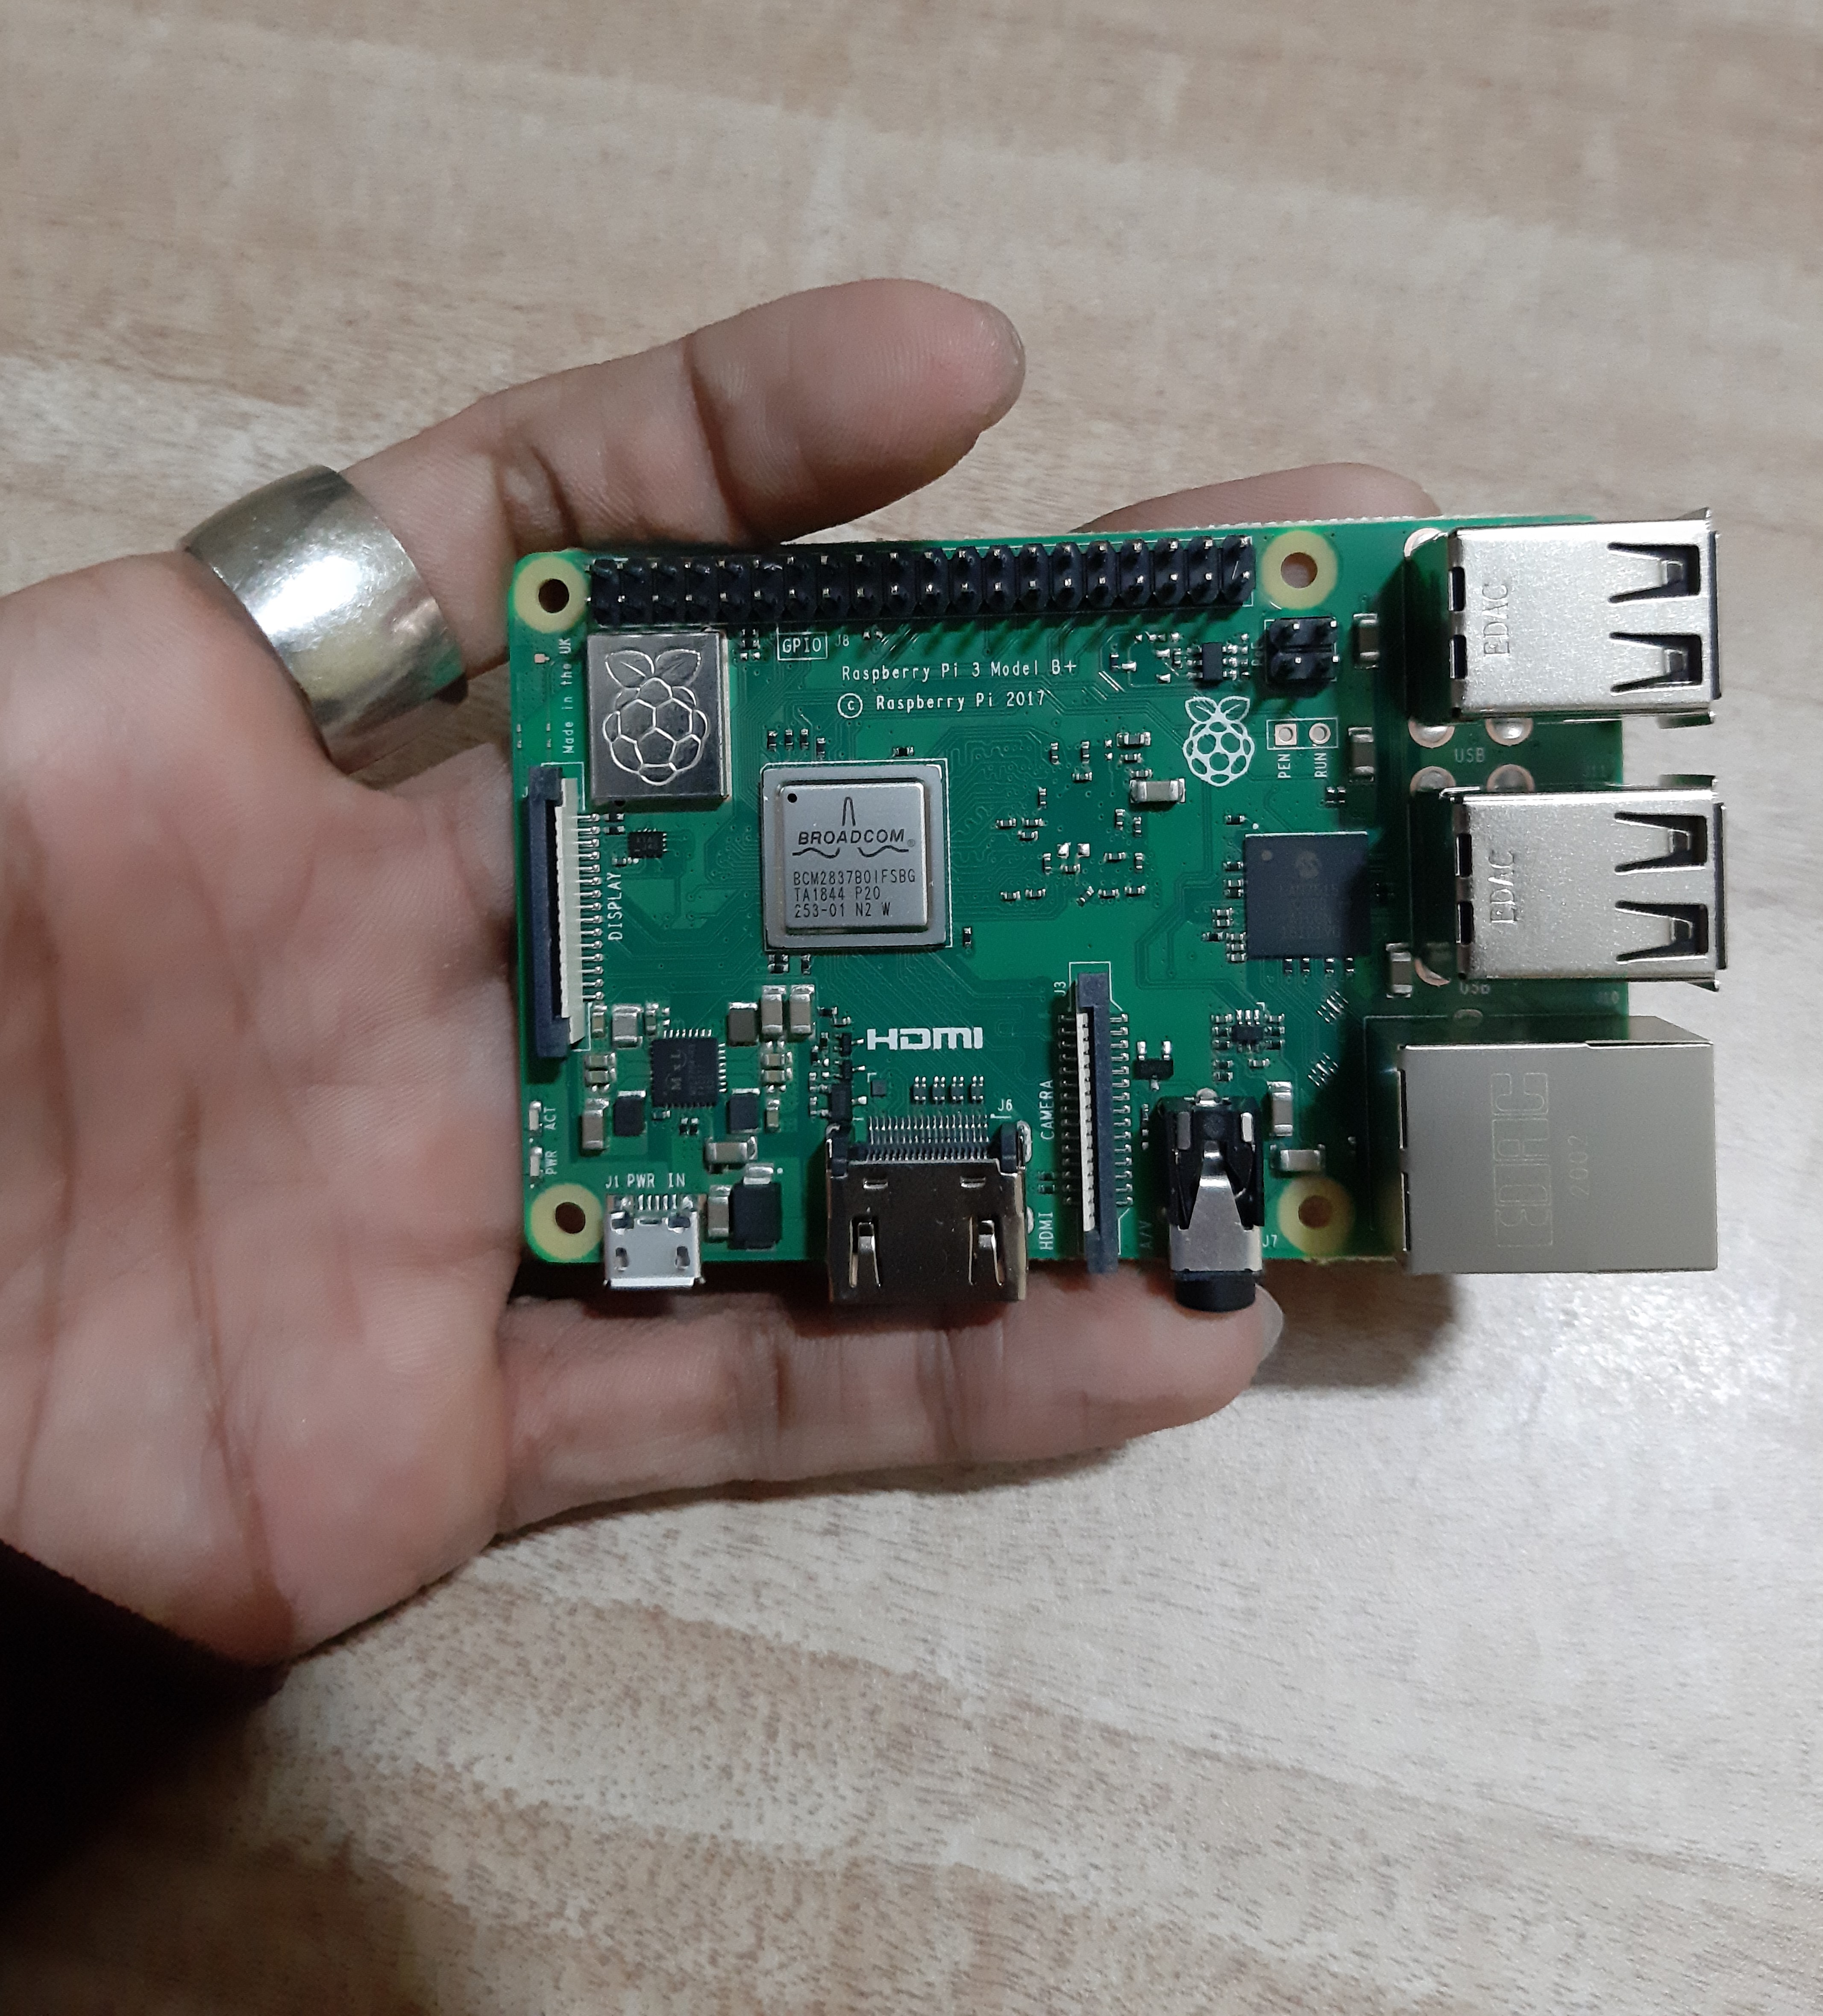 Beautiful in'it?
First things first...
- Raspberry Pi 3 or 3B+ or 4
- Micro SD Card or a SD card if you’re using an old version of the Pi.
- Ethernet Cord or Wifi network adapter (The Pi 3 has WiFi inbuilt)
Before we get started with setting up the Raspberry Pi VPN server there are a few things we must go over to ensure that you are ready to set it up and use it. For starters, make sure you actually do need a VPN before you start setting this up, as it can act as a gateway into your home network. If you do intend on using a VPN make sure all the computers on your home network are secure, and that you aren’t sharing anything within your local network that you wouldn’t want someone gaining access to.
It’s important to decide whether you are going to make use of a static IP address or a dynamic IP address, setting up a VPN for a static IP address is a rather simple process and requires no extra work.
However, if you want to utilize a dynamic IP address, you must make use of a dynamic DNS service.
If you choose to go down the dynamic DNS service route, then you should decide whether you want to make use of your own domain name or a free one. If you want to make use of your own domain name, then you can use a service like CloudFlare, if you’re going to make use of a free subdomain then a service such as no-ip.org will be useful for you. Remember the domain name that you set up for either Cloudflare or no-ip.org as you will need this later on in the tutorial.
The third important thing that you will need to get done before you start setting up your Raspberry Pi is to port forward for the OpenVPN software.
The default port you need to forward is 1194. Remember the port you set as you will need this later on in the tutorial. The protocol you will have to make use of for this port is UDP.
- Setting up a Raspberry Pi VPN Server can be quite a complicated process, normally you would have to install the software, generate the encryption keys, add the port to the firewall, set the Pi to keep a static IP address and much more.
Luckily for us, there is a much easier way to set up a Raspberry Pi VPN server thanks to an install script called PiVPN, this handles all the grunt work for setting up a VPN and reduces the potential for making mistakes.
Before we get started, we should first change the password of the default pi user, this is to ensure if someone managed to gain access to your VPN they wouldn’t be able to access your Raspberry Pi easily.
passwd
- With the password changed we can begin the process of setting up our VPN server on the Raspberry Pi. We can begin this process by running the command below, this command downloads the install script from PiVPN’s GitHub page and runs it. Here's the link for the resource https://github.com/pivpn/pivpn
Normally running a script straight from a URL is a poor idea, as it can be an easy way for someone to gain access to your Raspberry Pi and do some serious damage.
However this is a trusted source that we have verified, if you want to check out the code yourself, just go to the location of the script---https://raw.githubusercontent.com/pivpn/pivpn/master/auto_install/install.sh
curl -L https://install.pivpn.io | bash
- Once you have run the above command, you should be met with the following screen. This screen will feature some text telling you that you are about to install OpenVPN.
To proceed to the next screen, you need to press the ENTER key.
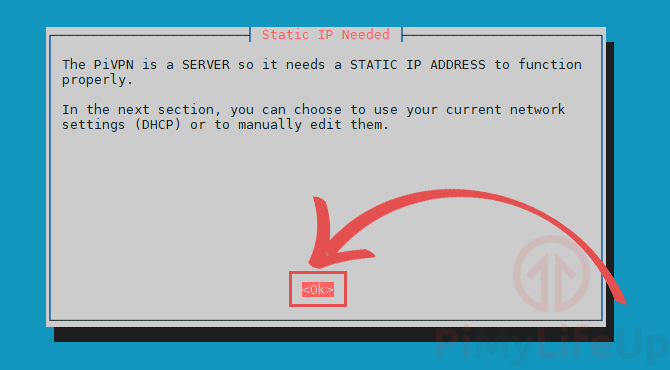
- The next screen explains that you will need to set up a static IP address for your VPN. This is so that when the Raspberry Pi is restarted, it will try and use the same IP address. If the local IP changes, you could potentially lose access to your VPN.
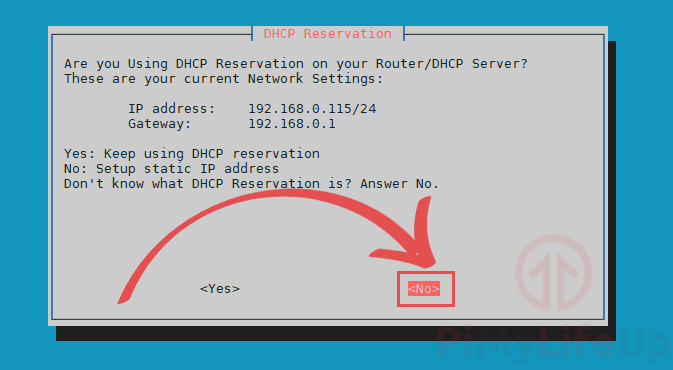
- You will now be asked if you are using a DHCP reservation on your router.
If you don’t know what DHCP reservation is or how to use it, select to continue.
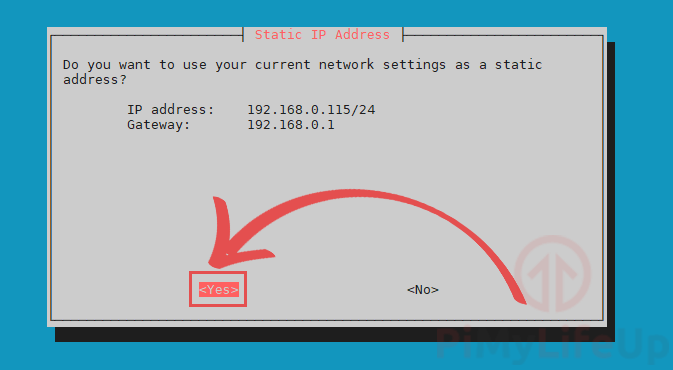
- Here, select to set the current IP address and gateway as static.
If you are unhappy with the IP address displayed on this page, then select .
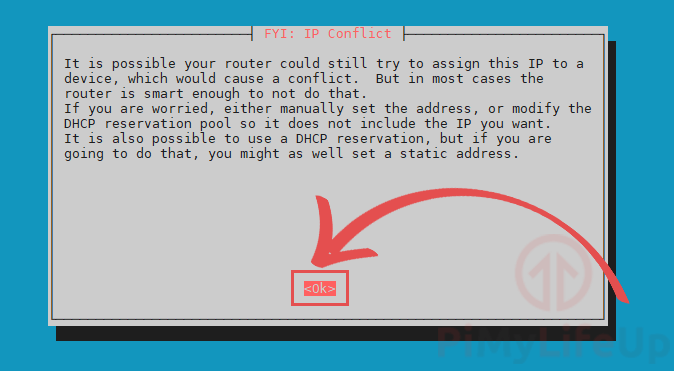
- This screen warns you that there is a chance your router will assign the IP address to another device.
You can use DHCP reservations to avoid this. However, most routers are smart enough to prevent the problem.
To continue, select and press the ENTER key.
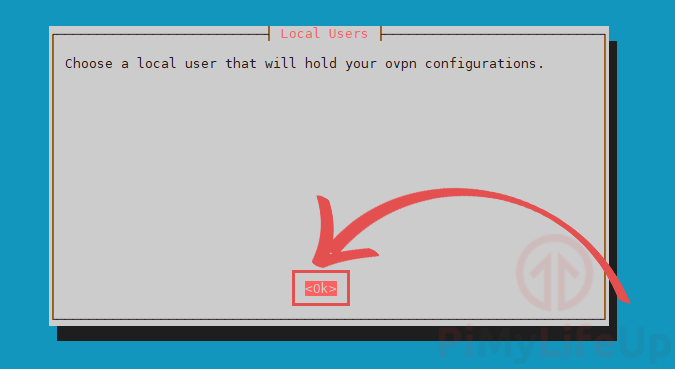
- This screen explains that we will need to set a user that will own the OpenVPN configuration files.
Select and press ENTER to go to the next screen.
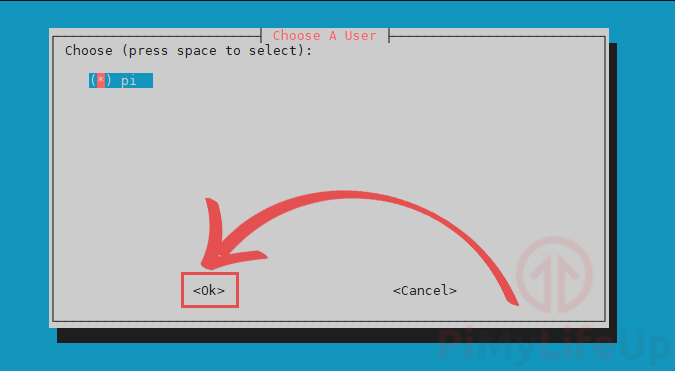
- We will be presented with a list of users who can own our Raspberry Pi’s VPN config files.
In this tutorial, we will be making use of the pi user. If you want to use another user, use the ARROW keys and SPACEBAR to select it.
Once you are happy with your selection, press the ENTER key to continue.
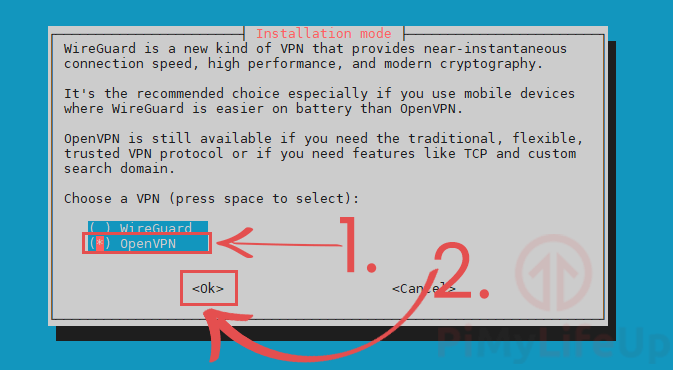
- You will now be asked to select what type of VPN you want to install on your Raspberry Pi. The two choices are WireGuard and OpenVPN.
For this guide, we will be using OpenVPN on our Raspberry Pi (1.). Use the ARROW keys and the SPACEBAR to select it.
Once you have OpenVPN selected, press the ENTER key to continue (2.).
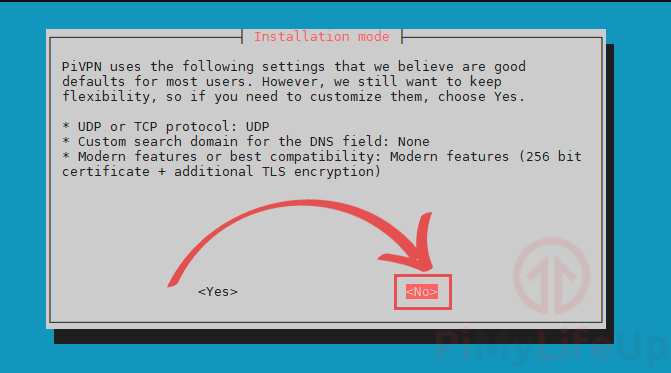
- You can now decide whether you want to customize the installation of OpenVPN on your Raspberry Pi.
The setting chosen by the PiVPN team is best for most users. However, you can modify these if you like. For our guide, we are going to stick with the default settings.
To continue, select , then press the ENTER key.

- Now we will be selecting the port that OpenVPN will operate through.
For this tutorial, we are going to stick with the default port of 1194. You should only change the port if you have a good reason to.
Once you have defined the port, select and press ENTER.

- You will be asked to confirm the port that you set for your OpenVPN installation
If you are happy with the port you have chosen, then select to continue.

- The next step is to select a DNS provider. A DNS provider is what resolves a URL like https://pimylifeup.com into an IP address.
Within our guide, we will be making use of Cloudflare’s DNS servers. Cloudflare wipes their logs every 24 hours and does not track the querying IP address.
To select Cloudflare or another DNS provider, you will need to use the ARROW keys (1.).
Once you are hovering over the DNS provider you want, press the SPACEBAR key to select it.
Once you are happy that you have made the right choice, you can press the ENTER key to proceed.
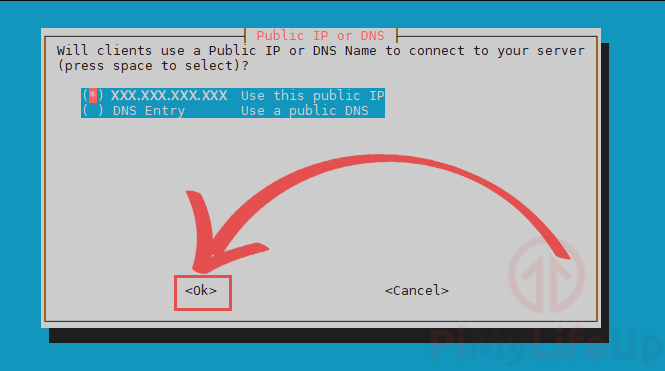
- You will need to decide whether you want to make use of your public IP Address or a DNS name.
If you are using a dynamic IP address, we recommend using the public DNS name option. You can follow our guide on setting up dynamic DNS on the Raspberry Pi if you need assistance with this.
As we are using a static public IP address, we will stick with using our public IP address for this guide.
You can change between options by using the ARROW keys. Once you have the one you want, press the SPACEBAR key to select it.

- This next step is just explaining to you that the PiVPN script is about to generate both the HMAC key and the server key.
These keys are part of what makes up the encryption part of your Raspberry Pi’s VPN.
Press the ENTER key to continue with the guide.
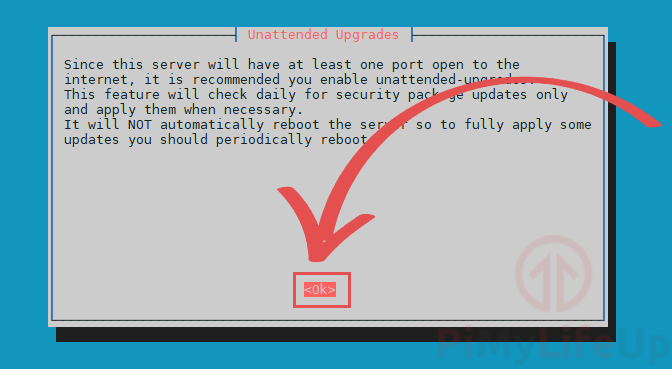
- Now you will be presented with a simple explanation of unattended-upgrades.
This feature makes the Raspberry Pi OS automatically download security package updates daily.
Press the ENTER key to proceed to the actual configuration page for this setting.

- On this screen, we highly recommend that you enable unattended-upgrades by selecting . Enabling this will ensure your Raspberry Pi should always have the latest packages.
Leaving this feature switched off can pose a significant security risk to your Raspberry Pi’s VPN and potentially your home network.
Once done, press the ENTER key to confirm your settings.
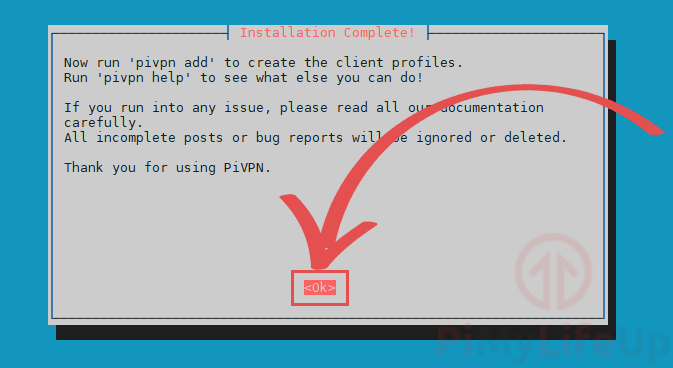
- You have now completed the installation of OpenVPN on your Raspberry Pi.
While there are still a couple more things you will need to complete to allow connections, you are now about 90% through this setup guide.

- We will now be greeted by a screen asking for us to reboot the Raspberry Pi.
Select the option to the following two screens by pressing the ENTER key.
Rebooting your Raspberry Pi after installing OpenVPN is a crucial step.

- Normally setting up a user for OpenVPN would be a painful process as you would have to generate the individual certificates for the user, luckily we can do this in one single command thanks to PiVPN.
To begin adding the user, run the following command:
sudo pivpn add
On this screen, you will need to enter a name for the client, and this name will act as an identifier so you can differentiate between different clients.
It will also ask you to set a password for the client, and it is important to make this something secure and not easy to guess as this will secure the encryption key.
So, if someone can guess the password easily, it severely reduces the security of your VPN.

Once you press enter to these, the PiVPN script will tell Easy-RSA to generate the 2048-bit RSA private key for the client, and then store the file into /home/pi/ovpns.
/home/pi/ovpns is the folder we will have to gain access to in the next few steps so we can copy the generated file to our devices.
Make sure you keep these files safe as they are your only way of accessing your VPN.
- Now that our new client has been set up for OpenVPN with our passphrase we will now need to get it to the device that we intend on connecting from.
The easiest way to do this is to make use of SFTP from within your home network.
Make sure you have a program such as FileZilla that can handle SFTP connections installed before continuing with this tutorial.
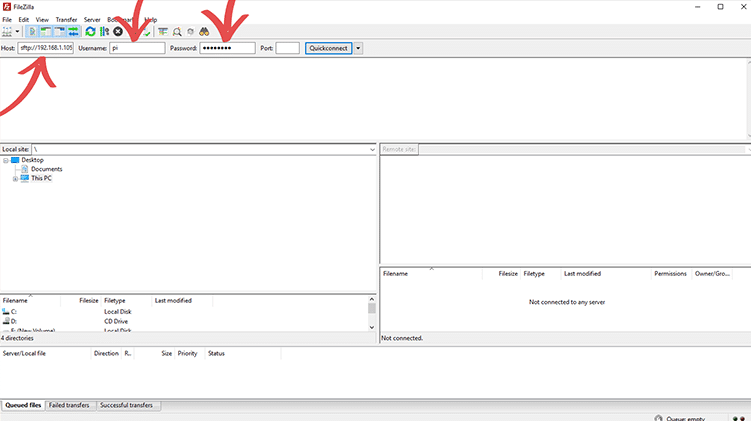
To get started, let’s log in to our Raspberry Pi over SFTP. Remember to type sftp:// in front of your Raspberry Pi’s IP address.
If you don’t have you Pi’s local address use the command hostname -I in the terminal.
Once you have entered your IP address, Username and Password, press the quick-connect button.
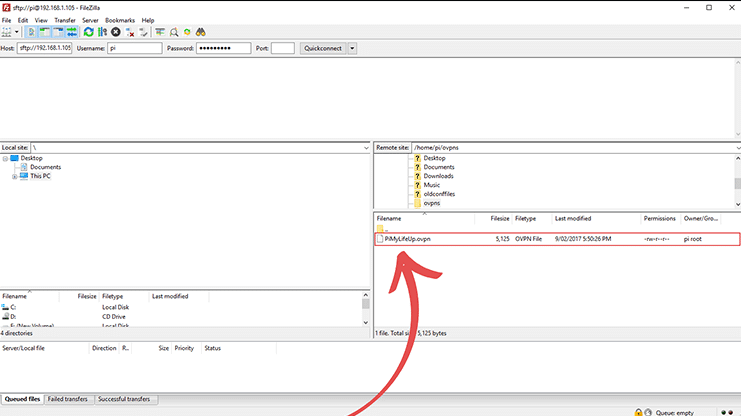
- Once you have successfully logged in, we need to look for the ovpns folder, as this is where the file we need will be located.
Once you have found the folder, double-click on it.

- Now, all we need to do is drag the .ovpn file you want to somewhere safe on your computer. This file contains the data that we will need to connect to the VPN so keep this file safe.
It is also the only way someone could potentially gain access to your VPN, so keeping the passphrase and the file secure is incredibly important.
If someone gains access to these, they could potentially cause some harm to your network.
- Now we have the .opvn file on our device we can use this to make a connection to our VPN.
The .opvn file stores everything we need to make a secure connection. It contains the web address to connect to, and all the encryption data it needs.
The only thing it does not contain is your passphrase, so you will need to enter this when you connect to the VPN.
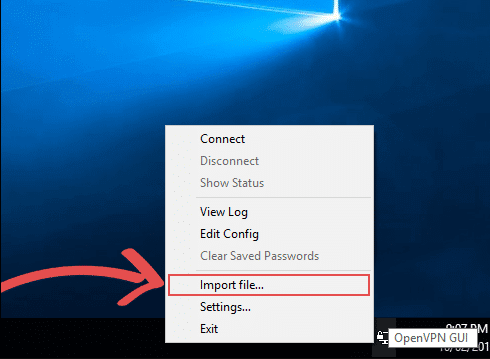
The client we are going to use is the official OpenVPN client, and you can obtain this from their official OpenVPN website.
Download and install this client, on its first run it will automatically minimize to the taskbar, right click on the icon, then select “Import file…”
- You will be presented with a file explorer screen, in here go to where you saved the .opvn file from earlier.
Once you have found it, double-click the file to import into the OpenVPN client.

- You should now be presented with a dialog telling you the file has been successfully imported into OpenVPN.
Just click the “OK” button to proceed.

- Now right-click the OpenVPN client icon in the taskbar again, this time click the “Connect” button.

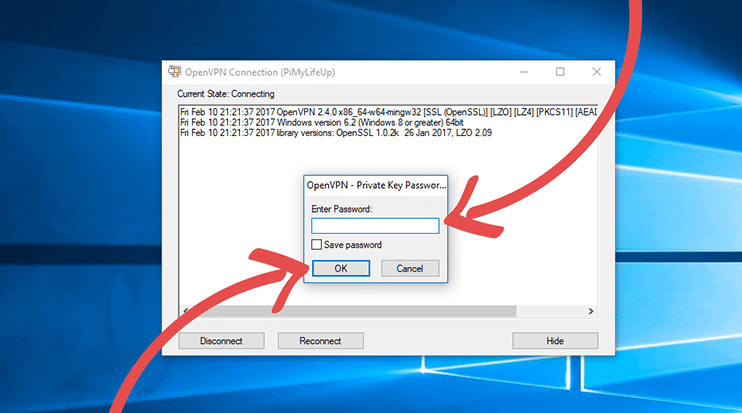
- Now the OpenVPN client will attempt to read the data located in the .opvn file.
Since we have a passphrase set, it will now ask for you to enter the passphrase you set earlier on in this tutorial.
Once you are certain you have entered the correct passphrase, click the “OK” Button.
- The OpenVPN client will now attempt to connect to your Raspberry Pi’s VPN server. If the OpenVPN icon turns to a solid green, then it means that you have successfully connected into your VPN.
However, if it turns yellow and fails to turn green after 60 seconds that means something is causing the connection to fail.
In most cases the connection failure is caused by port forwarding issues, my router, for instance, has numerous issues with port forwarding.
It is easiest to google your router’s model number to try and find help on any issues you may face with port forwarding.
Some ISP’s (Internet Service Provider) also block specific ports, so it’s best to check that your ISP is not blocking the port you plan on using.
If you are using a dynamic DNS service, then make sure that the service is being correctly updated with your latest IP address if the IP address has changed, but the DNS setting hasn’t then it will cause the connection to fail.
Hopefully, by now, you will have a fully functional VPN that you’re able to connect to successfully.
- If for some reason you want to remove your VPN from your Raspberry Pi you can simply utilize the following command on it.
This command will utilize the pivpn software to uninstall the VPN tunnel.
sudo pivpn uninstall
I hope that this tutorial has shown you how to set up a Raspberry Pi VPN Server and that you haven’t run into any issues. It’s certainly a great project for anyone who wishes to set up a cheap always-on VPN network.
If you have some feedback, tips or have come across any issues that you would like to share, then please don’t hesitate to contact me...
until next time...
-B