Run the VPC Wizard The VPC wizard automatically creates and configures most of your VPC resources for you.
To run the VPC wizard
In the left navigation pane, choose VPC Dashboard.
Choose Launch VPC Wizard.
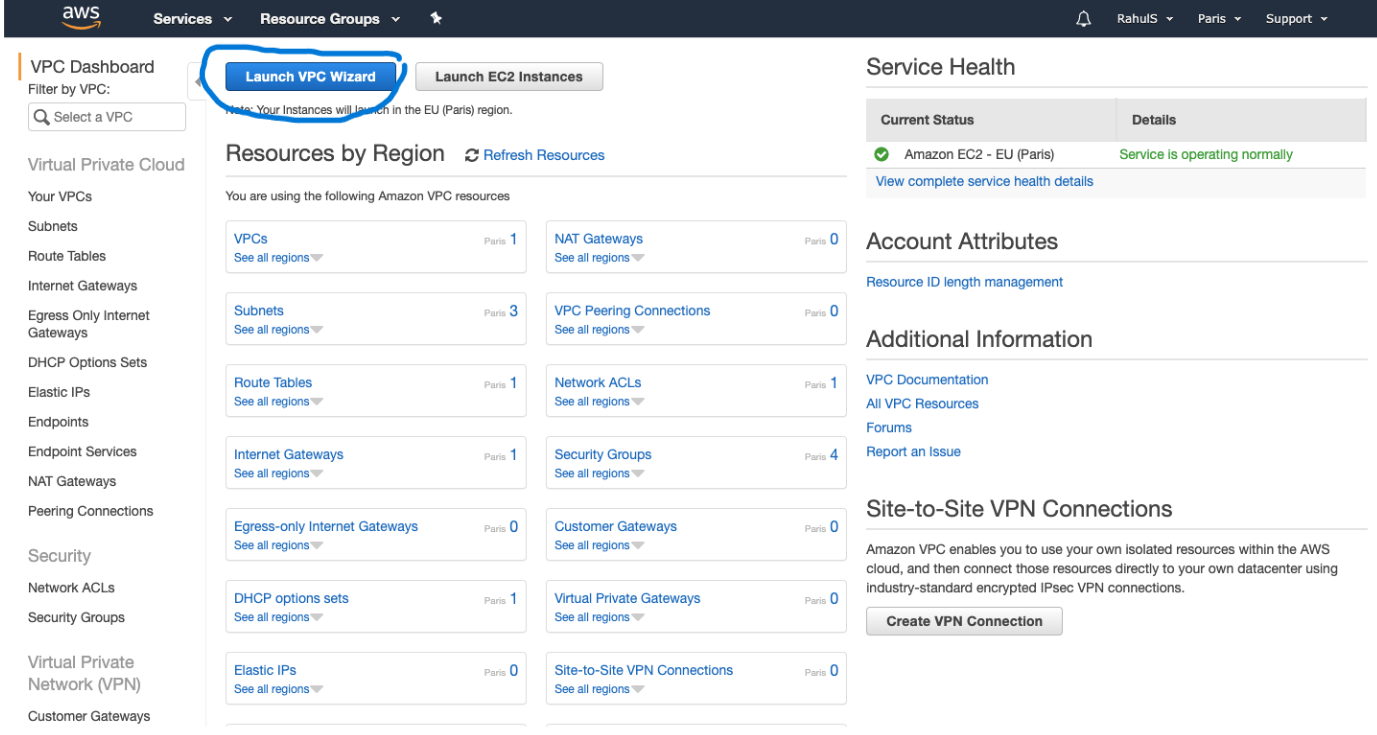
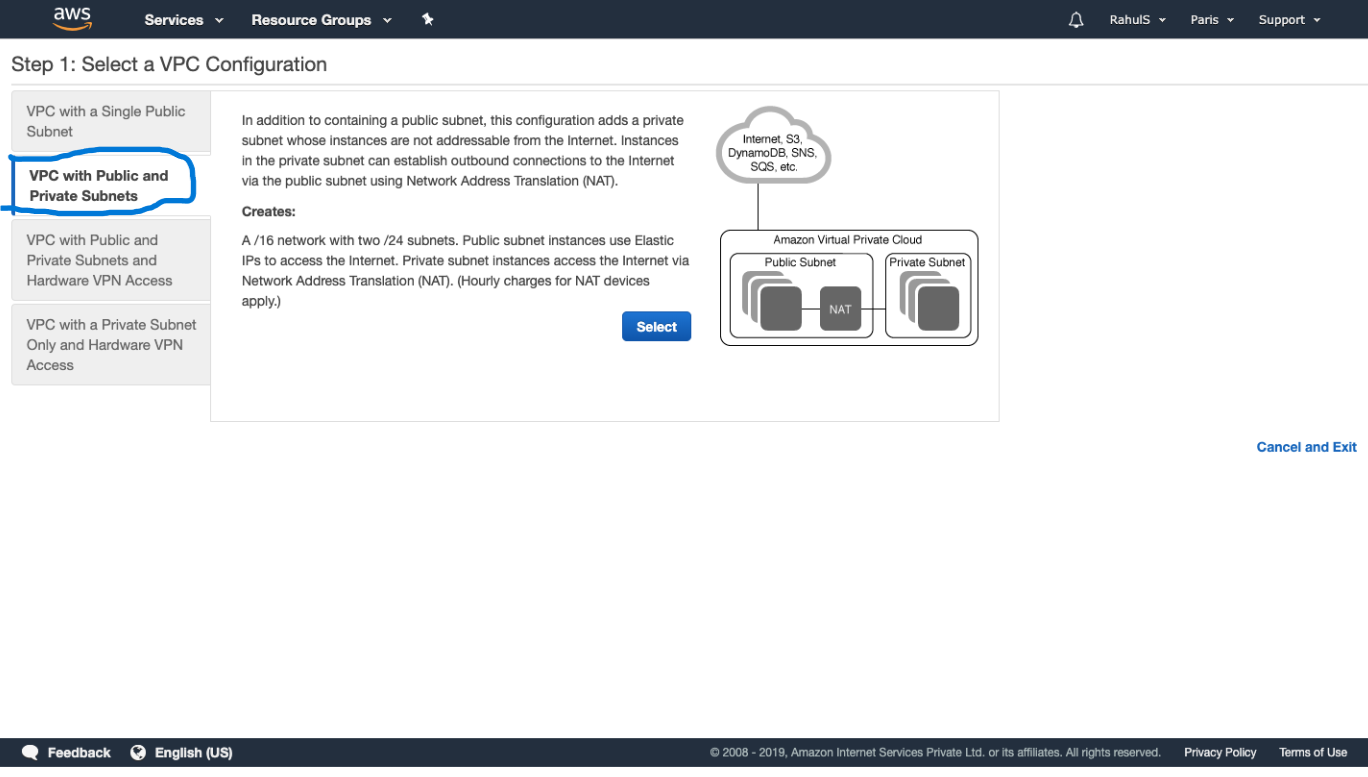
Here, we have 4 options available to create a VPC.
VPC with a Single Public Subnet. VPC with Public and Private Subnets. VPC with Public and Private Subnets and Hardware VPN Access and VPC with a Private Subnet Only and Hardware VPN Access.
In this article, we will see how to create a VPC with Public and Private Subnets.
To create a VPC with a Public and Private Subnet, select the second option from the left panel.
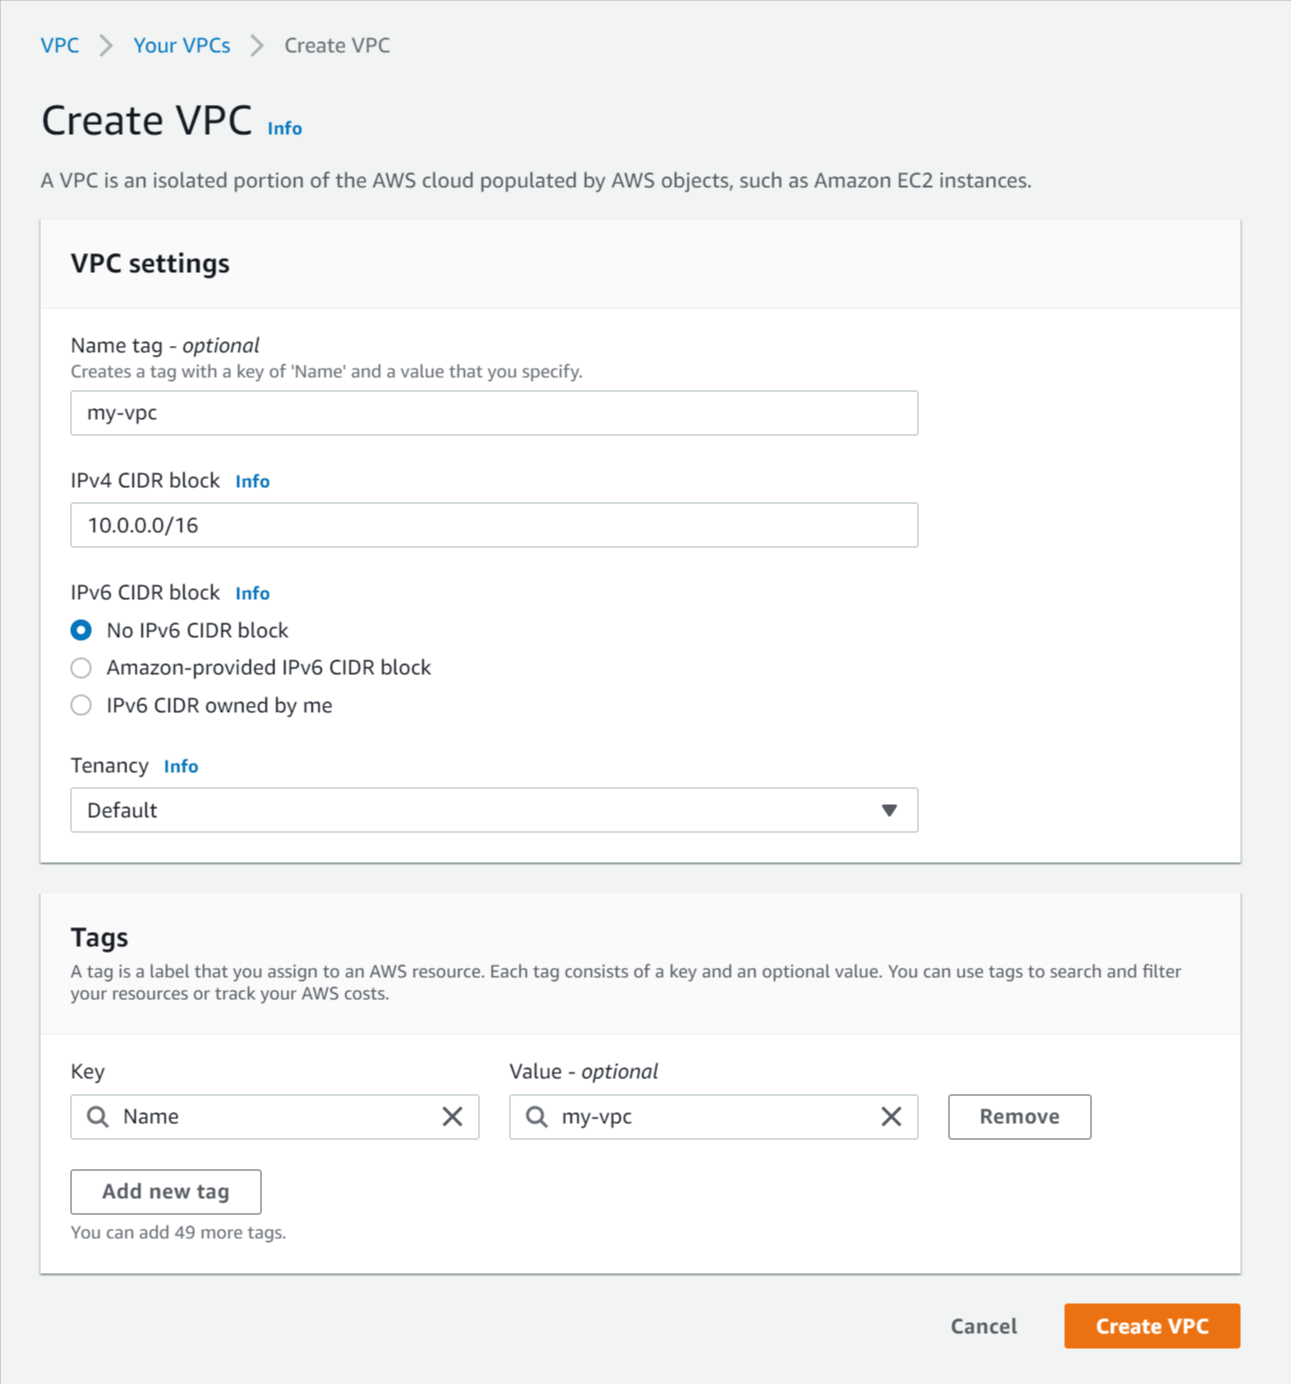
Here, you can specify the CIDR block, which means the IP range of the Public and Private Subnet. Both these networks will have different IP range . Both these subnets will be a subset of the main VPC CIDR.
Next we'll create the subnets inside our VPC that will hold our AWS resources.
Select Subnets in the left menu.
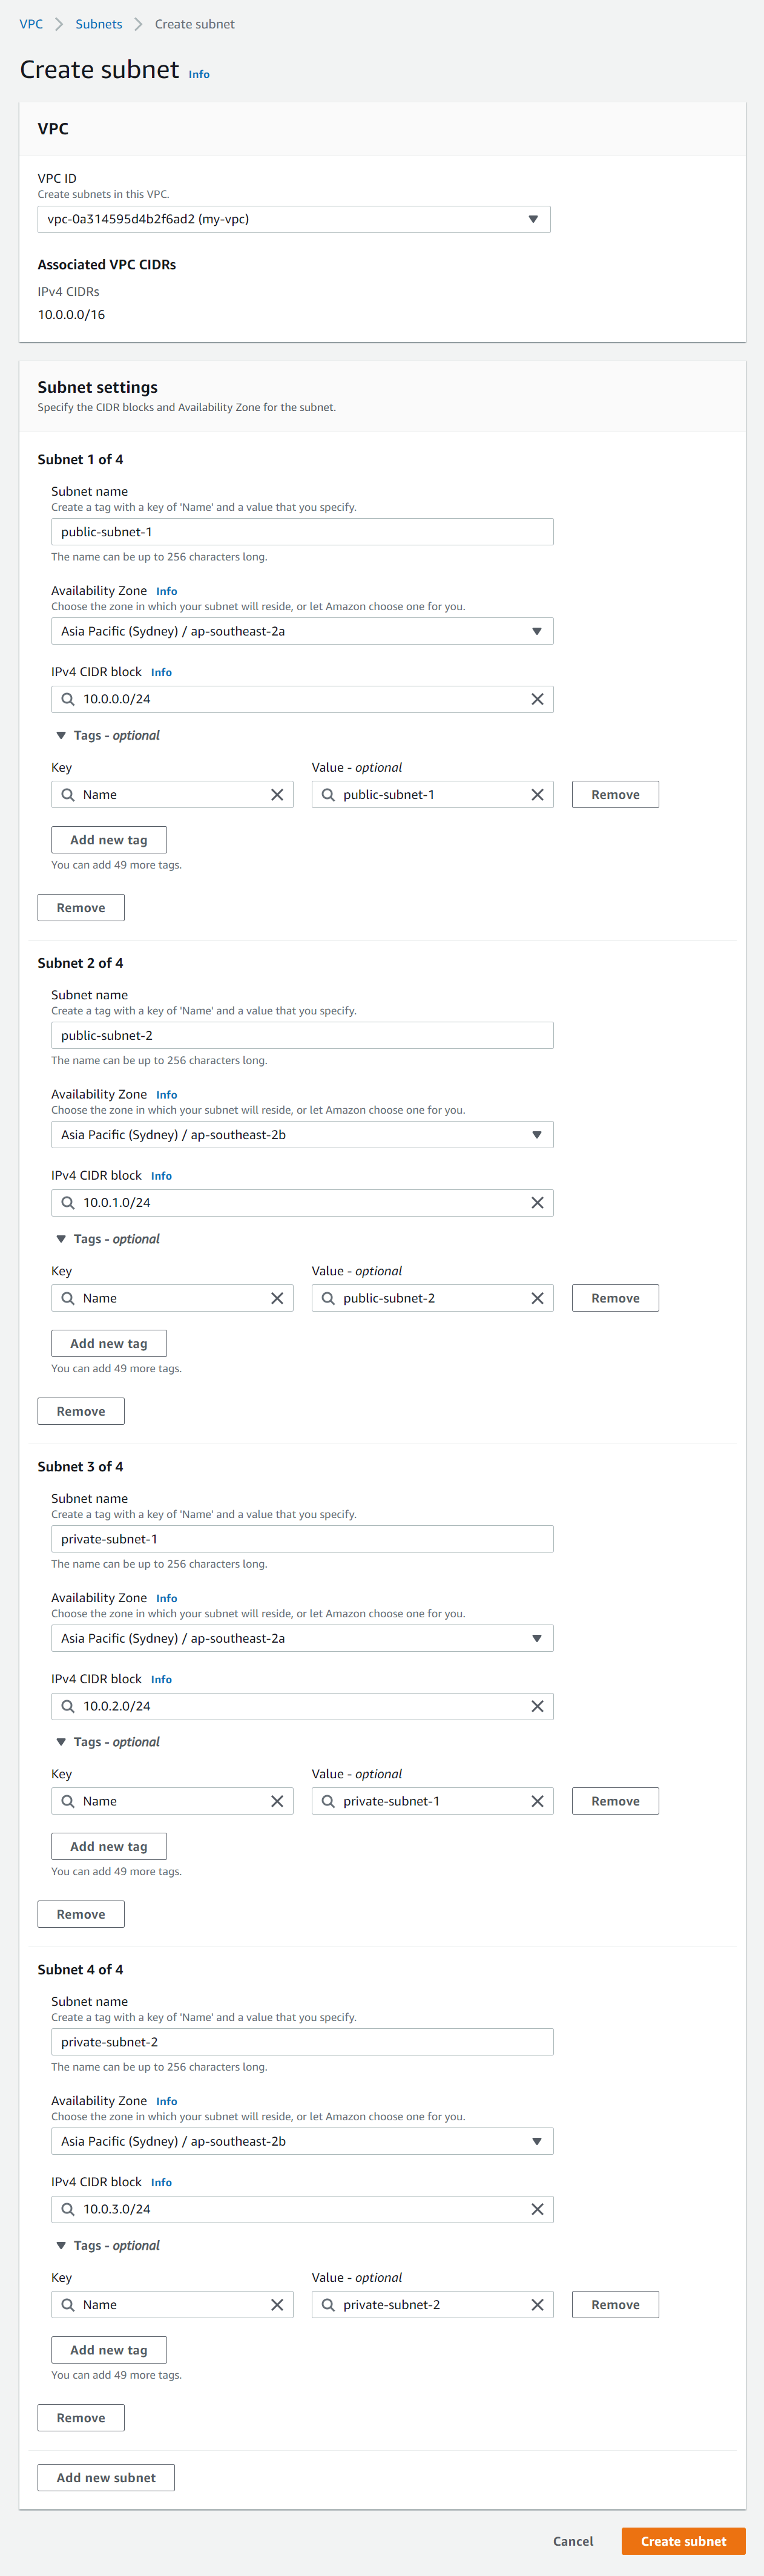
Click Create subnet and enter the following details:
VPC ID - Select the VPC you created above.
Subnet settings - Click Add new subnet three times to make four new subnet forms.
Subnet 1 of 4 - Enter the following details:
Subnet name - Enter public-subnet-1
Availability Zone - Select the first option (e.g. ap-southeast-2a)
Enter a CIDR block for each subnet that fits into your VPC CIDR block (e.g 10.0.0.0/24)
Subnet 2 of 4 - Enter the following details:
Subnet name - Enter public-subnet-2
Availability Zone - Select the second option (e.g. ap-southeast-2b). This must be in a different AZ to public-subnet-1.
Enter a CIDR block for each subnet that fits into your VPC CIDR block (e.g 10.0.1.0/24)
Subnet 3 of 4 - Enter the following details:
Subnet name - Enter private-subnet-1
Availability Zone - Select the first option (e.g. ap-southeast-2a)
Enter a CIDR block for each subnet that fits into your VPC CIDR block (e.g 10.0.2.0/24)
Subnet 4 of 4 - Enter the following details:
Subnet name - Enter private-subnet-2
Availability Zone - Select the second option (e.g. ap-southeast-2b). This must be in a different AZ to private-subnet-1.
Enter a CIDR block for each subnet that fits into your VPC CIDR block (e.g 10.0.3.0/24)
Click Create subnet
An AWS internet gateway (IGW) is used to enable internet access to and from subnets in your VPC. A subnet that routes traffic to an IGW is a public subnet, and a subnet that doesn't route traffic to an IGW is a private subnet. Routes are configured in route tables that we'll cover shortly.
Follow these steps to create an IGW and attach it to your VPC:
Select Internet Gateways in the left menu.
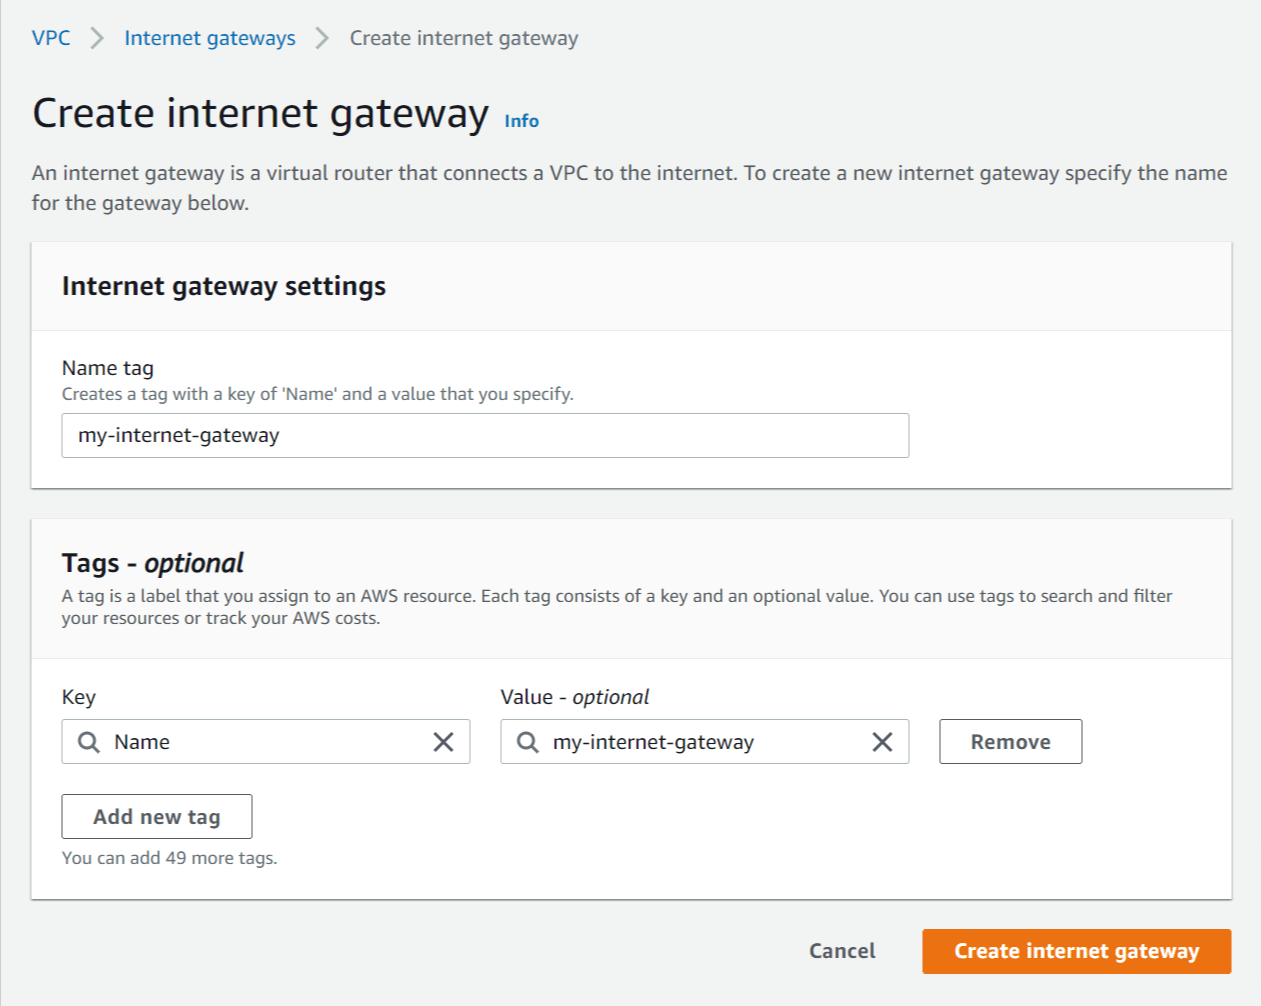
Click Create internet gateway and enter the following details:
Name tag - Enter a name for the internet gateway (e.g. my-internet-gateway)
Click Create internet gateway.
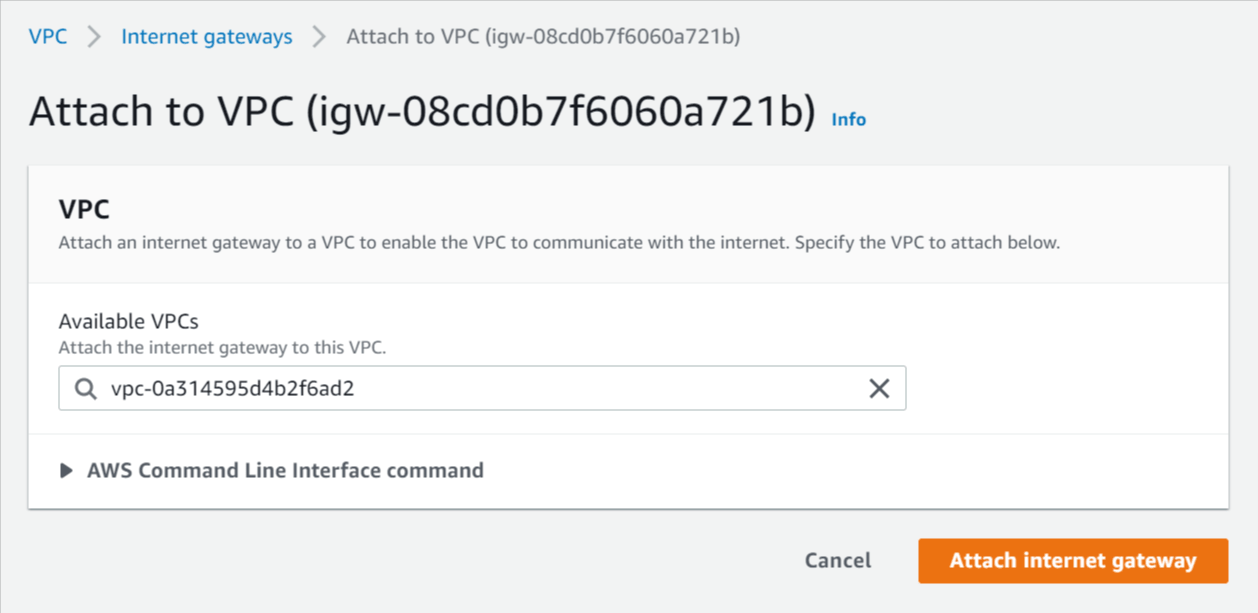
Select Actions -> Attach to VPC.
Select the VPC you created above and click Attach internet gateway.
A network address translation (NAT) gateway is used to provide outbound internet access to AWS resources running in private subnets. A NAT gateway is located in a public subnet and acts like a proxy for outbound traffic from private subnets that route their traffic to the NAT gateway.
Follow these steps to create a NAT gateway in your public subnet:
Select NAT Gateways in the left menu.
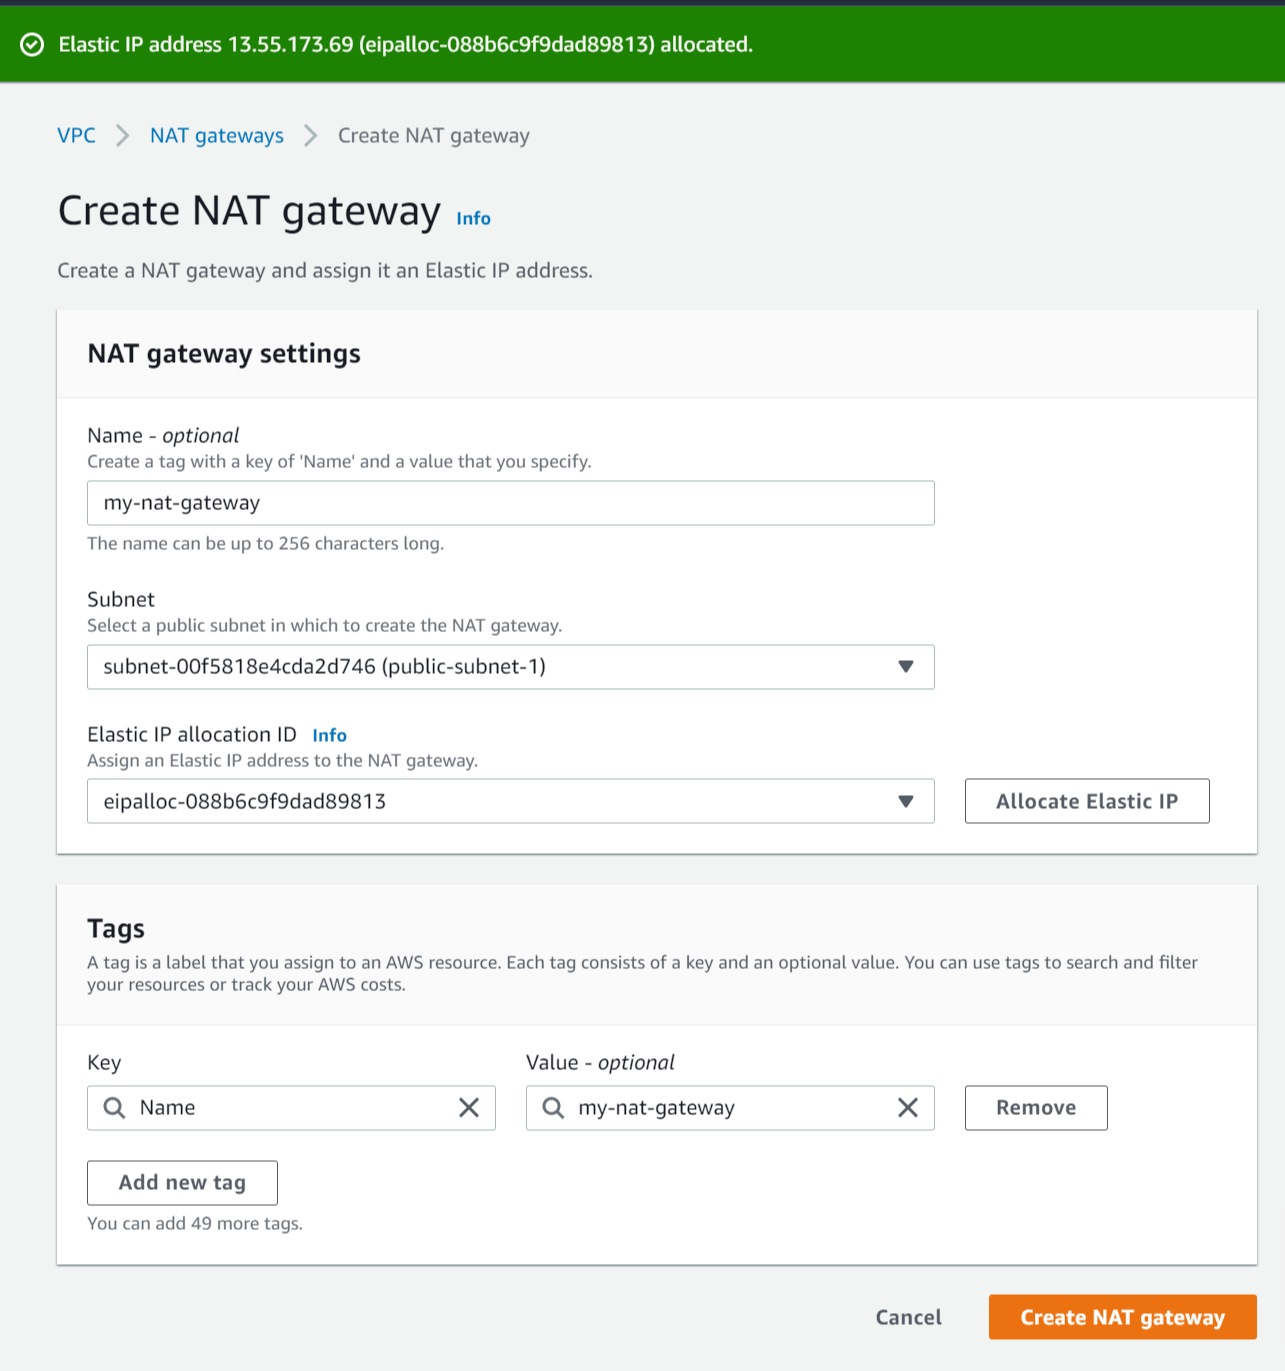
Click Create NAT gateway and enter the following details:
Name - Enter a name for the NAT gateway (e.g my-nat-gateway).
Subnet - Select the subnet with the name public-subnet-1.
Elastic IP allocation ID - Click Allocate Elastic IP to create a new elastic IP for the NAT gateway.
Click Create NAT gateway.
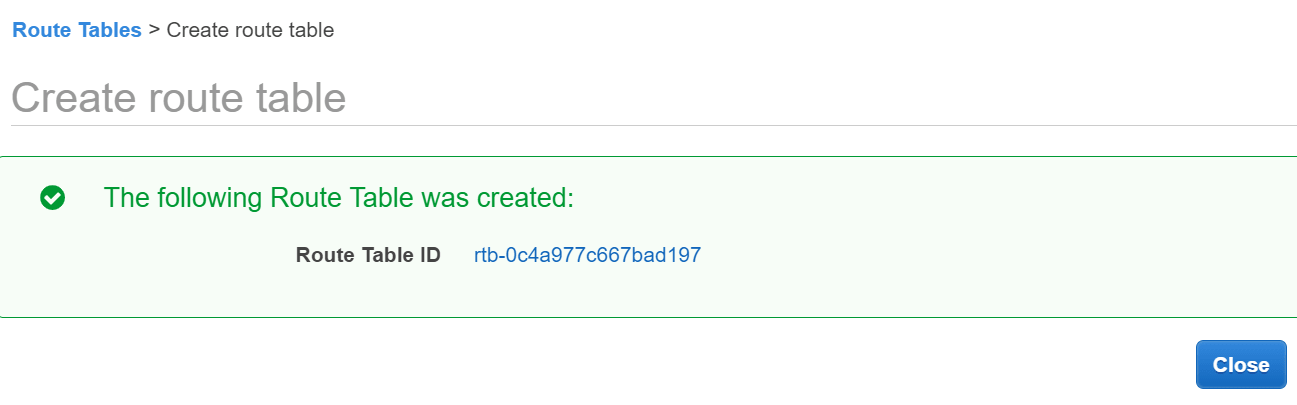
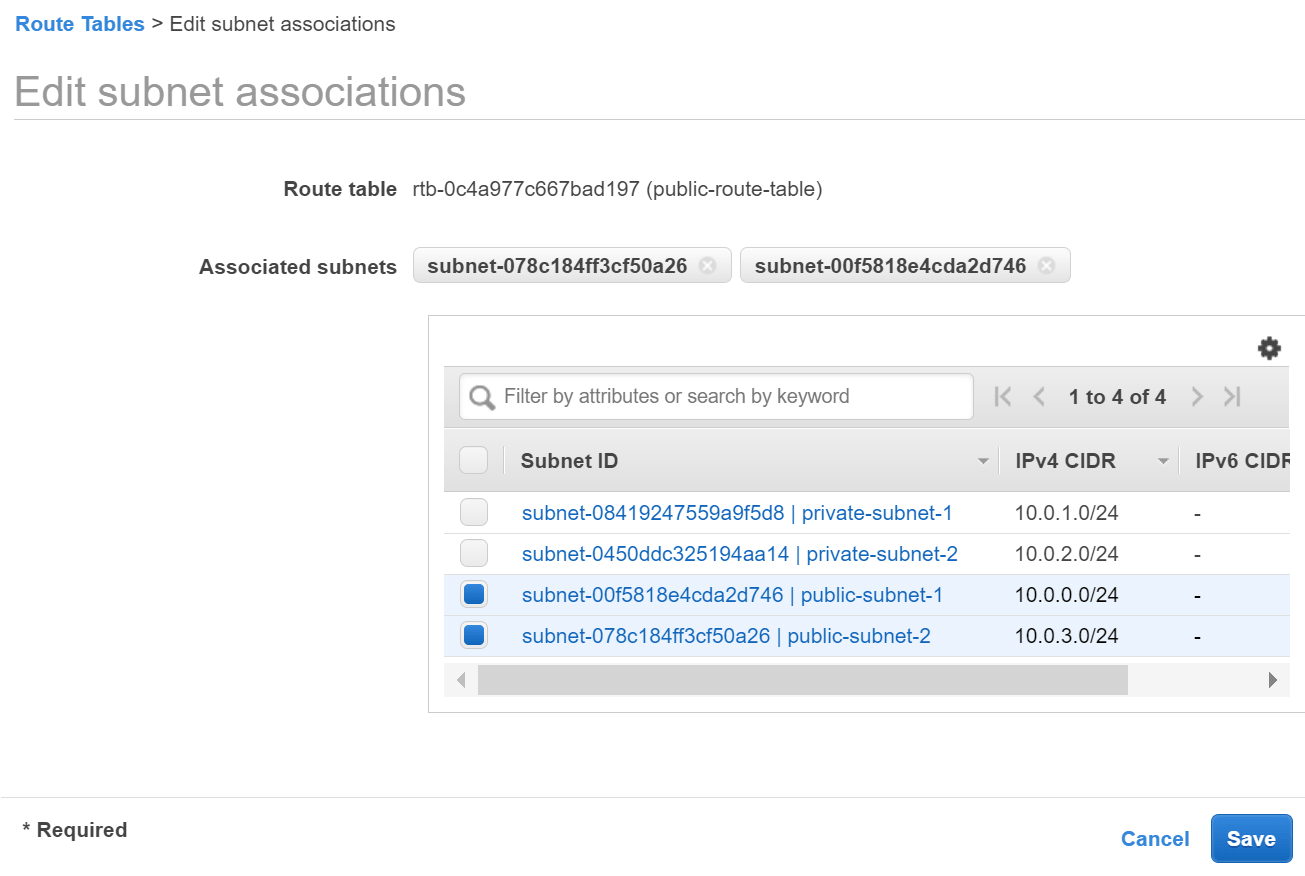
Route tables are used to control where network traffic is routed from subnets. Each VPC has one Main route table that is used by default for any subnet that isn't explicitly associated with a route table.
Here we'll configure the main route table in the VPC to target the NAT gateway to make subnets private by default. A private subnet is not accessible from the internet but can be given outbound internet access via a NAT Gateway located in a public subnet.
Follow these steps to configure the VPC main route table to be private:
Select Route Tables in the left menu.
Select the main route table for the VPC you created above.
Hover the mouse over the Name column of the selected route table, then click the edit icon and enter the name main-route-table.
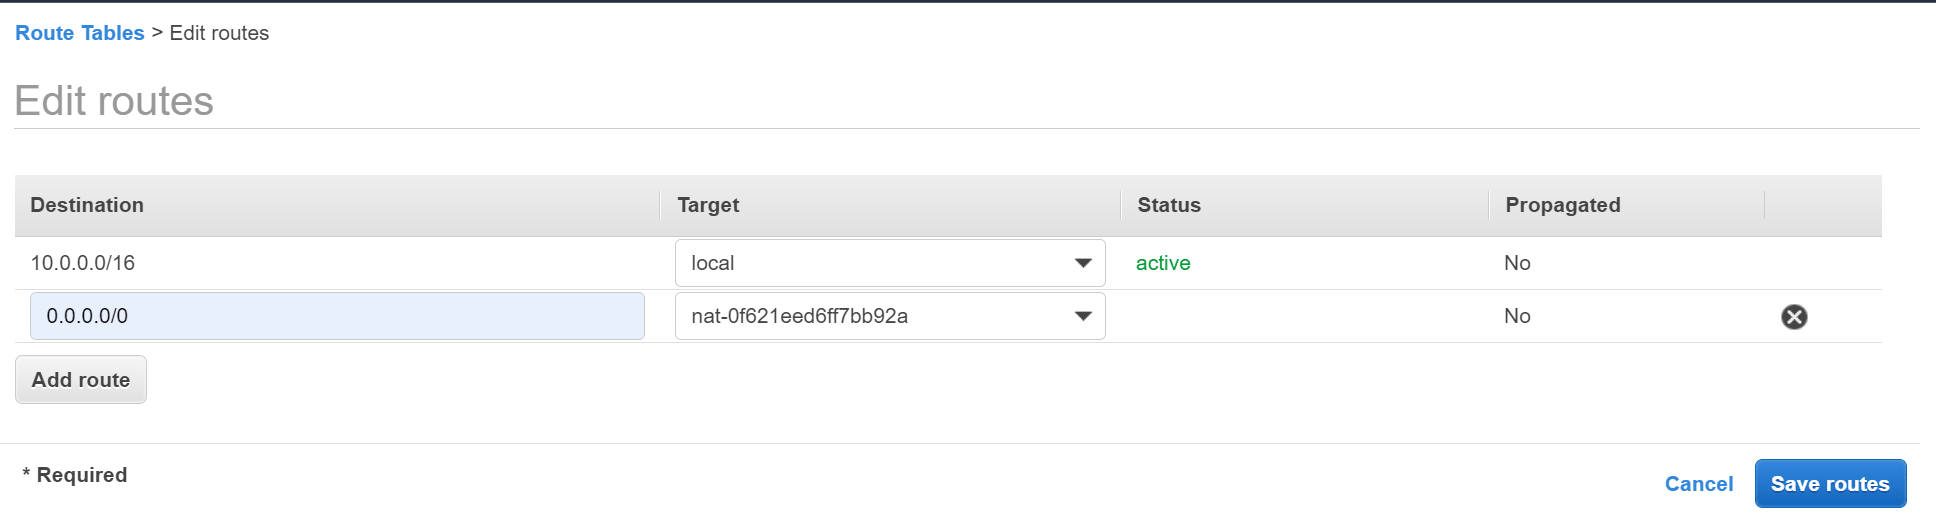
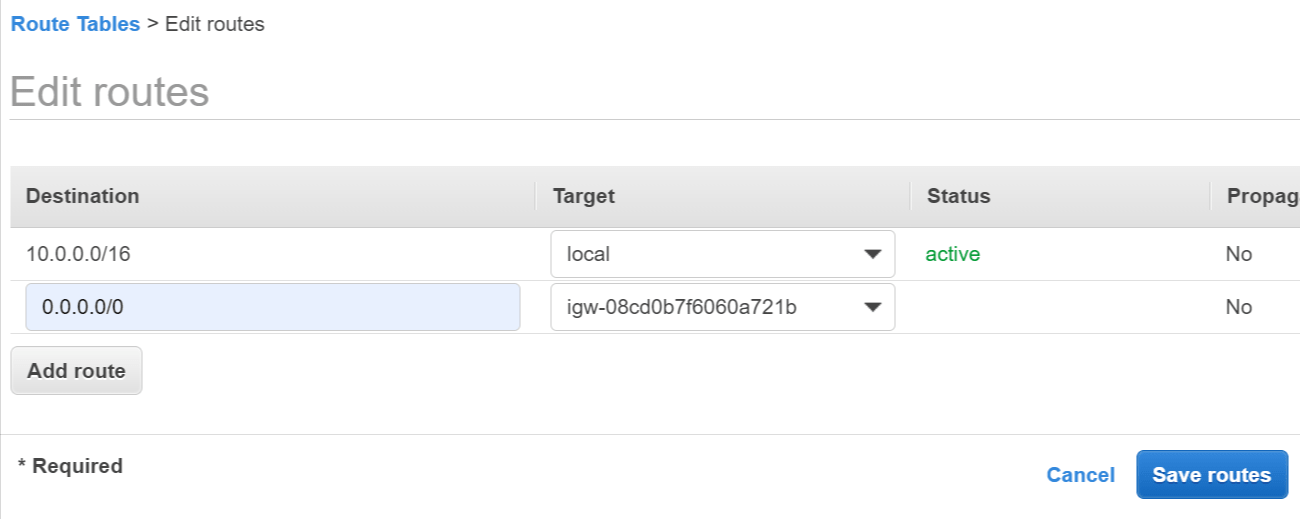
Click the Routes tab below and click Edit routes.
Click Add route and enter the following details:
Destination - Enter 0.0.0.0/0 to match all non-local traffic.
Target - Select NAT Gateway then select the NAT gateway you created above. Click Save routes.
When you're finished you can remove/delete all of the AWS resources created in the tutorial to avoid incurring any unnecessary costs.
Follow these steps to clean up the resources created in AWS:
Go to the VPC Service section and select NAT Gateways in the left menu.
Select the NAT gateway created above (my-nat-gateway) and click Actions and Delete NAT gateway.
Enter delete into the confirmation text field and click Delete.
After the NAT gateway is deleted select Elastic IP addresses in the left menu.
Select the IP address that was allocated to the NAT gateway, click Actions and Release Elastic IP address.
Select Your VPCs in the left menu.
Select the VPC you created at the start of the tutorial (my-vpc) and click Actions and Delete VPC.
Enter delete into the confirmation text field and click Delete.