- Create a Spring Boot project with dependencies.
Spring Boot makes it easy to create a project with the required dependencies. We can use the Spring Initializr tool to generate a SpringBoot project. We will generate a project in this section and then walk through some of the main configurations in the project.
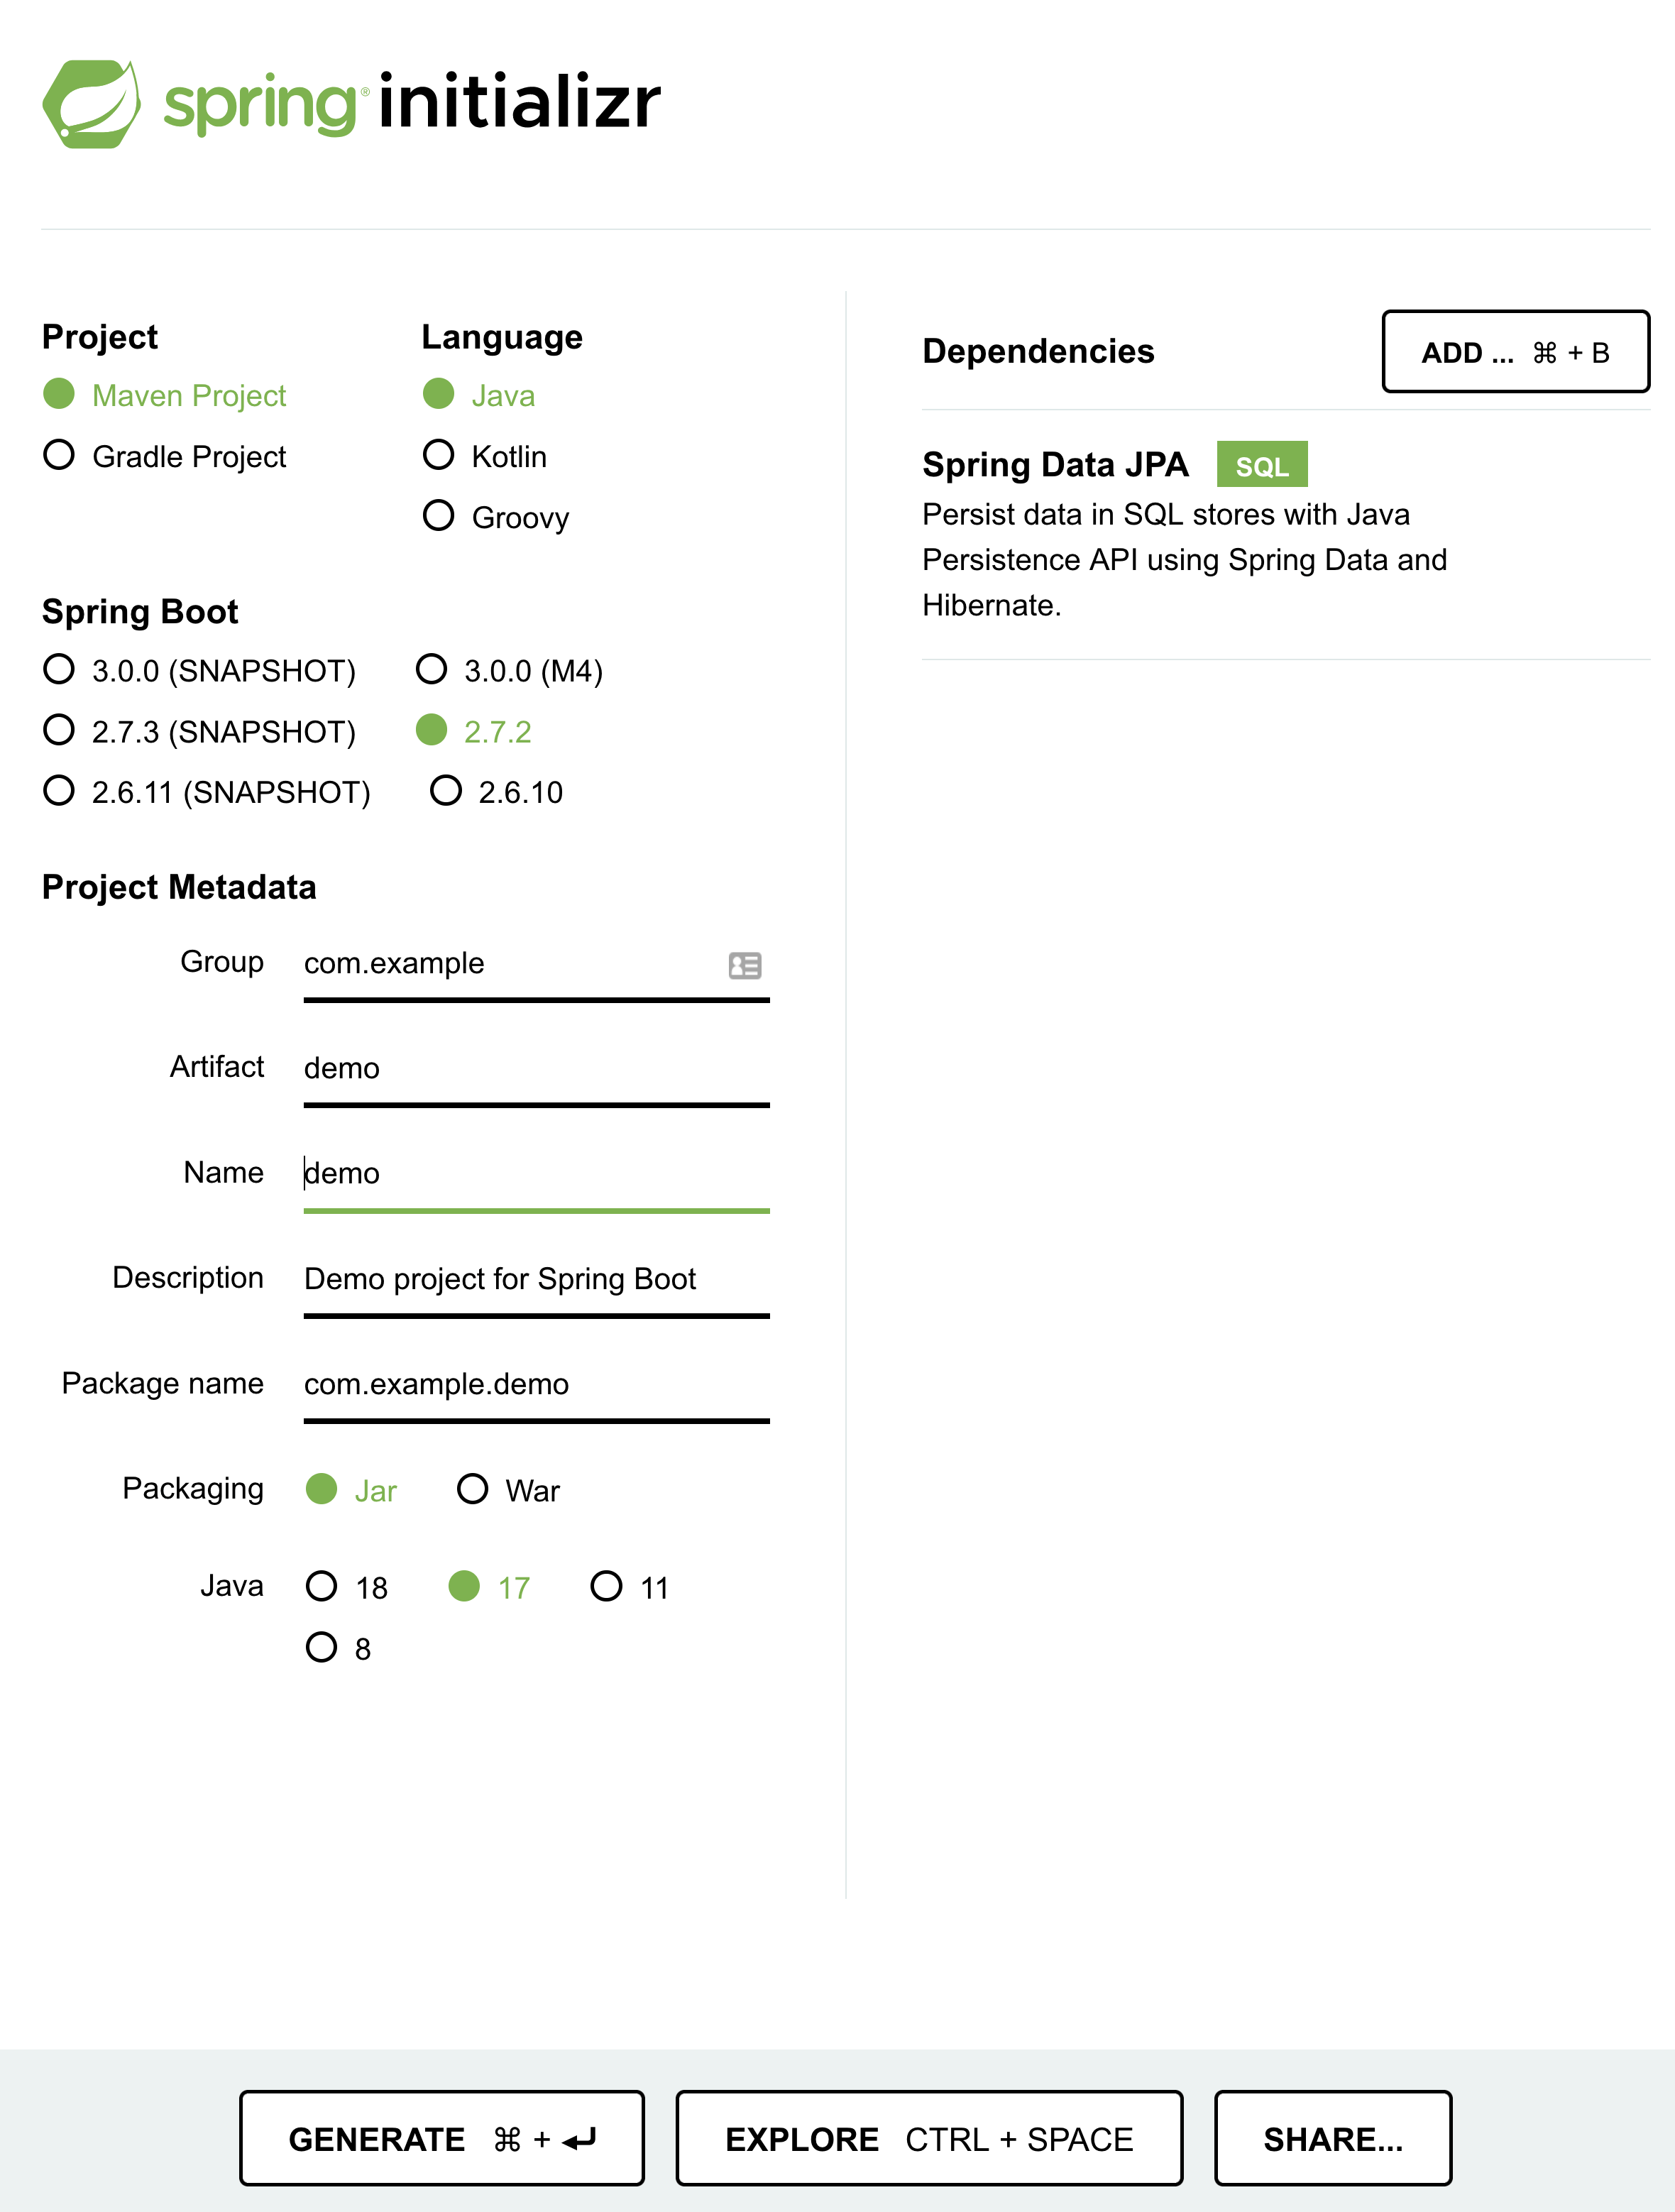
The Spring Initializr allows us to select the desired language, build tool, and dependencies and then packages everything together into a Spring Boot project.
Here are the steps for creating and opening a project:
- Go to https://start.spring.io/.
- Select the project properties.
- Add dependencies.
- Click on the “Generate” button on the bottom. This will download a zip file containing the SpringBoot project.
- Unzip the archive and open it in your preferred code editor or IDE.
We will discuss the following parts of the SpringBoot projects:
- The default class.
- POM Parent
- Dependencies
- Maven Plugin
- Properties file
A SpringBoot project has a single .java file that is the entry to the
application. In our case, we will have a DemoApplication class. This is what
our DemoApplication class looks like:
package com.example.demo;

import org.springframework.boot.SpringApplication;
import org.springframework.boot.autoconfigure.SpringBootApplication;

@SpringBootApplication
public class DemoApplication {

	public static void main(String[] args) {
		SpringApplication.run(DemoApplication.class, args);
	}

}
The @SpringBootApplication indicates the main class of the SpringBoot
application and this main method is the initial entry point of the
application.
The pom.xml file has a <parent> section that looks like this:
<parent>
	<groupId>org.springframework.boot</groupId>
	<artifactId>spring-boot-starter-parent</artifactId>
	<version>2.7.2</version>
	<relativePath/> <!-- lookup parent from repository -->
</parent>
This provides the compatible versions for the dependencies added to the project which is why most we don’t have to define the version for most of the dependencies added to the project. It is recommended to let Spring Boot manage the dependencies.
Spring Boot provides starter dependencies which package all the required
dependencies for certain tasks. For example, we added the
spring-boot-starter-data-jpa dependency which provides everything we need to
work with JPA and an external data source. This is what the dependencies looks
like:
<dependencies>
		<dependency>
			<groupId>org.springframework.boot</groupId>
			<artifactId>spring-boot-starter-data-jpa</artifactId>
		</dependency>

		<dependency>
			<groupId>org.springframework.boot</groupId>
			<artifactId>spring-boot-starter-test</artifactId>
			<scope>test</scope>
		</dependency>
</dependencies>The Maven plugin helps set up some of the default configuration for the project. It allows us to package executable jar or war archives, run Spring Boot applications, generate build information. You can read more about the plugin here.
<build>
	<plugins>
		<plugin>
			<groupId>org.springframework.boot</groupId>
			<artifactId>spring-boot-maven-plugin</artifactId>
		</plugin>
	</plugins>
</build>There is an application.properties file in the resources directory. This is
where we add configurations for dependencies or for overriding default Spring
Boot configurations.
We have learned how to set up a Spring Boot projects. In the next lessons, we will create Spring Boot projects with different dependencies but the initial process of generating a project will be very similar.