This tool provides a basic framework for sending and receiving encrypted messages between two machines using RSA for key exchange and AES-256 GCM for message encryption.
git clone https://github.com/ghostescript/passkey
cd passkeypython -m venv venv
source venv/bin/activateBefore using the tool, you need to install the cryptography library.
pip install cryptography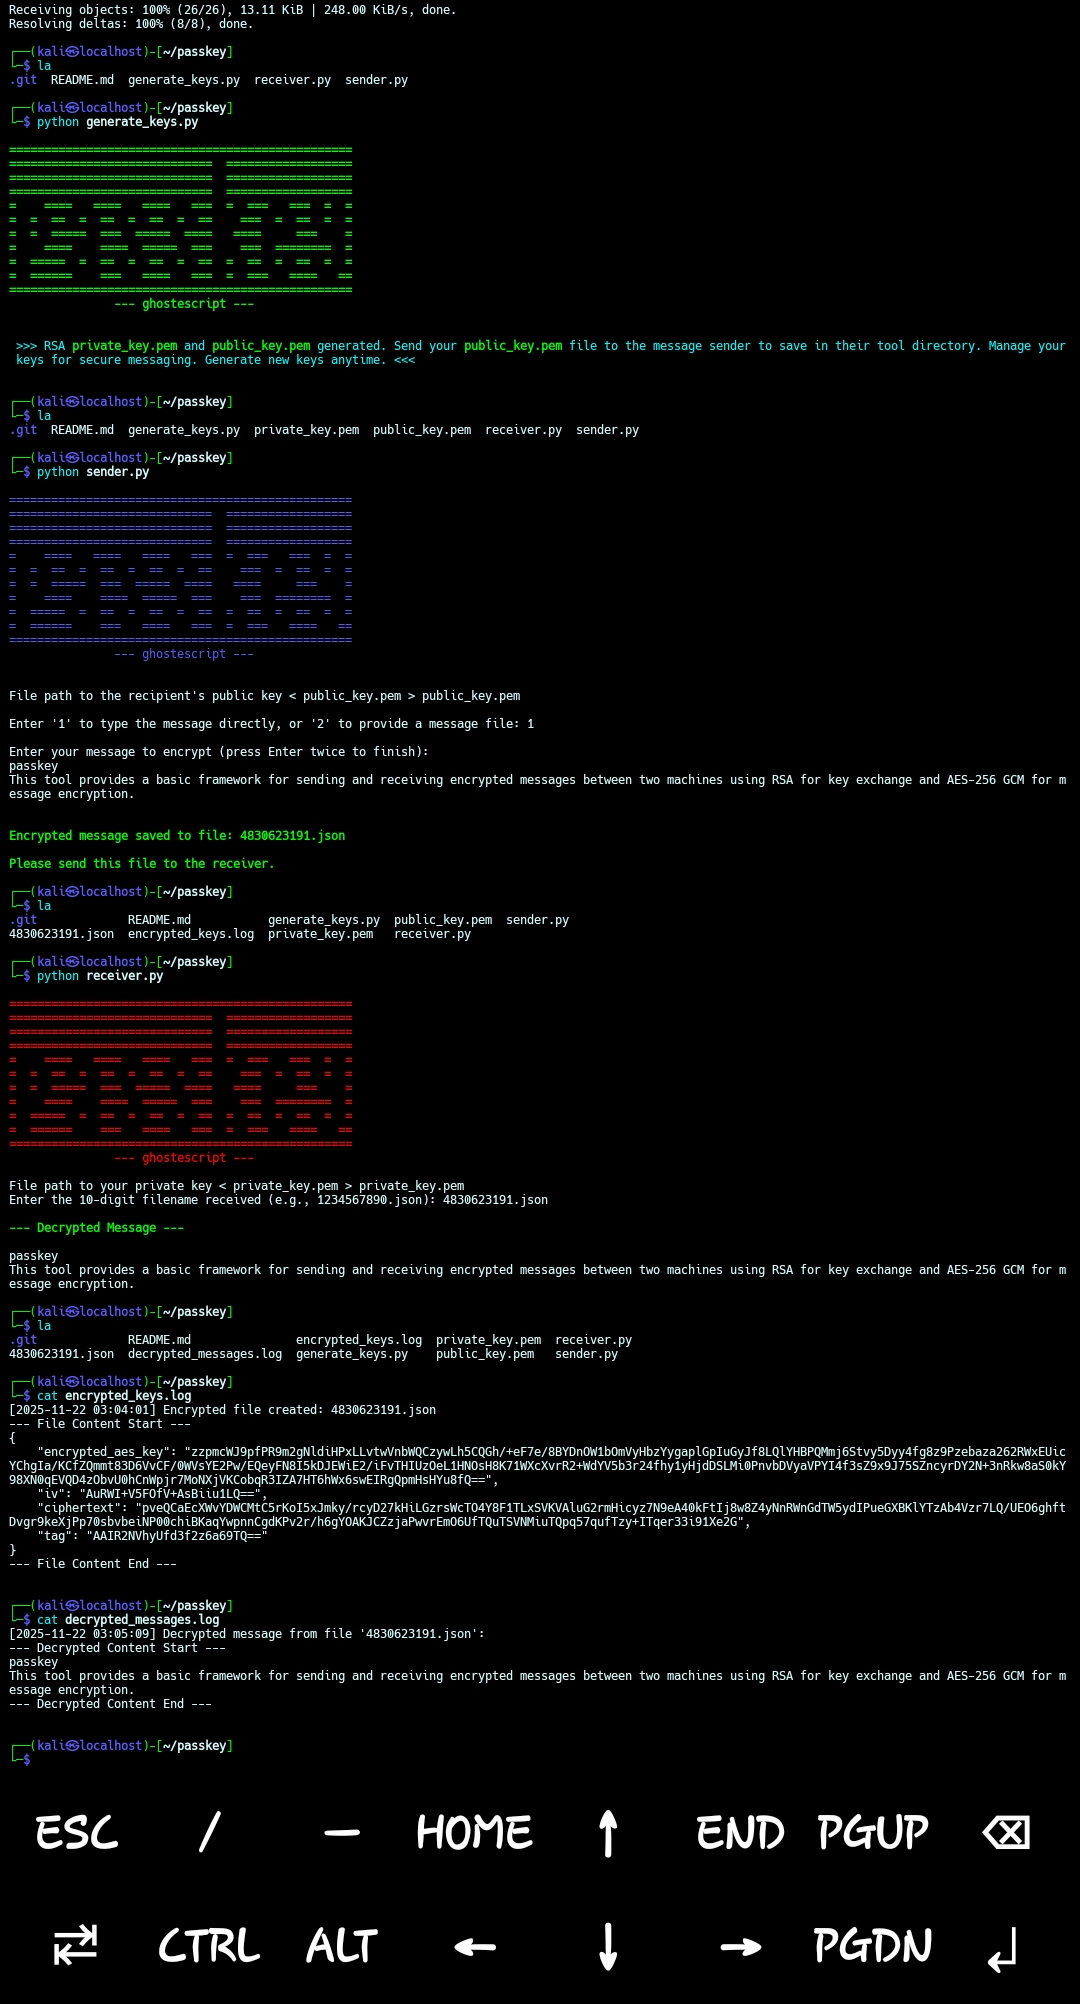
Follow these steps to generate keys, encrypt a message, and decrypt it.
The receiver needs to generate a pair of RSA keys: a private key and a public key. The public key will be shared with the sender, while the private key must be kept secret by the receiver.
- Navigate to the
passkeydirectory:cd passkey - Run the
generate_keys.pyscript:This will create two files in the current directory:python generate_keys.py
private_key.pemandpublic_key.pem.private_key.pem: Keep this file secure and do not share it. It's essential for decrypting messages.public_key.pem: Share this file with the person who will be sending you encrypted messages.
The sender uses the receiver's public_key.pem to encrypt their message.
- Ensure you have the receiver's
public_key.pemfile. Place it in the same directory assender.pyor provide its full path. - Navigate to the
passkeydirectory:cd passkey - Run the
sender.pyscript:python sender.py
- The script will prompt you for:
- The path to the recipient's public key (e.g.,
public_key.pem). - Whether you want to type the message directly or provide a message file.
- The path to the recipient's public key (e.g.,
- After entering the information, the script will generate a random 10-digit filename (e.g.,
1234567890.json) and save all the encrypted message details into this JSON file. The script will print the generated filename. You need to securely transmit this file to the receiver. Logging: Each time an encrypted file is created, an entry with a timestamp and the full content of the encrypted JSON file will be added toencrypted_keys.login the same directory. WARNING: Logging the full content of encrypted files can lead to very large log files and, depending on your security model, might expose sensitive encrypted data if the log file itself is not adequately protected. Consider disabling this feature or ensuring proper log management if this is a concern.
The receiver uses their private_key.pem and the 10-digit JSON file received from the sender to decrypt the message.
- Ensure you have your
private_key.pemfile in the same directory asreceiver.pyor provide its full path. - Ensure the encrypted message file (e.g.,
1234567890.json) is in the same directory asreceiver.pyor provide its full path. - Navigate to the
passkeydirectory:cd passkey - Run the
receiver.pyscript:python receiver.py
- The script will prompt you for:
- The path to your private key (e.g.,
private_key.pem). - The 10-digit filename (e.g.,
1234567890.json) received from the sender.
- The path to your private key (e.g.,
- After entering all the required information, the script will output the original decrypted message.
Logging: Each time a message is successfully decrypted, an entry with a timestamp and the decrypted message content will be added to
decrypted_messages.login the same directory. WARNING: Logging decrypted message content can expose sensitive information if the log file itself is not adequately protected. Consider disabling this feature or ensuring proper log management if this is a concern.
Nov 22, 2025