In this repo we will walk through one potential way to use Optimizely Full Stack with AWS Lambda using an Alexa Skill as the demo.
By following the steps in this guide you will be able to:
- Understand how Full Stack can be used with Lambdas execution model
- Host your own Alexa Skill
- Use Optimizely Full Stack + Alexa
Both Optimizely Full Stack and Lambda (as well as other serverless function providers) claim to be "stateless" solutions.
In Optimizely's case, stateless means that we do not store the state of a users bucketing assignment (which variation or feature they see). This is handled entirely by a Murmurhash3 algorithm that the SDK executes based on a json configuration file that's used to initialize the SDK client. This approach to deterministic bucket is great for two reasons:
1. It's fast - bucketing happens in memory, not external network requests required to get a variation
2. It's omnichannel - since all SDKs use the same algorithm, you can get the same variation assignment for the same user across channels, and track interactions for a user across multiple channels (ex: activate an experiment server-side, but track their interactions on a mobile app)
However, in order to gain the benefits of Optimizely's statelessness, you are required to access a JSON datafile to initialize the SDK client, and then cache that client for future re-use.
In serverless environments, your container/server is ephemeral, ostensibly only existing as long as your code takes to execute. At first glance this could appear to negate the speed benefits of Optimizely Full Stack. However, as it turns out Lambda, in particular, caches your function instance for a short period of time afterwards. You can read more about Lambda's execution model here.
Options to handle added latency in Lambda + Full Stack: 1. Deal with it - accept the cost of making a request to Optimizelys CDN per Lambda execution 2. Store your datafile in the same network - use S3 to host your datafile in the same region as your Lambda function 3. Add logic for caching the Optimizely SDK Client and accept potential hit on the first Lambda execution, with near 0 latency for subsequent hits
This code sample follows option 3.
How our Alexa Skill will work
- "Invoke" skill + initiate Amazon "intent"
- Alexa responds with a yes/no question (specific response string generated by Optimizely Feature Variable)
- User then responds with affirmative or negative intent to the inital response
- Affirmative or negaitve responses tracked in Optimizely
- AWS Lambda
- Optimizely Javascript SDK
- Node ASK (Alex Skill Kit library)
- Gulp to bundle zip file for Lambda
- Create an Optimizely Full Stack Project
- Create a feature flag with a variable for a response (this will be the response from Alexa)
- Create two events "respondedYes" and "respondedNo" (we'll track this from Alexa)
- Create an experiment using your Optimizely feature, and create one variation for each response that you want to demo (note for the logic of this dialog each response should end in a yes/no question)
- Start the experiment!
- Create an AWS account (if you don't already have one) & an Amazon Developer (you'll need this to create an Alexa Skill)
- Log into https://developer.amazon.com/ and click "amazon alexa"
- Click "Alexa Skills Kit" from the header, then click "Start a Skill"
- Click "Click Create a Skill", give your skill a name, and select "Custom"
- Click "Create Skill"
- From the Alexa Skill Console, click "Invocation" from the left hand menu and give your Skill an invocation (this is the phrase that will awaken the skill) then click "Save Model"
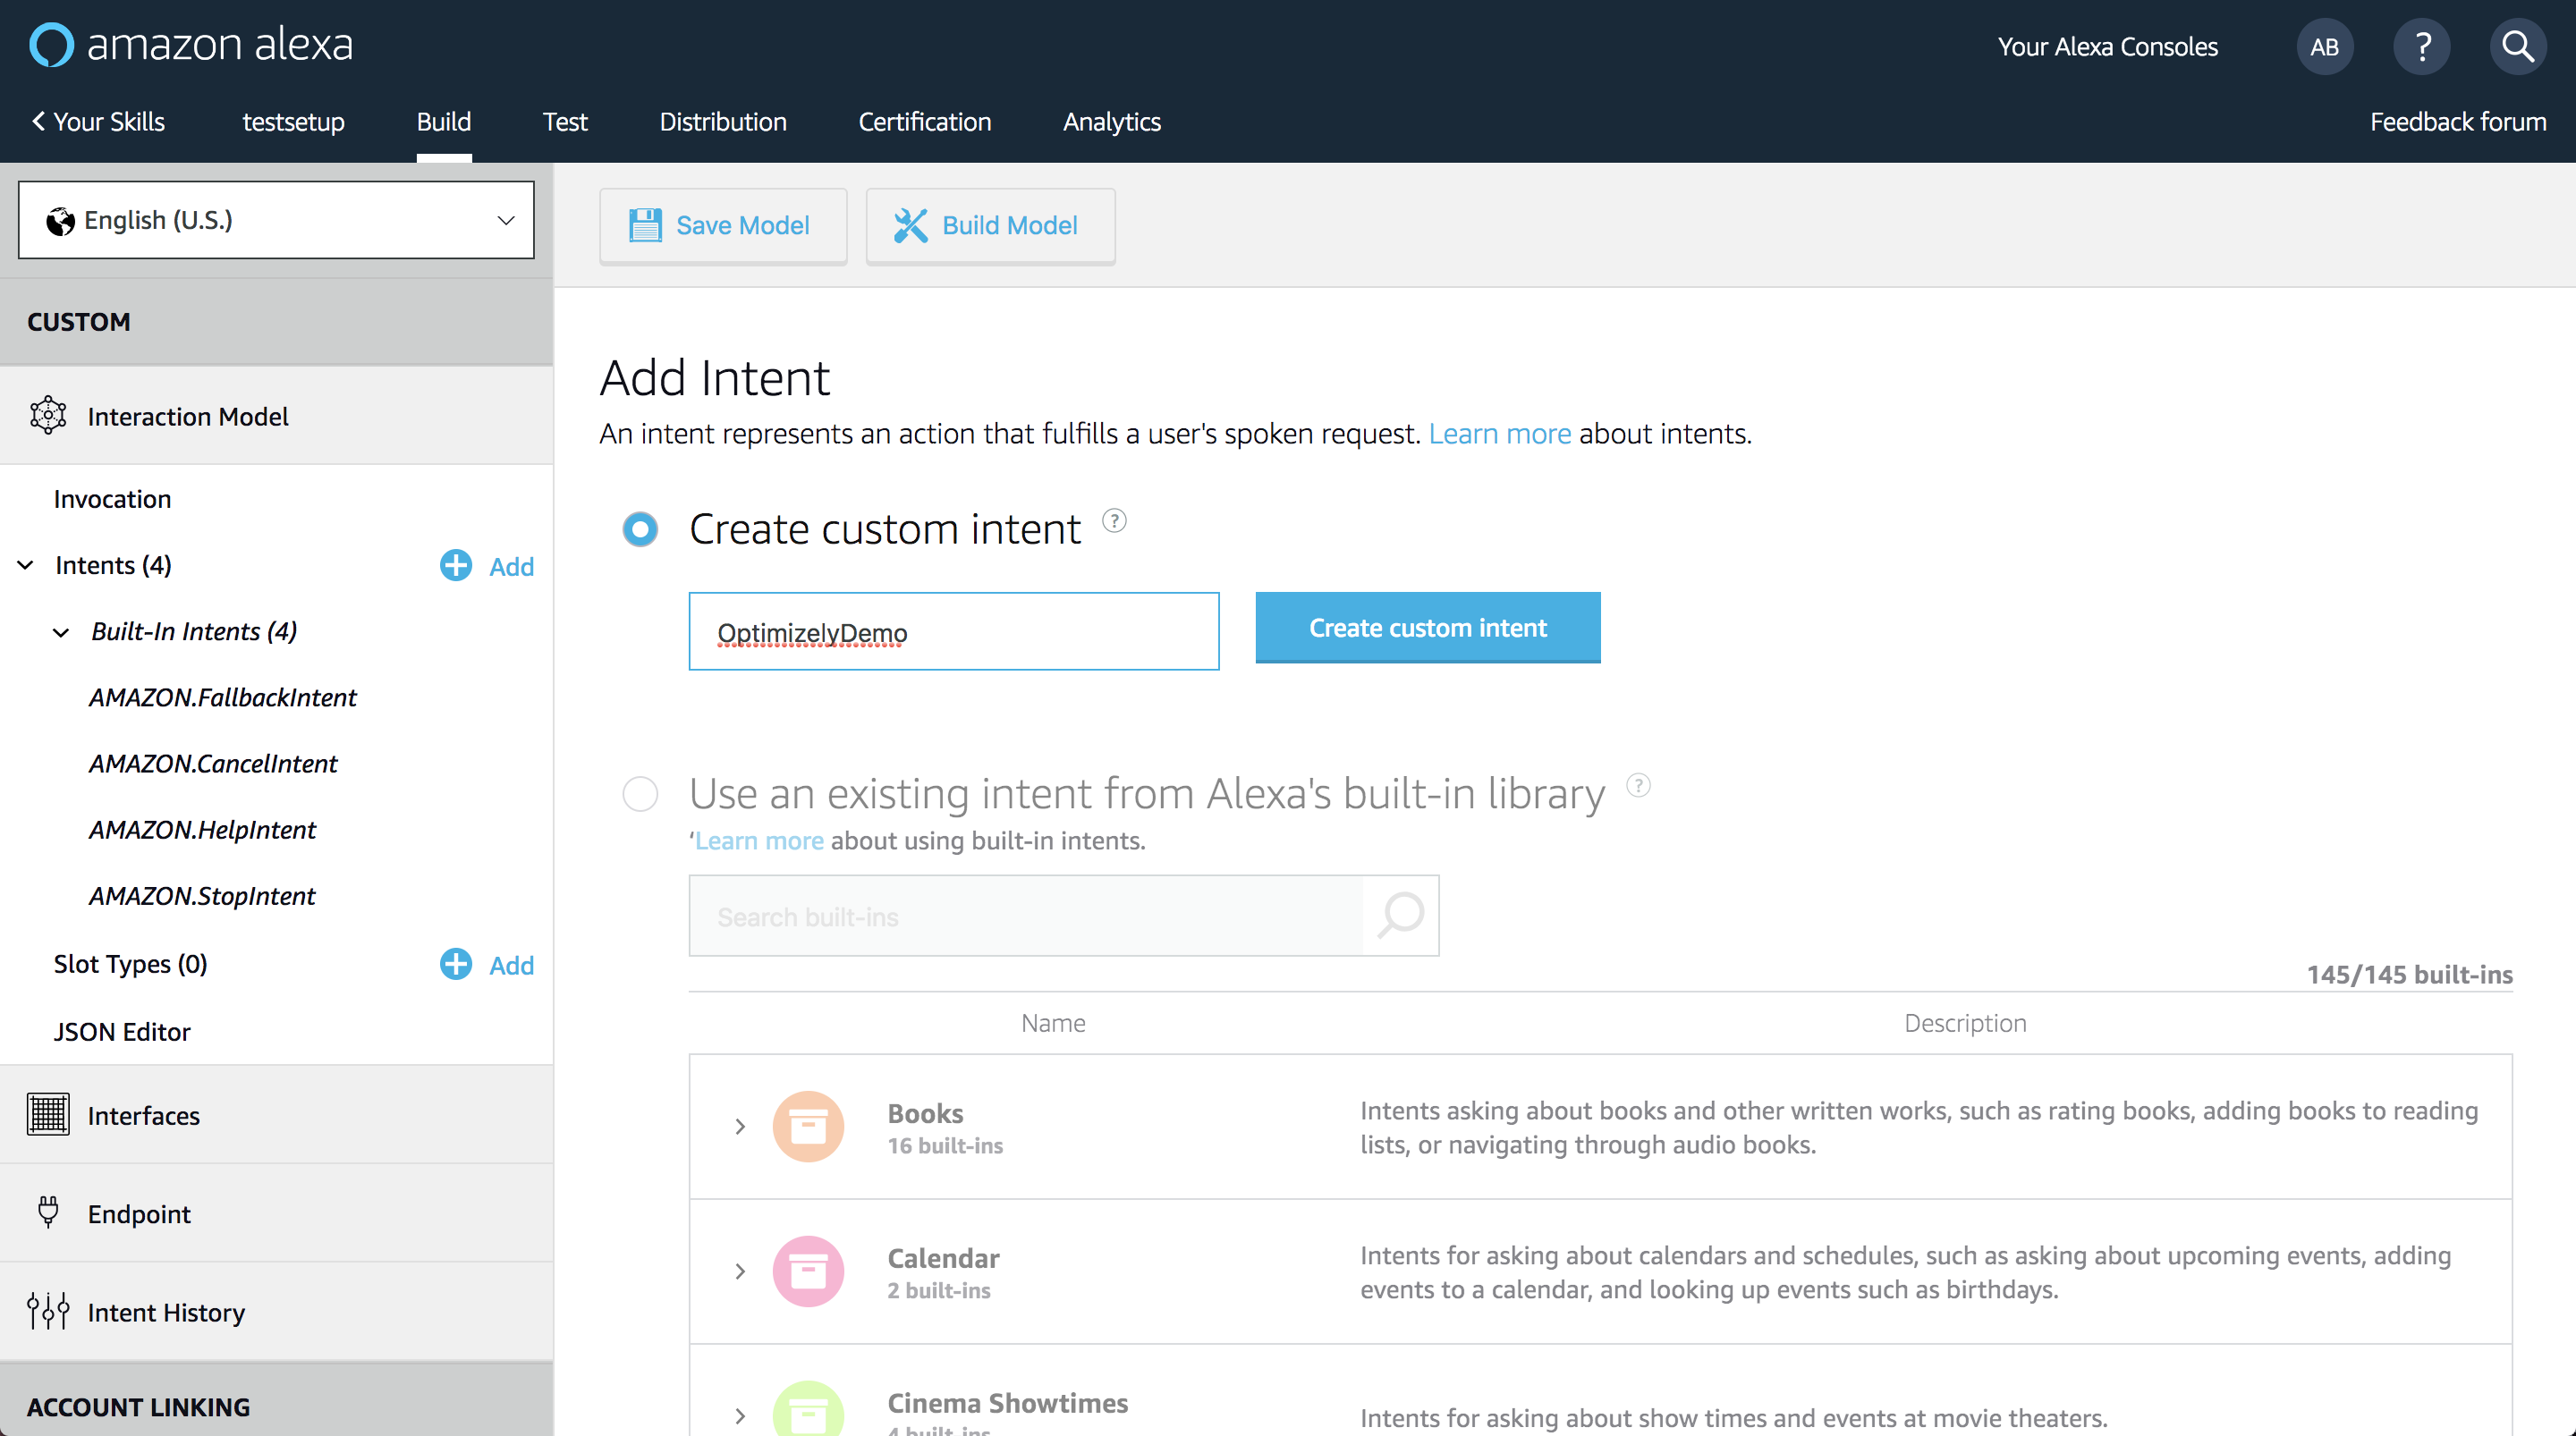
- Click the "+ Add" button next to "Intents" in the left hand menu and create a custom intent called "OptimizelyDemo"
- Add an few phrases you want Amazon to interpret for your demo Skill
- Click "Save Model" and then "Build Model"
- Click "Your Skills" in the header, and click "View Skill ID" below the skill you just created
- Take note of this skill ID... you will need it later!
- Sign into the AWS Console
- Click "Services" from the menu and search for "Lambda"
- Click "Create Function"
- Give your function a name and select Node 8.10 for the Runtime
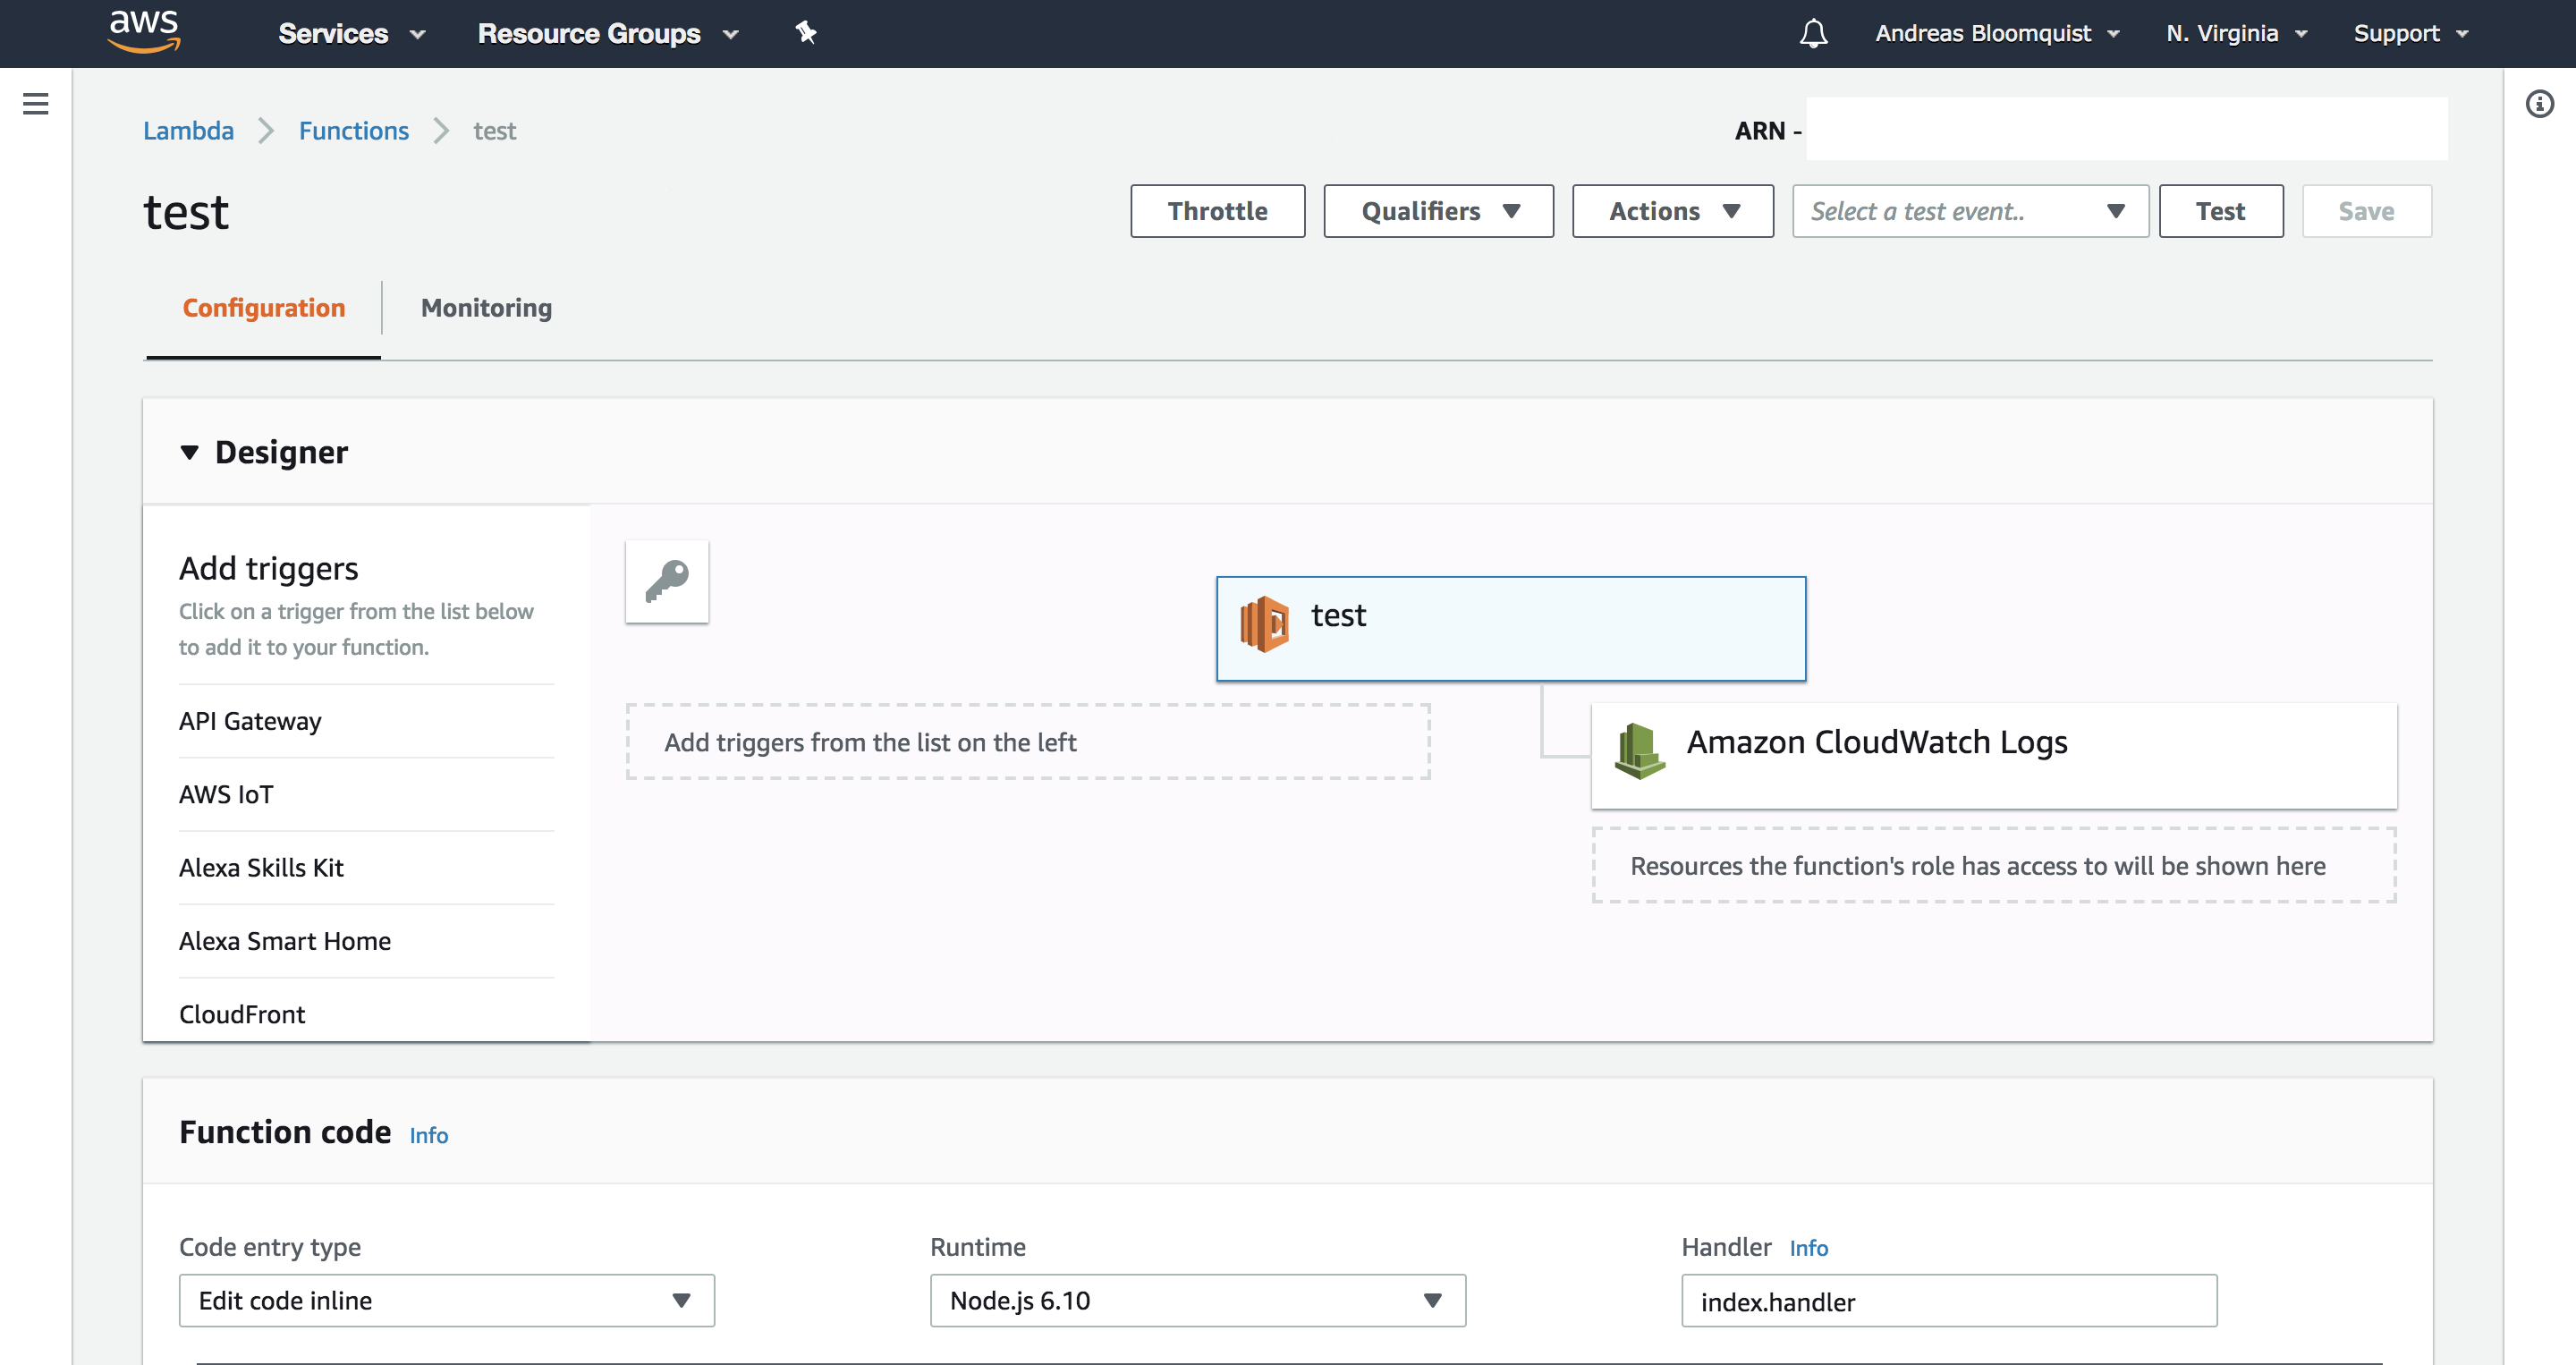
- Click "Designer" from the Lambda configuration panel to show the triggers
- From the triggers menu select Alexa Skills Kit and scroll down and paste your Alexa skill ID from before in the "Skill ID" field and click "Add"
- Add an einvronment variable to your Lambda function called
PROJECT_IDand paste your Optimizely Project ID for the project that you created your feature test in
- Clone this repo to a local directory on your computer
- Run
npm install - Decide whether to use CDN or REST api access the datafile in the
initOptimizely()function - CDN will be faster, but may take up to 1-2 minutes to update after making a change in Optimizely - Customize the confirmation and denied responses on line 12 and 13 (this is the responses that a user will receive when they confirm or deny the request from Alexa)
- Implement your feature flag + feature variable on/or around line 94
- In the projects terminal window, run
gulp- this will zip together the - Return to your Lambda Skill and in the Functional Code box, click the "Code entry type" and select "Upload a .ZIP file"
- Click Upload and search for the directory created after cloning this repo, and select the zip file from the "/builds" directory
- Click "Save"
- Once you've uploaded your skills code (in the .zip) file, and connected your Lambda function to your Alexa skill, return to your Alexa Skill console in Amazon
- Click "Test" from the header navigation
- Enter the phrase to innvoke your skill + a phrase entered for the OptimizelyDemo intent, for example "ask Optimizely for a mind blowing demo"
YAY!
- Connecting this to a real Amazon Echo...
- get your hands on an echo!
- download the Amazon Alexa app
- in the app log in using the same credentials used for your Amazon Developer account
- You're now ready to use your skill on a real device!
Now that you've set this up, for future demos, all you need to do is...
- Change the feature variable strings in your Optimizely project
- Update the datafile in
index.js - Run
gulpand re-upload the new zip file in AWS Lambda - Change the innvocation and any intent phrases in your Amazon Aleka Skills console
- That's it!


