In Module 6, we discussed how the open-source world manages a constant flow of new ideas through collaboration and transparency, and how that same approach could make institutions more open and participatory. The video highlighted GitHub as an example of that kind of shared problem solving; a platform where people contribute, review, and build on one another’s work.
That same idea runs through this course. Some of our labs have pulled data or documentation from GitHub, and we’ve seen how R packages and projects are maintained there. For this code-through, I wanted to show how you too can use GitHub; not just as a place to download data, but as a way to manage, version, and share your own RStudio projects using the same open-source tools that power collaboration across data science.
For this demonstration, I created a new GitHub account sthread2-asu, so I could show each step from a clean setup, just as someone new to GitHub would experience it. Unfortunately while updating the files my account vanished, but you can still see this work on my personal account sthreadgill-dev. As a reference, I used How to Use Git/GitHub with R, which is also the same source I used when I first got started with GitHub.
Windows: Download Git for Windows
Mac: Most likely pre-installed.
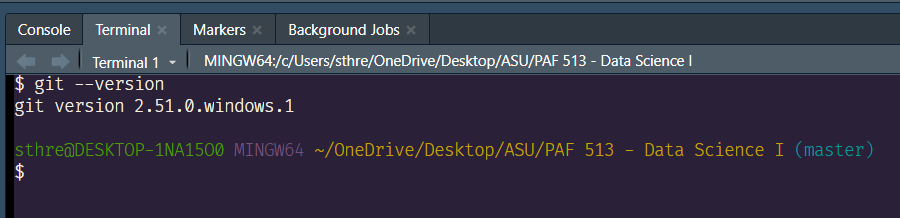
Check in RStudio by running this in the terminal:
git --versionIf you see a version number, Git is installed correctly.
Create an account at https://github.com.
Keep in mind when creating a username that it will be public if you’re sharing content. This is particularly good to remember if you’re building a portfolio of work that you might share when applying for a technical role.
My GitHub for this demonstration is sthread2-asu.
My main GitHub is sthreadgill-dev.
install.packages("usethis")
library(usethis)
use_git_config(user.name = "Your Name", user.email = "your@email.com")
Note: Nothing will appear to happen when you run this command, but it is updating the Git config file so it knows your name and email.
library(usethis)
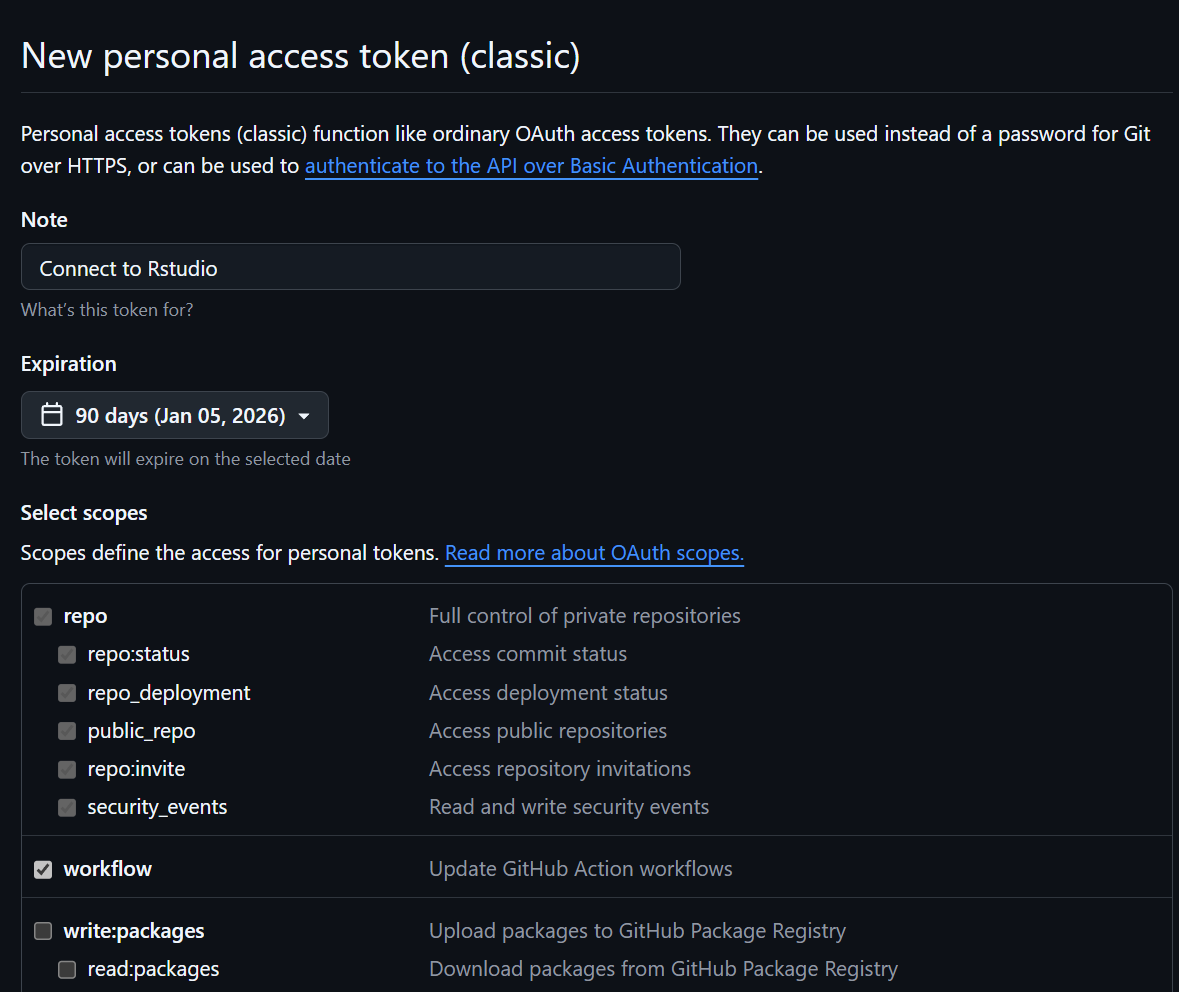
create_github_token()When run, the GitHub website will open in your browser to “New personal access token (classic).”
In the Note field, describe the use case. I went with Connect to RStudio.
Select an Expiration Date — I went with 90 days.
Personal tokens don’t last forever, and for security they will need to be generated at a regular cadence. When your token expires, you may not be able to push your code or access repositories.
You do not need to change anything in Select Scopes.
Scroll down and click Generate token.
Copy the token to use in RStudio — you can also save it to a note or in a password manager to access later, but make sure that space is secure.
install.packages("gitcreds")
library(gitcreds)
gitcreds_set()
You will be prompted to enter a password or token. Paste your token in and hit Enter. The console will inform you when you are done.
library(usethis)
use_github()
If you see an error:
Error in `check_uses_git()`:
✖ Cannot detect that project is already a Git repository.
ℹ Do you need to run usethis::use_git()?
Run `rlang::last_trace()` to see where the error occurred.
Just run:
usethis::use_git()A repo will initialize and you will be asked if it’s okay to commit the files. Type the selection for Yes/For Sure.
You may be prompted to restart RStudio to activate the Git pane. Type the selection for Yes/For Sure.
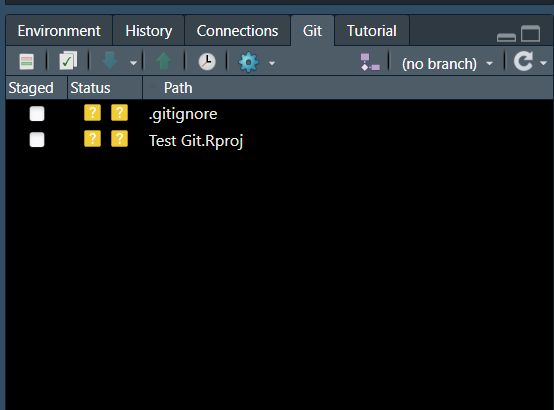
Now you will see a Git tab in the same pane as Environment, History, and Connections.
In GitHub:
Go to Repositories in the top navigation bar, and then click New on the right-hand side.
Give your new repository a name and a description.
For visibility, the default is Public. This means anyone can access your repository. You’ll be familiar with this, as it’s how we’ve accessed some of our datasets and where documentation on packages may live. Private means only you can see it. If you’re going to share your work, keep it public. This can be changed later in the repository settings if you change your mind.
Toggle on Add README if this repository will be public — this is how you explain what your project is, how it can be used, and who contributes to it.
For more information, see About READMEs on GitHub.
READMEs can be written in Markdown.
You don’t need to change anything for Add .gitignore or Add license.
Once this is created, you will see the URL for your repository. This is where you will begin to add your code.
Copy the URL provided. In RStudio, go to **New Project → Version Control → Git**, then paste your repository URL. Make sure your project is being created in the correct folder on your computer. RStudio will automatically switch to this project.
Create a new file for what you would like to add to GitHub. To practice, try using a previous lab.
For this example, I created a new file titled First Commit and added the text:
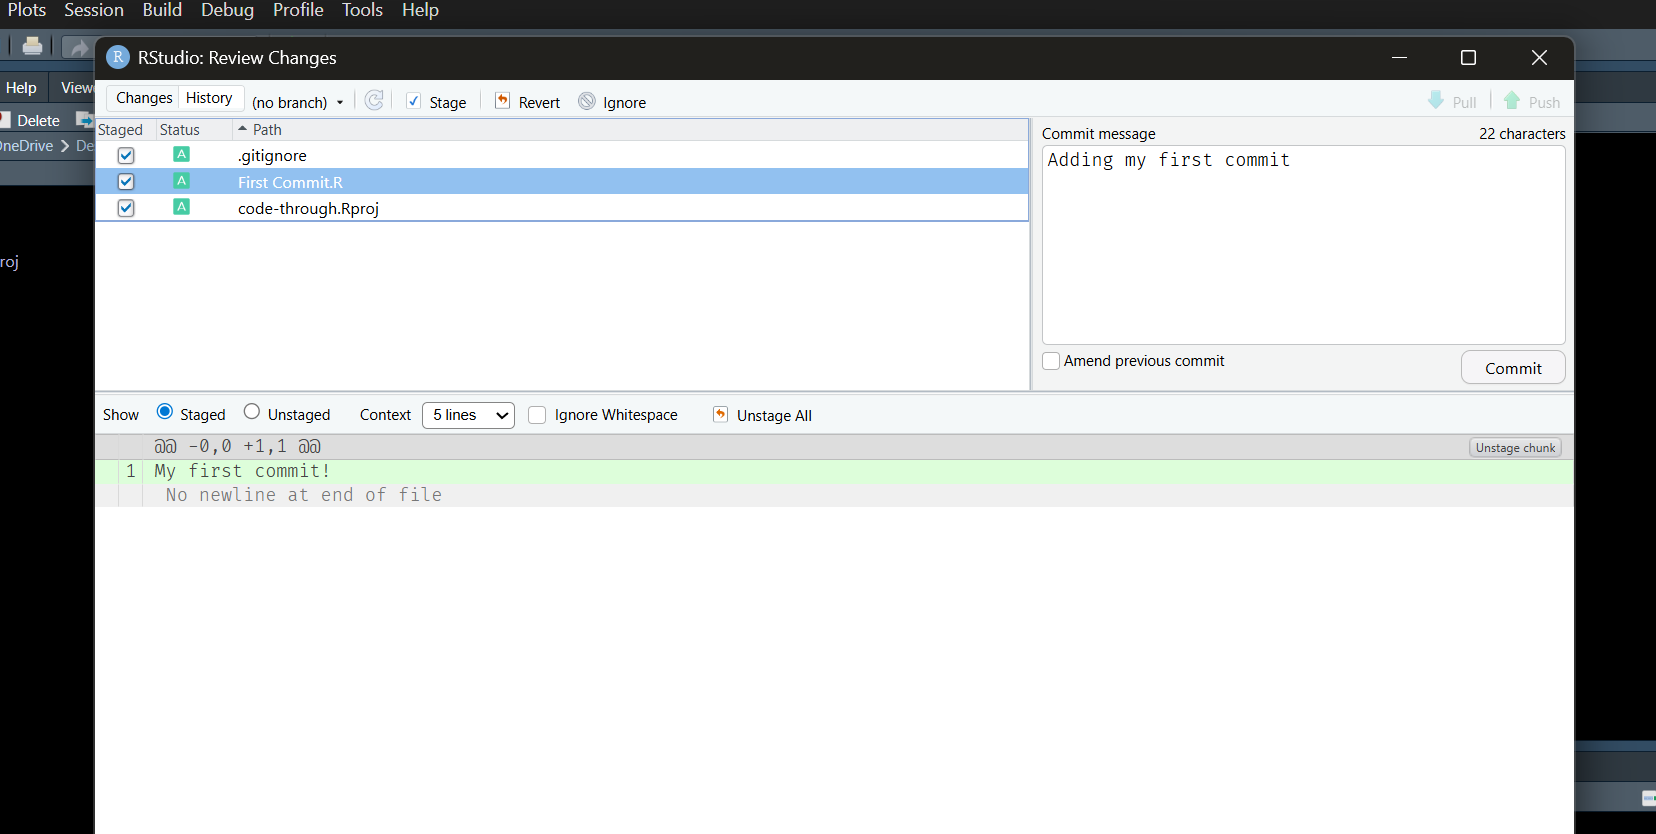
My first commit!Once you’re ready, go to the Git tab and click Commit (the second icon with a check in a white box).
Check Staged for the files you would like to commit, and then add a commit message. This is similar to how you leave a comment in your code, but instead it is a comment on the pull request you are about to create (more on these shortly).
Then hit Commit and close the pop-up that appears.
In this same window, click **Push** in the top-right corner. This will create a new branch and send it to your GitHub.
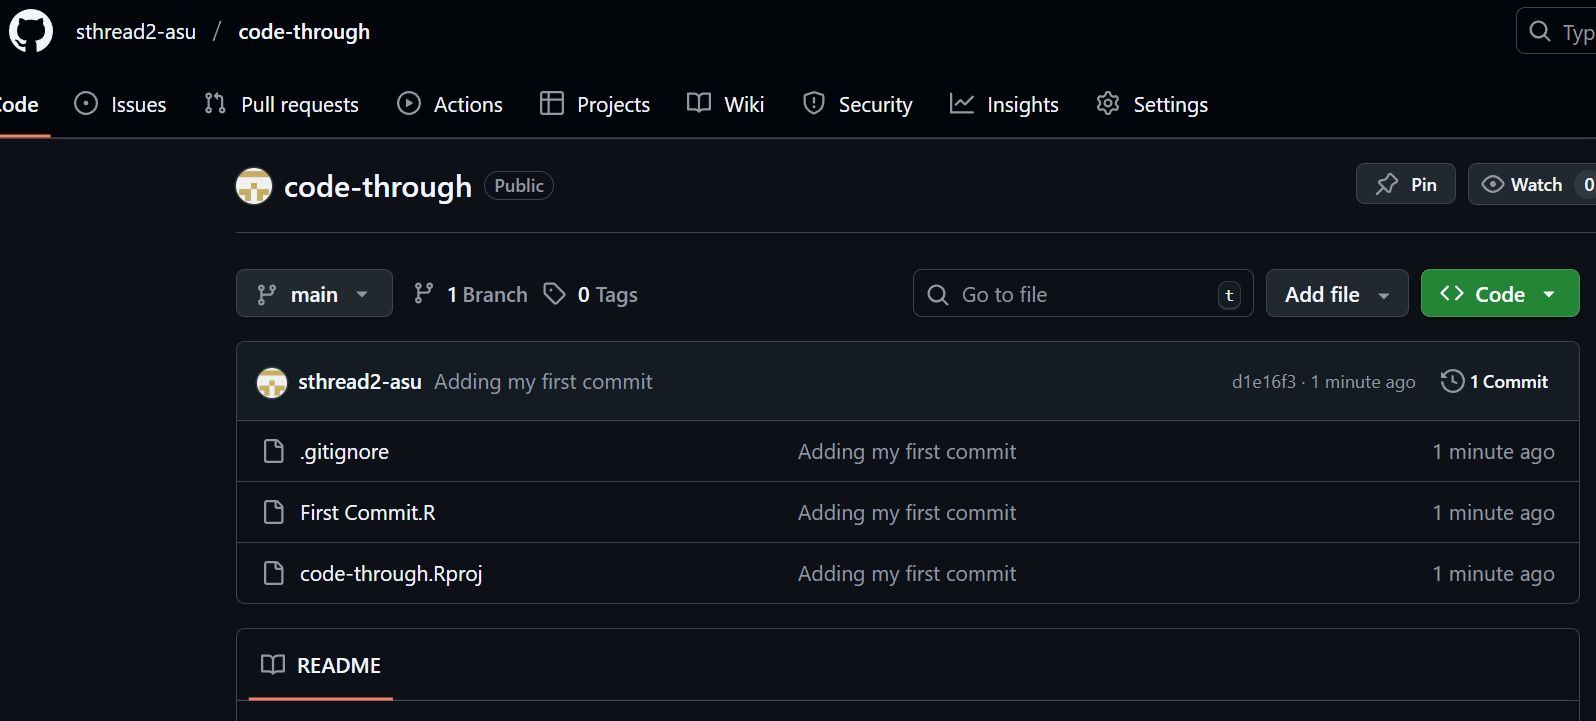
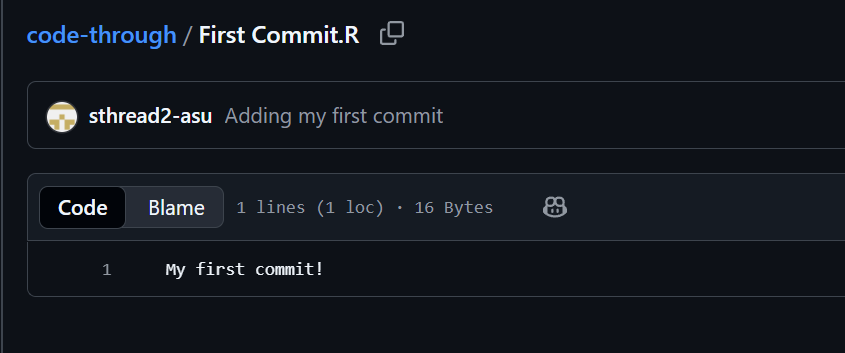
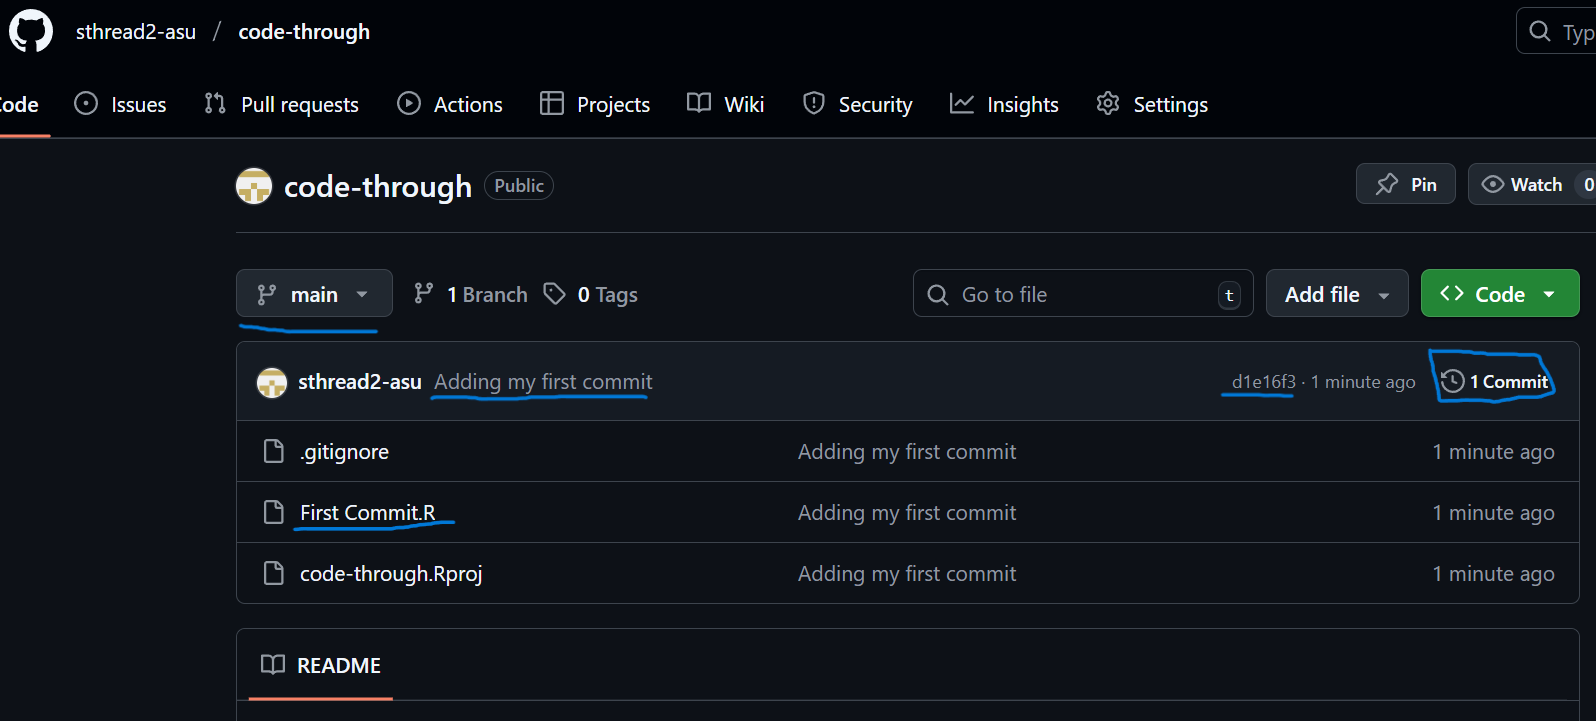
If you go to your repository and click Code, you should now see the files you pushed and your commit message.
You can click on a file to see the code contents.
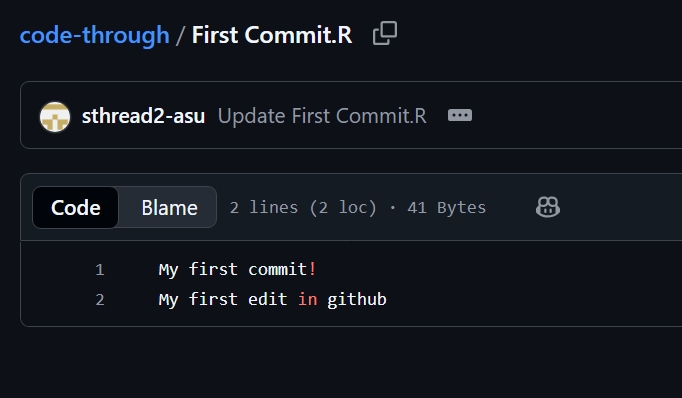
If you edit files in GitHub or are working with others, you will need to pull in those changes from GitHub to your local repository in RStudio. When editing in GitHub, you will see the option to commit your changes directly to the main branch or create a new branch. For this code-through, we will just commit directly to the main branch.
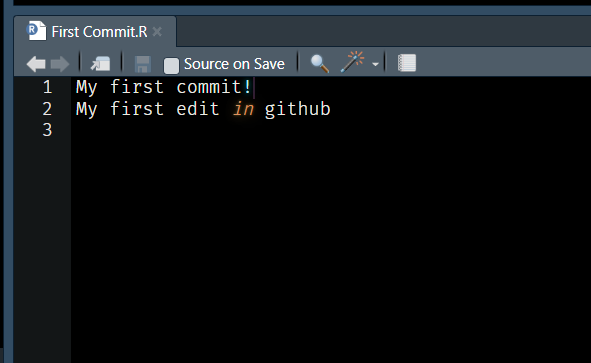
In RStudio, make sure you’re in the correct repository and go to the Git tab.
Click Pull (the blue down arrow).
When you look at the file you changed in GitHub, the updates should now appear.
Using this method, you can make changes locally → push them to GitHub → make changes in GitHub → pull those changes back to your local repository, and repeat from there.
This is how open-source projects work. There is a shared repository in GitHub. Changes committed to the main branch can be pulled by others to make their own contributions before pushing them back to GitHub for the rest of the community to see.
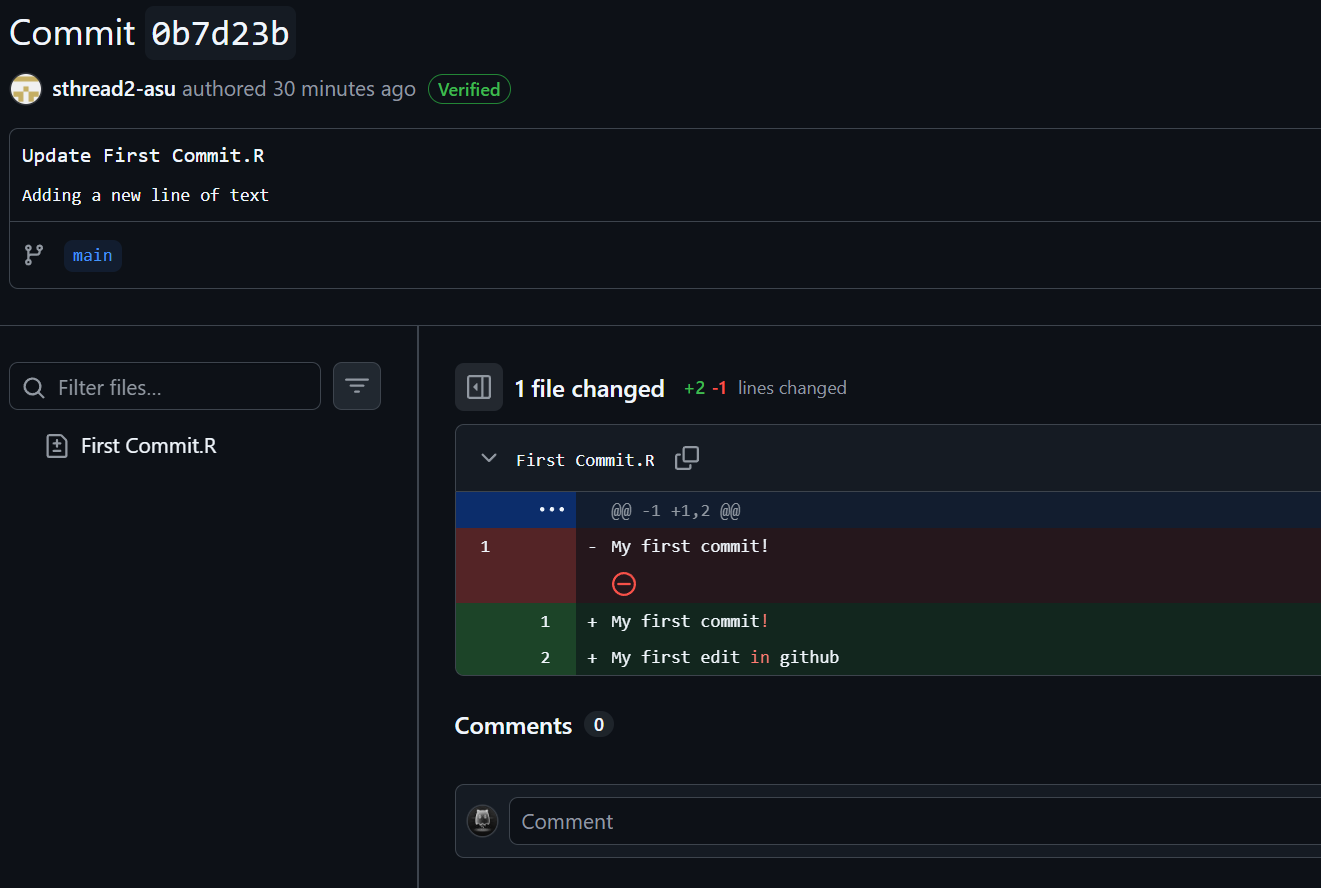
In GitHub, you will see a bunch of letters and numbers next to your commit —> this is the version control discussed in Module 6. You can see all the commits that were made to the main branch by clicking # Commits. This will show the commit history. Each commit has its own unique ID along with information on who, what, and when. You can click on the unique ID to see the commit details. This allows you to understand what code was added and what was removed. You can leave comments on a commit as well.
This lab ties back to the themes in Module 6 around openness, collaboration, and shared knowledge. Learning to program in R is just one step, but we also need to master how to make sure what we're developing can be seen, used, and adapted. ShinyApp has been one way we've done this, and GitHub allows you to take it a step further.
Here, I’ve shown how you can use those same principles in your own work by using GitHub to manage your RStudio projects, track versions, and share results in a way that’s transparent and reproducible. It’s the same platform that supports open data and collaborative research, and it can support your individual projects too.
Learn more about Git, GitHub, and reproducible workflows with the following:
- How to Use Git/GitHub with R — R for the Rest of Us How to Use Git/GitHub with R
- Learn Git & GitHub right in GitHub Git & GitHub learning resources
- GitHub & RStudio tutorial from GitHub Resources GitHub & RStudio tutorial
- RStudio Version Control / Git support guide RStudio version control guide
- Happy Git with R — RStudio, Git & GitHub Happy Git with R — RStudio, Git & GitHub
- Using Git with RStudio by Jenny Bryan Using Git with RStudio
- Download Git for Windows Git for Windows
- Download Git for macOS Git for macOS
This code through references and cites the following sources:
- R-for-the-Rest-of-Us (2021). How to Use Git/GitHub with R. How to Use Git/GitHub with R
- GitHub (n.d.). About READMEs & repository workflows. GitHub READMEs & workflows