Adding Configurations to an IDE
This page explains how to create or change Configurations to one of the two supported IDEs: Xcode and Atmel Studio 7.
-
Adding and Revising Boards (please read this first)
-
Adding Configurations to an IDE (this page)
First, create the new files for the board and config as described in Adding and Revising Boards and related pages. Then go to Creating a new target.
First, create the new files for the board and config as described in Adding and Revising Boards and related pages.
Once you have everything you need to build a new config or board then follow these steps, being very careful to follow them carefully. Atmel Studio 7 project and solution files can be broken pretty easily!
Atmel Studio has two levels of settings: Solution, and Project.
A solution may configure many projects.
The project holds the actual configuration for the build.
You cannot have a project that is outside of a solution. When building you choose a solution, which then chooses the project(s).
So, we will make a solution that has no other job than to hold a project that has the same name, then we will configure that project.
Once that’s done you will likely forget the difference between a solution and a project.
-
Make sure you have to solution open in Atmel Studio 7, and the projects
g2coreandMotateboth opened successfully.💡If you don’t have Atmel Studio 7, please visit Compiling g2core on Windows 10 and Atmel Studio 7 💡If the Motate project shows as unable to load, you may not have the Motate submodule loaded. See "Problem: The Motate directory is empty. The Motate project is missing." on our Troubleshooting page. -
Under the Build menu, choose "Configuration Manager…"
-
Under the "Active solution configuration" menu (see image) choose "<New…>"
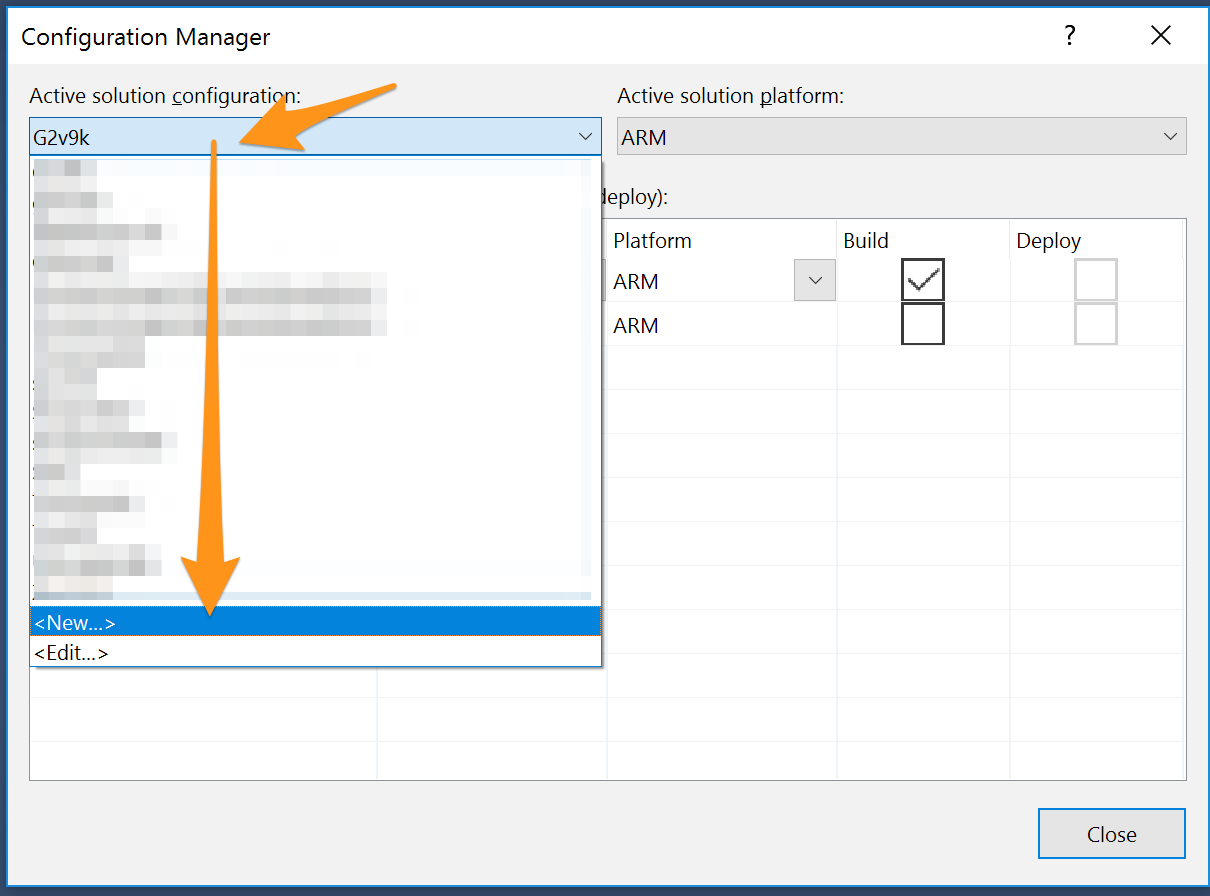
⚠️ There are a few other menus in this windows that look very similar and have the same options at the bottom. Make sure you get the right one! -
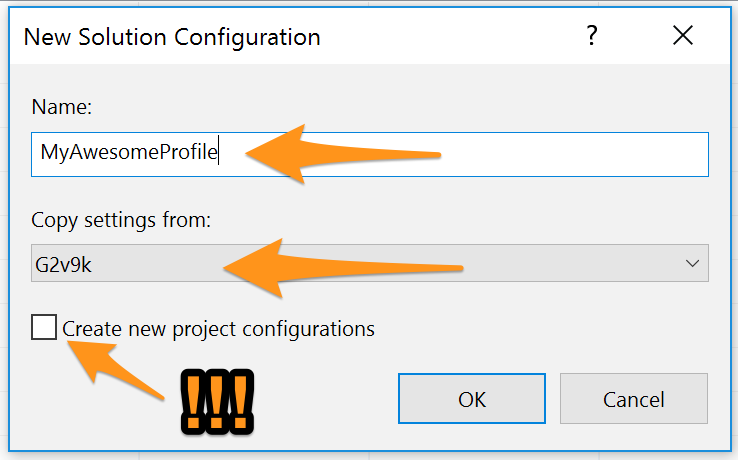
A "New Solution Configuration" dialog should appear. Double-check the dialog name to make sure you didn’t accidentally choose "New…" from the wrong menu.
-
Enter the Name of your new solution configuration. It should consist of only letters, numbers, dashes (
-), underscores (_), and dots (.). It’s probably best to keep it all lowercase if you can.💡We generally try to name these in the style of machine-board, where machine matches the SETTINGS_FILE(without the_settings.hsuffix) name, and board matches theBOARDvalue. -
🔥 Be sure that the "Create new project configuration" is not checked.
-
Choose another solution with a similar board (most any will likely do) from the "Copy settings from:" menu.
-
Click "OK".
-
Verify that the "Active solution configuration" is the solution you just created.
-
-
In the
g2corerow (not theMotaterow!), in the Configuration column, click and choose "<New…>" from the bottom of the menu. (See image for clarification.)-
Alternately, select the Solution name in the drop list and skip the rest of this step
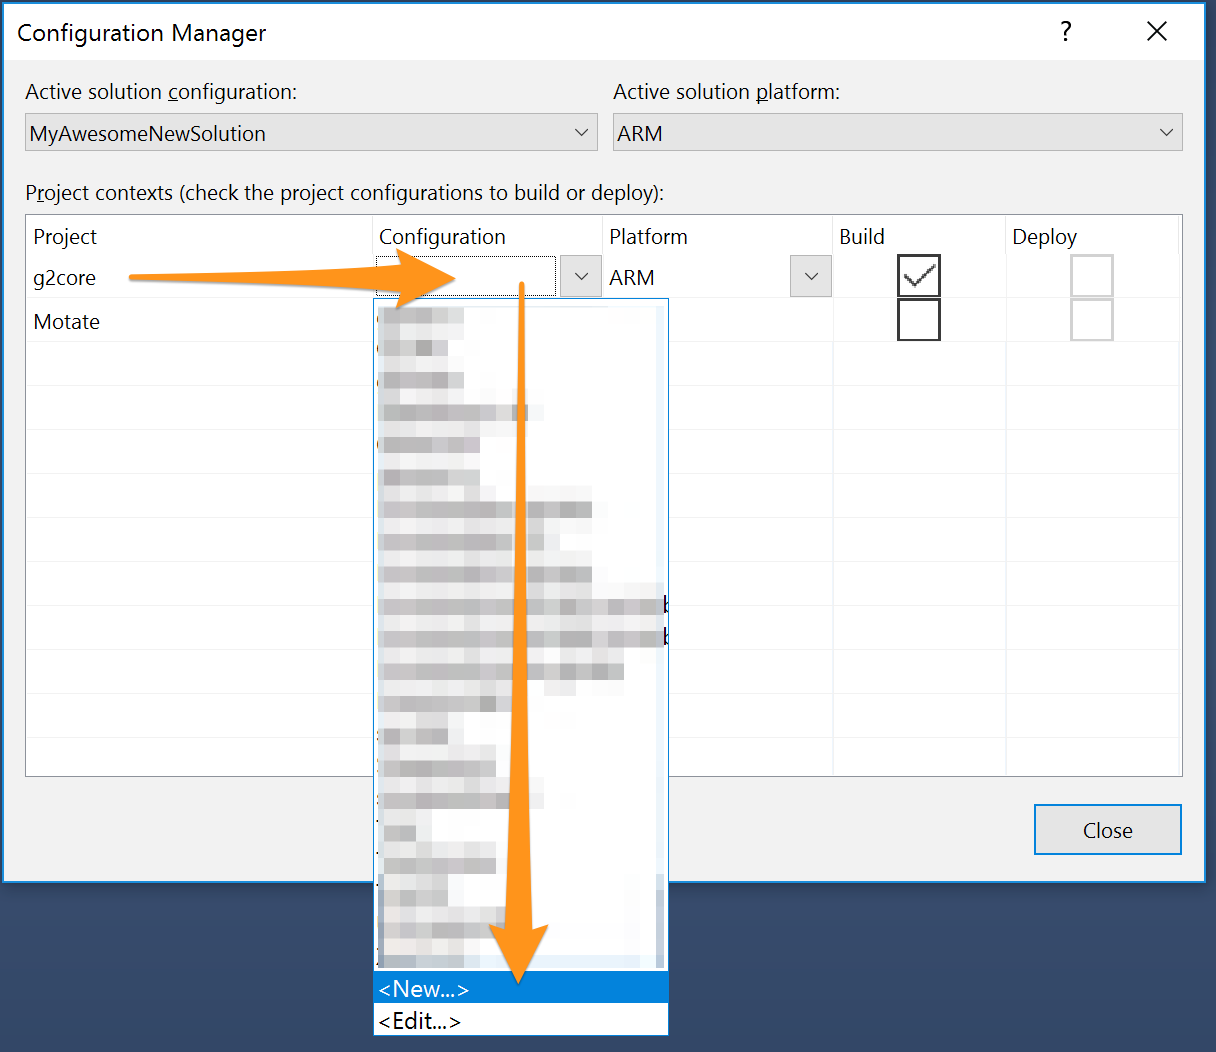 ❗
❗Be very careful not to choose the wrong cell! Several of them have a "<New..>" at the bottom of the menu!
-
-
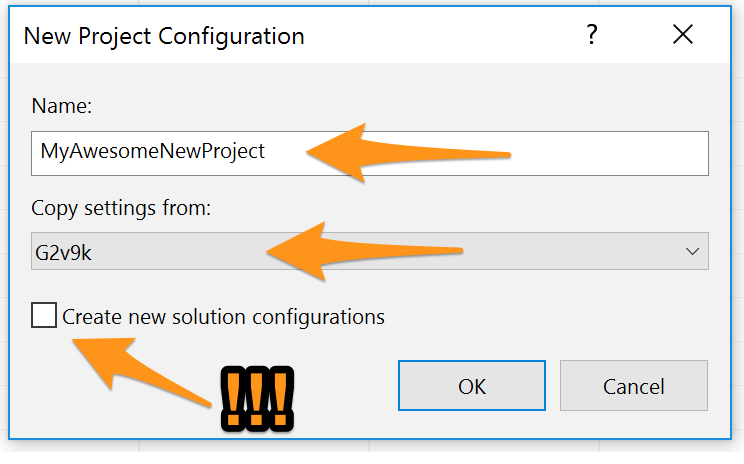
A "New Project Configuration" dialog should appear. Double-check the dialog name.
-
Add the name for your new project. You should make this the same as the new solution you just created.
-
🔥 Be sure that the "Create new project configuration" is not checked.
-
Choose another project with a similar board (most any will likely do) from the "Copy settings from:" menu.
-
Click "OK".
-
Verify that the
g2core/Configuration is showing your new configuration. -
Click "Close" on the Configuration Manager.
-
-
Right click on
g2corein the Solution Explorer and choose Properties…-
In the properties window, choose the "Build" tab on the left (yes, those are tabs), and then modify the Build command line and Clean command line to match your new config/board/settings.
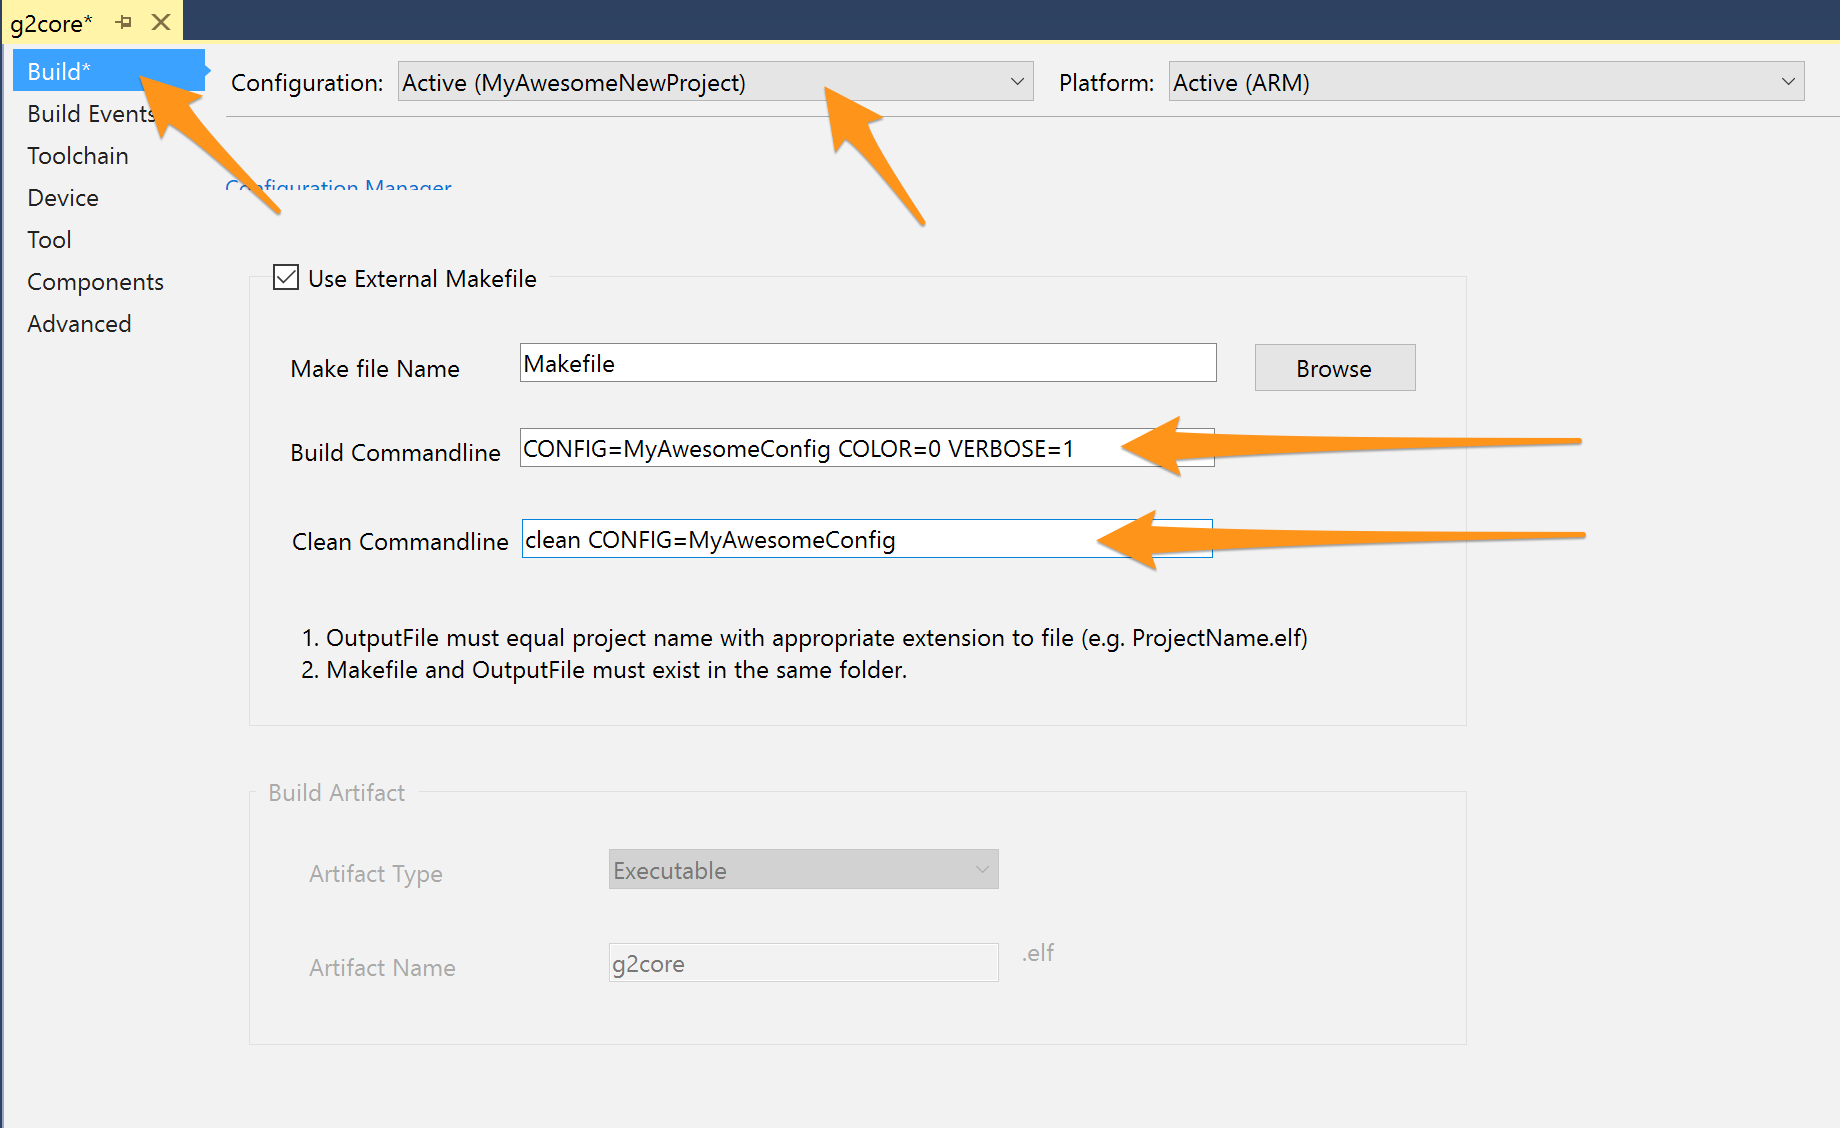 💡
💡The clean command must have the same CONFIG/BOARDas the make line in order to delete the correct files. See Cleaning Up for more info.
-
-
Under File, choose "Save All" to make sure your changes are committed to disk.
-
You may also want to commit the Atmel Studio project file changes in git as well.
-