#Develop With Passion® - .Net Developer BootCamp Setup
##The following setup should take between 30-90 minutes to complete depending on your skill level and familiarity with unix based environments.
##Network Security Considerations
- Make sure that you have access to port 443 for github ssh operations (have your network admins open this up for the week if necessary, to avoid any unecessary complications)
##Programs That Should Be Installed Prior to following these instructions
###Required
- VS2012/2013
###Optional
##The main programs you will be installing in this setup are:
- Git
- Ruby
- MingW
- IIS Express 7.5 (following the instructions in this doc)
- Firefox (even if you already have this installed, please uninstall and follow along with the setup outlined in this doc)
#Required Setup
The following is the setup that you WILL need to perform to configure all necessary prerequisites to be able to enjoy the week. If you have any questions, please do not hesitate to contact me
##Make sure that you have configured windows to show all hidden files and folders
##Create the utility folder
- Open up windows explorer and navigate to your C:\ drive
- Create a new folder at the root of C:\ called utils (all lowercase). All of the tools we will install for the week will go into here.
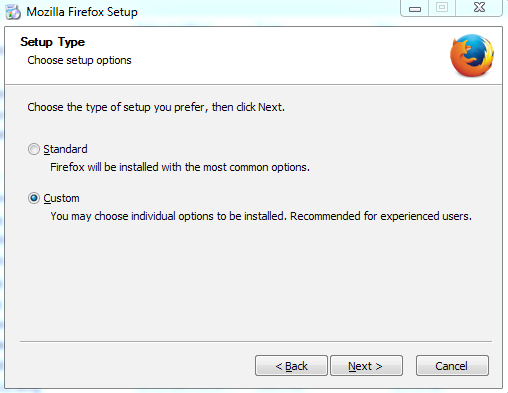
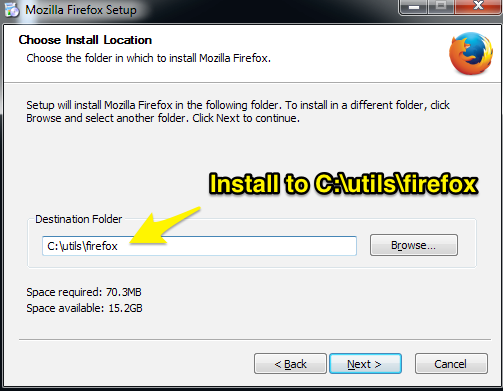
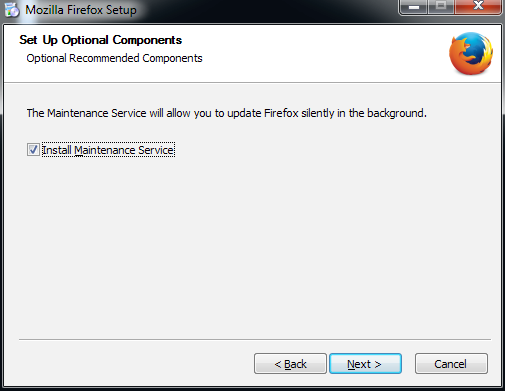
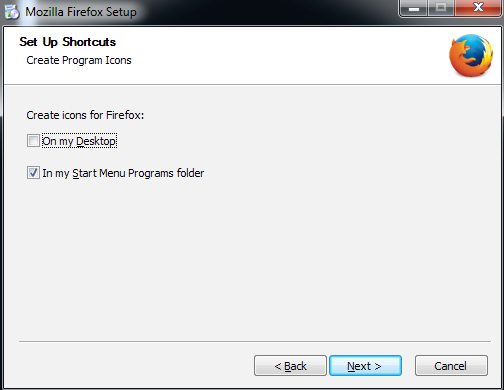
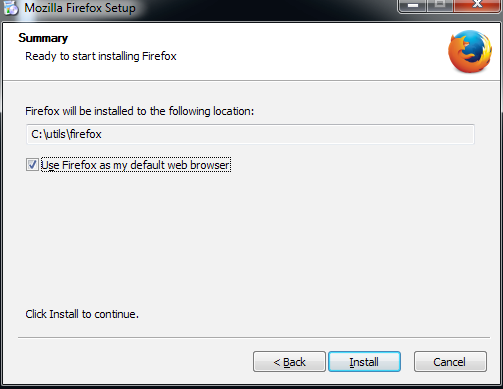
##Install Firefox
- Download the latest version of firefox from here
- Run the downloaded installer and configure according to the following screenshots:
##Get setup at Github
- Sign up for a free account at github.com. My recommendation is to use an all lowercase username.
##Install Ruby
-
Install Ruby, yes the specific version in this link, not the newest.
-
Configure according to the following screenshots:

- Once the install has completed, verify your installation by opening up a command prompt and typing in: ruby -v. You should see:
- ruby 2.0.0p481 [version and date information]
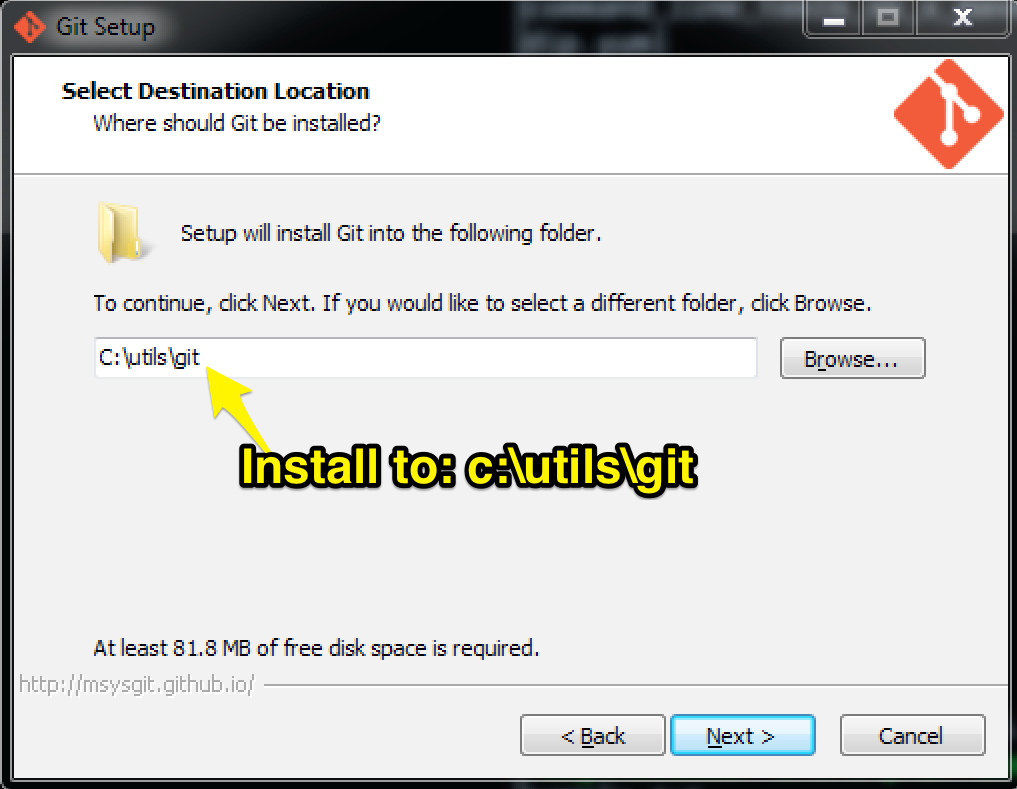
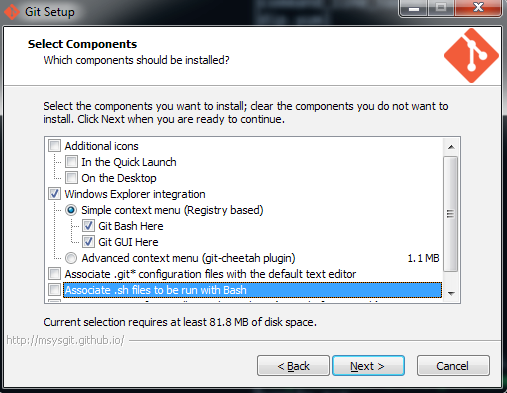
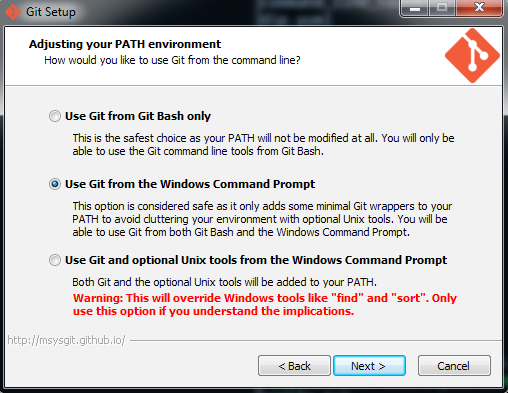
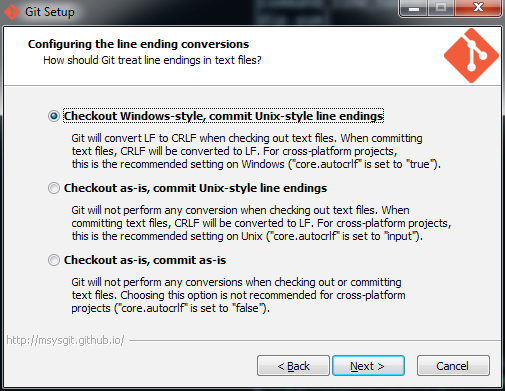
##Install Git for windows
- Install the latest version of Git for windows from here
- Configure according to the following screenshots:
##Setup your git ssh authentication key
-
Open up a git bash prompt
-
Enter the following command:
ssh-keygen -t rsa -C your_email_address
Accept the defaults for the remaining prompts (leave the passphrase blank).
-
Navigate to the folder where your ssh key was created (by default your profile ssh folder C:\Users\your_user_name\.ssh)
-
Open the file id_rsa.pub and copy the contents to the clipboard.
-
Login to your account at github.
-
Navigate to your ssh settings
-
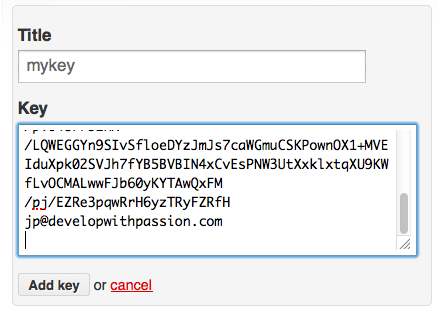
Click on the Add SSH Key Button
-
Give your key a title and paste the public key that is in your clipboard from step 4 into the Key text entry:
##Verify that your git ssh authentication works
-
Open up a git bash prompt
-
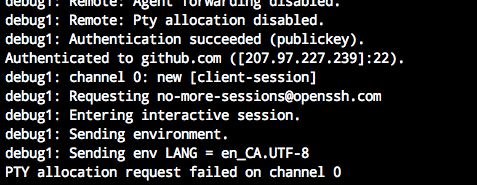
Enter the following command:
ssh -v git@ssh.github.com
-
If prompted to cache the server identity, type yes.
-
If you have setup your ssh settings correctly the bottom part of the command output should look similar to the following:
##Clone this setup repository
- Open up a git bash prompt and type the following commands:
cd /c
mkdir course
cd course
git clone git@ssh.github.com:201411edmonton/setup.git [enter]
##Install Mingw
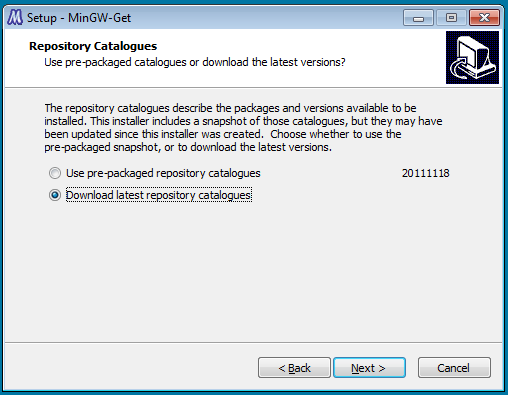
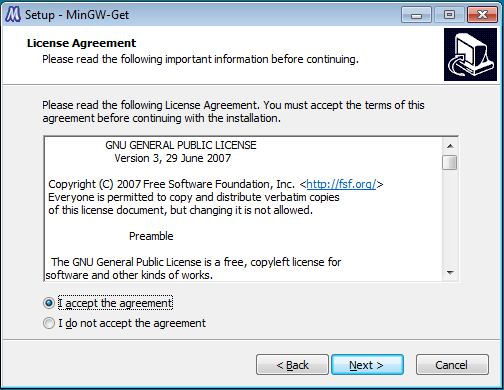
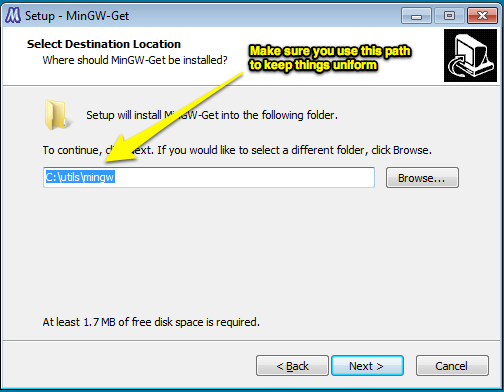
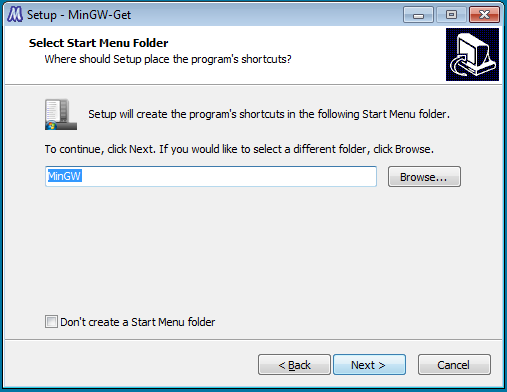
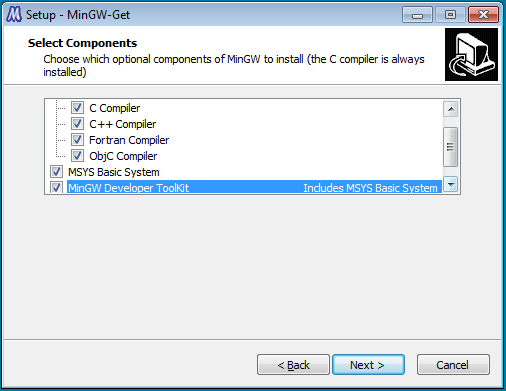
Open up a git bash prompt and type the following commands:
cd /c/course/setup
explorer .
Double click the mingw-get-inst-20111118.exe installer and install using the following screenshots:
At the completion of the last command you should have a copy of this repository on your local machine.
##Finalize setup
The following steps will ensure that you have your git and mingw environments setup correctly for the class. If you already have existing git/mingw configuration that you use on a regular basis, either make your changes manually to match the recommended settings, or create a backup of your existing configuration and restore it after the class.
Open up a git bash prompt and type in the following commands:
cd /c/course/setup
gem uninstall bundler   # Answer yes to any prompts if you are prompted
gem install bundler
bundle install
thor setup
Upon running the last command you will be prompted to make changes to a settings file that has been generated based on your username. It should be in the root of this repo folder with the name [ your-logged-in-name-without-spaces-or-path-symbols-all-lowercase ].settings.
Open up your settings file in your favourite text editor and make sure all of the settings are correct. If you have followed along correctly to this point (by using the specified install paths and key generation procedure etc), the only settings you should need to change are in the git section of the configuration file. Change the following:
- name
Take a look at the sample_settings file in this directory, if you are unsure how to make the changes. It uses fake values for the values you need to change.
If you deviated from the recommended setup you will have to tweak extra settings as needed. The config file is fairly self explanatory, so hopefully you can figure it out if you made your own custom changes. Make your change(s) and save the file.
Continue to rerun the following command:
thor setupThis task will do the following:
- Setup a sane ~/.gitconfig that contains the email you provided and your name, along with some other aliases and a setting that is essential for our work during the week.
- Copies some basic bash dotfiles into your home folder, this correctly sets up the ssh agent to use the key you generated/provided earlier.
- Configures the mingw path
##Verify that your git ssh authentication works using the new config that has been created
-
Open up a git bash prompt
-
Enter the following command:
ssh -v github
-
If prompted to cache the server identity, type yes.
-
Once again, the command output should look similar to the following:
##Verify Installs
Open up a git bash prompt and type the following:
ruby -vYou should see a ruby version, if you don't see anything you may need to repeat the steps above as you may have missed a step.
##Fork the project repositories for the week
- Login to your account at github
- Navigate to the following url: http://github.com/201411edmonton
- Click on the prep repository:
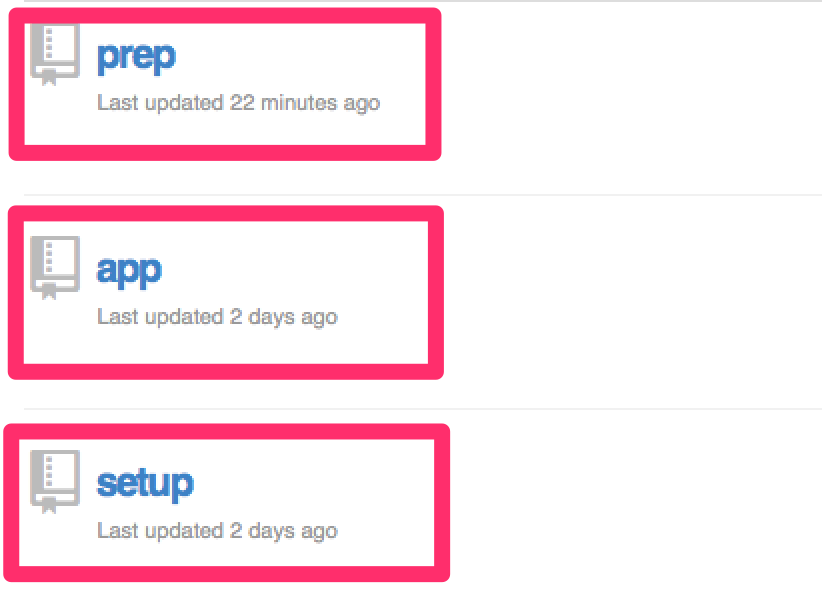
- Click on the fork button to create your own copy of this repository

- Repeat steps 2-5 for the app repository.
-
Open up a git bash prompt and type the following commands:
cd /c/course
git clone github:[your github user name]/prep.git
git clone github:[your github user name]/app.git
Assuming your github username is jp the commands would look as follows:
git clone github:jp/prep.git
git clone github:jp/app.git
-
Once you have completed cloning the repositories your course folder should look as follows:

##Install IIS Express 7.5
- If you already have a version of IIS Express installed (even if it is >= 7.5) please follow these steps.
Configure IIS Express 7.5 following these steps:
- Download the following zip file
- Copy the downloaded zip file to the clipboard
- Open up a windows explorer folder and navigate to your C:\utils folder.
- Paste the zip file into your C:\utils folder.
- Unzip the zip file into your C:\utils folder.
- You should now have a folder named iis_express in your c:\utils folder.
##Install TestDriven .Net
- Download and install the latest student version of TestDriven.Net
##Prepare the code bases
- Watch the following to makes sure you are able to hit the ground running at the beginning of the first day!