BlenderKit add on documentation
BlenderKit is an online database of materials, brushes and 3D models which you can search, download, upload and rate directly from the add-on.
Install BlenderKit to the newest version of Blender.
- Open Blender. Go to preferences and, then open Add-ons.
- Click on Install and find blenderkit-(number of version).zip in your Downloads folder.
- BlenderKit will appear in the add-ons list. Click on checkbox to enable BlenderKit.
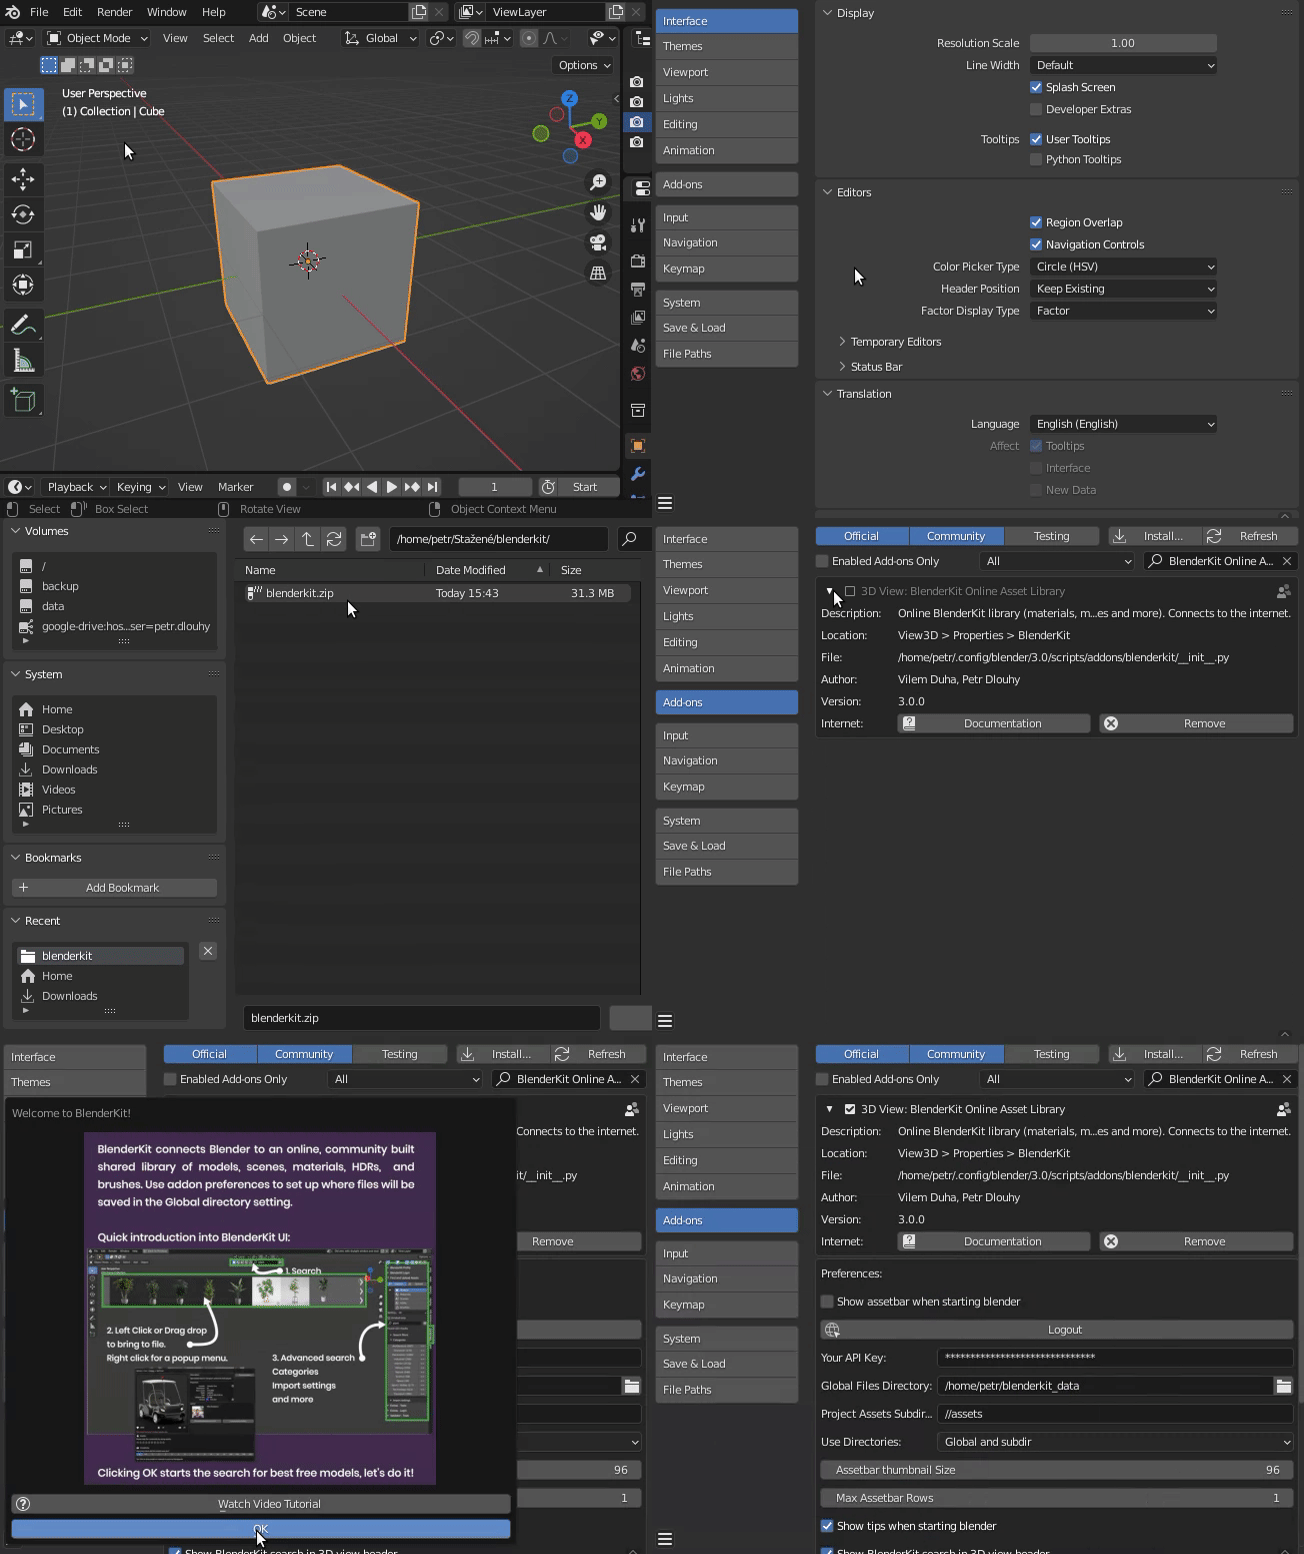
Click on the sign-up button to create a new account and activate it by pressing Log in directly in BlenderKit settings. It will direct you to log in through our website.
Type a search term into the search field.
- Type a search term into the search field.
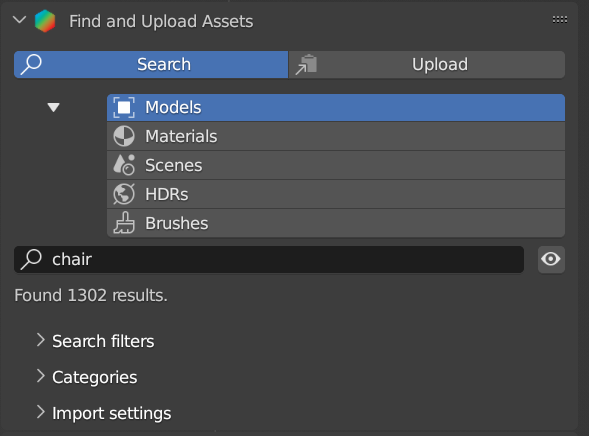
- The results are shown in the Assetbar.

- The results are shown in the Assetbar.
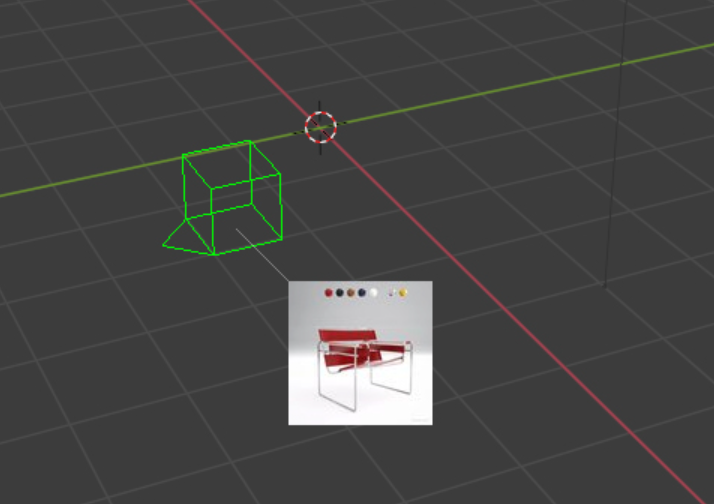
Reference Panel: Assetbar
The Assetbar shows search results and allows you to interact with them. It pops up when the search results are retrieved from the server. The Assetbar can be shown or hidden by clicking the toggle with the eye icon next to the search field.
-
Drag and dropping an object or material directly into the scene.
-
Click on an item to link/append it to the scene.
-
Open the context menu of an item for further interaction (right click):
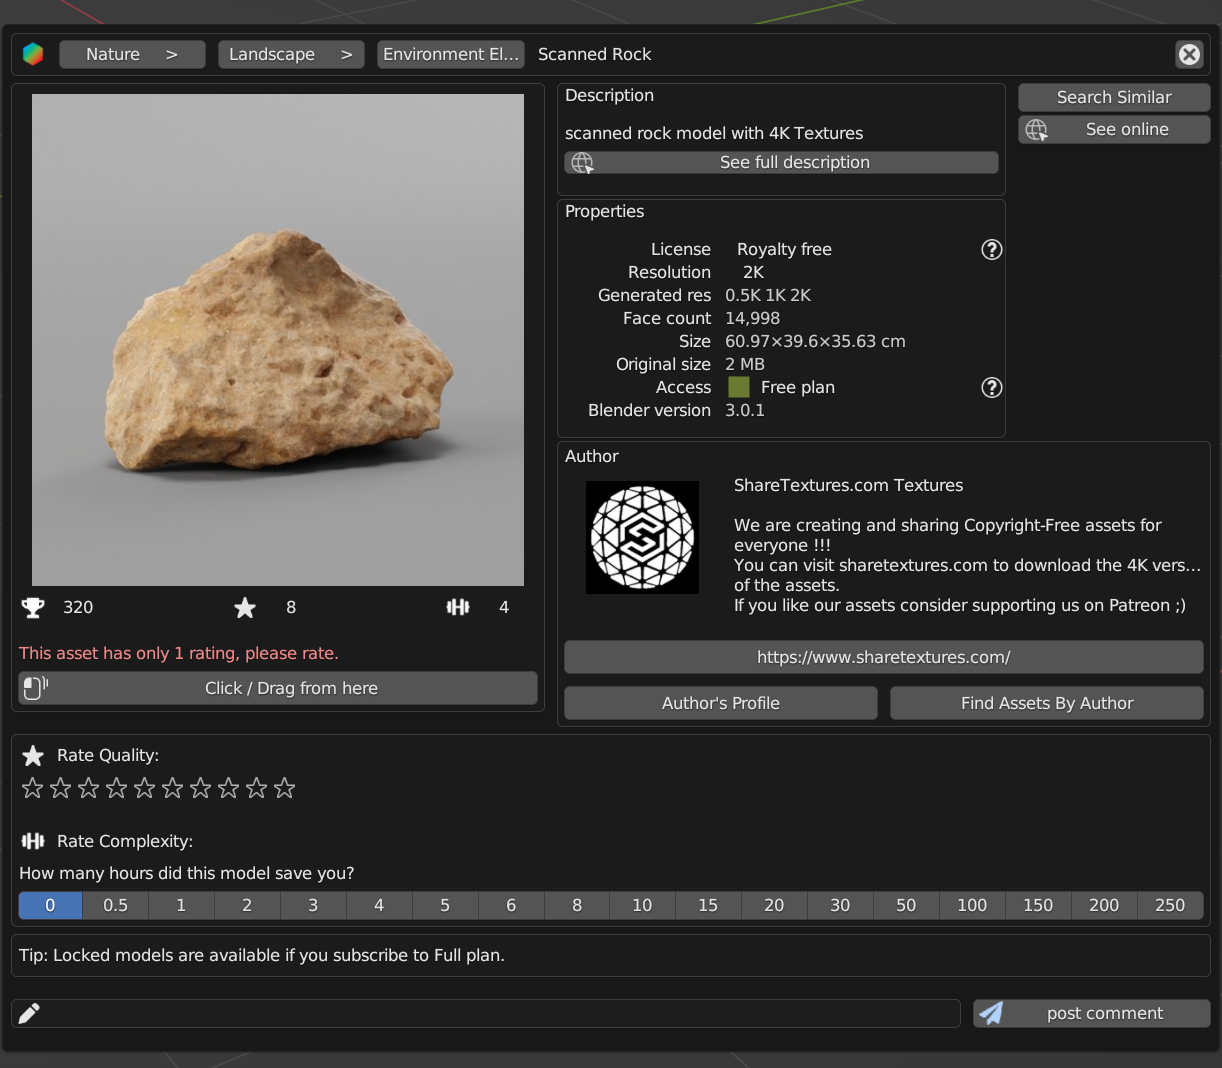
- Search similar: Shows similar assets.
- See online: Opens the BlenderKit web page with this asset.
- Author profile: Opens the link that the author has specified in a web browser.
- Finds assets by Author: Displays all assets uploaded by the author of the selected 3D model.
- Click/drag from here: Transmits the asset directly to the scene.
- See full description: Shows the full description of the asset.
- Rate quality: Allows you to rate the quality of the asset.
- Rate complexity: Allows you to rate complexity of the asset.
- Work hours: Allows you to evaluate how many hours this asset has saved you time.
- Post comment: Allows you to comment on this asset.
- Replace Active Models: Replace all selected assets with the last selected asset (active). If you use this option from the context menu, the target asset is downloaded and replaces selected assets.
- Use the Wheel to scroll the results.
- Click arrows on the side of the Assetbar for a jump to the next or previous page.
- Left-click and move the asset panel to the desired location.
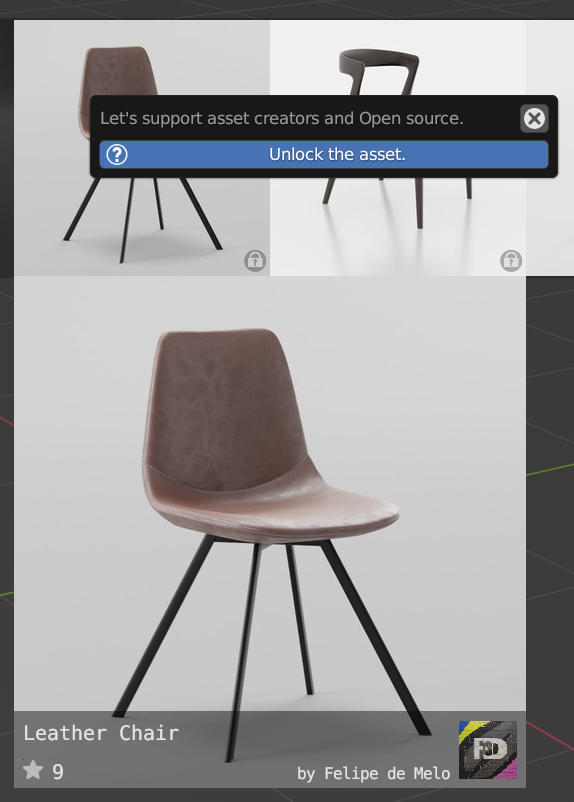
- Unlock the asset (when the user has a free plan).

- Find models
- Find Materials
- Find Scenes
- Find HDRs
- Find Brushes
Search for these keywords.
Click to hide asset bar.
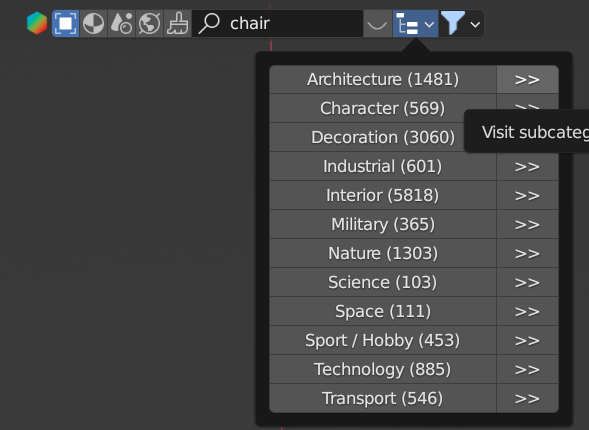
Search assets in categories.
Search only for your 3D models.
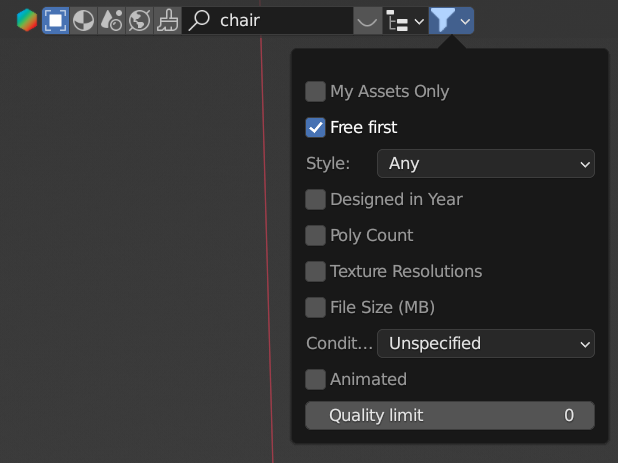
Show only free models. This option is available only for models, since all Materials and all Brushes are free.
Search filter limiting the results (Any, realistic, painterly, lowpoly, anime, 2D vector, 3D graphics, polygonal and other). Designed In (min - max) When the object was approximately designed in terms of year. Can be used for parallel worlds or future sci-fi dates (search for sci-fi assets by entering 2100 as minimum year).
Use the poly count of 3D object for filtering.
Limit search to the texture resolutions in a range.
Limit search file size. This uses the basic file size of the original file.
Condition of the object (Unspecified, New, Used, Old, Desolate). Animated Search only animated assets.
Only shows assets with a higher quality.
Reference Panel: Sidebar ‣ BlenderKit ‣ BlenderKit Profile
This panel shows your login information, plan and information about your public and private remaining storage.
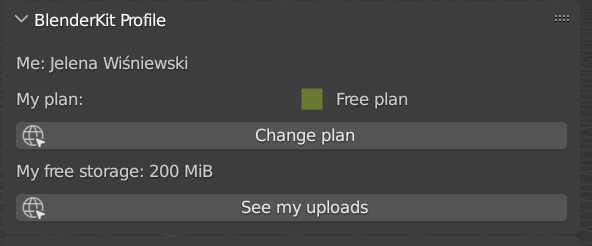
Open a website with plans in the web browser (appears only when a user has a free plan).
Open the BlenderKit website and show a list of your assets.
Reference Panel: Sidebar ‣ BlenderKit ‣ BlenderKit Login
Log in online on BlenderKit webpage.
Log out from BlenderKit.
The main panel enables you to Search or Upload all supported asset types.
Reference Panel: Sidebar ‣ BlenderKit ‣ Find and Upload
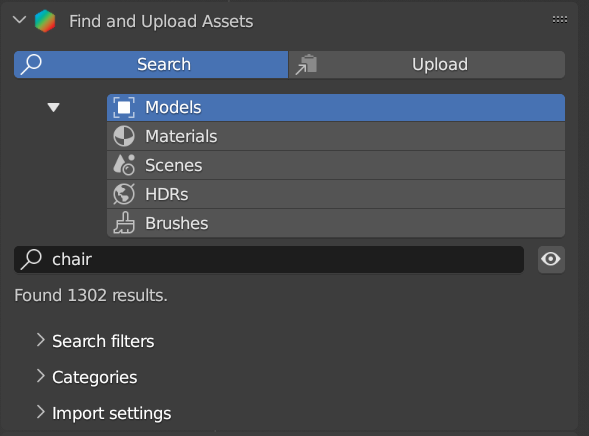
Switch the main panel between the Search and Upload tabs.
Reference Panel: Sidebar ‣ BlenderKit ‣ Find and Upload ‣ Search
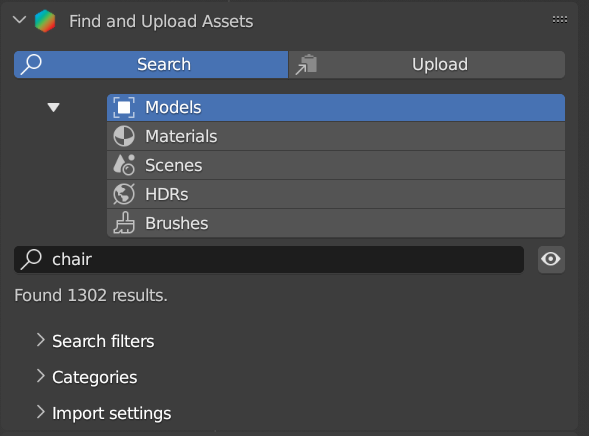
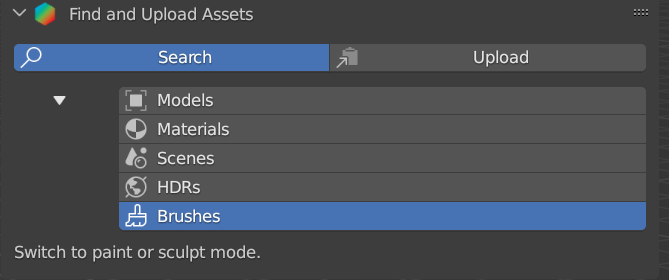
Switch between asset types available in BlenderKit.
These controls are common for all asset types:
Search assets by name.
Show/hide the Assetbar viewport overlay.
Reference Panel: Sidebar ‣ BlenderKit ‣ Find and Upload ‣ Search ‣ Models
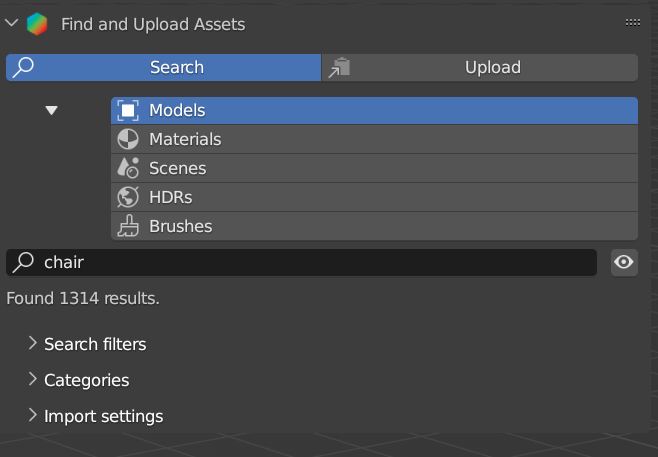
Search only for your 3D models.
Show only free models. This option is available only for models, since all Materials and all Brushes are free.
Search filter limiting the results (Any, realistic, painterly, lowpoly, anime, 2D vector, 3D graphics, polygonal and other).
When the object was approximately designed in terms of year. Can be used for parallel worlds or future sci-fi dates (search for sci-fi assets by entering 2100 as minimum year).
Use the poly count of 3D object for filtering.
Limit search to the texture resolutions in a range.
Limit search file size. This uses the basic file size of the original file.
Condition of the object (Unspecified, New, Used, Old, Desolate).
Search only animated assets.
Only shows assets with a higher quality.
Reference Panel: Sidebar ‣ BlenderKit ‣ Find and Upload ‣ Search ‣ Models ‣ Categories
Category panel enables direct browsing of BlenderKit categories.
Visit subcategory.
Return to parent category.
Reference Panel: Sidebar ‣ BlenderKit ‣ Find and Upload ‣ Search ‣ Models ‣ Import settings
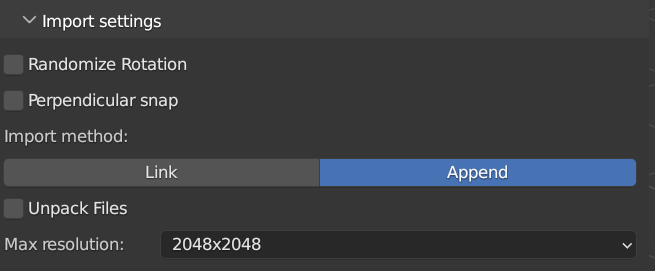
Randomize the rotation of the model around the Z axis during placement in the Blender scene.
Limit snapping if the angle is close to perpendicular angles to become exactly perpendicular. Useful for placing lamps on curved ceilings, or placing trees on slopes, or similar cases.
Link 3D model into Blender scene. Linked models are saved in original files. To edit them, you need to open the model in the subdirectory of your project: – assets/models. Linking helps to keep file size low.
Append 3D model into Blender scene. Appended objects are included and editable in your scene.
Unpack assets after download.
Resolution of the asset (512x512 - ORIGINAL FILE).
Reference Panel: Sidebar ‣ BlenderKit ‣ Find and Upload ‣ Search ‣ Materials
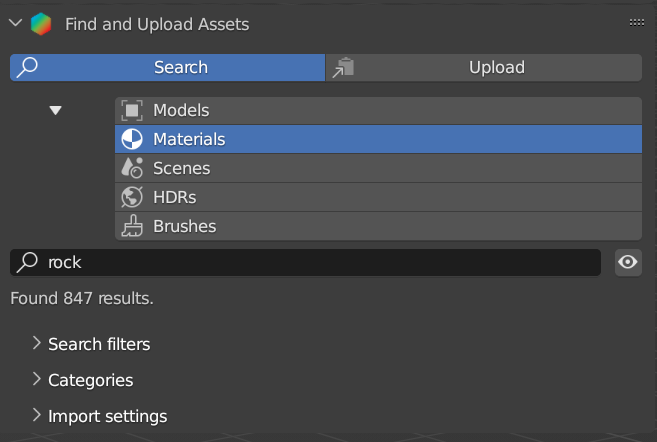
Search only for your 3D materials.
Procedural/Texture Based/Both Limit search to only procedural or texture based materials.
Limit search with file size.
Only show assets with higher quality.
Category panel enables direct browsing of BlenderKit categories.
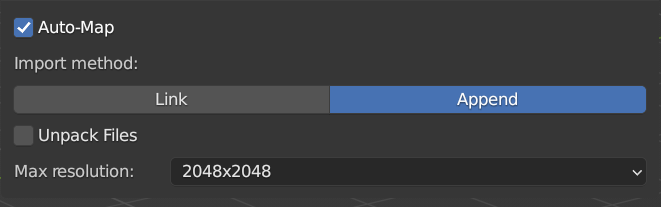
Reset object texture space and also add automatically a cube mapped uv to the object. This allows most materials to instantly apply to any mesh.
Linked materials are saved in your original files, aren't editable directly, but also don't increase your files.
Appended materials are editable in your scene.
Unpack assets after download.
Resolution of the asset (512x512 - ORIGINAL FILE).
Reference Panel: Sidebar ‣ BlenderKit ‣ Find and Upload ‣ Search ‣ Scenes
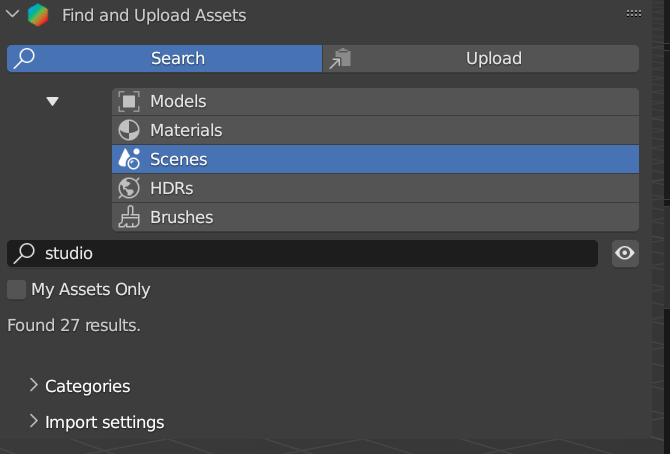
Search only for your 3D materials.
Category panel enables direct browsing of BlenderKit categories.

Switch to scene after download.
Choose if the scene will be linked or appended.
Choose if the scene will be linked or appended.
Reference Panel: Sidebar ‣ BlenderKit ‣ Find and Upload ‣ Search ‣ HDRs
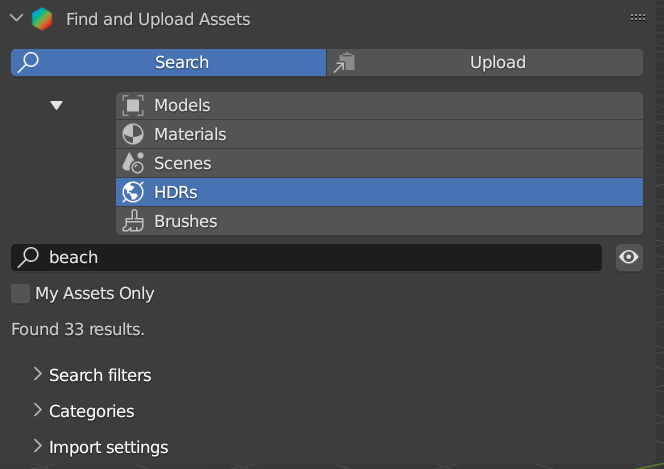
Search only for your 3D materials.
Search only for HDRs, this means images that have a range higher than 0-1 in their pixels.
Category panel enables direct browsing of BlenderKit categories.

Unpack assets after download.
Resolution of the asset (512x512 - ORIGINAL FILE).
Reference Panel: Sidebar ‣ BlenderKit ‣ Find and Upload ‣ Search ‣ Brushes
Switch between asset types which are available to upload in BlenderKit.
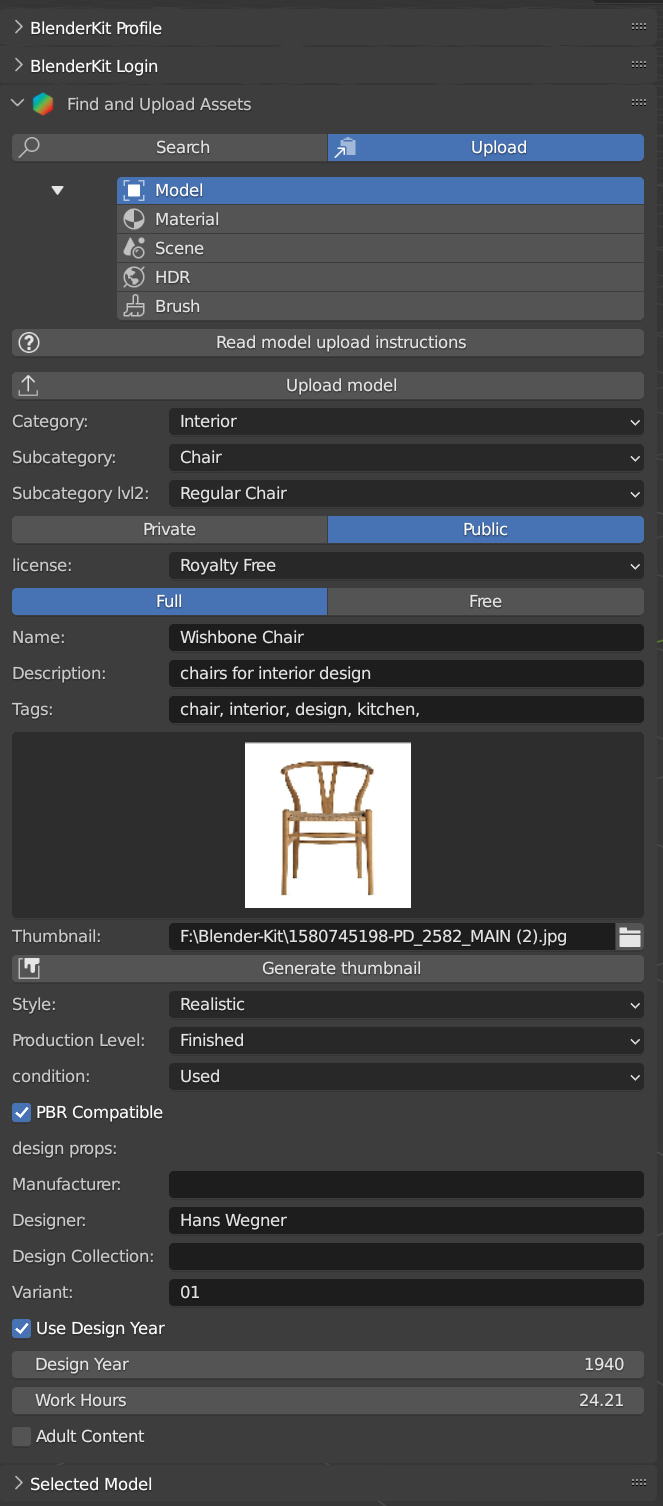
Open the Upload manual on the BlenderKit website. Read the manuals for models, materials, and brushes on the website.
Upload or re-upload the 3D model+thumbnail+metadata. In the operator you can choose if you want to update the file. If both file and thumbnail are deactivated, only the metadata get updated.
The main category to place the model into.
The subcategory to place the model into.
Set the assets privacy. Assets marked as Public will be automatically submitted into the Validation process. Private assets will be hidden to the public and are limited in quantity by a quota.
BlenderKit offers two licenses for the assets. Both licenses allow for commercial and non-commercial use.
Royalty free: Royalty-free commercial license
Creative Commons Zero: Creative Commons Zero
Free Assets can be in Free or in Full plan. Also free assets generate credits. You consent you want to release this asset as free for everyone.
Full Assets can be in Free or in Full plan. Also free assets generate credits. Your asset will be only available for subscribers.
Name of your asset.
Description of the asset.
List of tags, separated by commas (optional). Include at least three tags
The path to the preview image (square, at least 512×512 px, JPG image).
Automatically generate a thumbnail for the 3D model assets.
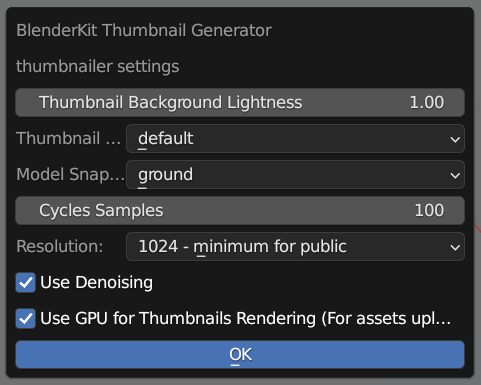
Set to make your asset stand out.
Choose the angle of the thumbnail (default, front, side, top)
Typical placing of the interior. Leave on ground for most objects that respect gravity.(ground, wall, ceiling, floating)
Cycles samples settings.
Thumbnail resolution.
Use denoising.
By default this is off so you can continue your work without any lag.
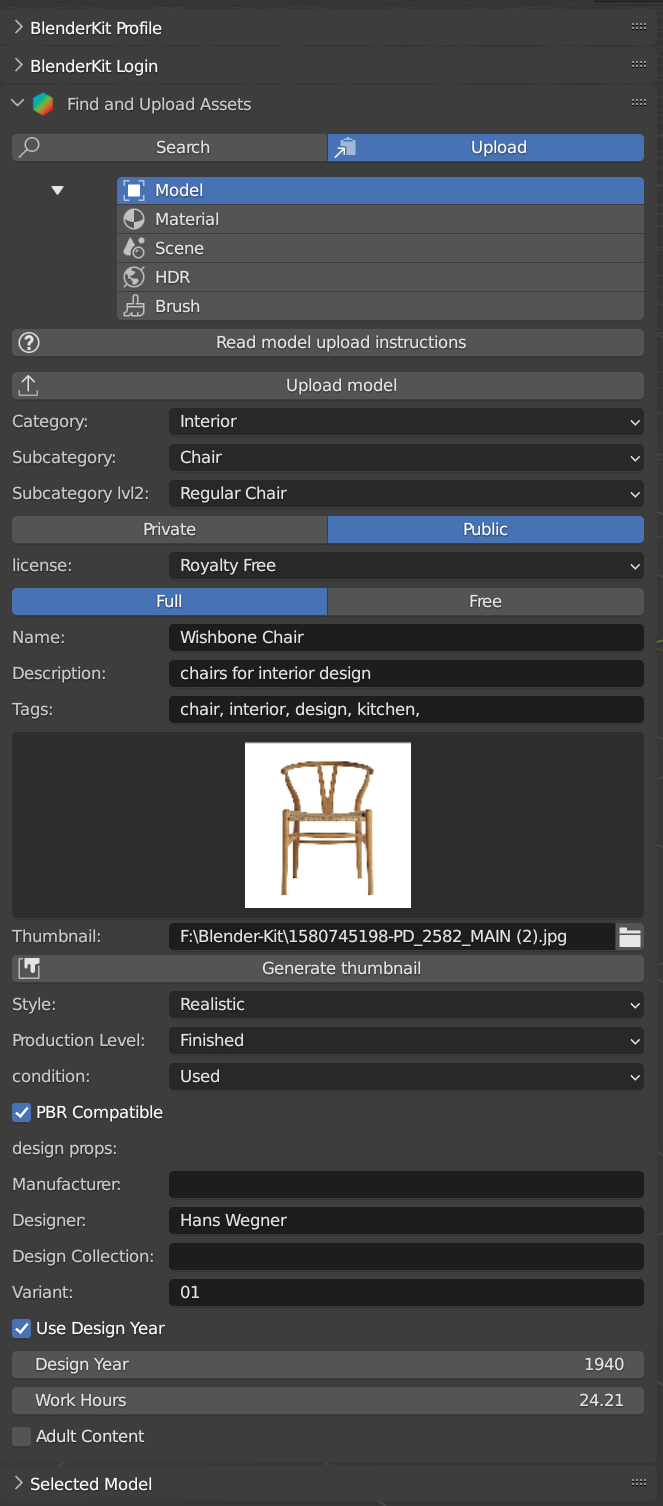
Define the visual style of the asset.
Realistic: Photo-realistic model
Painterly: Hand-painted with visible strokes. Mostly For games.
Lowpoly: Do not mix up with poly count!
Anime: Anime style
2D Vector: 2D vector graphics
3D graphics: 3D graphics
Other: Other style
Any: Any style
Production state of the asset. Also templates should be actually finished, just the nature of it can be a template, like a thumbnail scene, finished mesh topology as start for modeling or similar.
For the public database, the asset should always be ready for rendering. Assets without materials aren’t accepted into the public database.
Templates are models that have general usability and have a clear description of how the asset is supposed to work. An example can be a beverage can with a prepared texture slot.
Condition of the object. (Unspecified, New, Used, Old, Desolate.)
Tick if the asset meets the PBR standard. Read what PBR is.
Manufacturer The company making the design piece or product.
Designer Author of the original design piece depicted. Usually not you – fill in your name and personal statement in your profile on BlenderKit webpage.
Design Collection Fill if this piece is part of a real-world design collection.
Variant Color or material variant of the product.
Design Year Time when the item was designed. It can also be used for living creatures and other objects, for example, for a dinosaur you can set it to something like 240 million years.
Work Hours How long it has taken you to finish the asset? This value isn’t used in the BlenderKit scoring mechanism, but serves as comparison for administrators on how the rating system performs.
Adult Content Mark adult content.
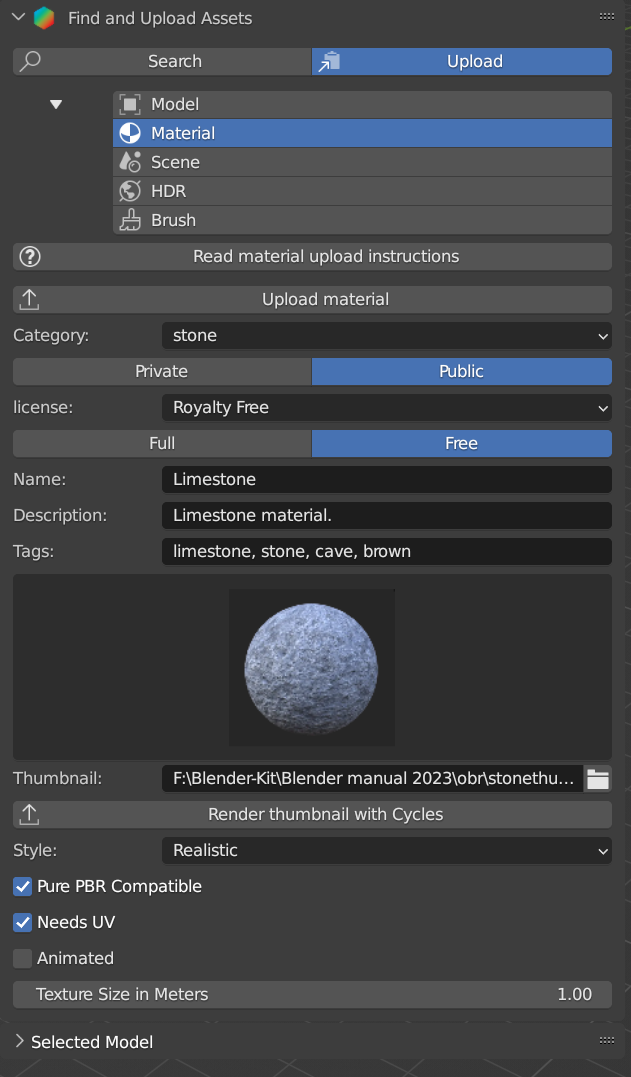
Style of material. (Realistic, Non photo-realistic, other)
The asset meets the PBR standard. This means only image textures are used with no procedural textures, no color correction, and only PBR shaders are used. Read what PBR is.
Requires a UV set. Read what UV is.
The material is animated.
If the material uses textures, this value sets the length of one side of the texture. This value is very important so that the materials apply with the correct scale.
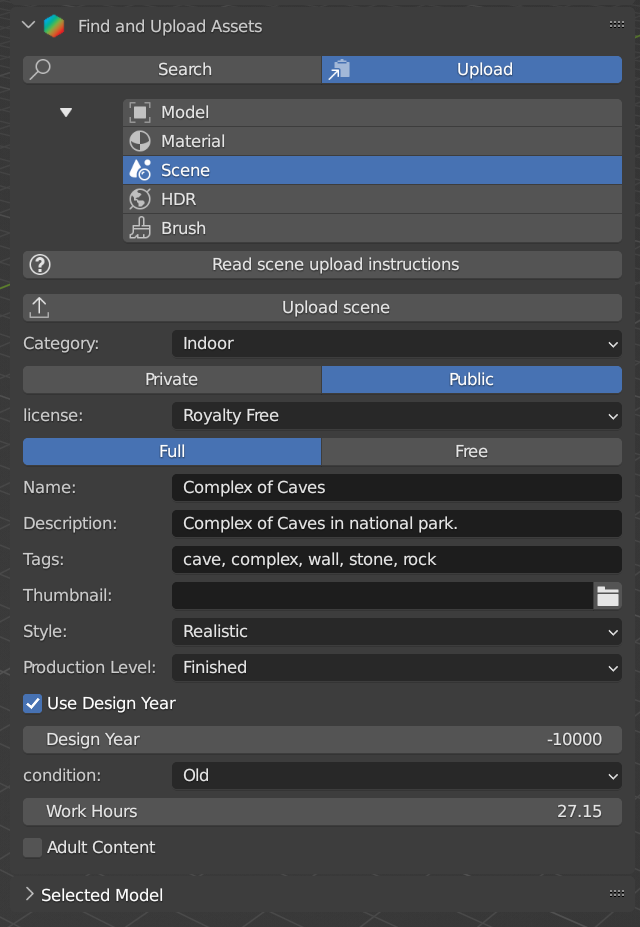
Open the website with uploading scene tutorial in the browser.
Upload or re-upload asset+thumbnail+metadata.
Style of material. (Realistic, Non photo-realistic, other)
Main category to put into.
Production state of the asset. Also templates should be actually finished, just the nature of it can be a template, like a thumbnail scene, finished mesh topology as start for modeling or similar.
Time when the item was designed. It can also be used for living creatures and other objects, for example, for a dinosaur you can set it to something like 240 million years.
Condition of the object (Unspecified, New, Used, Old, Desolate).
How long it has taken you to finish the asset? This value isn’t used in the BlenderKit scoring mechanism, but serves as comparison for administrators on how the rating system performs.
Mark adult content.
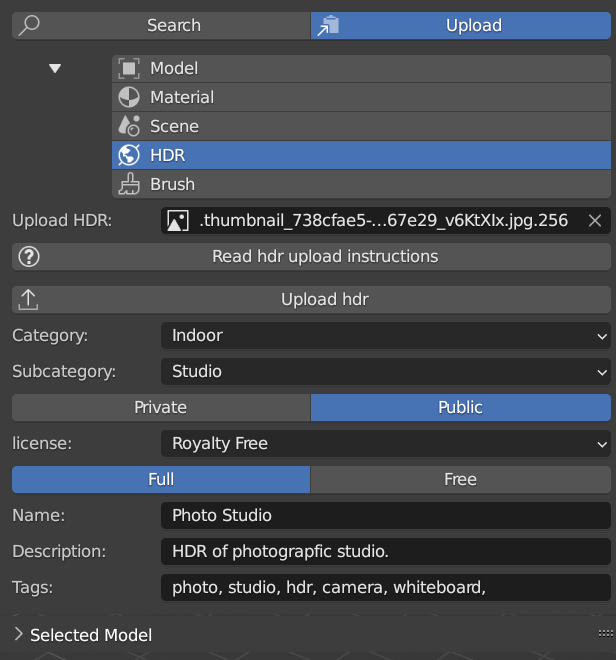
Open the website with uploading a hdr instructions in the browser.
Upload or re-upload asset+thumbnail+metadata.
Main category to put into.
Subcategory to put into.
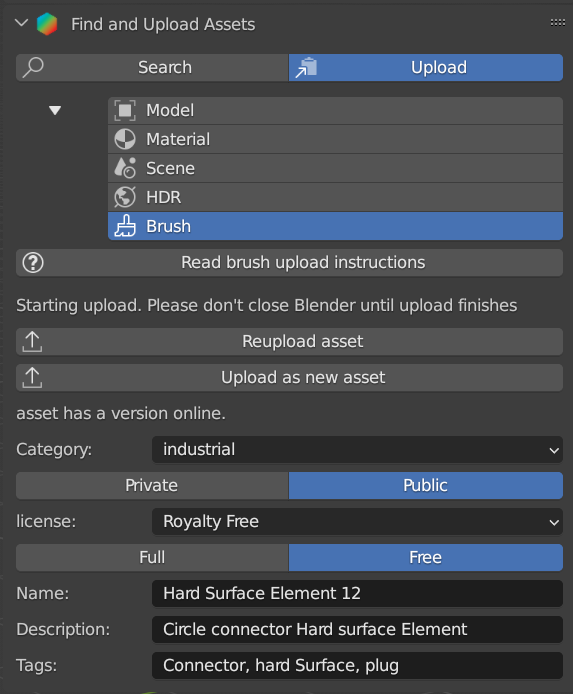
Open the website with uploading a brush instructions in the browser.
Upload or re-upload asset+thumbnail+metadata.
Main category to put into.
Public assets go into the validation process. Validated assets are visible to all the users. Private assets are limited by your plan.
Choose the license of the asset (Royalty Free, Creative Common Zero).
Assets can be in free or full plan. Also free assets generate credits.
Name of your asset.
Description of your asset.
List of tags, separated by commas.
Reference Panel: Sidebar ‣ BlenderKit ‣ Selected model
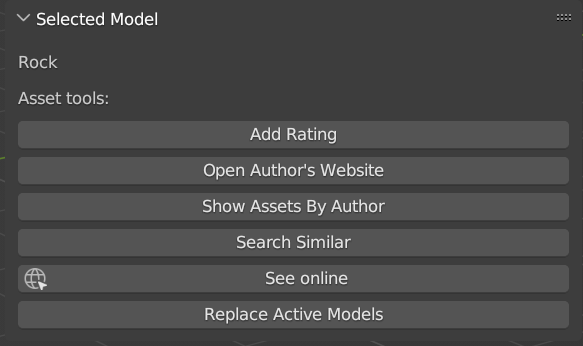
This panel is shown if you select a 3D model downloaded from BlenderKit. The name of the model appears below.
Rating of the asset, also directly in the assetbar - without need to download assets.
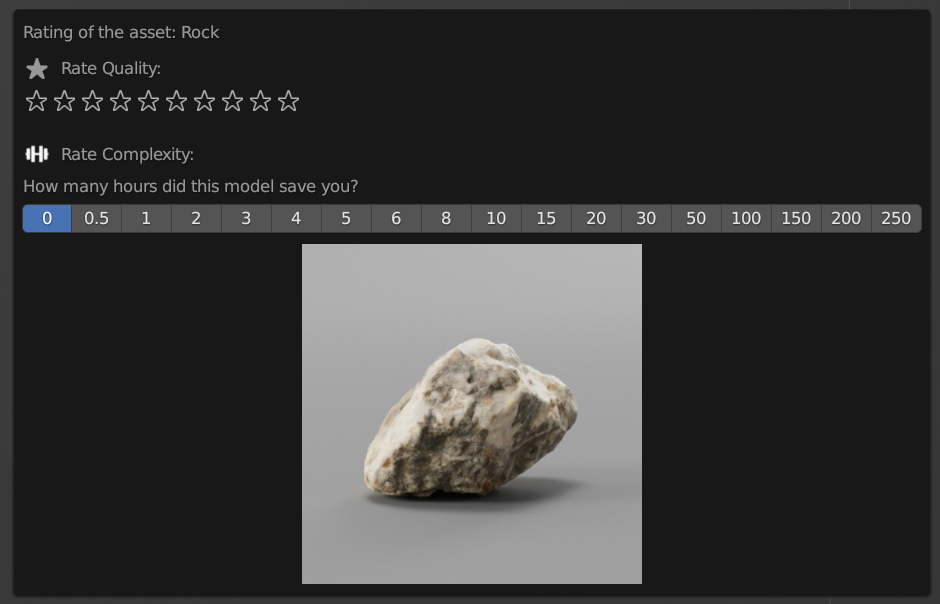
Estimate how many hour you saved thanks to this asset. Rating helps BlenderKit distribute rewards to authors, and thus it is very important for us that you rate assets and do it in a fair manner.
Open the Author Website in a web browser.
Run search and display the assetbar at the same time.
Search for similar assets in the library.
Opens the website with the selected model in a web browser.
Replace all selected with this one.

Enable/ Disable Add-on.
Open the website with a documentation in a web browser.
Open a website in your web browser where you can report the bug.
Delete the add-on from the file system.
Shows Assetbar after the Blender startup.
Login or register online.
Login or register online.
Log out from BlenderKit.
The BlenderKit API Key. Get it from your page on the website.

Global storage for your asset files, will use subdirectories for the contents.
Where data will be stored for individual projects.
Which directories will be used for storing download data ( global and subdir, global, local).
Global and Subdir Store files both in global lib and subdirectory of current project. Warning - each file can be many times on your harddrive, but helps you keep your project in one piece.
Global Store downloaded files only in a global directory. This can bring problems when moving your projects, since assets won't be in the subdirectory of current project.
Local Store downloaded files only in a local directory. This can use more bandwidth when you reuse assets in different projects.
Unpack assets after download.
- With unpack on, you can access your textures easier, and resolution swapping of assets is possible.
- With unpack off, you can avoid some issues that are caused by other addons like e.g. Megascans. Switch unpack off if you encounter problems like stuck downloads.
Size of the asset thumbnails in the Assetbar.
Max rows of assetbar in the 3D view.
By default this is off so you can continue your work without any lag.
Port to be used for startup and communication with download deamon. Changing the port will cancel all running downloads and searches.
Which address family add-on should use for connection.
Use both IPv4 and IPv6 Add-on will use both IPv4 and IPv6 families of addresses for connections.
Use only IPv4 Add-on will use only IPv4 family of addresses for connections. This might fix connection issues on some systems connected to only IPv4 networks.
Which directories will be used for storing downloaded data.
SYSTEM: Use system proxy settings Add-on will use system-wide proxy settings, custom proxy settings in add-on preferences will be ignored.
NONE: Ignore system and custom proxy settings Add-on will ignore both system-wide proxy settings and custom proxy settings defined in add-on preferences. All add-on HTTP requests will not go through any proxy server.
CUSTOM: Use custom system proxy settings (experimental) Add-on will use custom proxy settings, system proxy settings will be ignored. Please set the address in the add-on preferences below in the field “Custom proxy address”. This is an experimental feature, might not work on some systems.
Auto-check for updates If enabled, auto-check for using an interval.
Enable pre-releases If enabled, updater will also include pre-release versions.
Months - Number of months between checking for updates. Days - Number of days between checking for updates.
Check now for and update to the blenderkit add-on.
Install a targeted version of the blenderkit add-on.
Restore add-on backup.