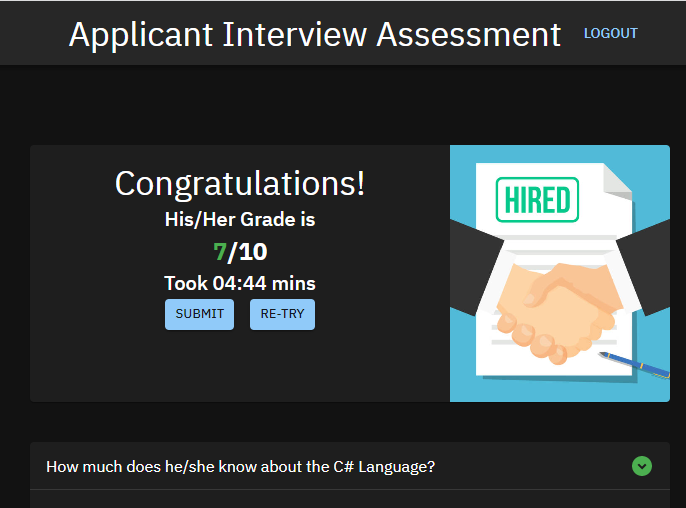
Applicant Interview Assessment App is a Website Application for HR Personnel who interviewed thier Applicants.
It will help HR Personnel in assessing their Applicants thru the sets of questions given.
Although it is subjective approach but it may have a bigger help in deciding who will be hired in your Precious Company.
Now if you are interested. This is how I did it!
Open Folder you want to save the Application.
From folder directory type "cmd" and hit enter.
Execute command >npx create-react-app applicant-app.
Find the folder and open it with visual code.
Check if the creation is okey by hitting control j to show terminal and type nmp start. It will show the default React Web Application.
From mui.com find the link and install this: npm install @mui/material @emotion/react @emotion/styled.
insert this link to index.html:
Remove the some codes in the App.JS from line 6 to 21 and the logo reference as well.
Create a New Folder named 'components'.
Create a file Login.js.
Inside of Login.js type rfc (should install ES7 + React/Redux/React-Native snippets).
It create a automatic Component.
Create a folder name hooks
Create a file name useForm.js
Encode some codes to Create the Text field for Email and name with error function. See attached file.
Create ASP.Net Project
Open Visual Studio 2022
Choose ASP.NET Core Web API
Name the Project.
Choose Net 6.0 (Long-term support)
Uncheck the Configure for HTTPS.
Click Create.
Install Microsoft.EntityFrameworkCore v6 thru NuGet Packages.
Install also the Microsoft.EntityFrameworkCore.SqlServer and .Tools.
Create a Folder named Models.
Create a class named Question.cs
Encode some codes. See attach File for this code.
Create another class named Participant.cs
Encode some codes. See attach File for this code.
Create a class named ApplicantDBContext.cs
Encode some codes. See attach File for this code.
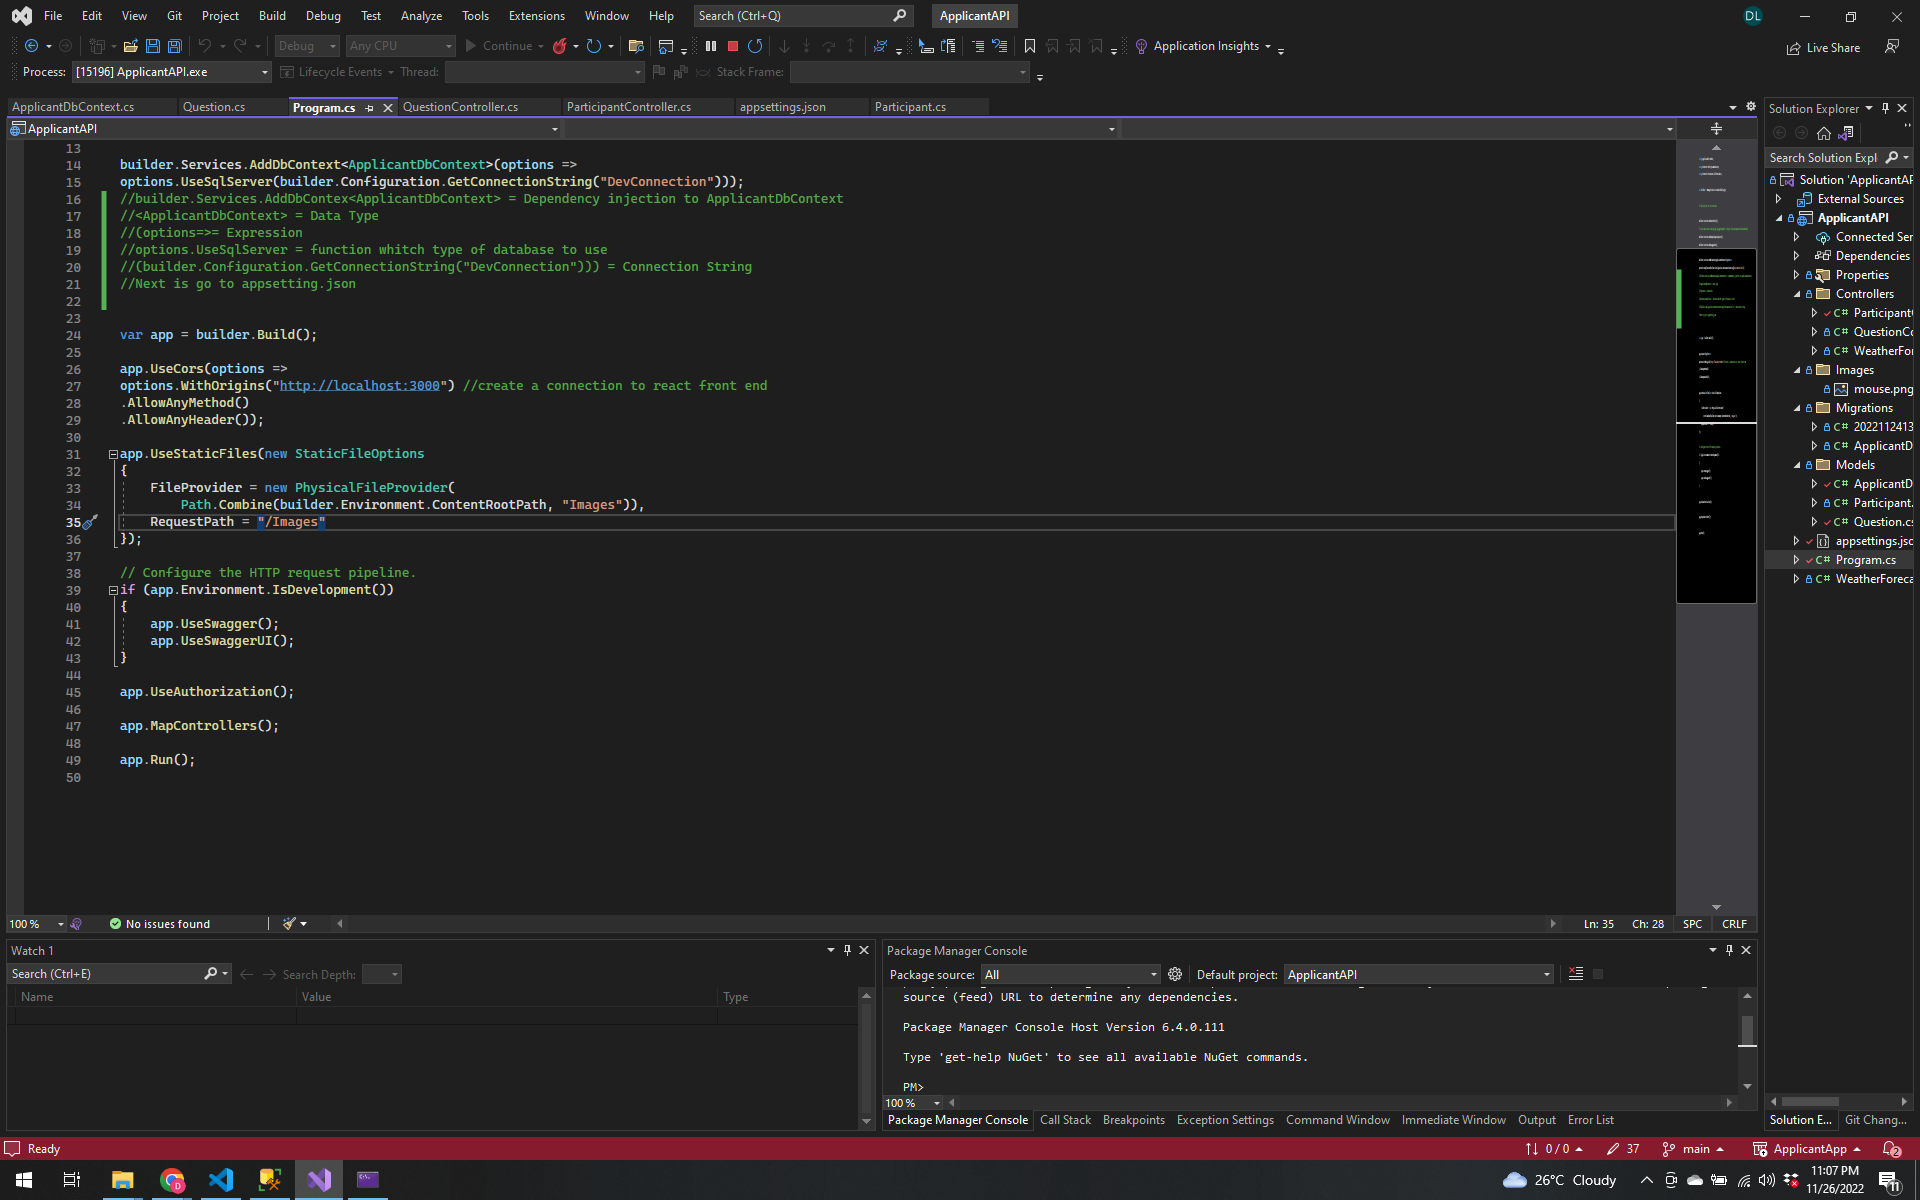
Encoce some codes at Program.cs. See attach File for this code.
Encoce some codes at appsetting.json. See attach File for this code.
Click Window, then Run, type services.msc
Check SQL Server (SQLEXPRESS) is running.
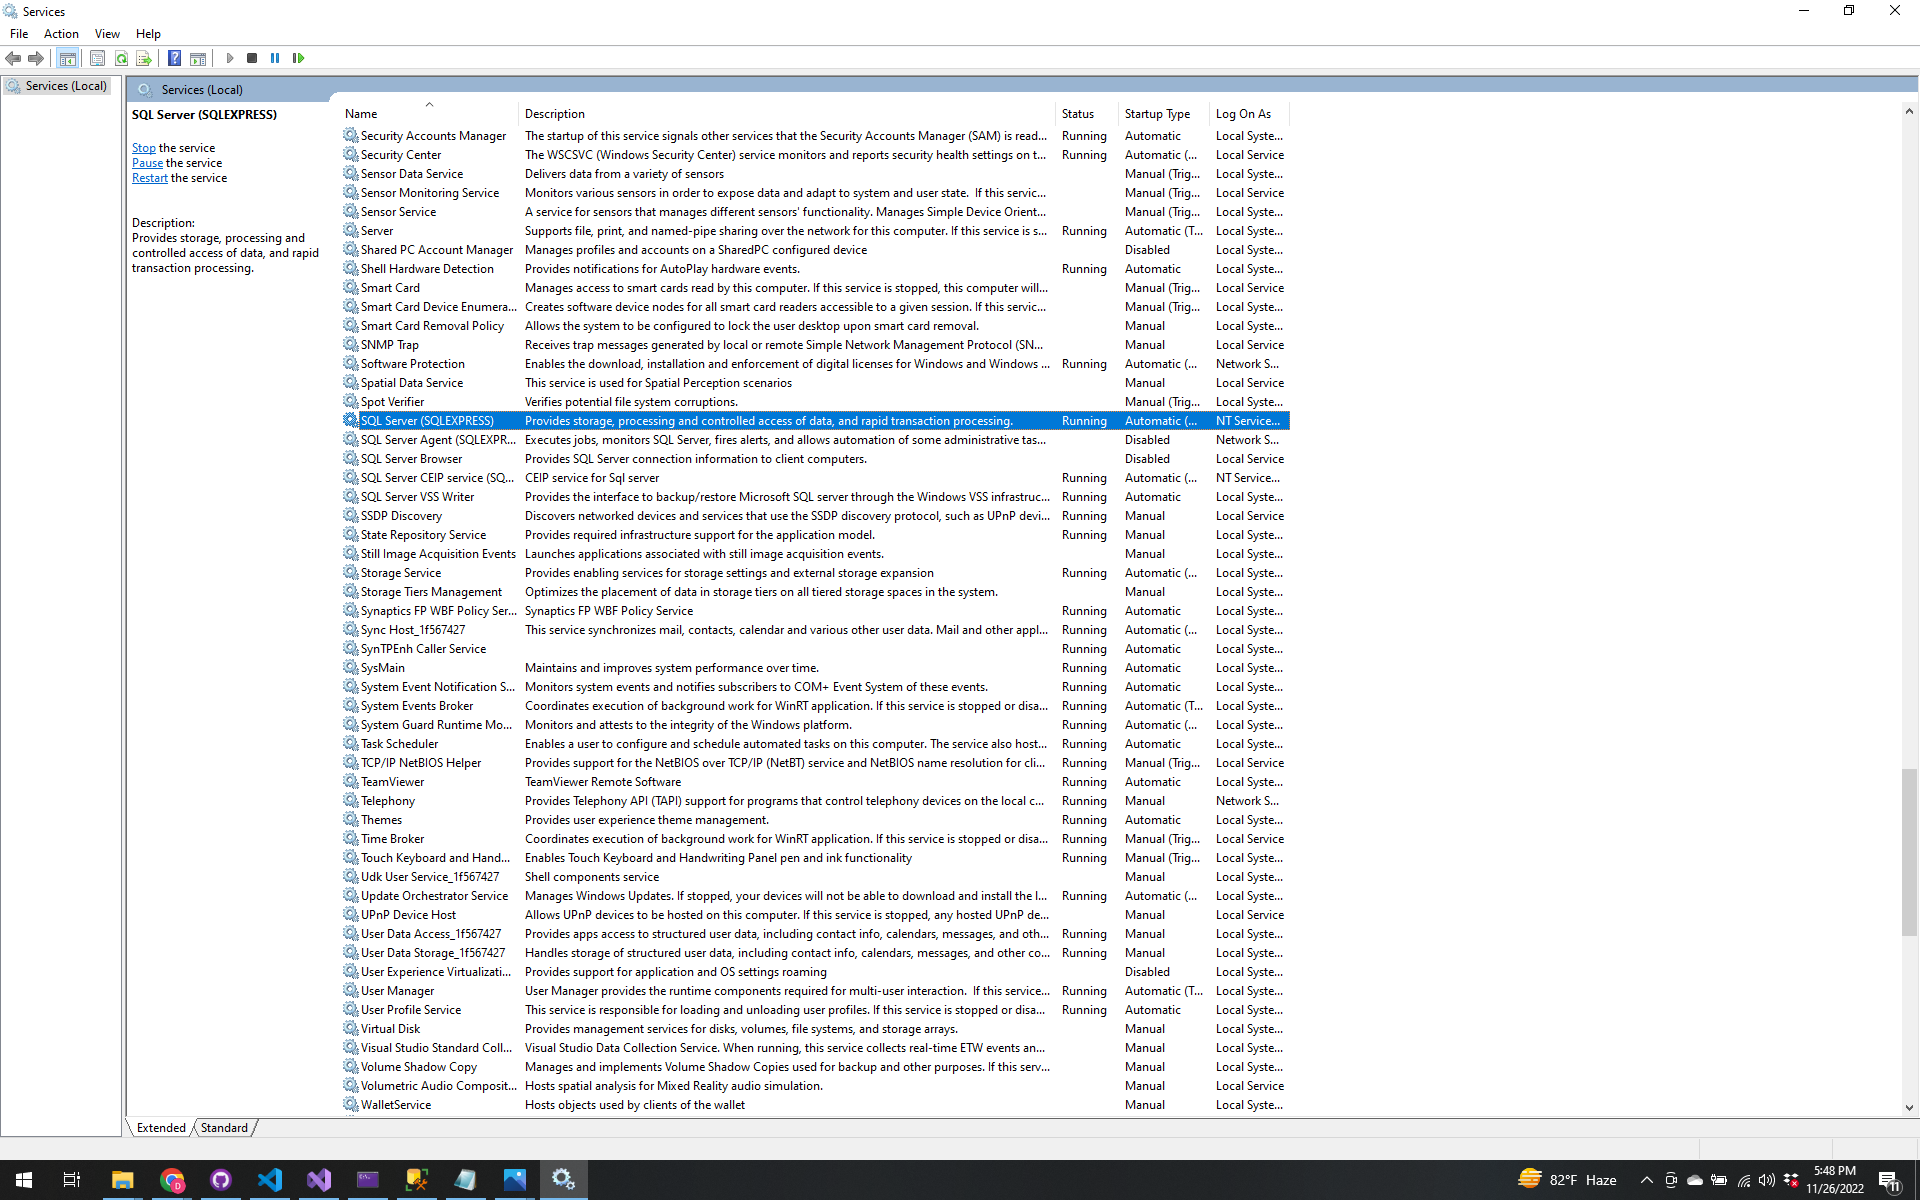
If you can't see it, then install the Microsoft SQL Server Management Studio 19
Build the project by right click on the API then choose Build.
We will do migration. Go to Tools> NuGet Package Manager >Package Manager Console
Make Sure that the Default Project is the name of your project you are working for.
Under Package Manager Console Type Add-Migration "initial create" and hit enter. During this process
the Script will be created according to the Model we have inside this project.
After that, type Update-Database and hit enter. It will create a database using Ms SQL Server Management Studio 19
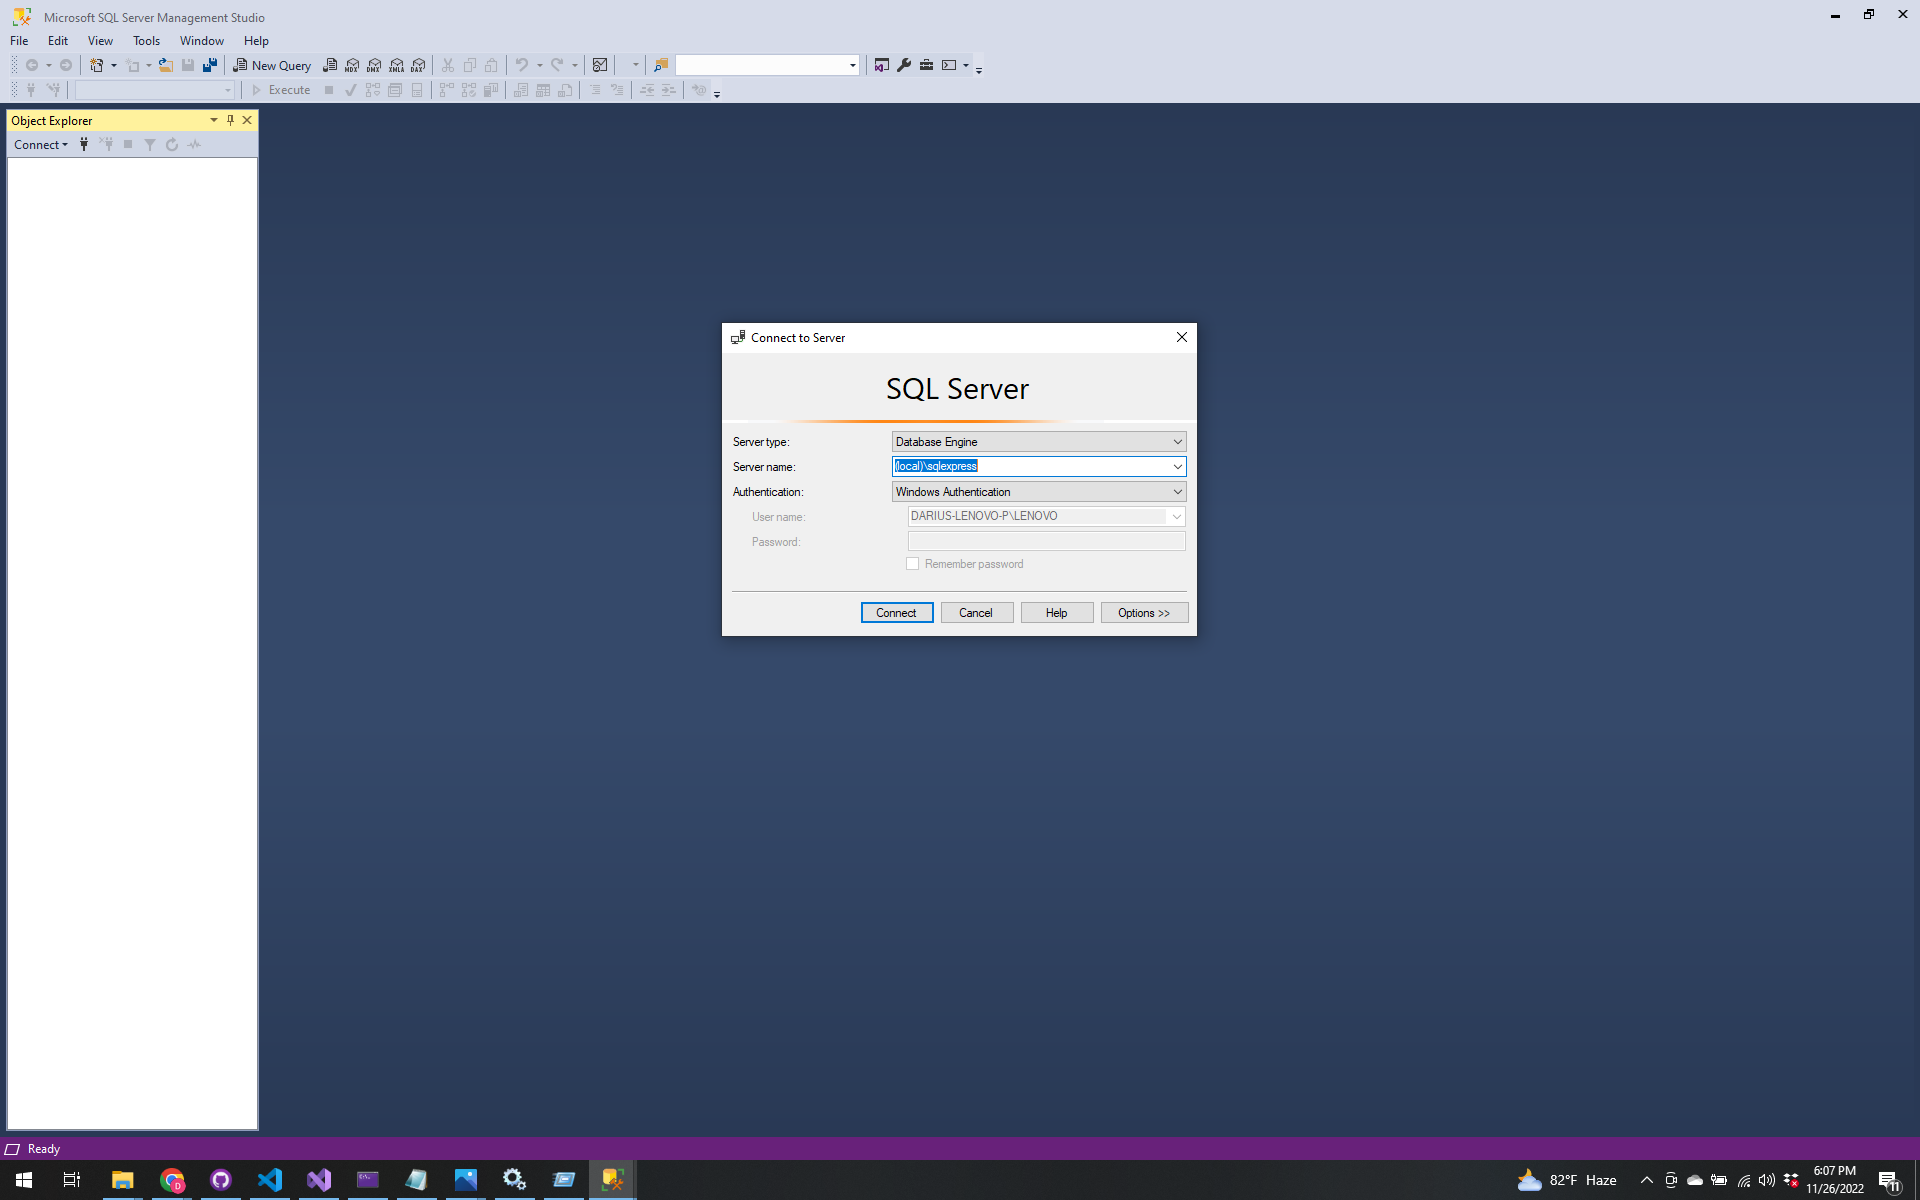
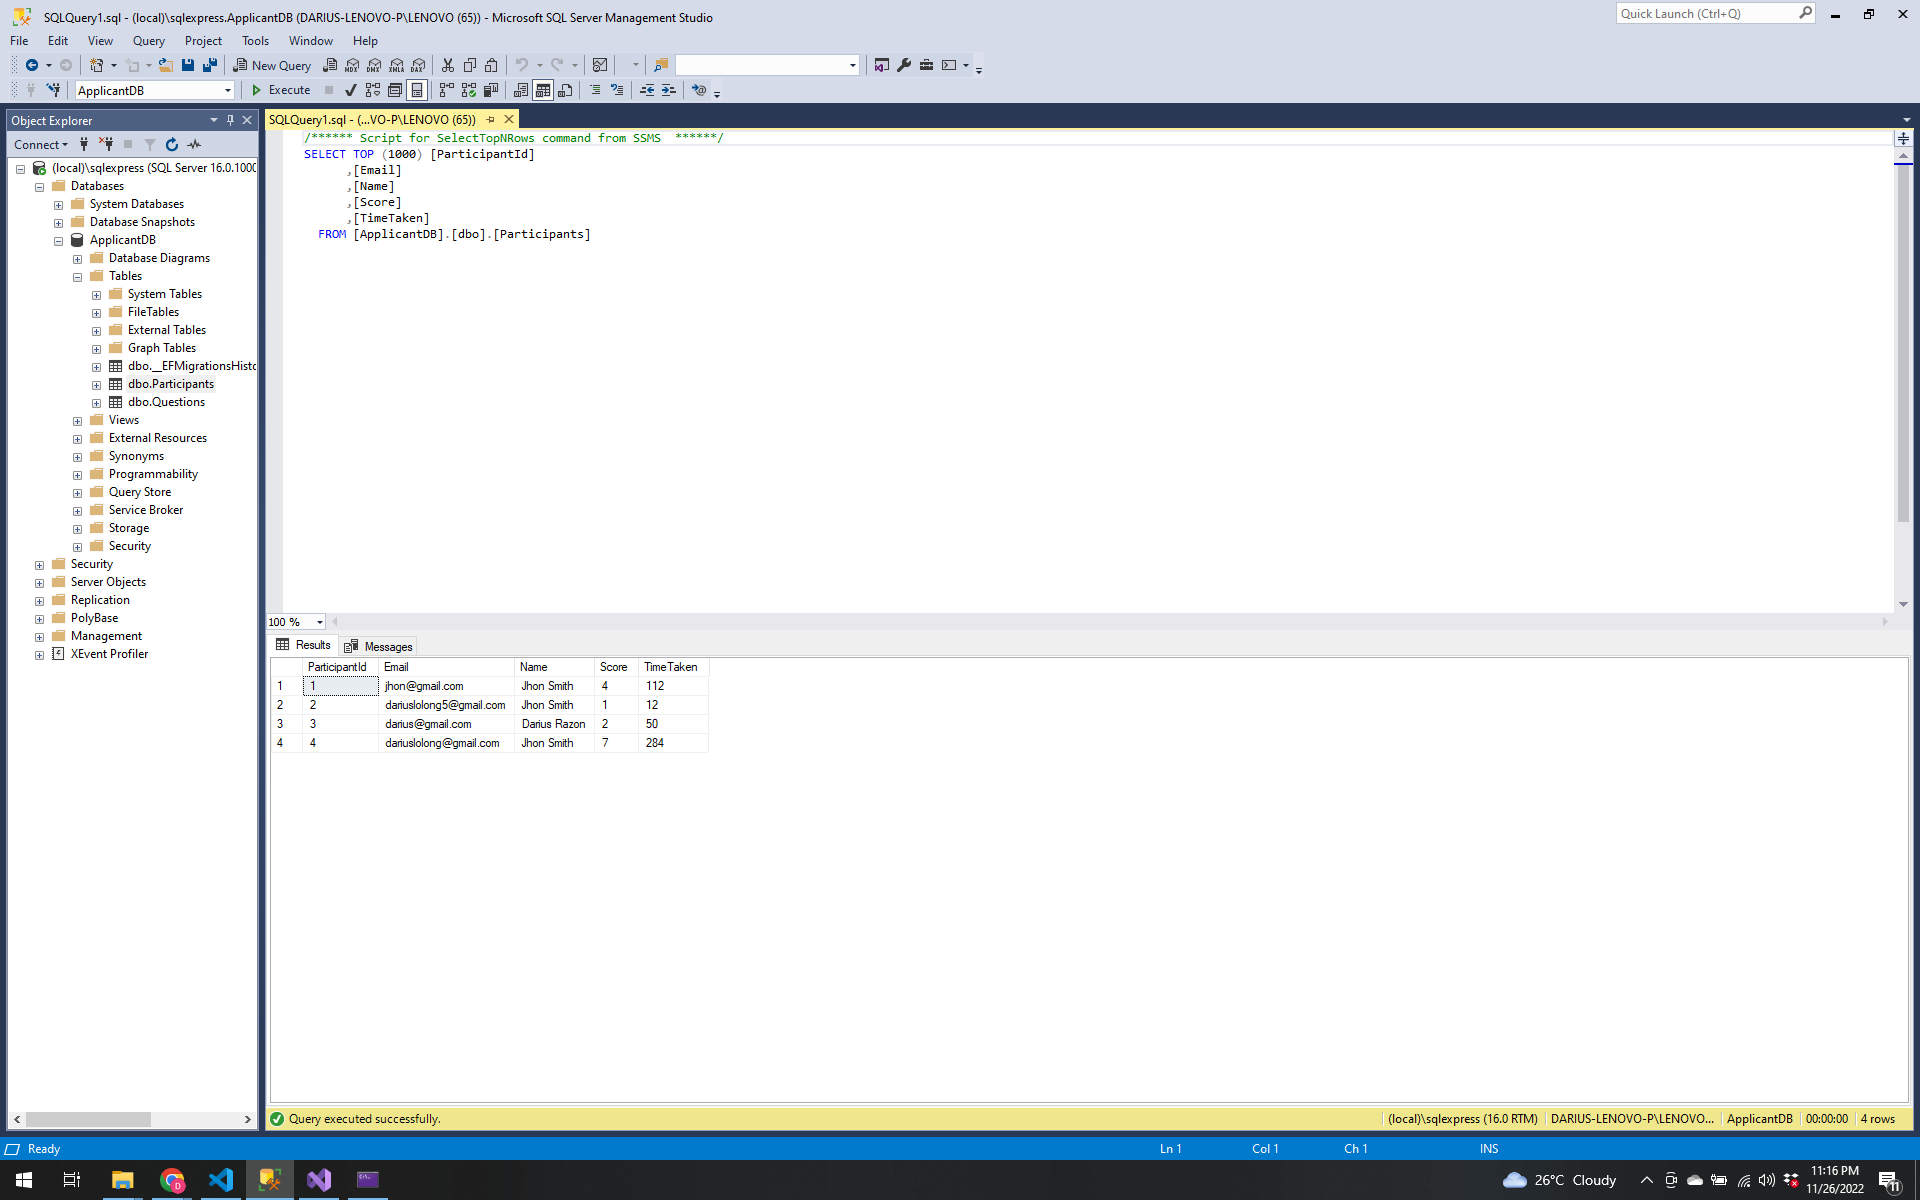
To check it, open Ms SQL Server Management Studio 19, then type the name of your server : (local)\sqlexpress then connect.
After you connect, the created database ApplicantDB will be shown.
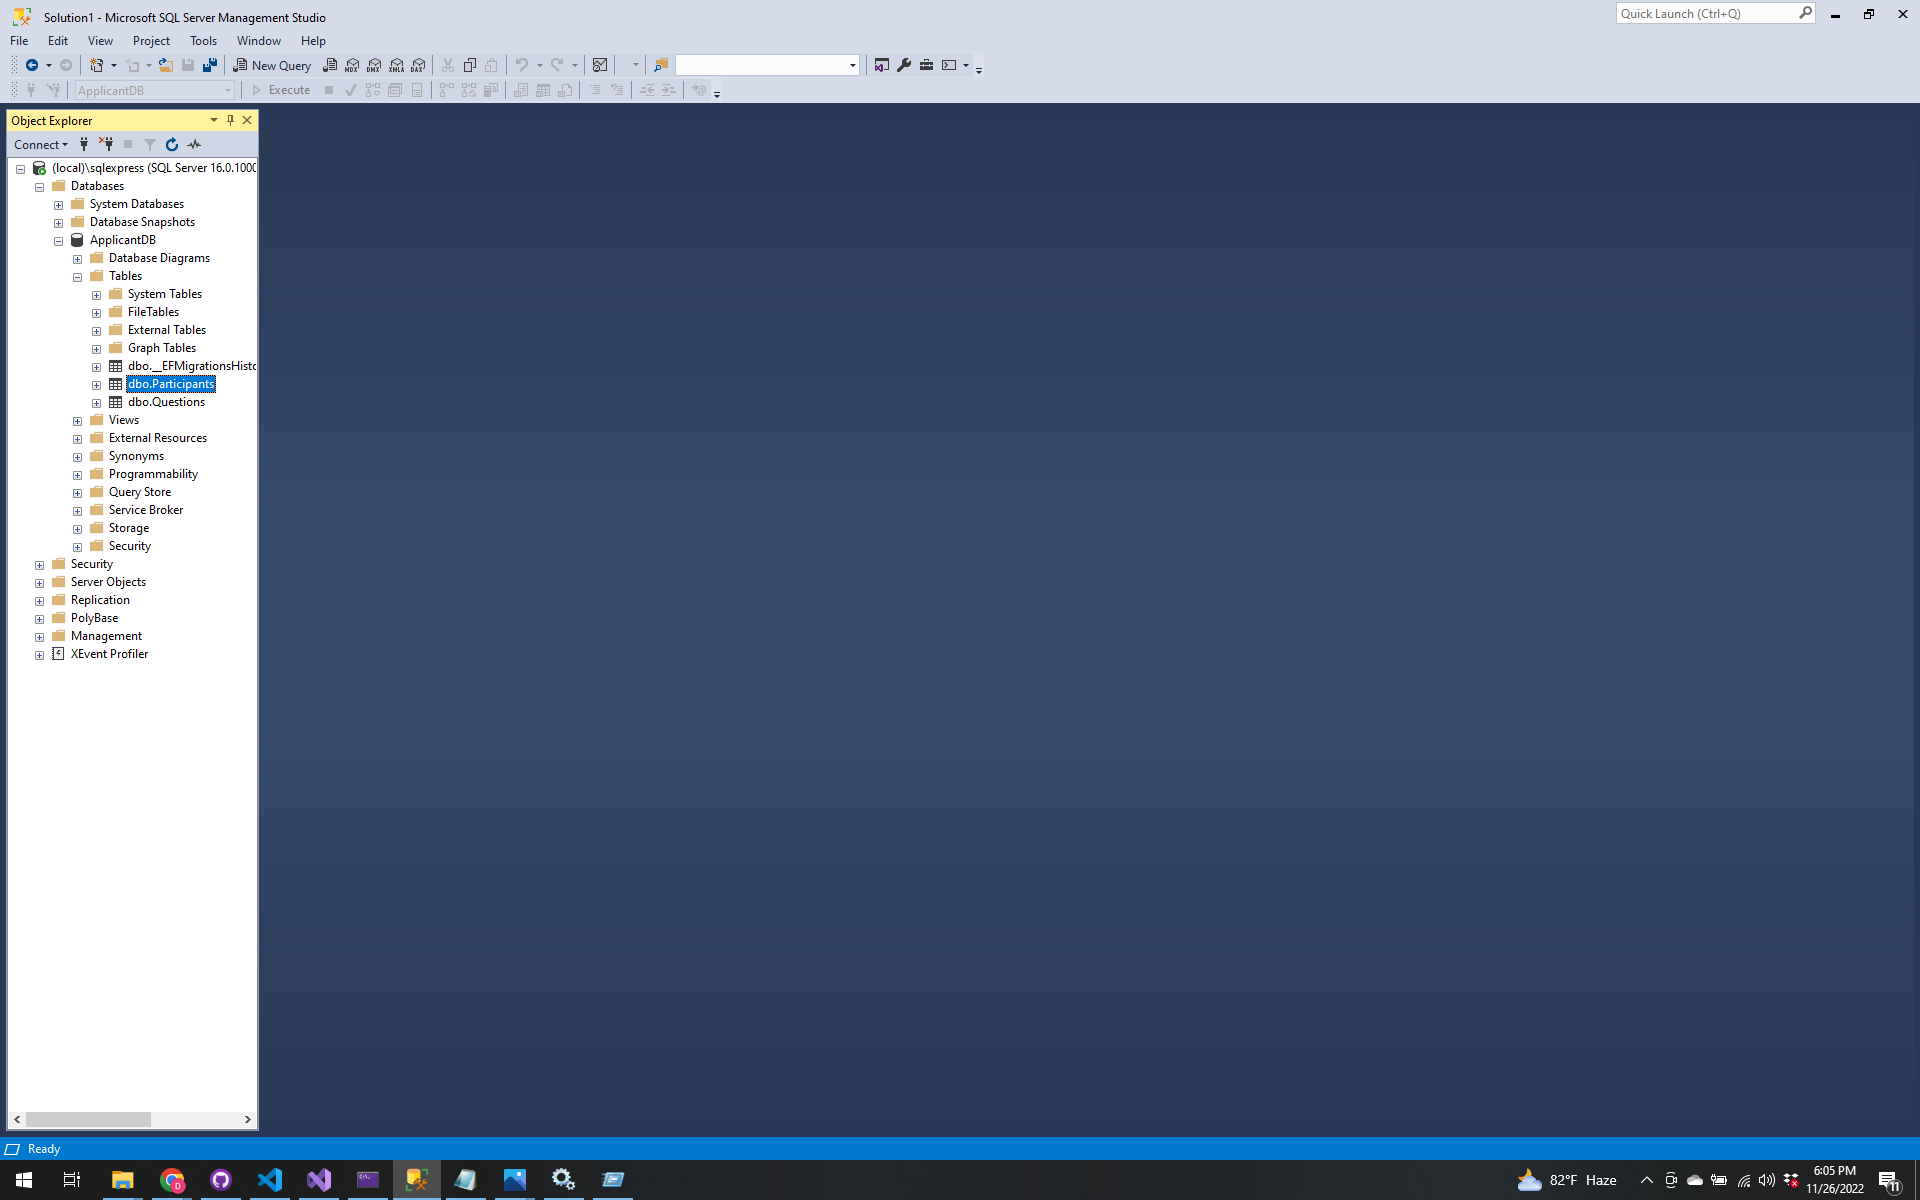
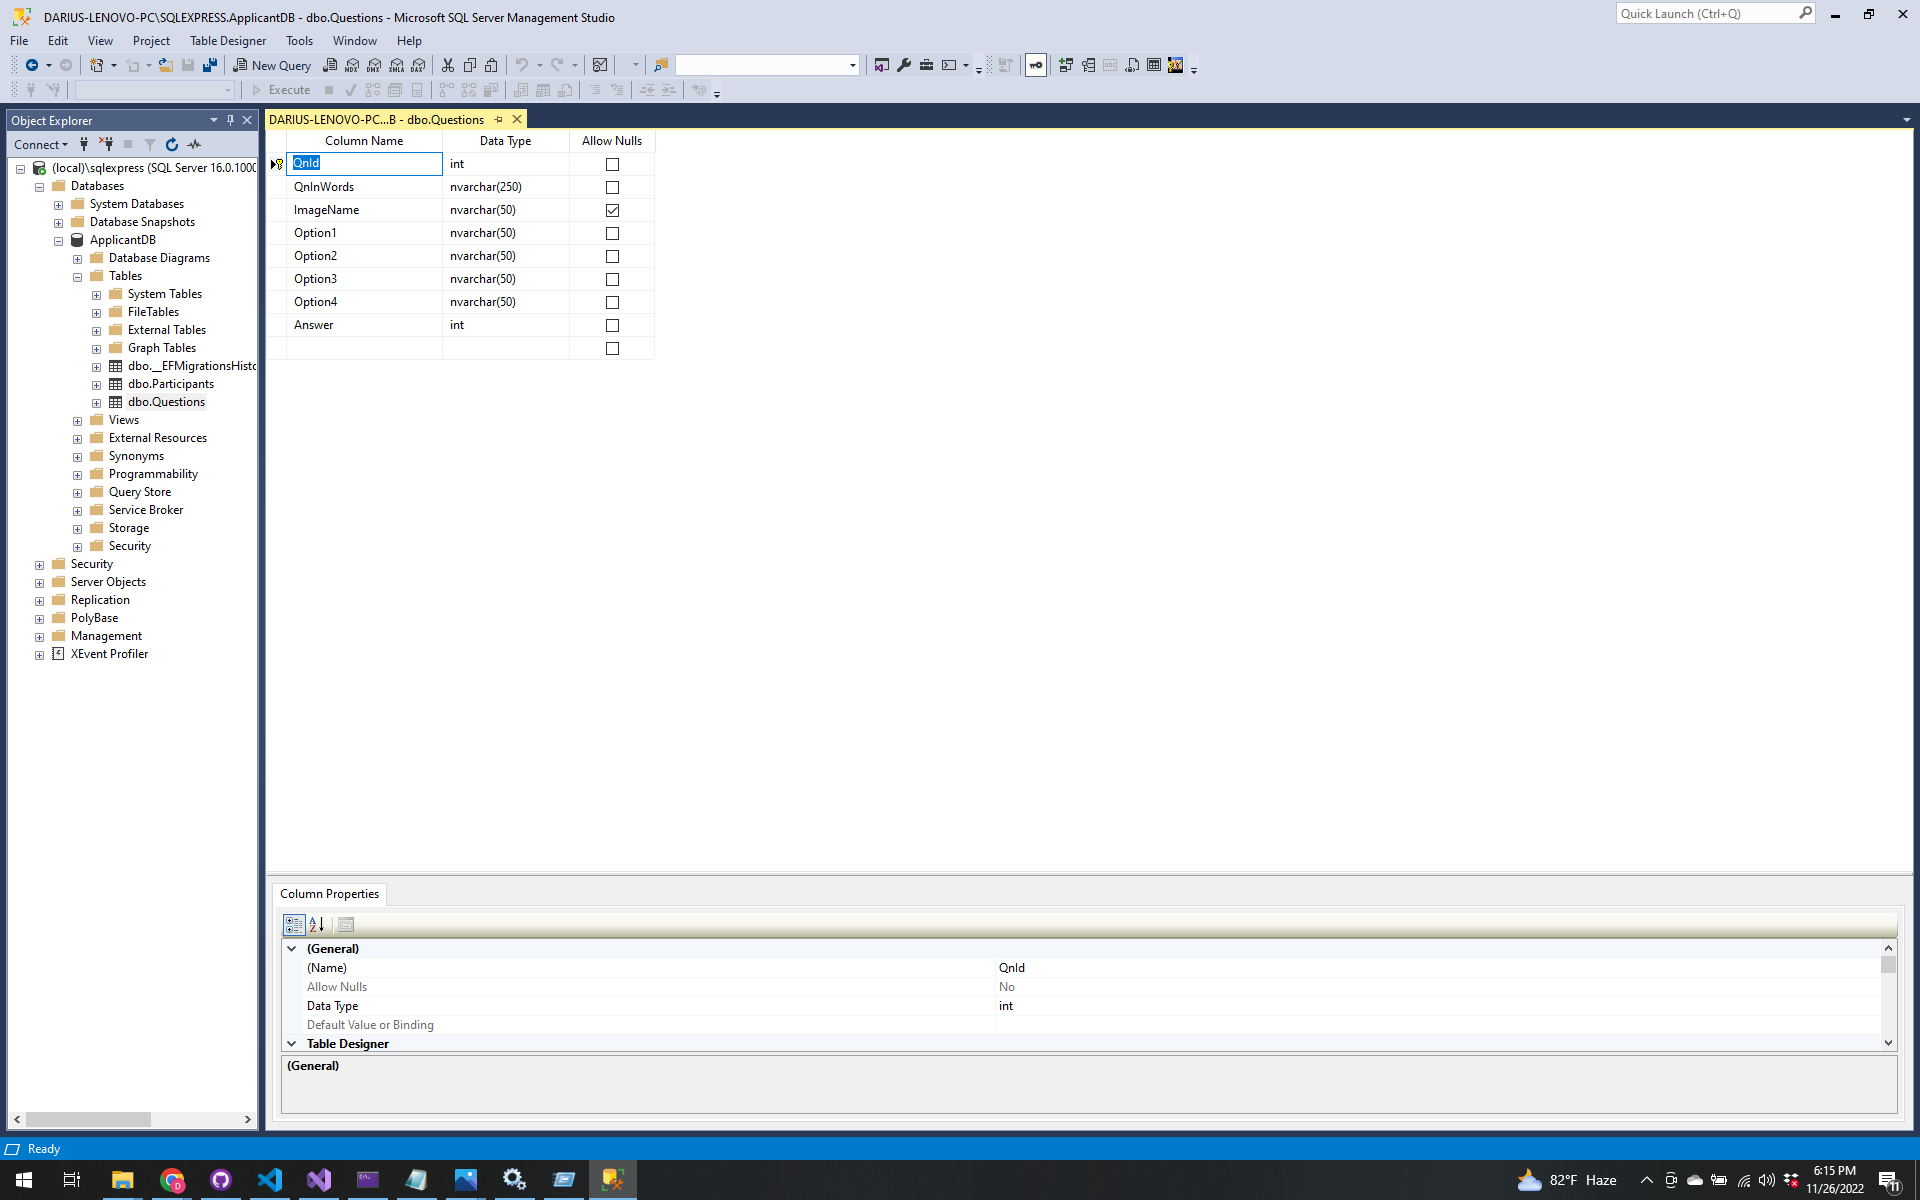
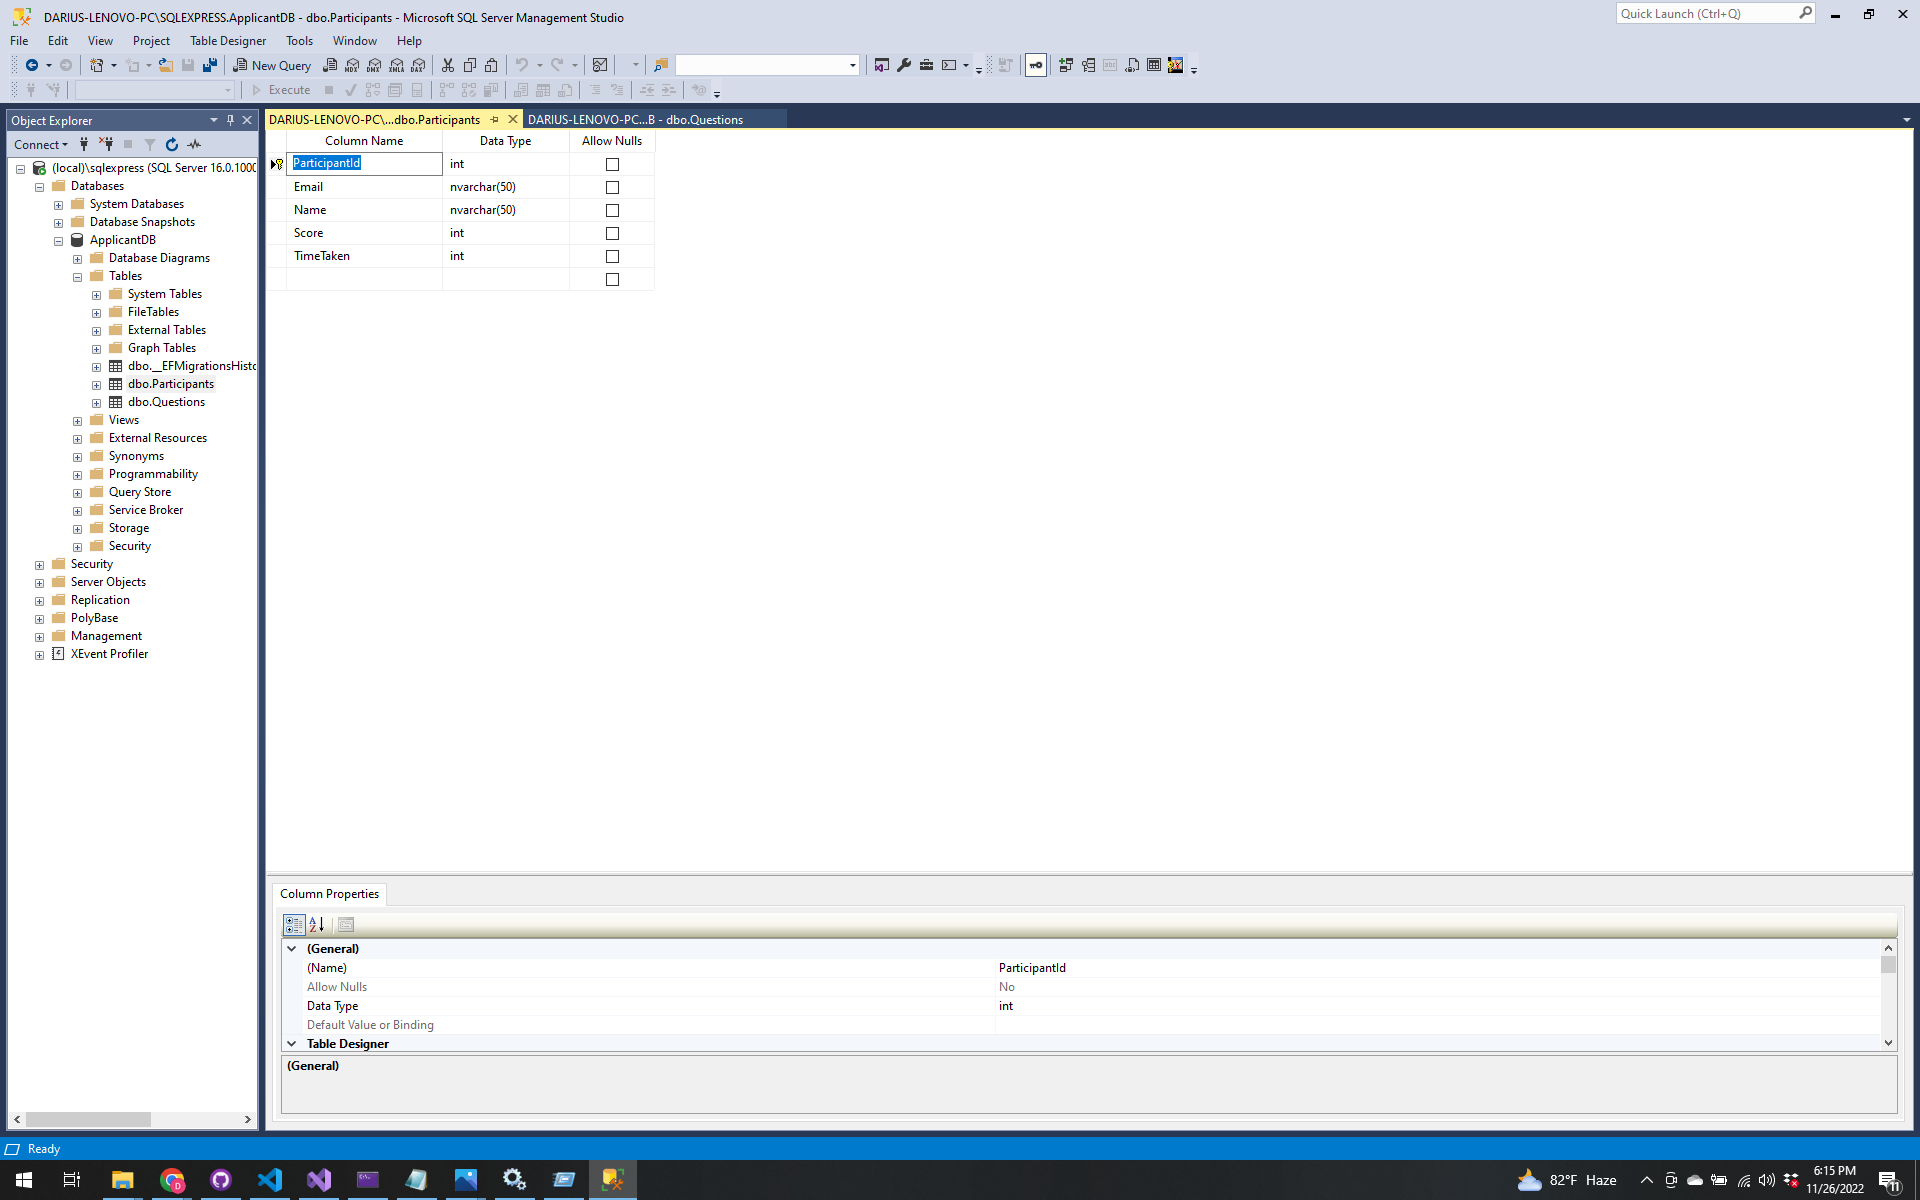
Let us expand the ApplicantDB, Open the Tables, Click the design of dbo.Participants and dbo.Questions to check if they
are properly created.
After that create a query with the question and answer to be inserted in the dbo.Questions
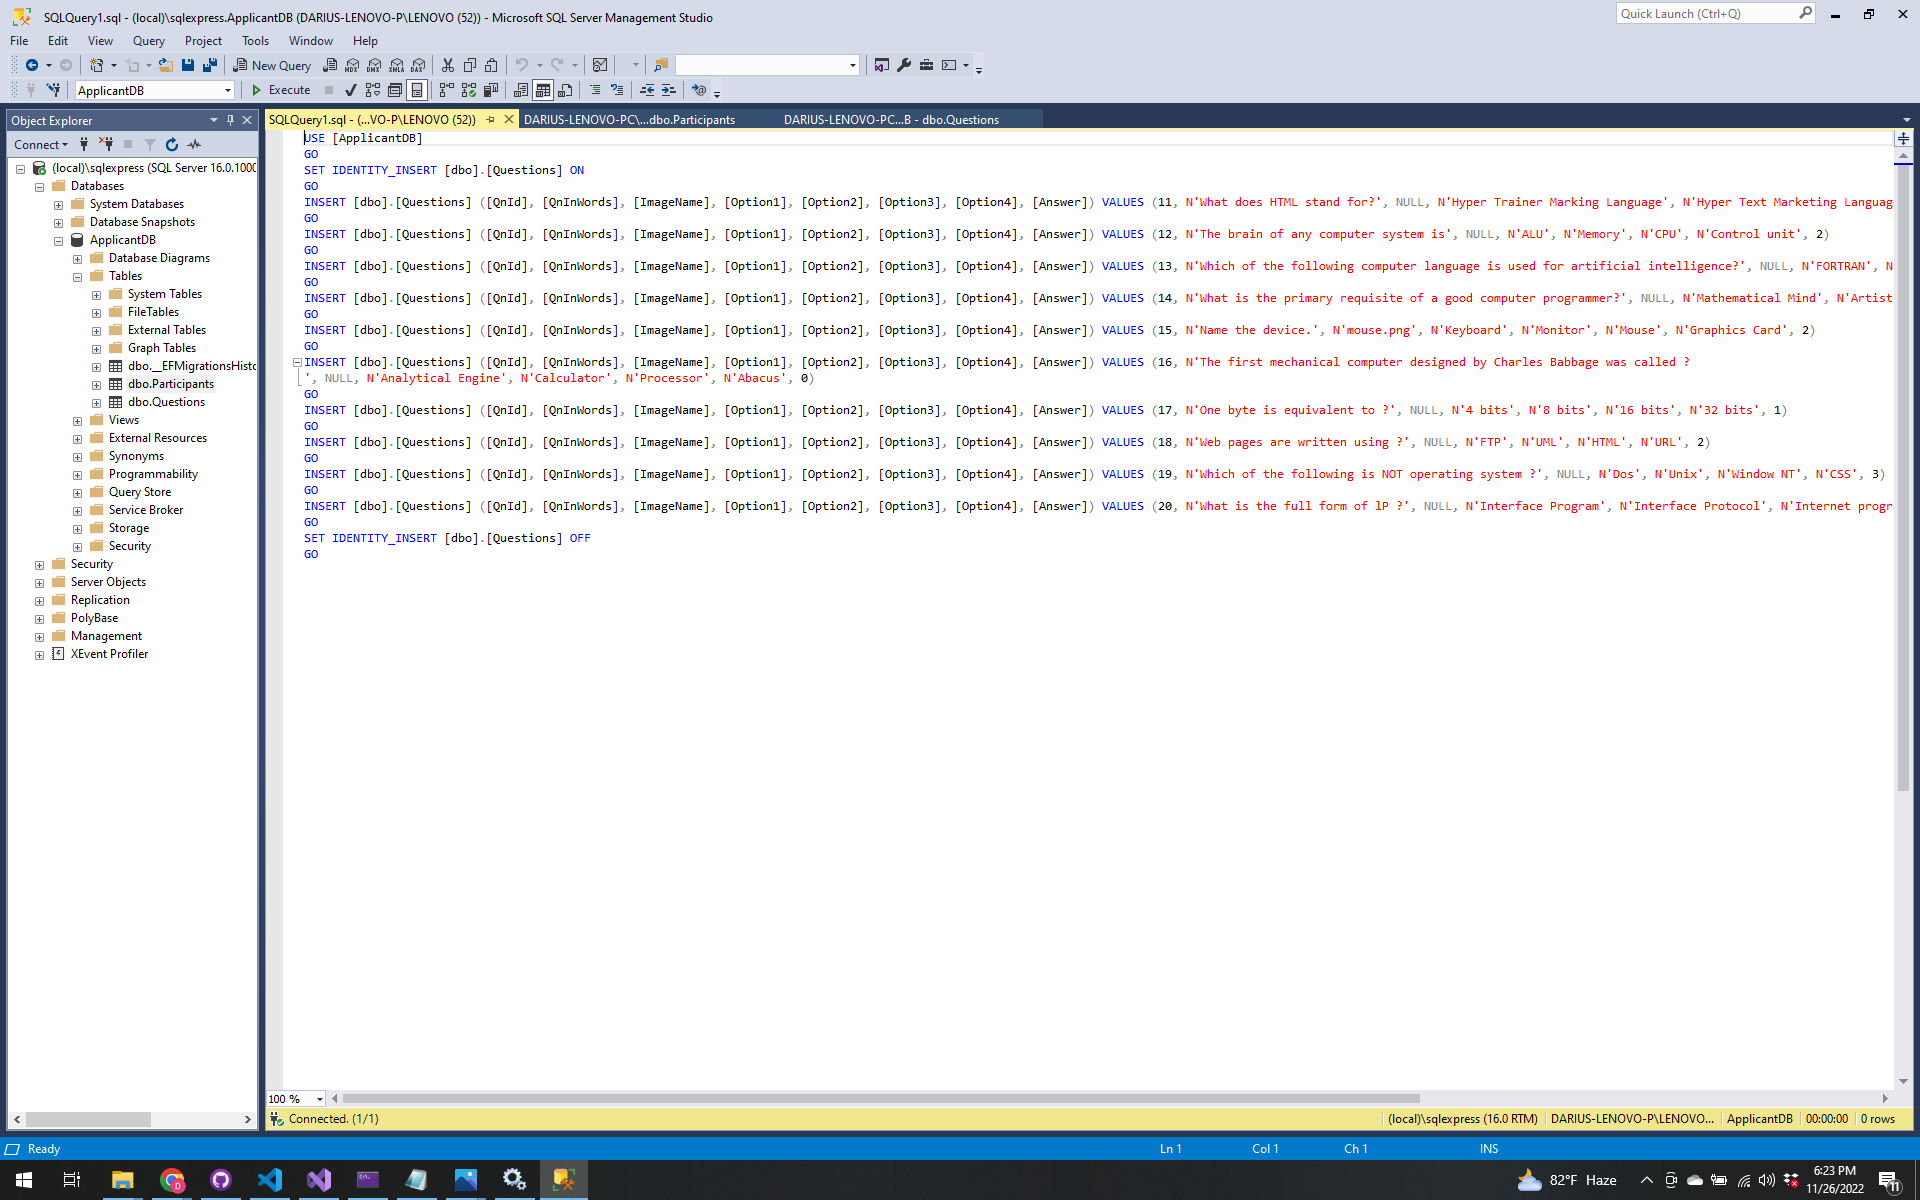
Then Execute
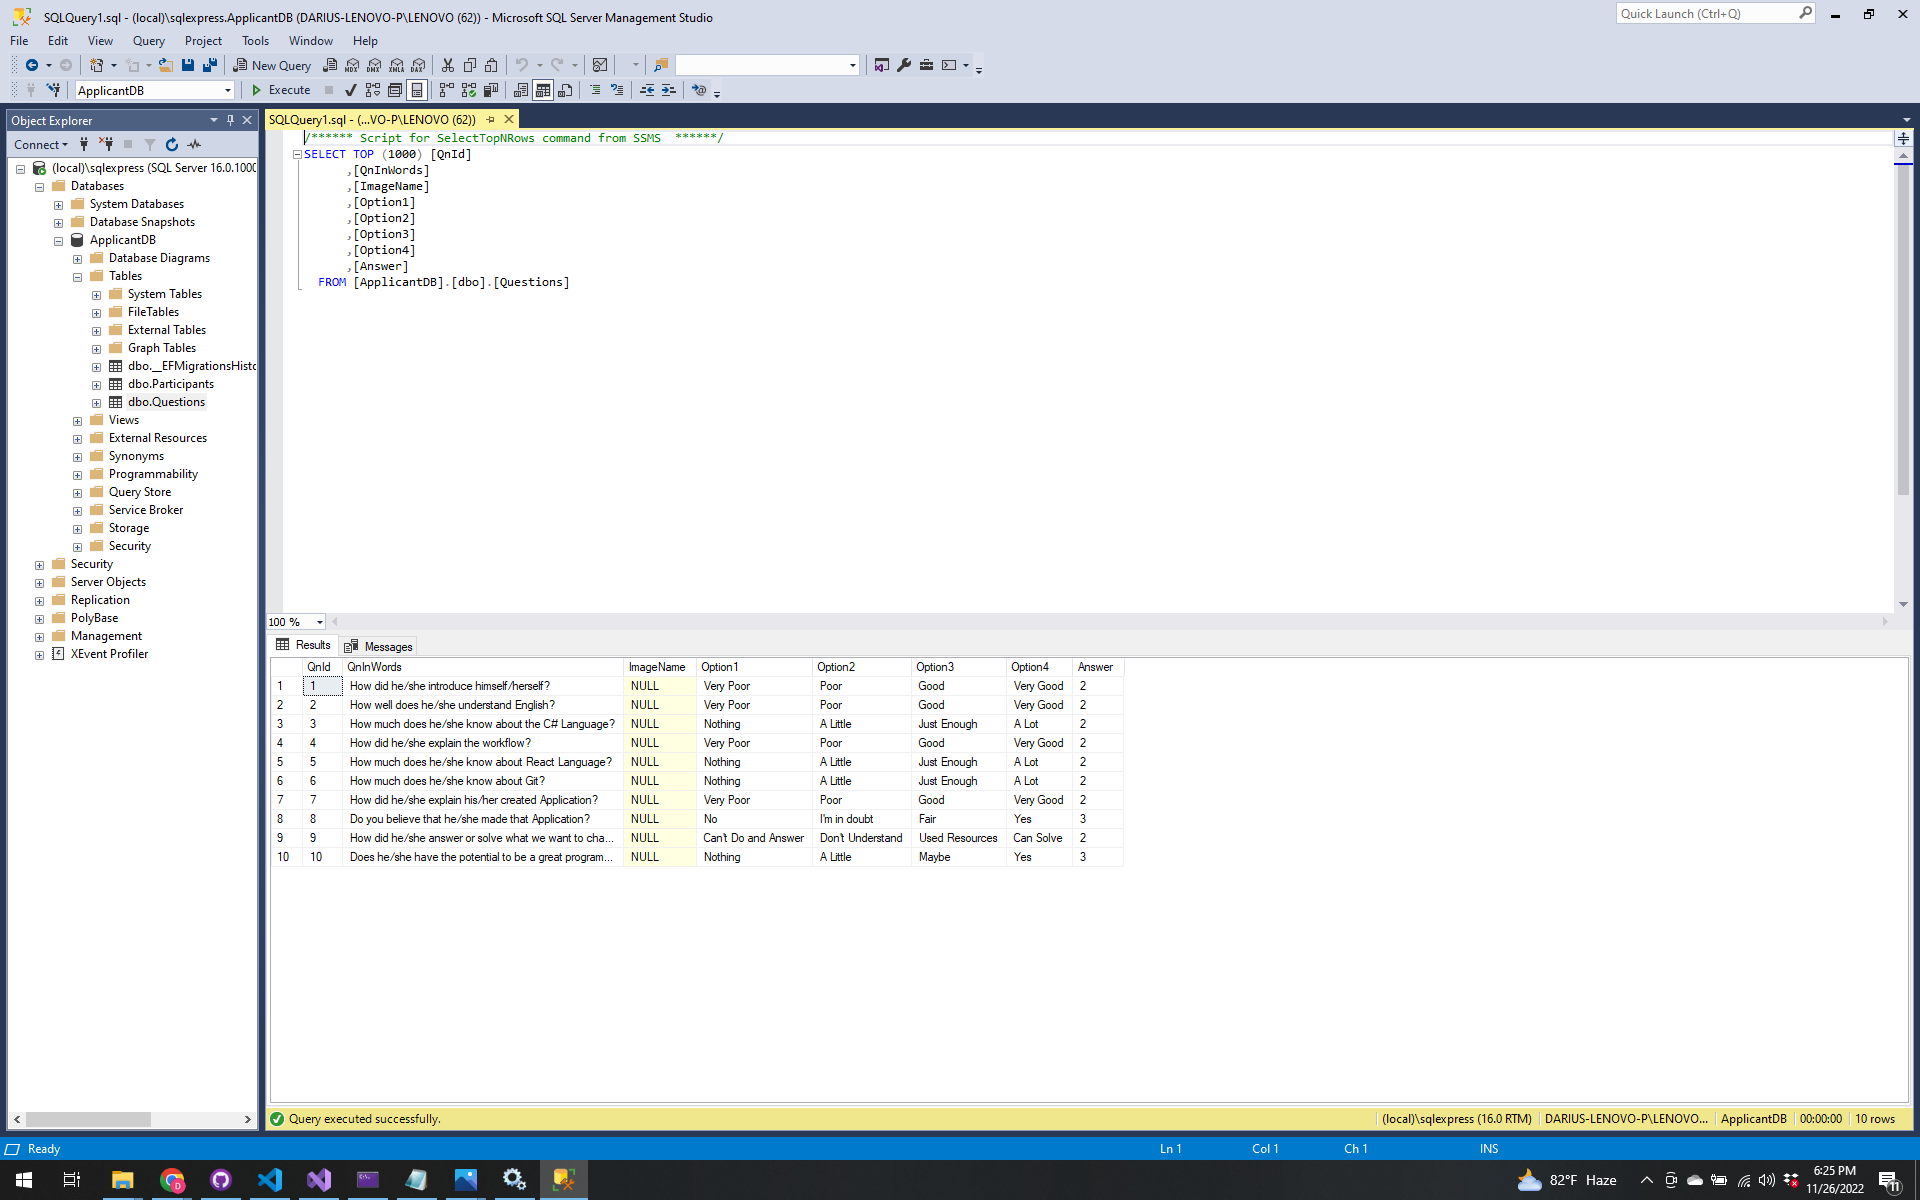
The Right Click on the dbo.Questions then Select the Top 1000 Rows
Now it is time to create API Controllers
Before that Click again the build to check if there is an error. If none, proceed.
Right CLick on Controller and Add Controller, Select API, then API Controller with actions, using Entity Framework.
Select Model class as Question (ApplicantAPiModels).
Then, Data context class is ApplicantDbContext (ApplicantAPIModels). And named it as QuestionController.cs
It will automatically created a script or codes inside of it.
There will have some error but just install Microsoft.VisualStudio.Web.CodeGeneration.Design thru Manage NuGet Packages to solve it.
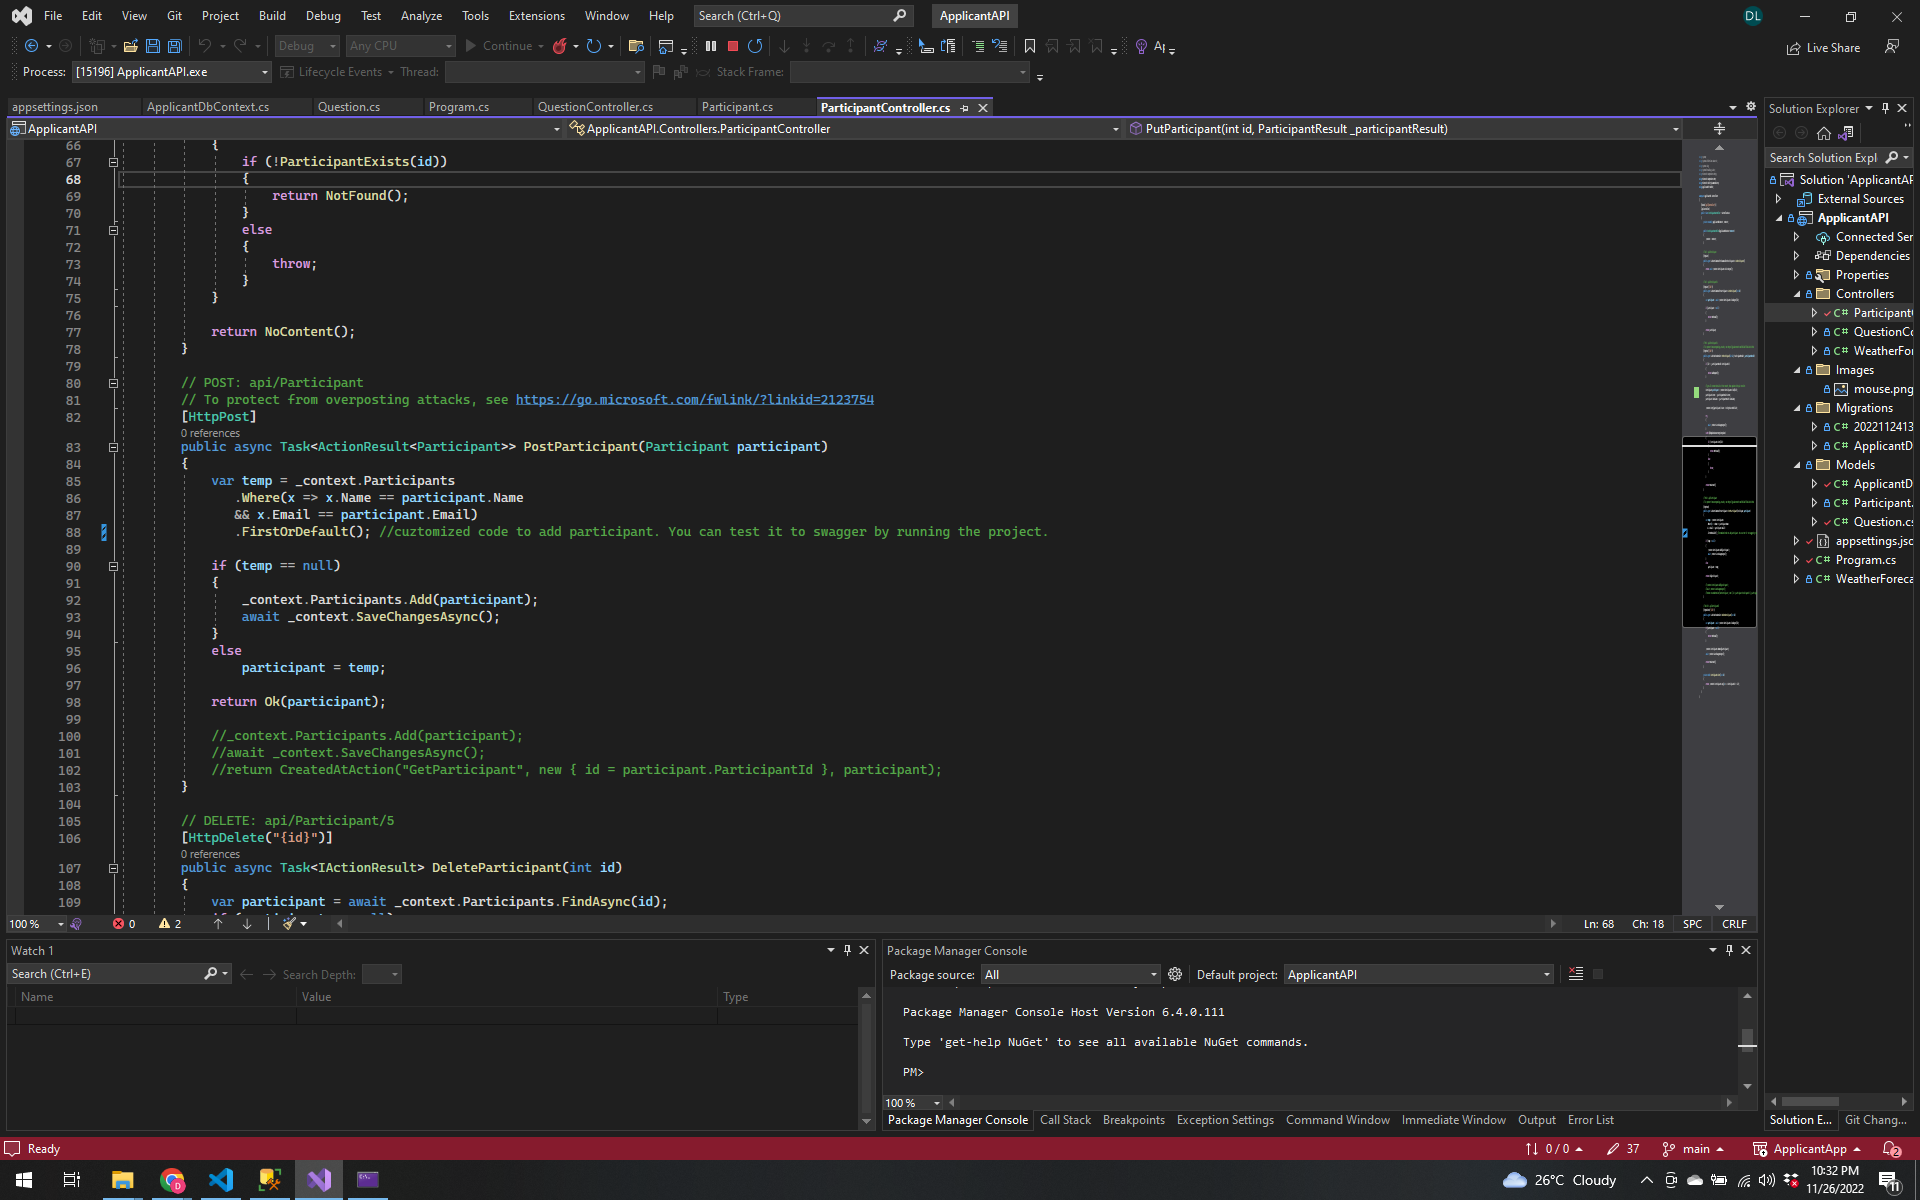
Create Another Controller named ParticipantController.cs.
Add and Edit some codes in the Participant and Question controller.
Go back to Visual Code > to useForm.js
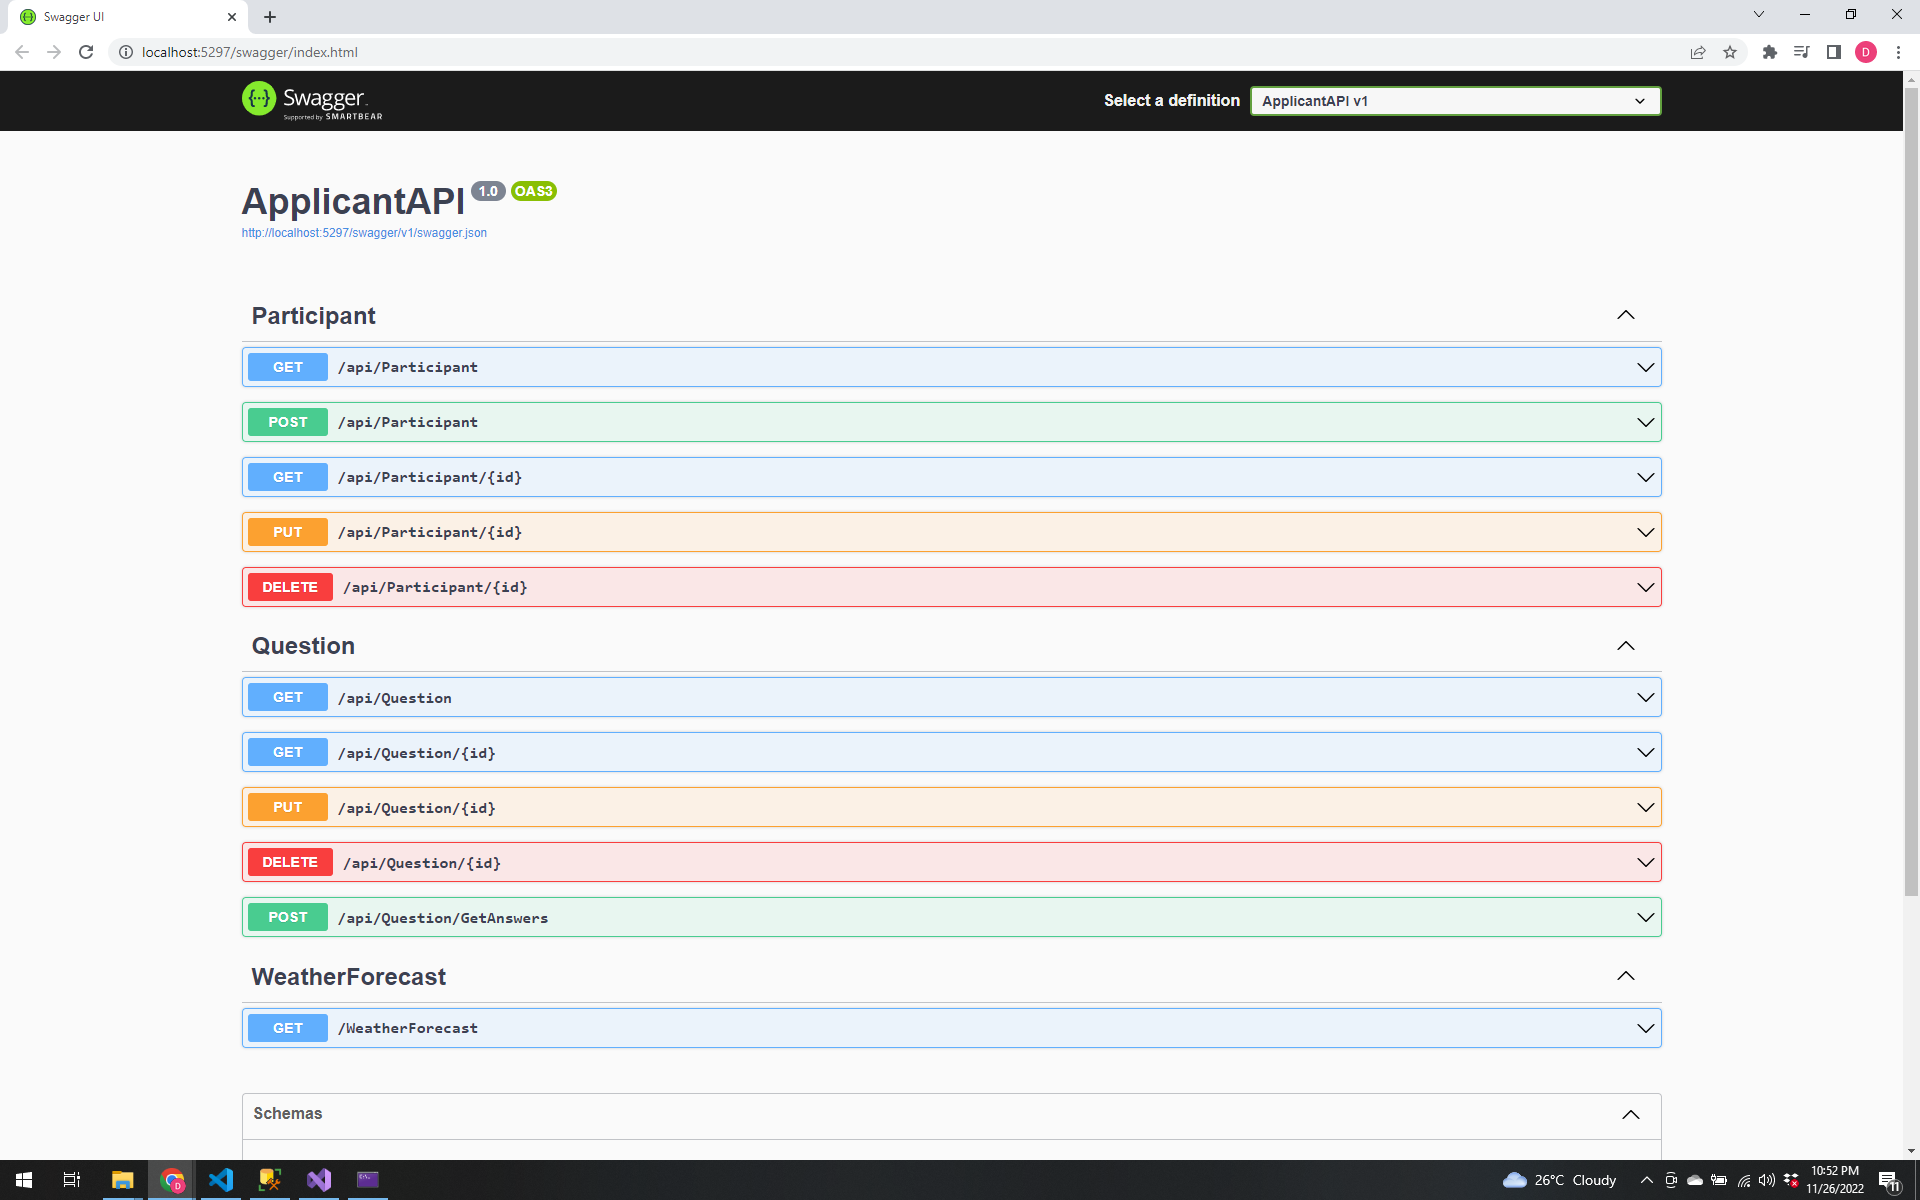
To Test it Run the Project and it will go to Swagger
In order to make an API request from React Application to the ApplicantAPI. Install the package Axios.
Open New Terminal then> npm i axios
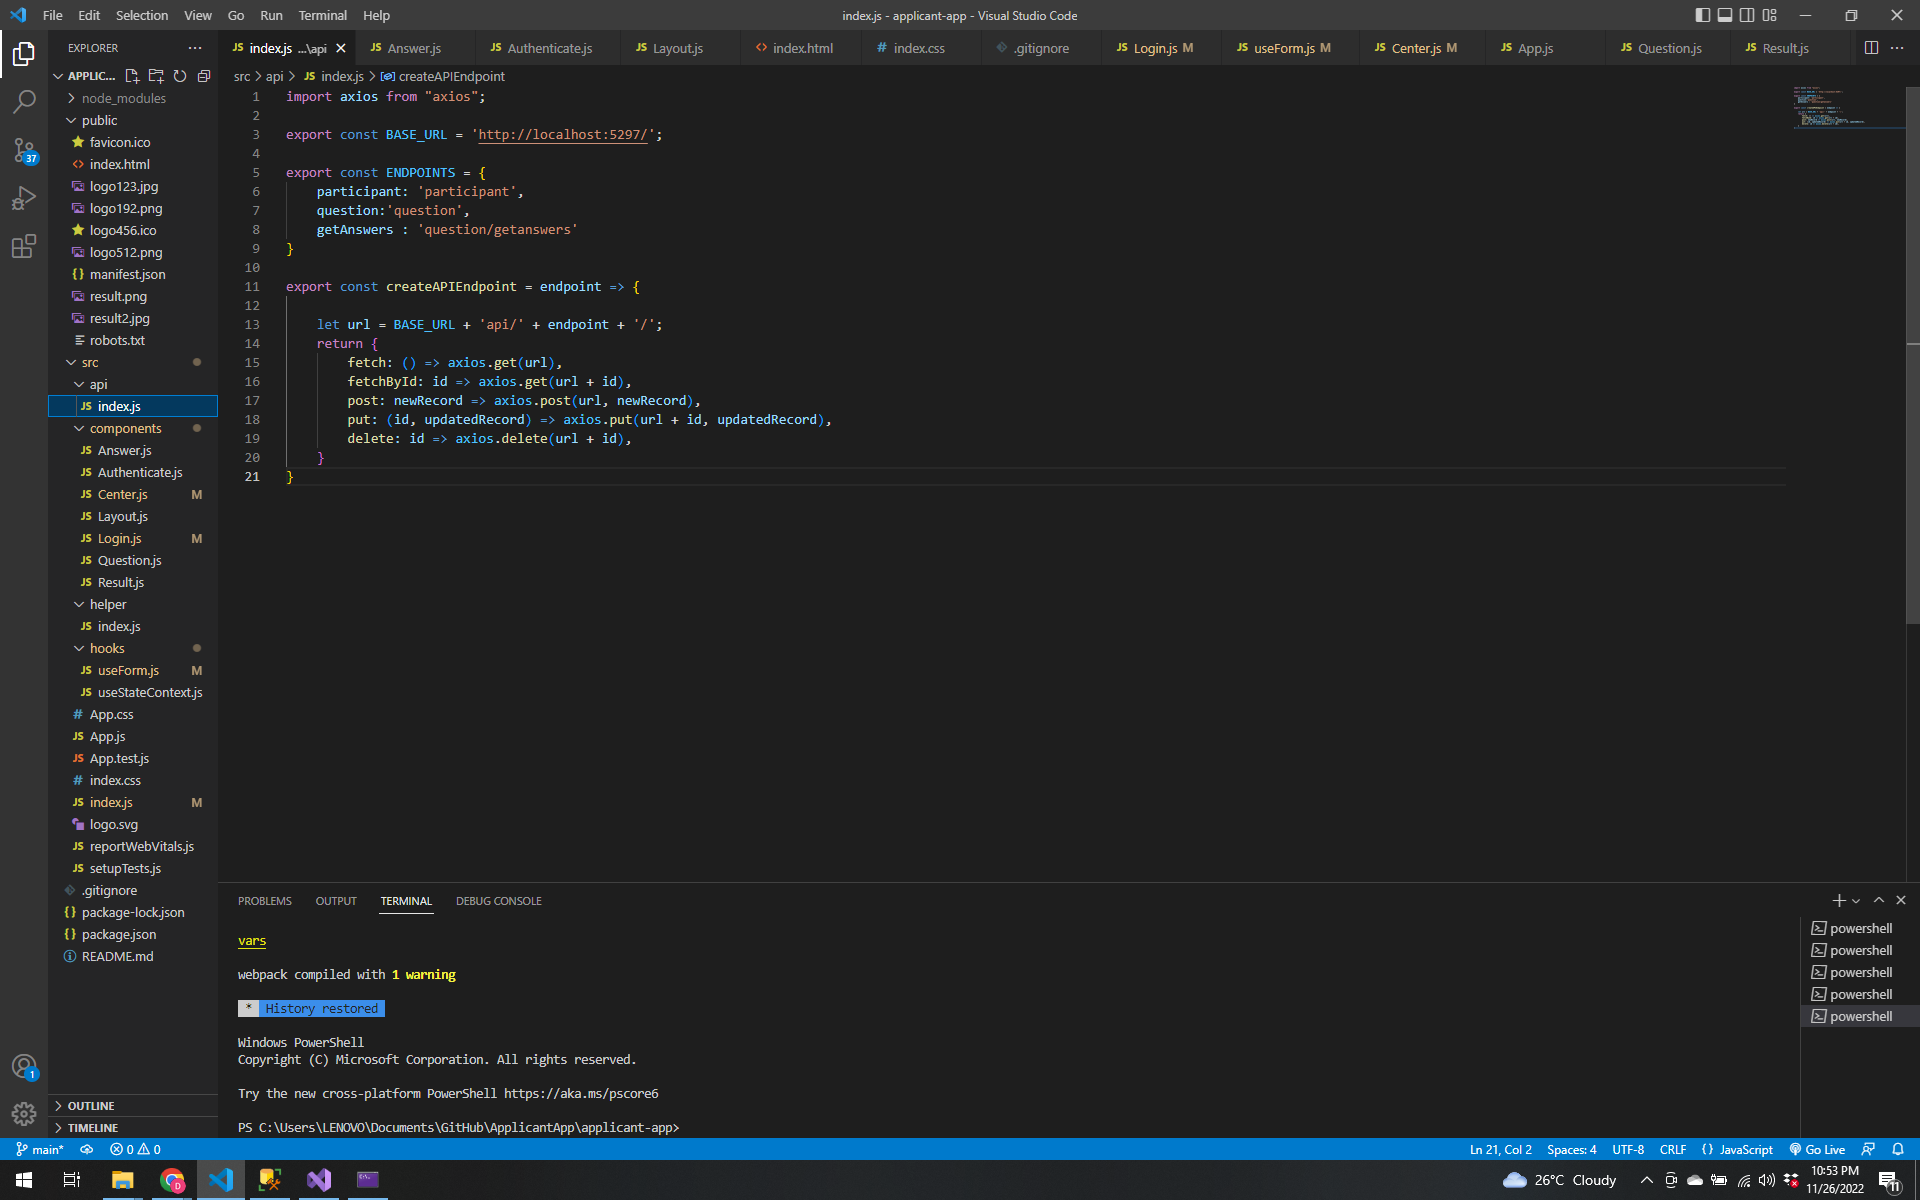
Create a new folder under src named api. Create index.js
Import the Axios to index.js and copy the URL in the Swagger then make a connection by following this code:
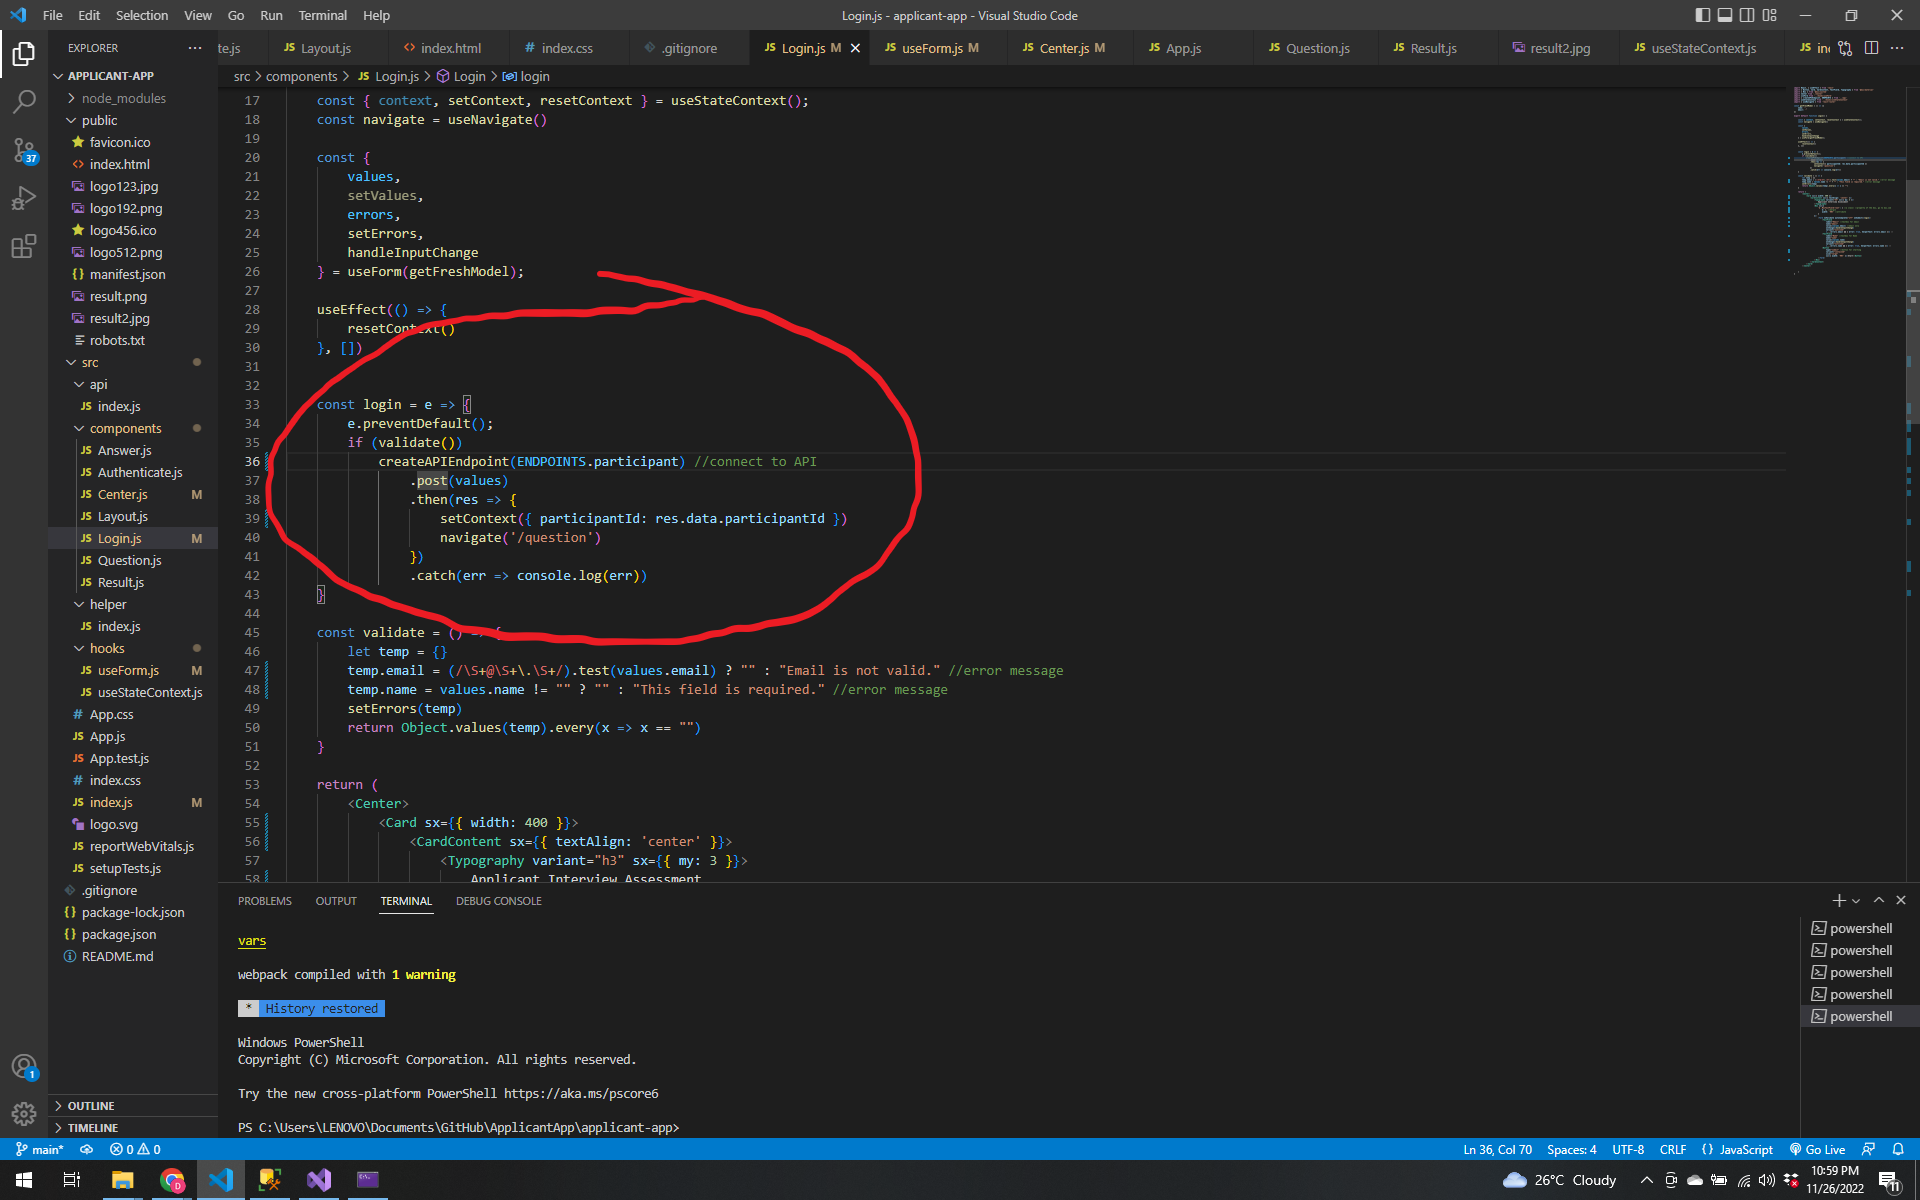
Now we make post request to the ApplicantAPI. Inside the login.js add some of these codes.
Now we copy the the URL in the React App and make some code inside the Program.cs
Now try it with the React App and under console the data will be shown.
Check also your database if it is working.
If you register with the same email and name it will not post for new but still get the same id.
Now Let us configure Context API.
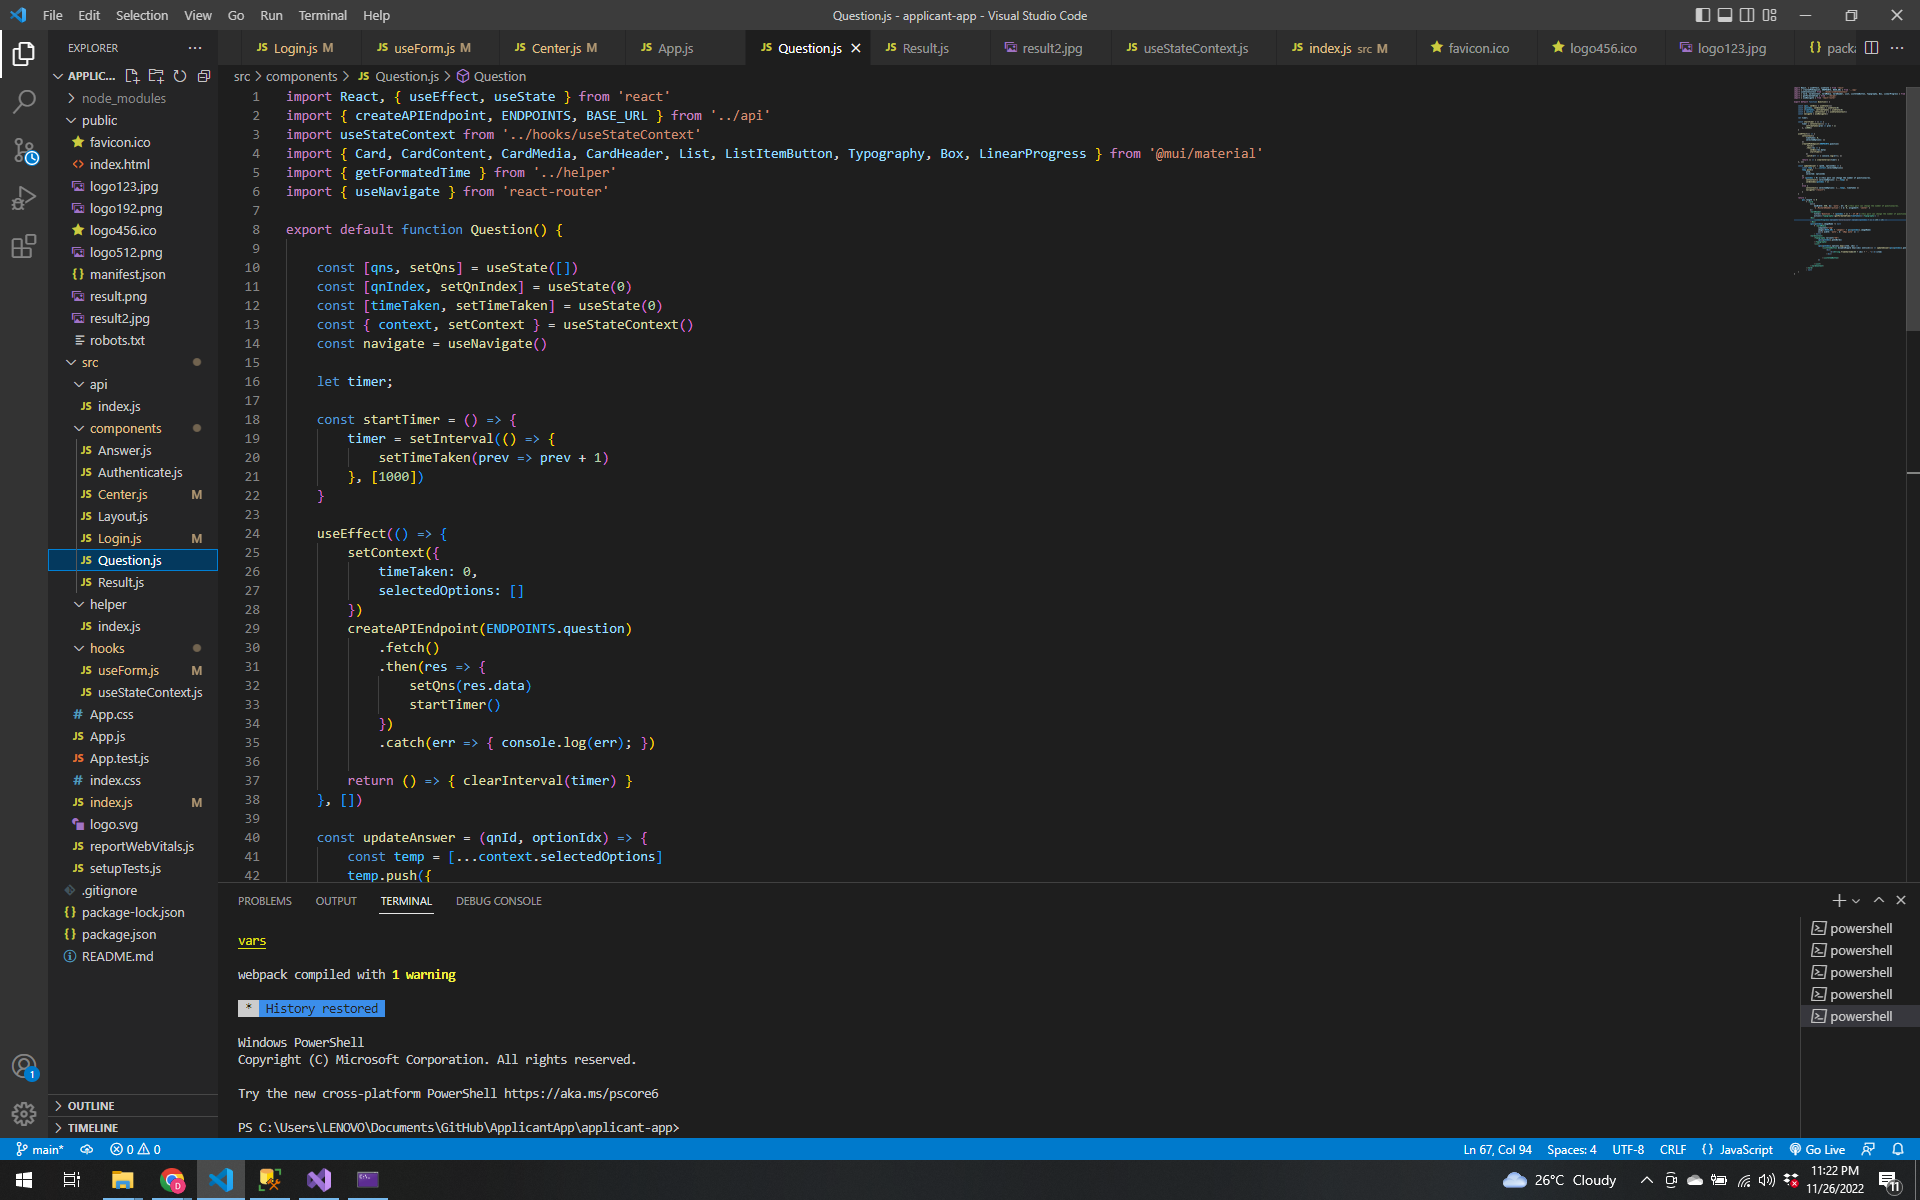
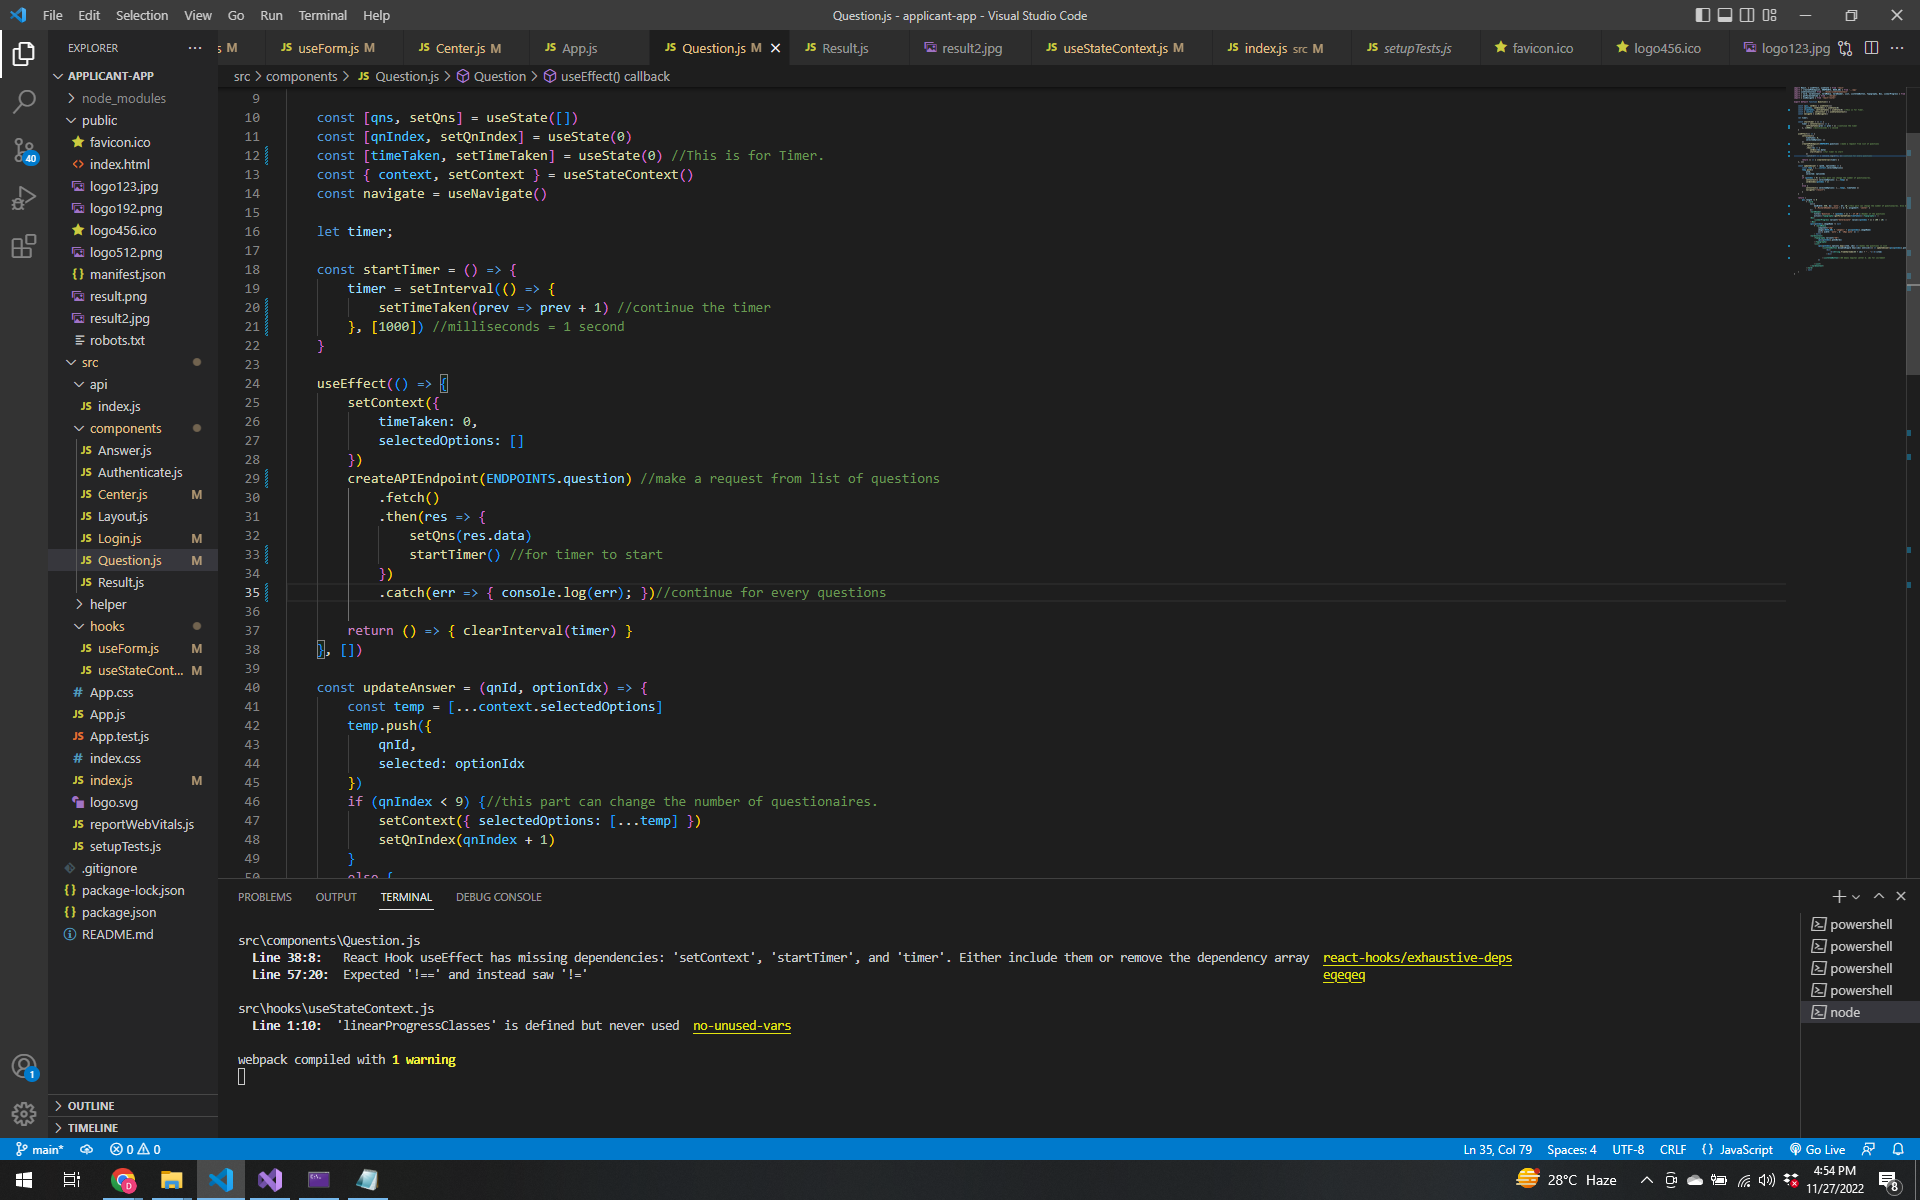
Let us create a file under components named Question.js. Import the following code.
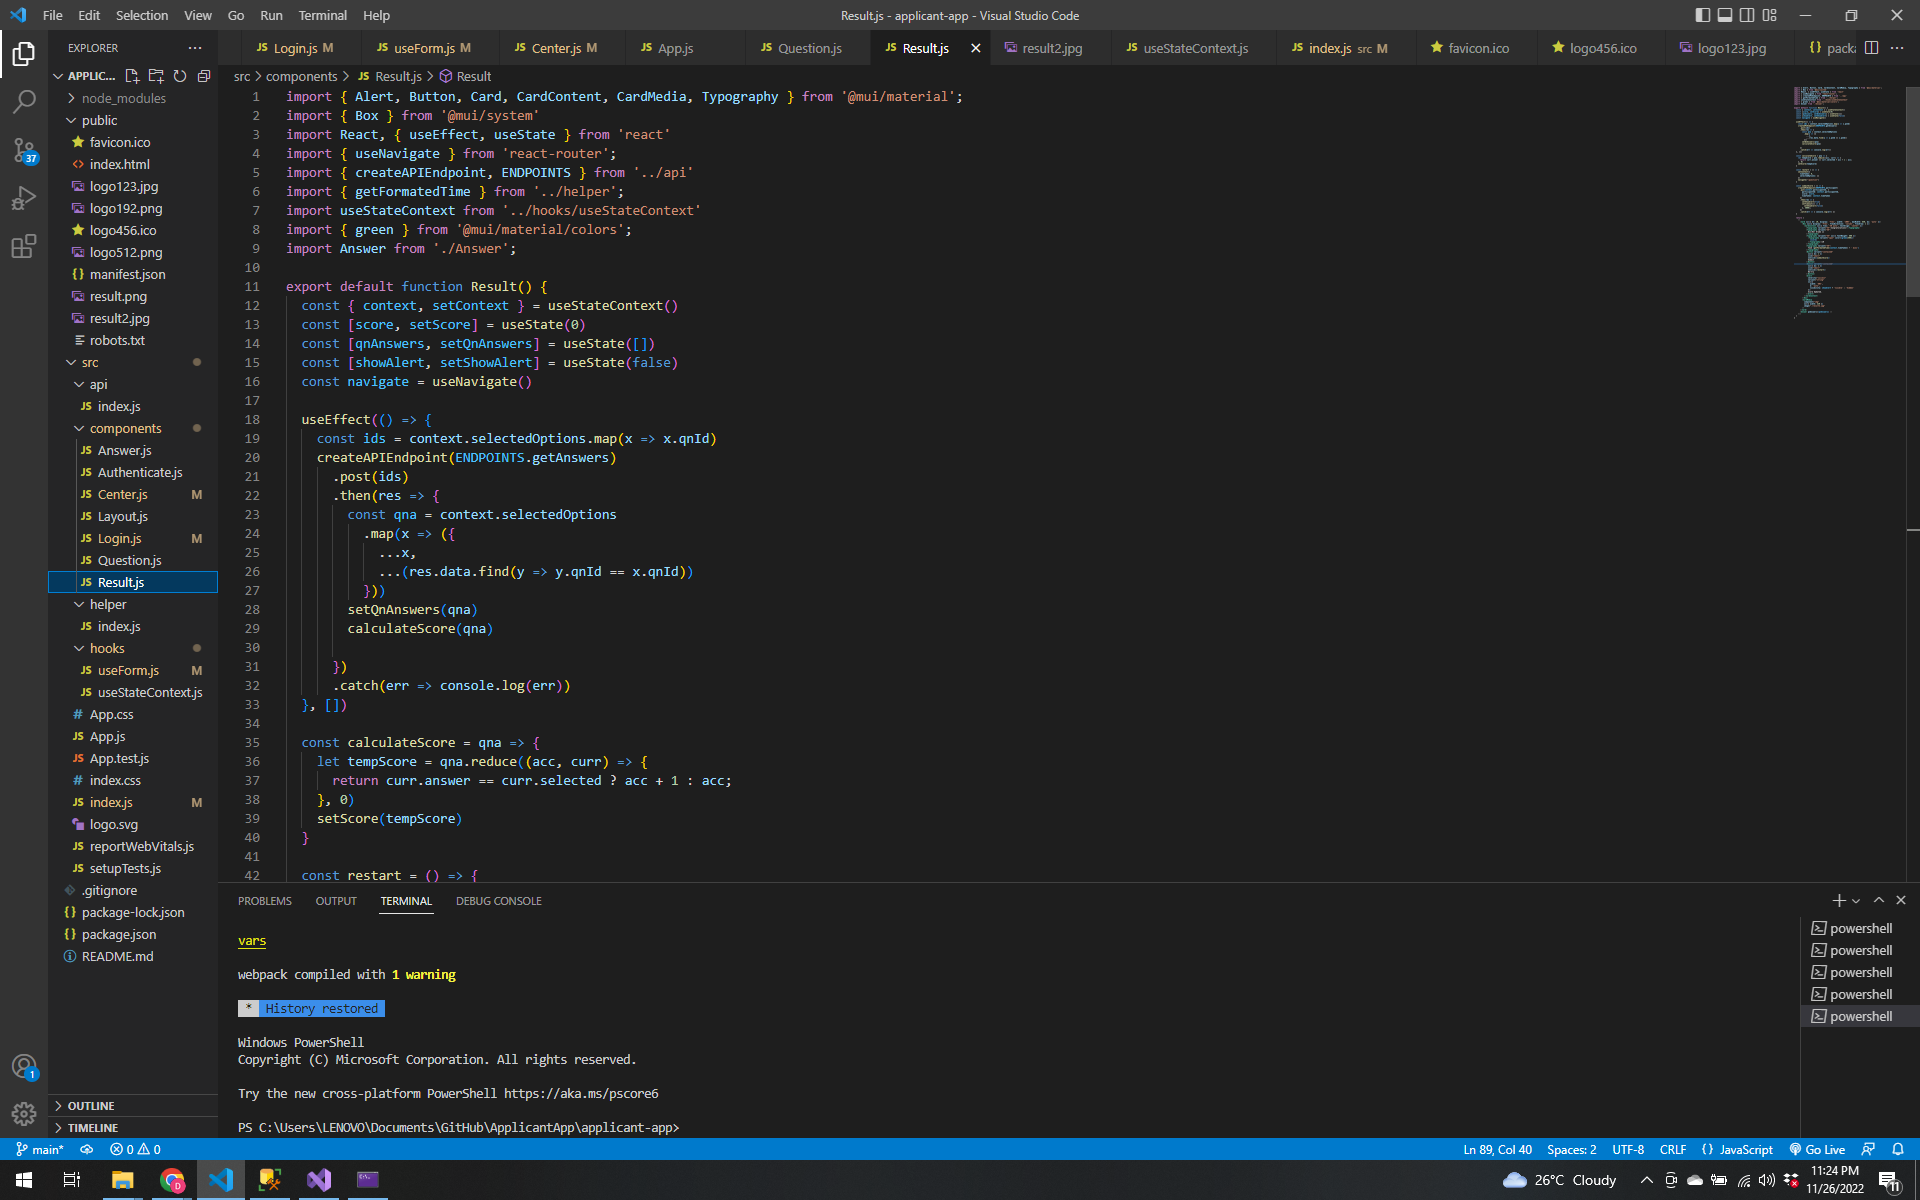
Let us also create a file under components named Result.js
Create new file under hooks named useStateContext.js
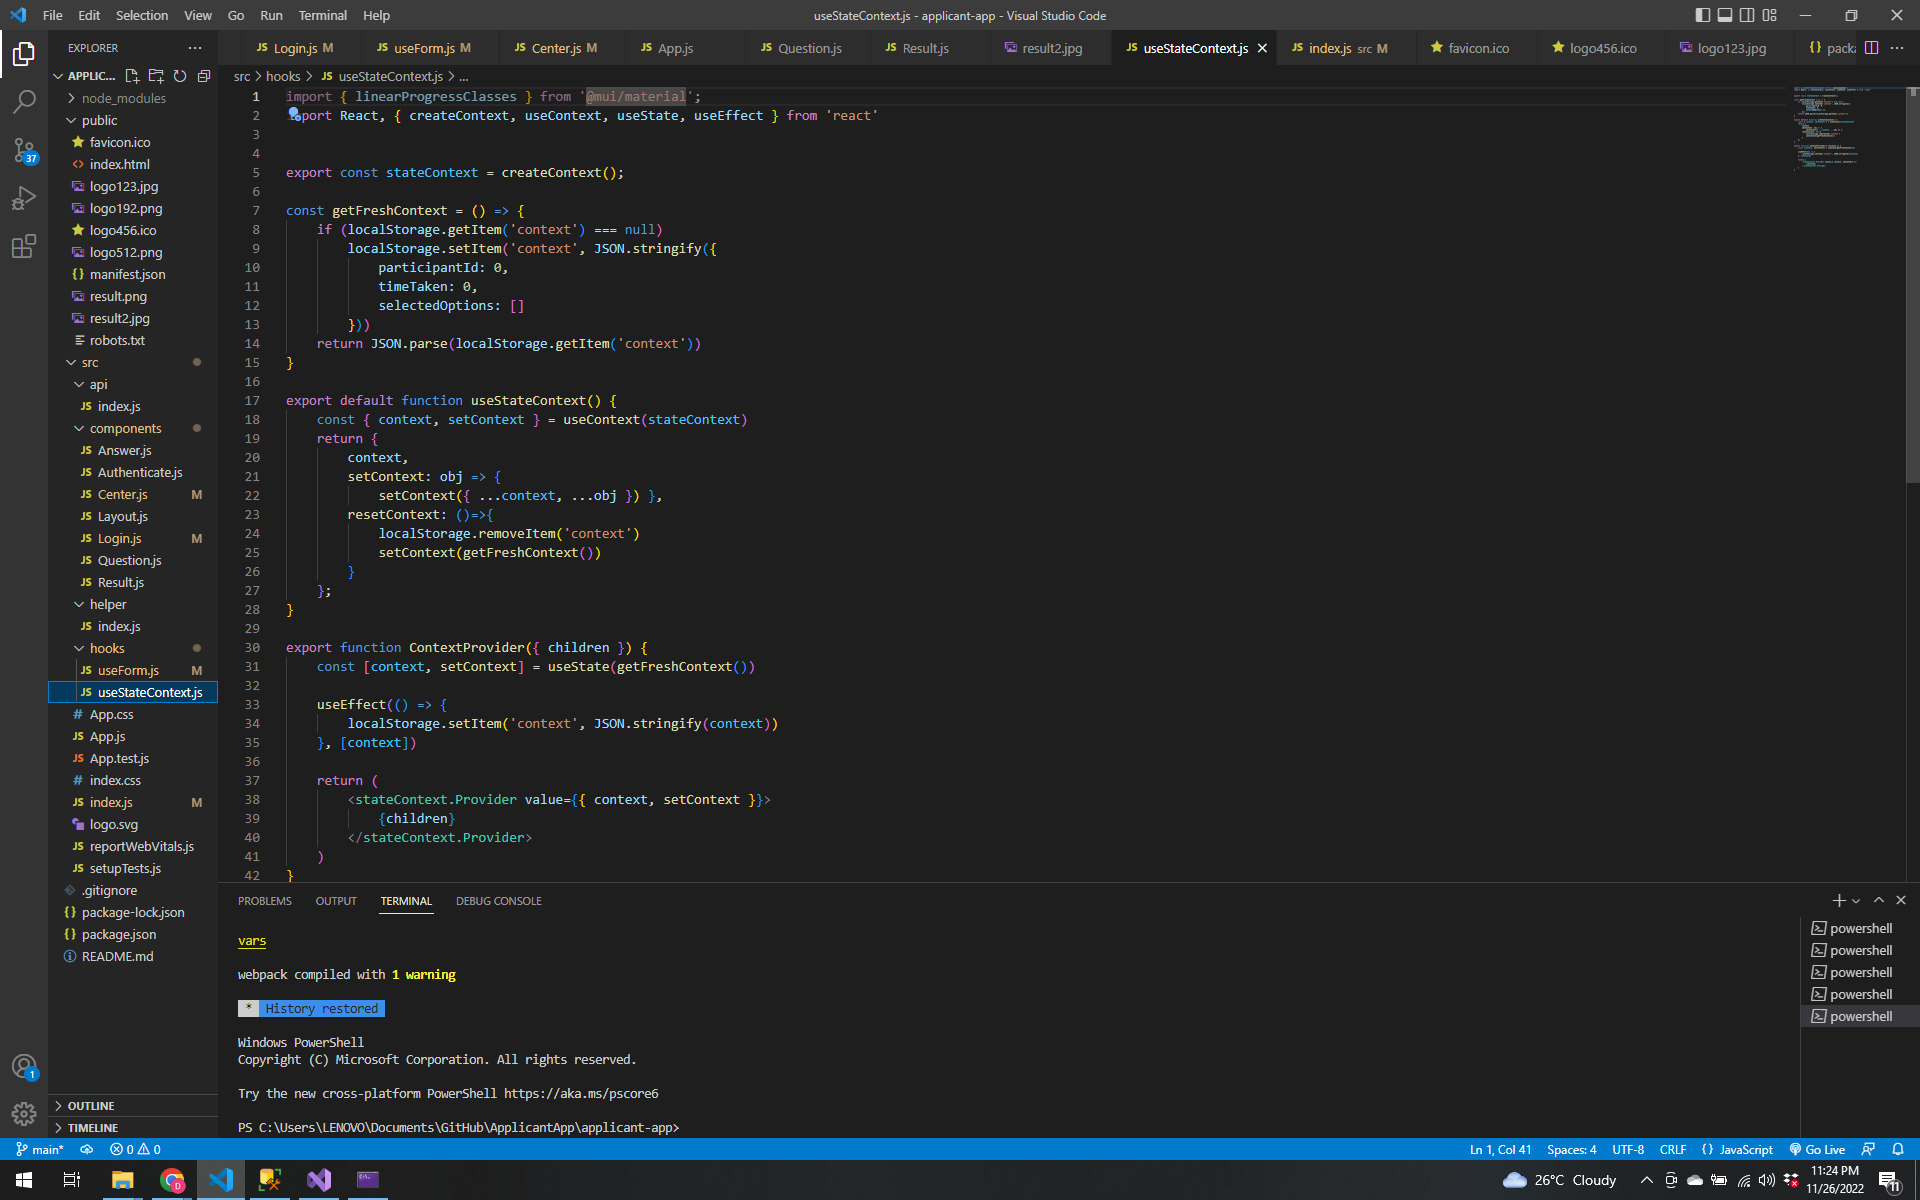
Follow coding in my video for setting up the configuration of API of different components.
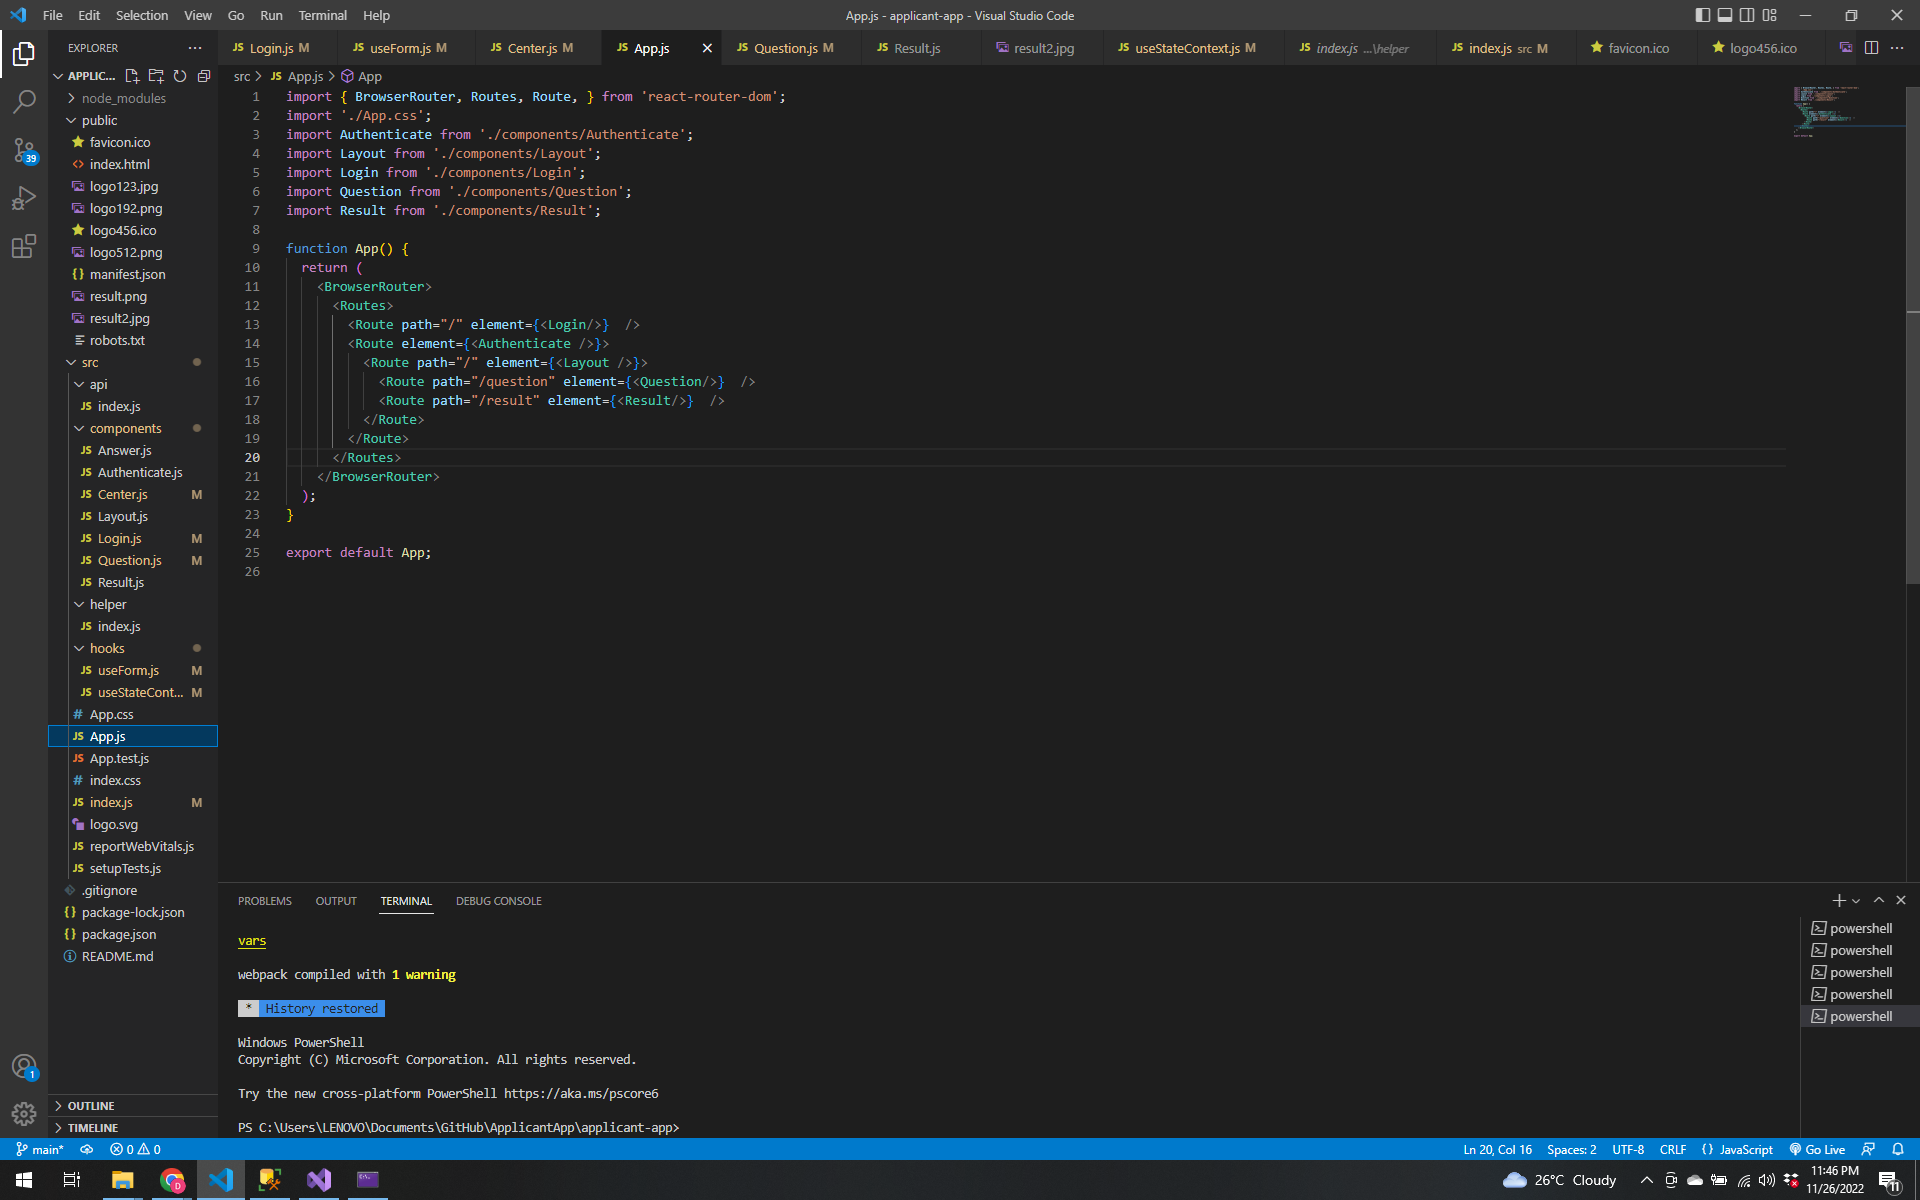
After that, let us route configuration.
Open New Terminal and type >npm i react-router-dom to install the react-router-dom
Follow this codes:
Follow my video again for other codes in the login.js for navigation
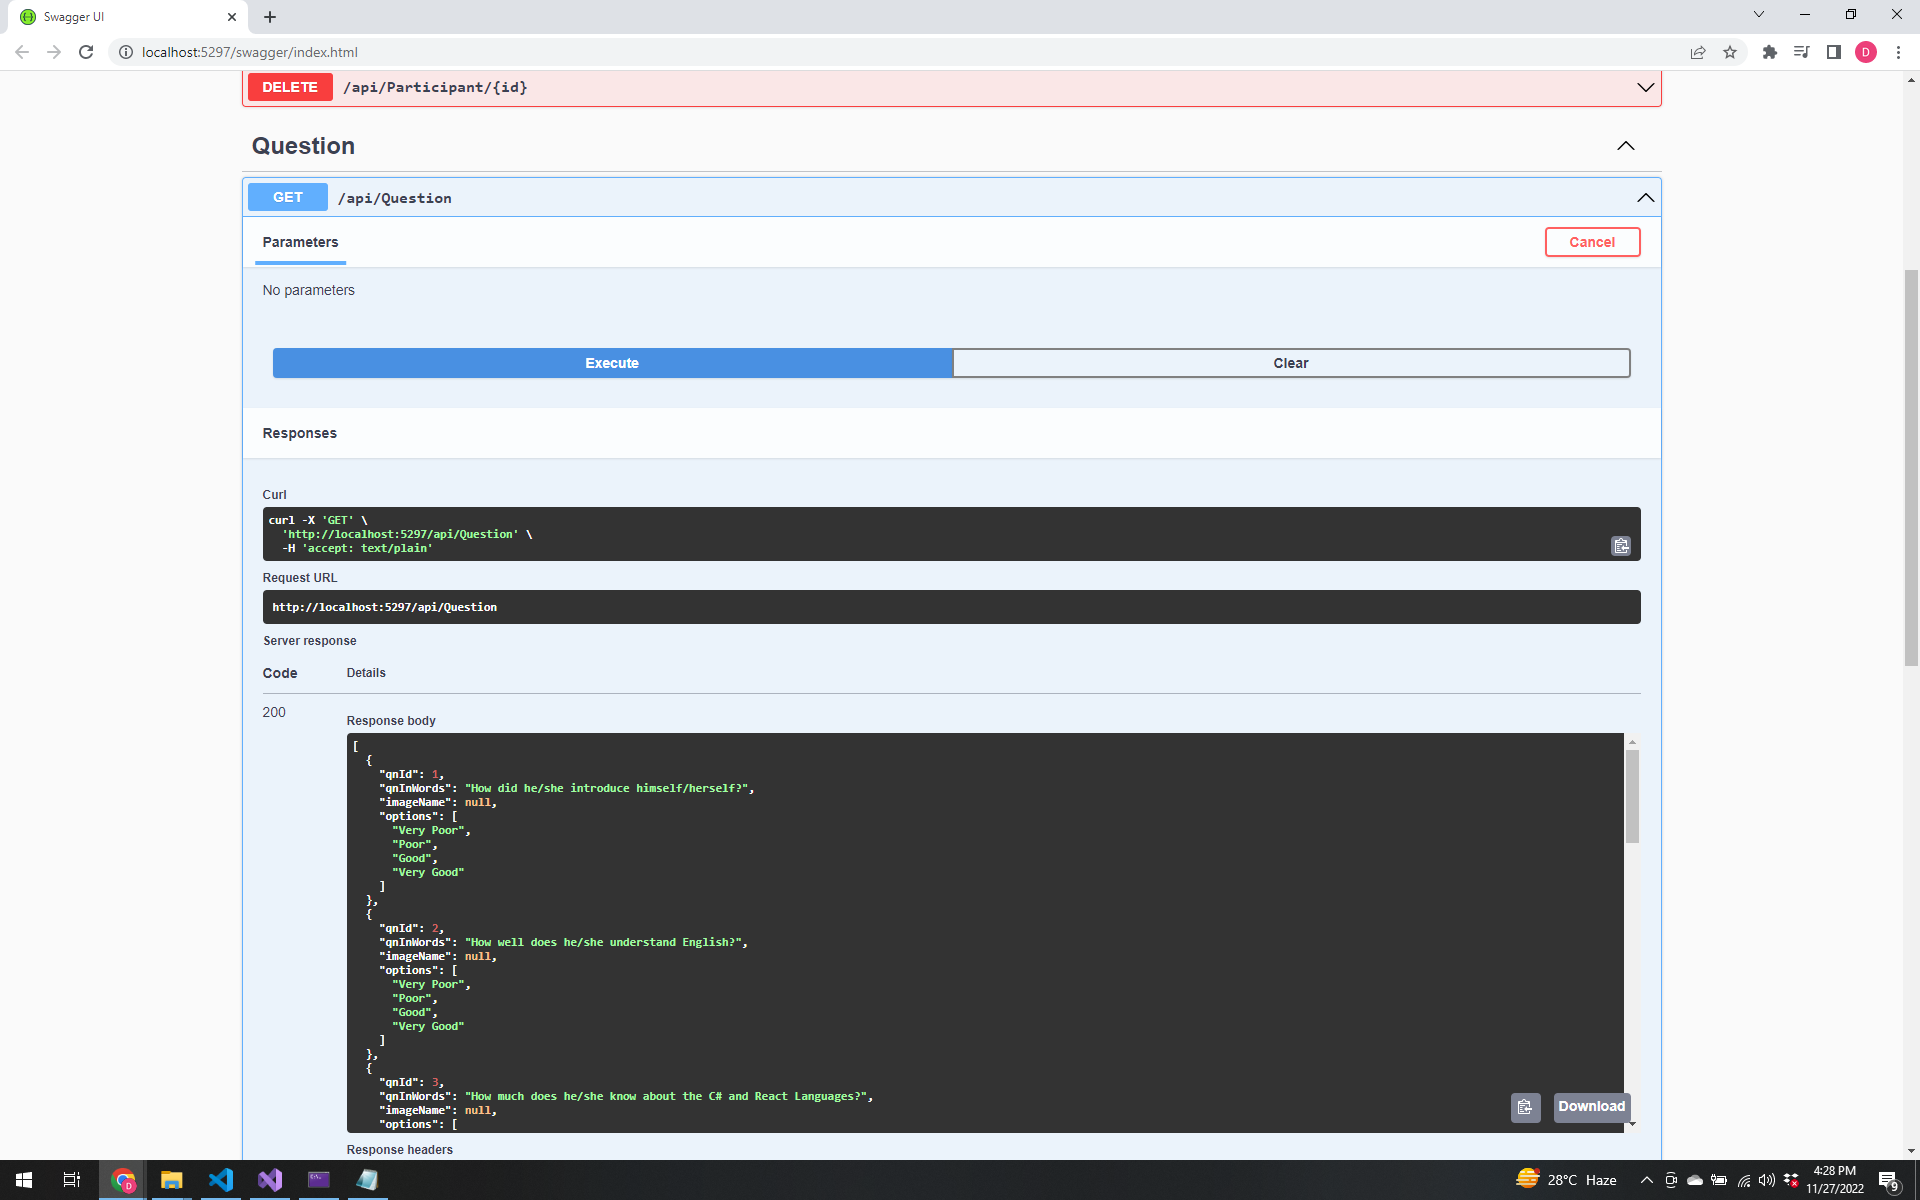
For Questions in the Application to be shown in the Front End Let us have some code like this.
To Test it if it is working, try it in the swagger.
We will make also some codes in the components of React the same effect of request. Follow these codes.
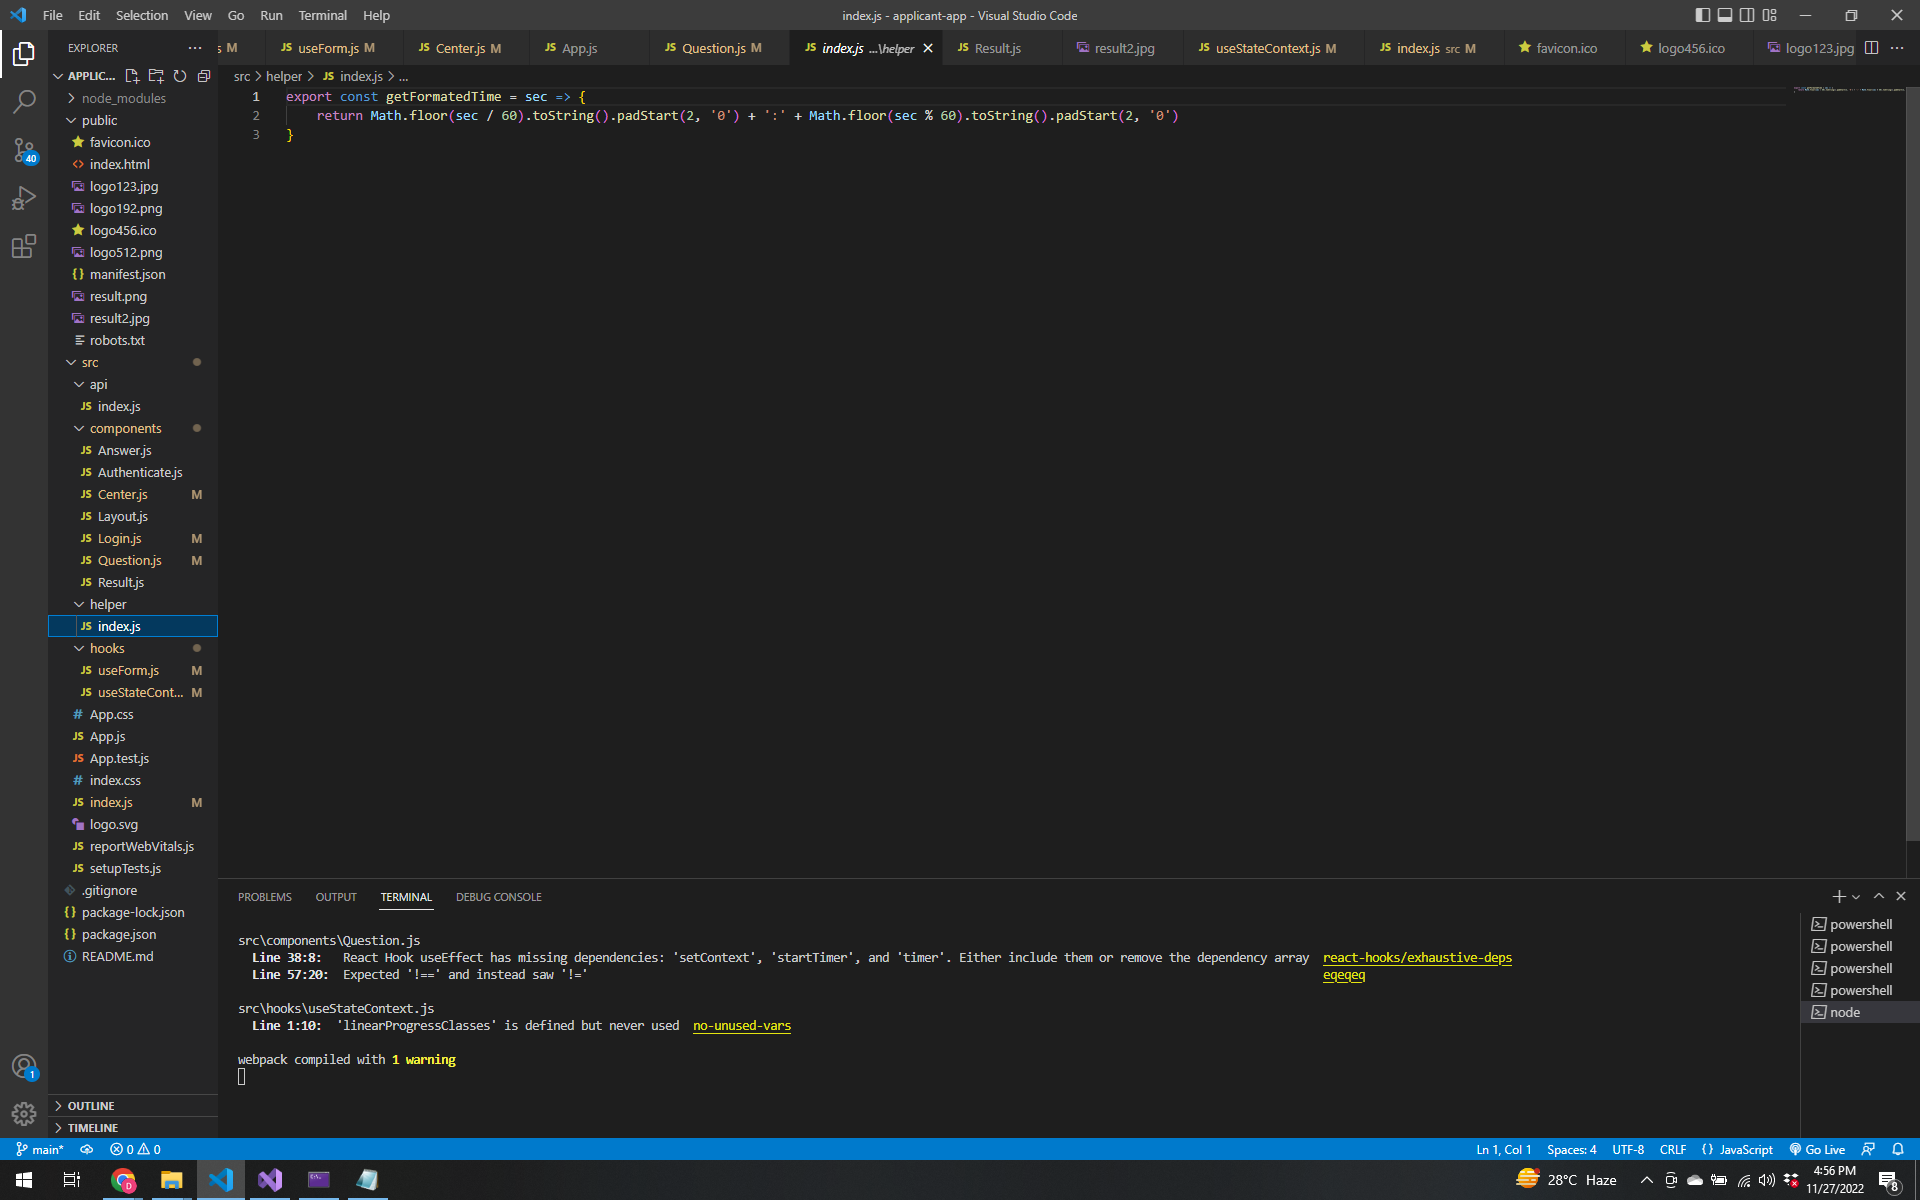
Create a new folder called helper to format the time in proper format. Create a file named index.js. Follow these codes
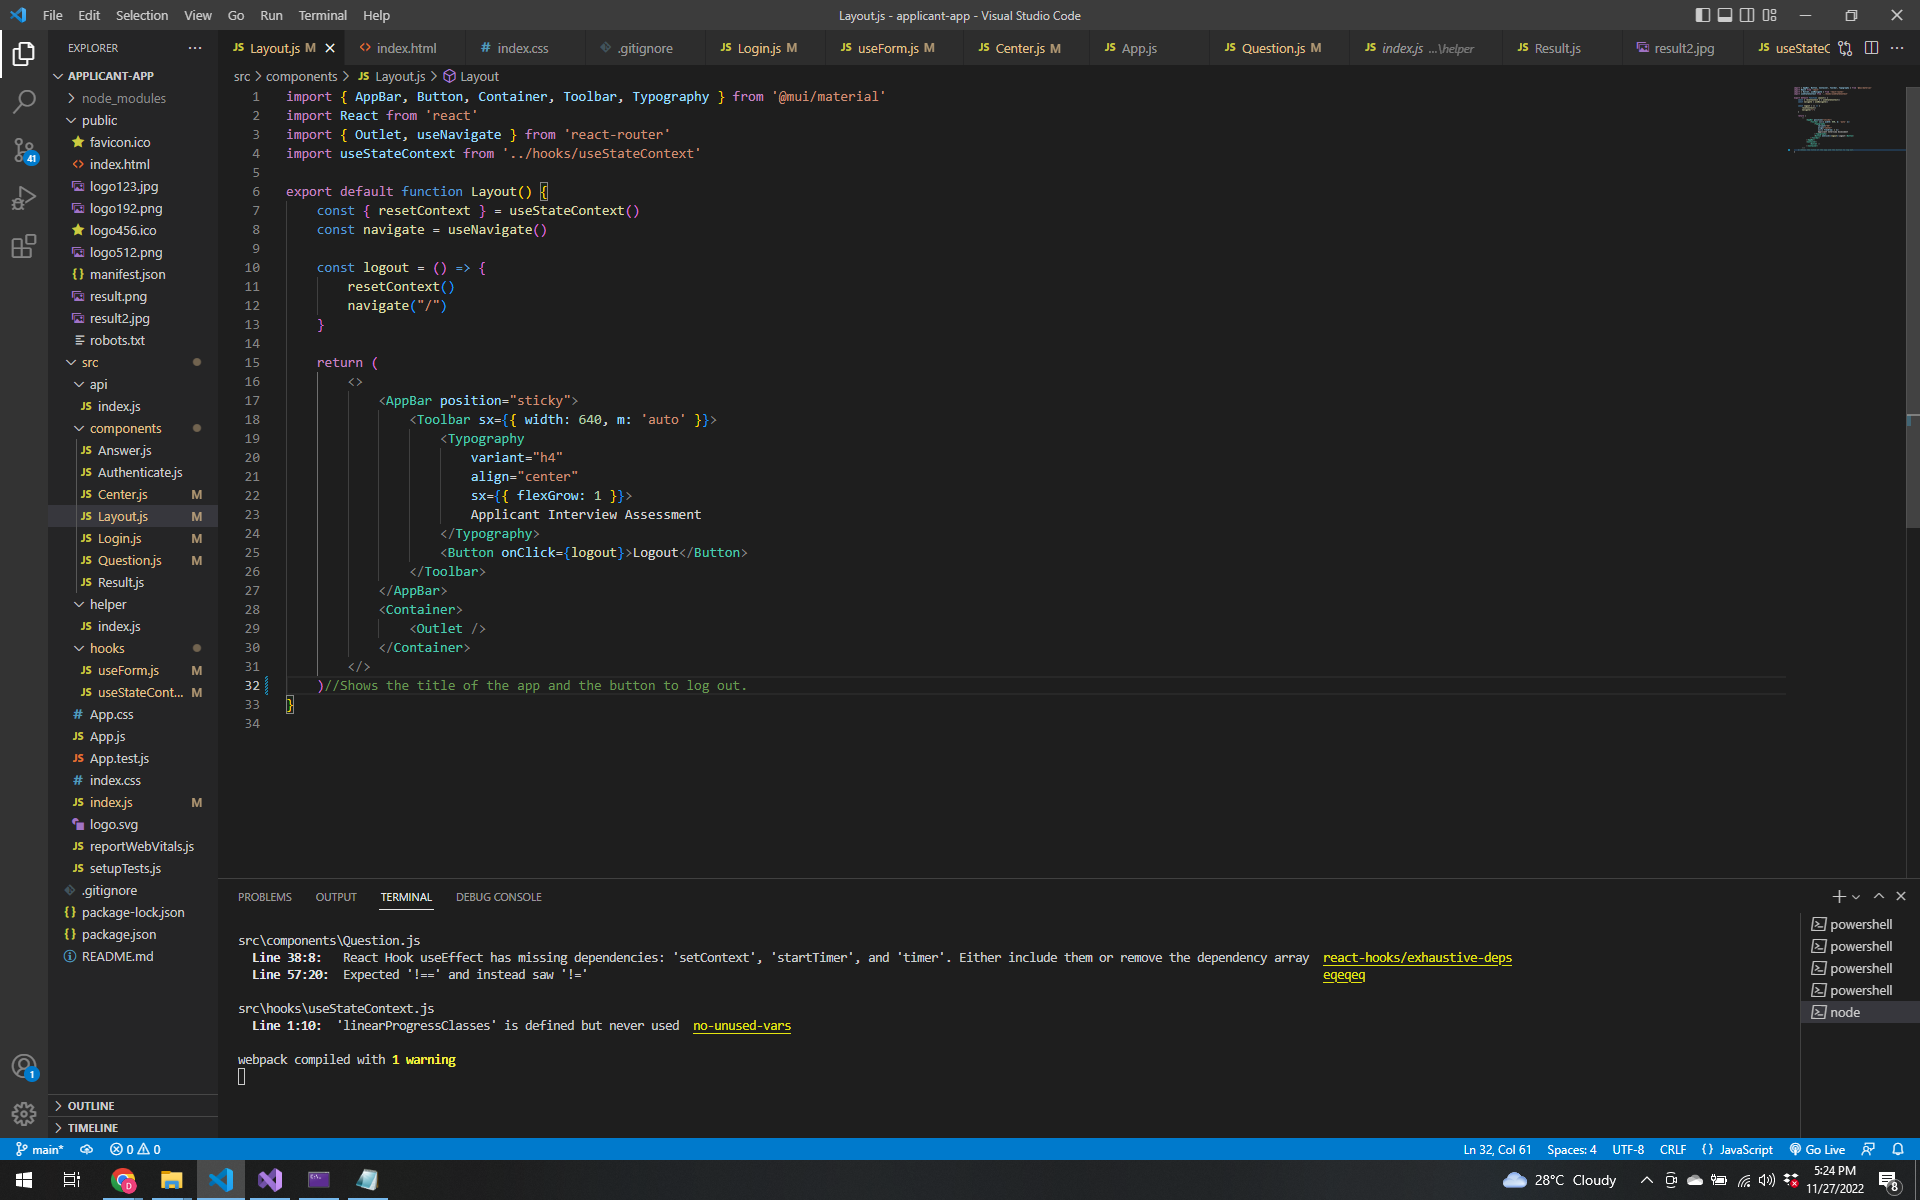
Create Title Bar for all pages and buttons in the Result to Submit the grade and log-out. Create a component named Layout.js.
Search again at mui.com for Appbar. And follow these codes.
Now let us create some applicant results . Follow the video.
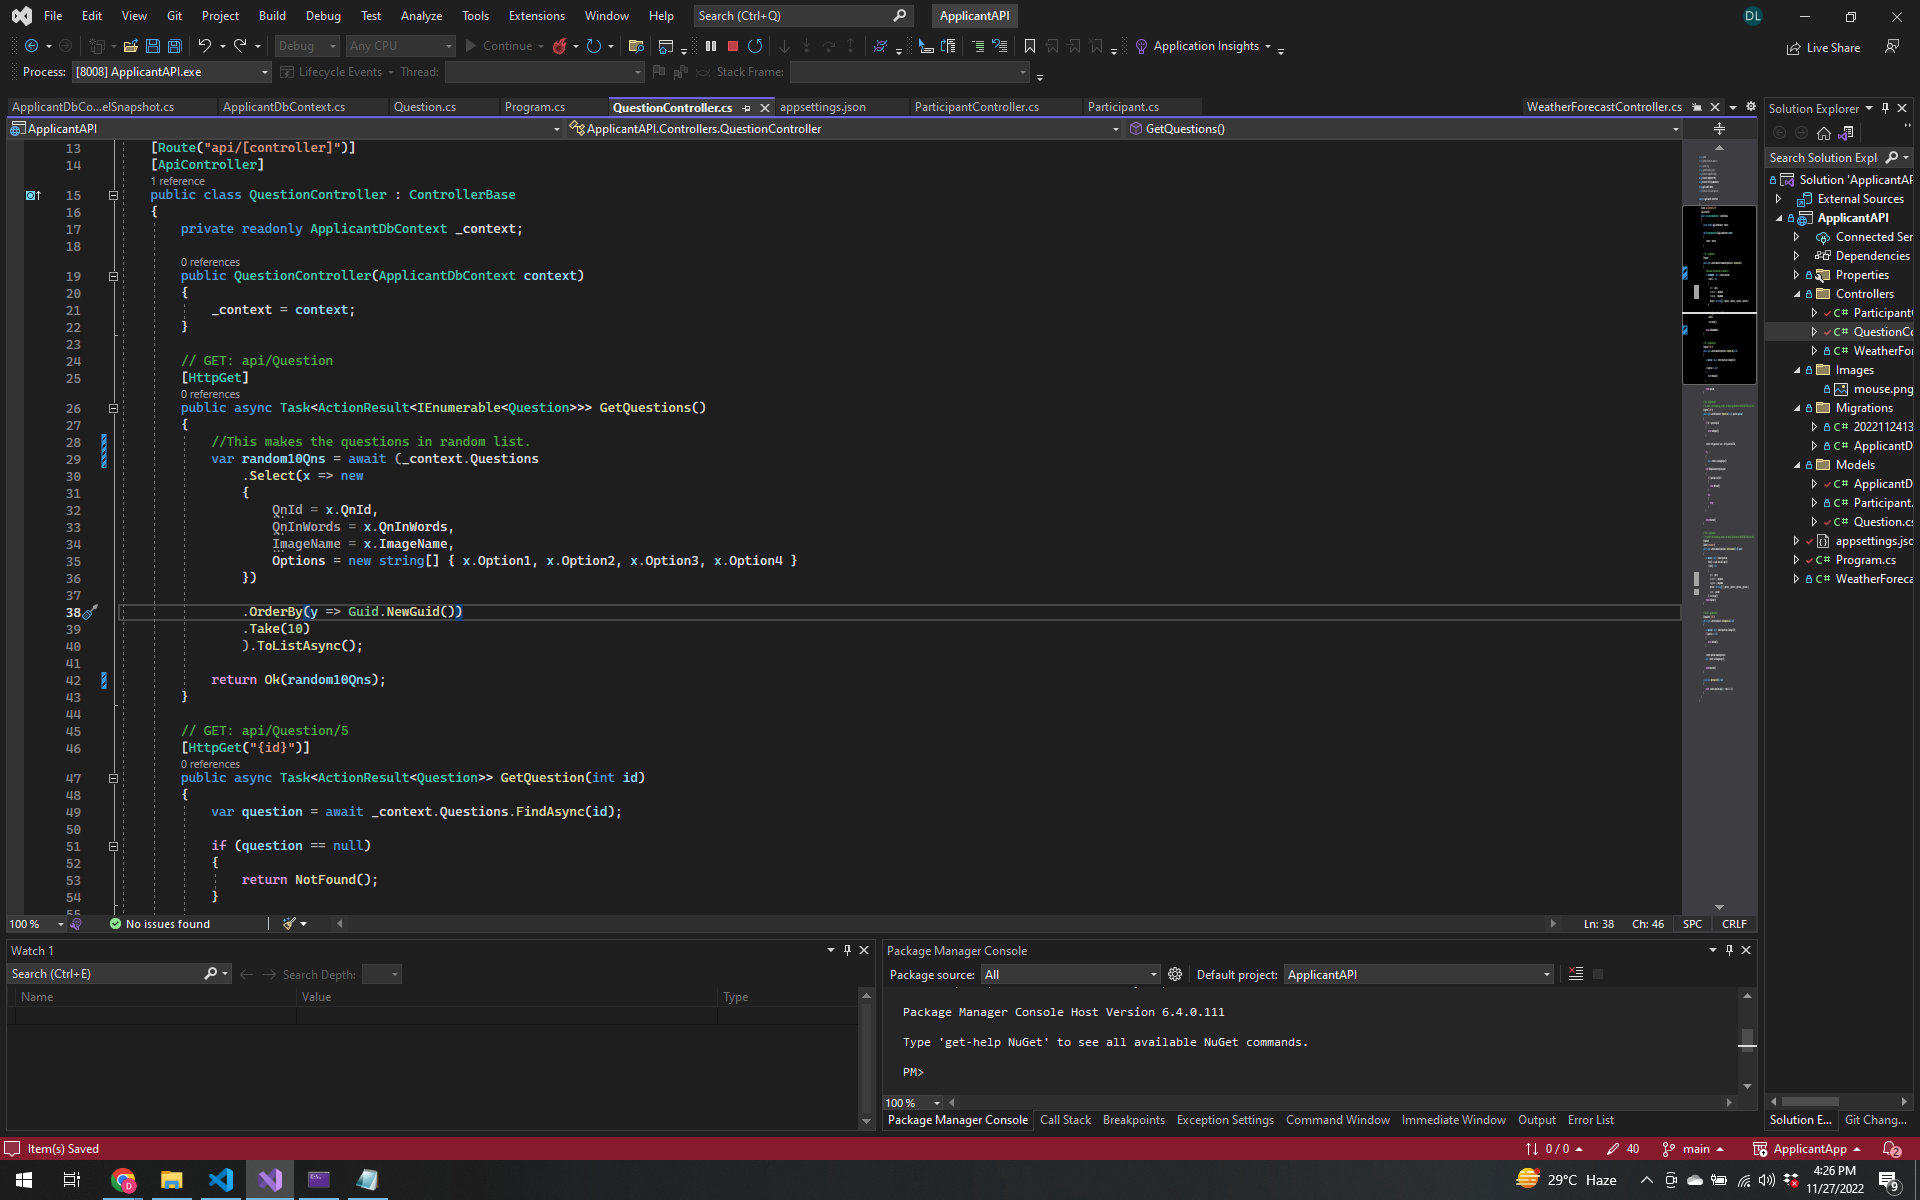
Edit some code in the QuestionController. Follow these codes.
![Screenshot 2022-11-28 01 37 37](https://user-images.githubusercontent.com/118221854/204150984-d64f2463-70d4-4c95-b31b-0fe8de663d4c.
Type this in the terminal npm install @mui/icons-material for icon.
Follow the video for final coding.