Provider Setup
This plugin has been tested to work against various providers, though not all providers provide support for all of this plugins' features.
This page holds the per-provider setup recipes and the general RBAC options. The operator-facing hardening and per-option reference (base-URL, SAML metadata/audience/binding/ request-signing/cert-rotation, provisioning, step-up/MFA, test-connection, config export/import, parental-rating) lives on Hardening & Options Reference; the security-control narratives (id_token requirements, secrets-at-rest, browser binding, in-flight capacity, SSO-only login) live on the Security Model. A one-line pointer is left below wherever a section moved.
❗ Before you proceed, make sure you have another admin account if you are going to link an SSO provider to the only admin account on the server — permissions might get overwritten.
❗ SAML signing algorithm: SAML responses must be signed with RSA or ECDSA using SHA-256 or stronger (SHA-384/SHA-512). Signatures using SHA-1 (rsa-sha1) or a SHA-1 digest are rejected, so if your identity provider still signs with SHA-1, reconfigure it to SHA-256 — otherwise every login through that provider fails with a "SAML response validation failed" error. The server log records the offending signature algorithm to help you diagnose this.
This section is broken into providers that support Role-Based Access Control (RBAC), and those that do not
-
✅ Dex
- ❗ Dex's built-in password database carries no group membership, so role-based access needs an upstream connector — see the section.
-
✅ Google OIDC
- ❗ Usernames are numeric
- ❗ Requires disabling validating OpenID endpoints
Every provider is configured with the same option surface. A minimal, RBAC-enabled provider looks like:
Enabled: true
EnableAuthorization: true
EnableAllFolders: true
EnabledFolders: []
Roles: ["jellyfin_user"]
AdminRoles: ["jellyfin_admin"]
EnableFolderRoles: false
FolderRoleMapping: []
The full per-provider option and hardening surface beyond these basics — permission-role mapping (transcode / downloads / deletion / …), parental rating by role, step-up / MFA, provisioning pending approval, the SAML validation / signing / response-binding / metadata / certificate-rotation options, secrets encrypted at rest and the downgrade procedure, the canonical base URL, the admin connection test, config export / import, SAML and OpenID login browser binding, in-flight login capacity, and SSO-only login — lives in two single homes:
- Hardening & Options Reference — the full per-provider option and hardening catalog.
- Security Model — the security properties and operator runbooks (id_token validation, login browser binding, in-flight capacity, secrets at rest, SSO-only login); the SSO-only threat model is in SSO-Only Login Design.
The rest of this page is the per-provider setup walkthroughs.
Authelia is simple to configure, and RBAC is straightforward.
Below is the identity_providers section of an Authelia config:
identity_providers:
  oidc:
    # hmac secret and private key given by env variables
    clients:
      - client_id: jellyfin
        client_name: My media server
        # Client secret should be randomly generated
        client_secret: <redacted>
        token_endpoint_auth_method: client_secret_post
        authorization_policy: one_factor
        redirect_uris:
- https://jellyfin.example.com/sso/OID/redirect/autheliaidentity_providers:
oidc:
# hmac secret and private key given by env variables
clients:
- id: jellyfin
description: My media server
# Client secret should be randomly generated
secret: <redacted>
authorization_policy: one_factor
redirect_uris:
- https://jellyfin.example.com/sso/OID/redirect/autheliaOn Jellyfin's end, we need to configure an Authelia provider as follows:
In order to test group membership, we need to request Authelia's groups OIDC scope, which we will use to check user roles.
authelia:
  OidEndpoint: https://authelia.example.com
  OidClientId: jellyfin
  OidSecret: <redacted>
  RoleClaim: groups
  OidScopes: ["groups"]
DisablePushedAuthorization: trueTo begin with, we must set up an OIDC provider + application in authentik. Refer to the official documentation for detailed instruction.
authentik supports RBAC, but is slightly more complicated to configure than Authelia, as we need to configure a custom scope binding to include in the OIDC response.
To do this, we:
-
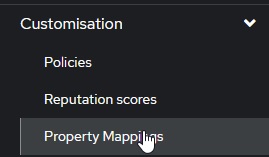
create a Custom Property Mapping
-
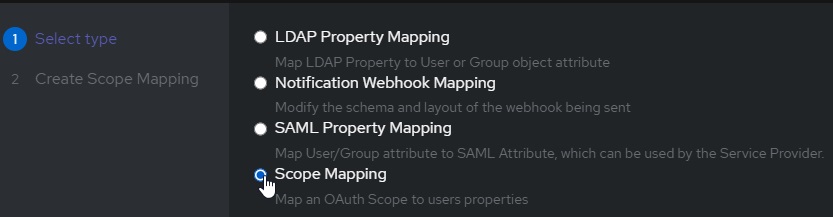
Create a Scope Mapping
-
Assign the following attributes:
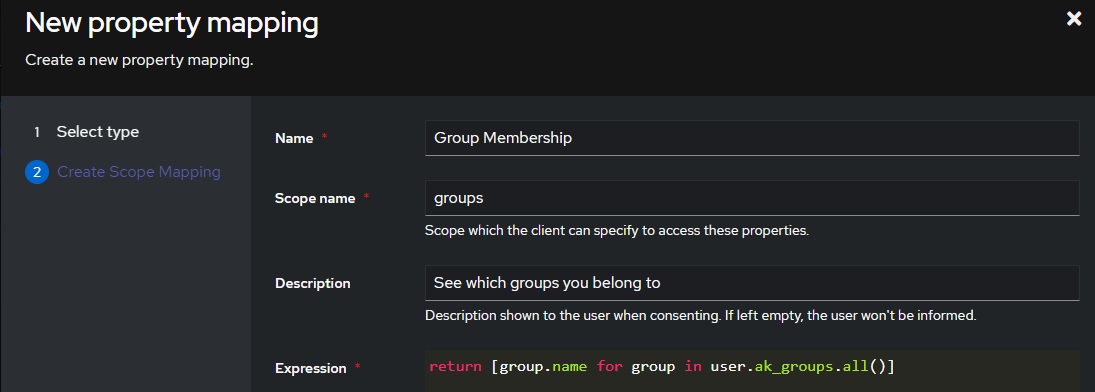
# A nice, human readable name
name: Group Membership
# The name of the scope a client must request to get access to a user's groups
Scope Name: groups
# A description of what is being requested to show to a user
Description: See Which Groups you belong to
-
For the Expression field, use the following code:
return [group.name for group in user.ak_groups.all()]
Now we can add this property mapping to authentik's Jellyfin OAuth provider:
-
Navigate to
Applications/providers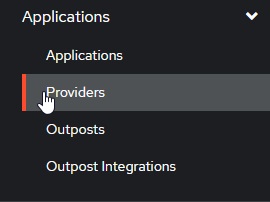
-
Edit / Update your Jellyfin OAuth provider
-
Verify your "Redirect URIs/Origins (RegEx)" follows the format:
https://domain.tld/sso/OID/redirect/Authentik. -
Under "Advanced Protocol Settings", add the Group Membership Scope
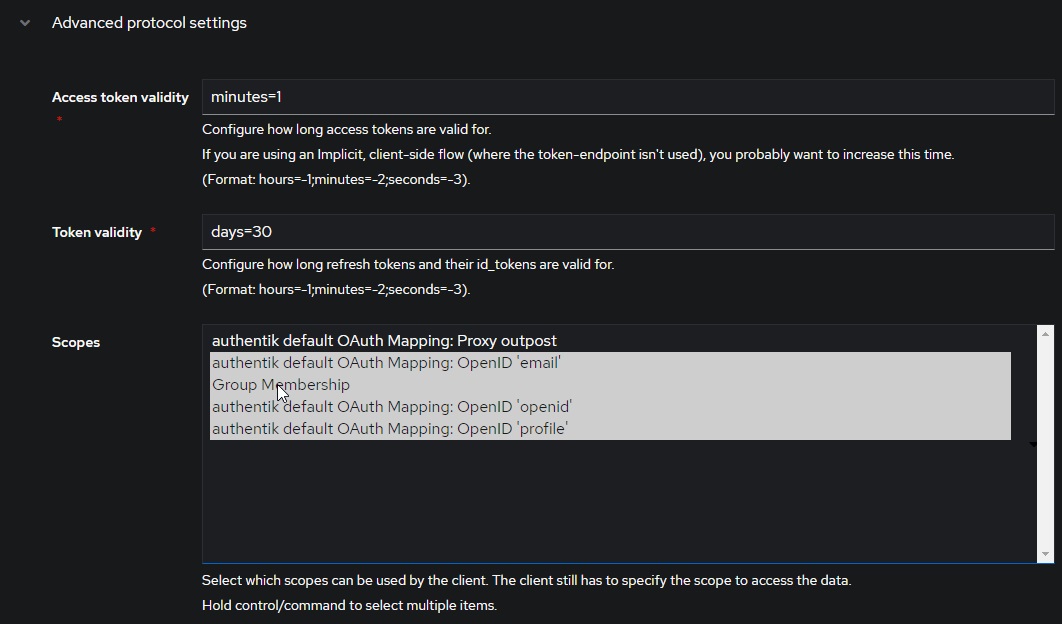
On Jellyfin's end, we need to configure an authentik provider as follows:
In order to test group membership, we need to request authentik's OIDC scope groups, which we will use to check user roles.
authentik:
  OidEndpoint: https://authentik.example.com/application/o/jellyfin
  OidClientId: <same-as-in-authentik>
  OidSecret: <redacted>
  RoleClaim: groups
  OidScopes: ["groups"]
If you receive the error Error processing request. from Jellyfin when attempting to login and the Jellyfin logs show Error loading discovery document: Endpoint belongs to different authority try setting Do not validate endpoints in the plugin settings.
Keycloak in general is a little more complicated than other providers. Ensure that you have a realm created and have some usable users.
Create a new Keycloak openid-connect application. Set the root URL to your Jellyfin URL (ie https://myjellyfin.example.com)
Ensure that the following configuration options are set:
- Access Type: Confidential
- Standard Flow Enabled
- Redirect URI: https://myjellyfin.example.com/sso/OID/redirect/PROVIDER_NAME
- Redirect URI (for Android app): org.jellyfin.mobile://login-callback
- Base URL: https://myjellyfin.example.com
Press the "Save" button at the bottom of the page and open the "Credentials" tab. Note down the secret.
For adding groups and RBAC, go to the "mappers" tab, press "Add Builtin", and select either "Groups", "Realm Roles", or "Client Roles", depending on the role system you are planning on using. Once the mapper is added, edit the mapper and ensure that you note down the Token Claim Name as well as enable all four toggles: "Multivalued", "Add to ID token", "Add to access token", and "Add to userinfo" are enabled.
Note that if you are using the template for the "Client Roles" mapper, the default token claim name has ${client_id} in it. When noting down this value, make sure you note down the actual Client ID (which should be written above).
On Jellyfin's side, we need to configure a Keycloak provider as follows:
keycloak:
  OidEndpoint: https://keycloak.example.com/realms/<realm>
  OidClientId: <same-as-in-keycloak>
  OidSecret: <redacted>
  RoleClaim: <same-as-token-claim-name>
Keycloak with SAML is very similar to OpenID. Again, Keycloak in general is a little more complicated than other providers. Ensure that you have a realm created and have some usable users.
Create a new Keycloak saml application. Set the root URL to your Jellyfin URL (ie https://myjellyfin.example.com)
Ensure that the following configuration options are set:
- Sign Documents on
- Sign Assertions off
- Client Signature Required off
- Redirect URI: https://myjellyfin.example.com/sso/SAML/post/PROVIDER_NAME
- Base URL: https://myjellyfin.example.com
- Master SAML processing URL: https://myjellyfin.example.com/sso/SAML/post/PROVIDER_NAME
These two URLs are the assertion consumer service endpoint Keycloak POSTs the SAML response to. The plugin accepts both the sso/SAML/post/PROVIDER_NAME spelling and the legacy sso/SAML/p/PROVIDER_NAME spelling; use either, consistently. (The challenge route sso/SAML/start/PROVIDER_NAME is only the URL a login starts from — it cannot process assertions.)
Press the "Save" button at the bottom of the page.
For adding groups and RBAC, go to the "mappers" tab, press "Add Builtin", and select either "Groups", "Realm Roles", or "Client Roles", depending on the role system you are planning on using. Once the mapper is added, edit the mapper and ensure that you note down the Token Claim Name as well as enable all four toggles: "Multivalued", "Add to ID token", "Add to access token", and "Add to userinfo" are enabled.
Note that if you are using the template for the "Client Roles" mapper, the default token claim name has ${client_id} in it. When noting down this value, make sure you note down the actual Client ID (which should be written above).
Finally, download the certificate. Open the "Installation" tab, select "Mod Auth Mellon files", and download the zip. Extract the zip file, and open the idp-metadata.xml file. Note down the contents of the X509Certificate value.
keycloak:
  SamlEndpoint: https://keycloak.example.com/realms/<realm>/protocol/saml
  SamlClientId: <same-as-in-keycloak>
SamlCertificate: <copied-from-xml-file>A simple and easy-to-use OIDC provider that allows users to authenticate with their passkeys to your services.
- Login to you Pocket ID admin account
- Go to
Administration -> OCID Clients - Click
Add OCID Client - Give the client a name e.g.
Jellyfin - Set the
Clent Launch URLto your Jellyfin endpoint - Set the callbak url to
https://jellyfin.example.com/sso/OID/redirect/pocketid. Thepocketidpart must match theName of OpenID Providerin the Jellyfin SSO provider - (optional) Enable PKCE if Jellyfin is an https endpoint
- (optional) Set a logo
- (optional) Set
Allowed User Groups
pocketid:
  OidEndpoint: https://pocketid.example.com/.well-known/openid-configuration
  OidClientId: <pocket-id-client-id>
  OidSecret: <pocket-id-secret>
  EnableAuthorization: true # (optional) If you want Jellyfin to read group permissions from pocket id
  RoleClaim: groups # (optional) If you want Jellyfin to be able to read group assignments from pocket id
  AdminRoles: admin # (optional) The pocket id group which will give a user Jellyfin admin privilges
  Roles: users  # (optional) The pocket id group which will give a user Jellyfin access
  AvatarUrlFormat: @{picture} # (optional) This will pull each users pocket id photo into Jellyfin
Kanidm is a modern and simple identity management platform written in rust.
kanidm system oauth2 create jellyfin "Jellyfin" https://jellyfin.example.com/

# Set this to drop the trailing @idm.example.com in usernames
kanidm system oauth2 prefer-short-username jellyfin

kanidm system oauth2 add-redirect-url jellyfin https://jellyfin.example.com/sso/OID/redirect/kanidm
kanidm system oauth2 add-redirect-url jellyfin https://jellyfin.example.com/sso/OID/r/kanidm

# Optionally setup groups for Jellyfin
kanidm group create jellyfin_admins
kanidm group create jellyfin_users

kanidm system oauth2 update-scope-map jellyfin jellyfin_admins openid profile groups
kanidm system oauth2 update-scope-map jellyfin jellyfin_users openid profile groups
Get the secret used in the Jellyfin config with kanidm system oauth2 show-basic-secret jellyfin.
kanidm:
  OidEndpoint: https://idm.example.com/oauth2/openid/jellyfin/
  OidClientId: jellyfin
  OidSecret: <kanidm-secret>
  # (optional) If you want Jellyfin to read group permissions from kanidm
  EnableAuthorization: true
  OidScopes:
    - groups
  RoleClaim: groups
  AdminRoles:
    - jellyfin_admins@idm.example.com
  Roles:
    - jellyfin_users@idm.example.com
    # If in your setup admin accounts aren't members of the users group you need to add the admins group to roles as well
    - jellyfin_admins@idm.example.com
  # (optional) If you want the name attribute instead of the spn attribute as username
DefaultUsernameClaim: preferred_usernameAn identity platform with organizations, projects and per-project roles. This recipe mirrors the plugin's automated end-to-end test against a real Zitadel instance, so every setting here is verified nightly.
Zitadel does not deliver roles as a flat array: the id_token claim urn:zitadel:iam:org:project:roles is an object map whose property names are the role keys ({"jellyfin-access": {"<org-id>": "<org-domain>"}}). The plugin reads that shape when you enable Role claim is an object map (RoleClaimIsObjectMap) — without it, every role-gated login is refused because the claim never parses as a role list.
- In the Zitadel console, create (or pick) a project — e.g.
jellyfin. - In the project's settings, enable Assert Roles on Authentication (
projectRoleAssertion) — without it the role claim is simply absent from the id_token and every role-gated login fails even though the grants exist. - In the project, create a web application of type Code (authorization-code flow):
- Authentication method: Basic (client id + secret).
- Redirect URI:
https://jellyfin.example.com/sso/OID/redirect/zitadel— the trailingzitadelmust match the provider name in Jellyfin. - In the app's Token Settings, enable Add user roles to the ID token (
idTokenRoleAssertion) and (recommended) User Info inside ID Token. - Only for plain-http test setups: enable the app's Dev Mode (allows a non-https redirect URI). Do not use Dev Mode in production.
- In the project, create the roles you want to gate on — e.g.
jellyfin-accessandjellyfin-admin. - Grant the roles to your users (user → Authorizations → add the project's roles). A user without a grant authenticates at Zitadel but is refused by the plugin's role gate — exactly the intended split.
zitadel:
  OidEndpoint: https://zitadel.example.com # the instance base URL; discovery is derived from it
  OidClientId: <client-id-from-the-app>
  OidSecret: <client-secret-from-the-app>
  OidScopes:
    - openid
    - email
    - profile
  EnableAuthorization: true
  RoleClaim: urn:zitadel:iam:org:project:roles
  RoleClaimIsObjectMap: true # REQUIRED for Zitadel — the roles are the object's property names
  Roles:
    - jellyfin-access
  AdminRoles:
- jellyfin-adminA lightweight OIDC broker, usually fronting an upstream identity source (LDAP, GitHub, SAML, another OIDC provider). The login round-trip below is verified by the plugin's automated end-to-end test against a real Dex instance.
❗ Role-based access needs an upstream connector. Dex's built-in password database (enablePasswordDB / staticPasswords) carries no group membership — groups only reach Dex through an upstream connector (LDAP, GitHub, …). With the built-in database you can authenticate users, but the plugin's role gate has nothing to read: leave the login allow-list empty (Roles: [], which admits every authenticated user) or use folder/admin gating only once you have a group-capable connector.
❗ Dex's local connector emits no preferred_username claim at all — the username comes from the name claim (Dex maps its username field there). Set the username claim accordingly or your users are created under an empty name.
issuer: https://dex.example.com/dex

staticClients:
  - id: jellyfin-oidc
    name: Jellyfin
    secret: <a-strong-random-secret>
    redirectURIs:
      - "https://jellyfin.example.com/sso/OID/redirect/dex" # the trailing `dex` must match the provider name in Jellyfin

# for a quick trial only — no groups, see the note above; production setups use a connector
enablePasswordDB: true
staticPasswords:
  - email: "alice" # Dex's local connector looks users up by `email`
    username: "alice" # becomes the id_token's `name` claim
    userID: "alice-1"
hash: "<bcrypt-hash>" # htpasswd -nbBC 10 "" 'password' | cut -d: -f2dex:
OidEndpoint: https://dex.example.com/dex # Dex serves discovery under its issuer path
OidClientId: jellyfin-oidc
OidSecret: <the-same-secret>
OidScopes:
- openid
- email
- profile
DefaultUsernameClaim: name # Dex's local connector emits no preferred_username
EnableAuthorization: true
Roles: [] # empty = every authenticated user may log in (no groups without an upstream connector)With a group-capable connector (e.g. LDAP), request the groups scope, set RoleClaim: groups and populate Roles / AdminRoles like any other RBAC provider above.