Warning
Please install GPU PyTorch: https://pytorch.org/get-started/locally/
- Use terminal or an anaconda prompt
conda create --name myenv-
Replace myenv with the name of your enviornment
-
When conda asks to proceed type y
proceed ([y]/n)?- Now navigate to new enviornment for following instructions
conda activate myenv- Clone this repository and navigate to the FastChat folder
git clone https://github.com/lm-sys/FastChat.git FastChat
cd FastChat
If you are running on Mac:
brew install rust cmake- Install Package
pip3 install --upgrade pip  # enable PEP 660 support
pip3 install -e ".[model_worker,webui]"- Clone this repository
git clone https://github.com/FranardoHuang/edugpt.git edugpt
cd FastChat- Navigate to folder
cd edugpt- Install requirements
pip3 install -r requirements.txt- Recommended python version
3.9+
-
Go to https://discord.com/developers/applications create an application
-
Build a Discord bot under the application
-
Get the token from bot setting

-
Store the token to
.envunder theDISCORD_BOT_TOKEN
-
Turn MESSAGE CONTENT INTENT
ON
-
Invite your bot to your server via OAuth2 URL Generator
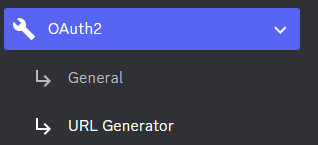
-
To use URL Generator go to general and create a redirect URI, please change the CLIENTID to application ID of your bot https://discordapp.com/oauth2/authorize?client_id=CLIENTID&scope=bot
-
Click Create new secret key

-
Store the SECRET KEY to
.envunder theOPENAI_API_KEY
-
Open a terminal or command prompt
-
Navigate to the directory where you installed the ChatGPT Discord bot
-
Run
python3 main.pyorpython main.pyto start the bot
-
Build the Docker image & Run the Docker container
docker compose up -d -
Inspect whether the bot works well
docker logs -t chatgpt-discord-botdocker psto see the list of running servicesdocker stop <BOT CONTAINER ID>to stop the running bot
- The auto-login feature allows your bot to automatically login to either Google Bard or Microsoft Bing using provided credentials
- It will auto fetch the cookies you need
- To enable this feature, first specify your Chrome browser's version by filling in the
chrome_versionfield in the.envfile - Google Bard
-
set
bard_enable_auto_logintoTruein.env -
Fill
google_accountandgoogle_passwordin.env(NOTICE: AUTO-LOGIN ONLY WORKS FOR GOOGLE ACCOUNT THAT DOES NOT HAVE 2FA)
-
- Microsoft Bing
- set
bing_enable_auto_logintoTruein.env - Then fill
bing_accountandbing_passwordin.env
- set
-
A system prompt would be invoked when the bot is first started or reset
-
You can set it up by modifying the content in
system_prompt.txt -
All the text in the file will be fired as a prompt to the bot
-
Get the first message from ChatGPT in your discord channel!
-
Go Discord setting turn
developer modeon-
Right-click the channel you want to recieve the message,
Copy ID
-
paste it into
.envunderDISCORD_CHANNEL_ID
-
- Set the value of
LOGGINGin the.envto False
-
/chat [message]Chat with ChatGPT! -
/draw [prompt]Generate an image with the Dalle2 model -
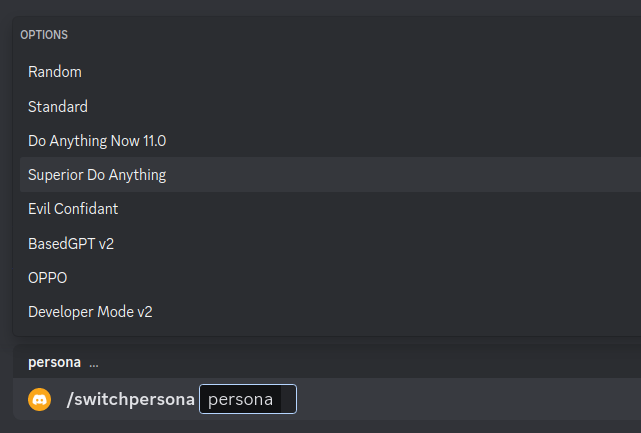
/switchpersona [persona]Switch between optional chatGPT jailbreaksrandom: Picks a random personachatGPT: Standard chatGPT modedan: Dan Mode 11.0, infamous Do Anything Now Modesda: Superior DAN has even more freedom in DAN Modeconfidant: Evil Confidant, evil trusted confidantbased: BasedGPT v2, sexy gptoppo: OPPO says exact opposite of what chatGPT would saydev: Developer Mode, v2 Developer mode enabled
-
/privateChatGPT switch to private mode -
/publicChatGPT switch to public mode -
/replyallChatGPT switch between replyAll mode and default mode -
/resetClear ChatGPT conversation history -
/chat-modelSwitch different chat modelOFFICIAL-GPT-3.5: GPT-3.5 modelOFFICIAL-GPT-4.0: GPT-4.0 model (make sure your account can access gpt-4 model)Website ChatGPT-3.5: Website ChatGPT-3.5 model (UNOFFICIAL)Website ChatGPT-4.0: Website ChatGPT-4.0 model (UNOFFICIAL)(available if you got a plus account)Bard: Google Bard ModelBing: Microsoft Bing Model

Warning
Using certain personas may generate vulgar or disturbing content. Use at your own risk.
-
public mode (default)the bot directly reply on the channel
-
private modethe bot's reply can only be seen by the person who used the command
-
replyall modethe bot will reply to all messages in the channel without using slash commands (/chatwill also be unavailable)Warning The bot will easily be triggered in
replyallmode, which could cause program failures