
Emulate Hitachi HD44780 and compatible devices in HTML
npm install char-lcd --save
or bower install char-lcd
or yarn add char-lcd
or clone the whole project from GitHub
https://github.com/jazz-soft/polymer-char-lcd
<script src="char-lcd.js"></script>
//...
<script src="https://cdn.jsdelivr.net/npm/char-lcd"></script>
//...
var CharLCD = require('char-lcd');
//...
require(['char-lcd'], function(CharLCD) {
  // ...
});
<div id=lcd></div>
...
var lcd = new CharLCD({ at: 'lcd', rows: 2, cols: 16, rom: 'eu' });
// Map UNICODE string to the internal character set:
lcd.text(0, 0, "ЁЛКИ-ПАЛКИ!");
var lcd = new CharLCD(params);
params is an object with the following keys:
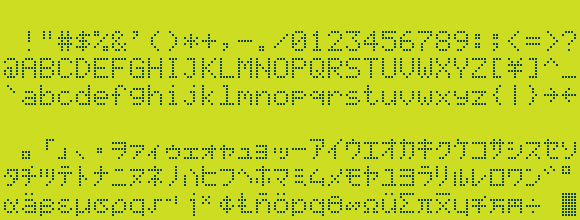
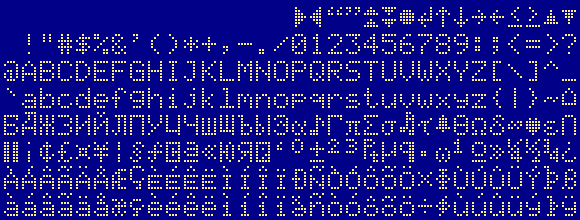
at: a DOM element in which to place the object, or itsid; default: at the bottom of the page;rom:jp(default) for Japanese standard font, oreufor European standard font.rows: - number of rows; default: 2;cols: - number of columns; default: 16;
Unlike the real hardware where only certain combinations of rows/cols exist, there are no restrictions in the simulator;
lcd.char(r, c, h); - set the character at row r, column c to byte h.
lcd.text(r, c, s); - print string s at row r, column c.
This function treats \n as new line and maps UNICODE characters to the internal character set.
lcd.font(n, data); - define the pixels for the n-th character; data is an array of up to 10 bytes.
In real hardware, only first 8 characters can be changed, but there is no such limitation in the simulator.
lcd.roms gives access to roms
lcd.cursor(r, c); - sets cursor at row r, column c. Must be called after setting the chars.