
| ⚡ High Performance | 💰 Cost Efficient | 🚀 Fast & Scalable |
FastCode is a token-efficient framework for comprehensive code understanding and analysis: delivering superior speed, exceptional accuracy, and cost-effectiveness for large-scale codebases and software architectures.
🚀 Superior Speed Advantage - Runs 3x faster than Cursor and 4x faster than Claude Code.
💰 Significant Cost Savings - Costs 55% less than Cursor and 44% less than Claude Code.
⚡ Highest Accuracy - Outperforms Cursor and Claude Code with the highest accuracy score.

- 3-4x Faster than competitors (Cursor/Claude Code)
- 44-55% Cost Reduction compared to alternatives
- Highest Accuracy Score across benchmarks
- Up to 10x Token Savings through smart navigation
- Large-Scale Repository Analysis - Handle massive codebases efficiently
- Multi-Language Support - Python, JavaScript, TypeScript, Java, Go, C/C++, Rust, C#
- Multi-Repository Reasoning - Cross-repo dependency analysis
- Small Model Support - Local model compatibility (qwen3-coder-30b)
- Beautiful Web UI - Intuitive codebase exploration
- Flexible API - Easy workflow integration
- Smart Structural Navigation - Load only what you need
Click to watch FastCode in action - See how FastCode analyzes complex codebases with lightning speed.
FastCode introduces a three-phase framework that transforms how LLMs understand and navigate codebases:

-
🔍 Hierarchical Code Units — Advanced multi-level indexing spanning files, classes, functions, and documentation using AST-based parsing across 8+ programming languages
-
🔗 Hybrid Index — Seamlessly combines semantic embeddings with keyword search (BM25) for robust and precise code retrieval
-
📊 Multi-Layer Graph Modeling — Three interconnected relationship graphs (Call Graph, Dependency Graph, Inheritance Graph) enabling structural navigation across the entire codebase
Finding the right code without opening every file - at lightning speed
-
⚡ Two-Stage Smart Search — Like having a research assistant that first finds potentially relevant code, then ranks and organizes the best matches for your specific question.
-
📁 Safe File Browsing — Explores your project structure securely, understanding folder organization and file patterns without compromising security.
-
🌐 Following Code Connections — Traces how code pieces connect (up to 2 steps away), like following a trail of breadcrumbs through your codebase.
-
🎯 Code Skimming — Instead of reading entire files, FastCode just looks at the "headlines" - function names, class definitions, and type hints. This is like reading a book's chapter titles instead of every page, saving massive amounts of processing power.
Getting maximum insight while minimizing costs - automatically
-
📈 Budget-Aware Decision Making — Considers five key factors before processing: confidence level, query complexity, codebase size, resource cost, and iteration count. Like a cost-conscious financial advisor that weighs all options before making decisions.
-
🔄 Resource-Optimized Learning — Continuously adapts its approach in real-time, getting more efficient about what information to gather and when to stop. Think of it as an AI that maximizes value and becomes more cost-effective with every query.
-
🎯 Value-First Selection — Prioritizes high-impact, low-cost information first, like choosing the ripest fruit at the best price. This cost-optimized approach ensures you get maximum value for every token spent until the perfect stopping point is reached.
FastCode has been rigorously tested on four major benchmarks representing real-world software engineering challenges:
| Benchmark | Focus Area | What It Tests |
|---|---|---|
| SWE-QA | Software Engineering Q&A | Complex technical question answering |
| LongCodeQA | Extended Code Analysis | Long-context code understanding |
| LOC-BENCH | Code Localization | Bug detection & feature requests |
| GitTaskBench | Real-World Tasks | Production repository workflows |
-
✅ Superior Accuracy — Consistently outperforms state-of-the-art baselines across all benchmarks
-
✅ 10x Token Efficiency — Achieves better results while using up to 90% fewer tokens
-
✅ Real-World Validation — Proven performance on actual production codebases and workflows
Get FastCode running in under 2 minutes:
# 1. Clone the repository
git clone https://github.com/HKUDS/FastCode.git
cd FastCode

# 2. Install dependencies
pip install -r requirements.txt

# 3. Configure your API keys
cp env.example .env
# Edit .env with your API keys

# 4. Launch the Web UI
python web_app.py --host 0.0.0.0 --port 5000
Open http://localhost:5000 and start asking questions about your code! 🎉
FastCode supports Linux, macOS, and Windows. Choose your platform below:
💡 Recommendation: We recommend using uv for faster and more reliable dependency installation.
🐧 Linux Installation
- Python 3.12 or higher
- Git
-
Clone FastCode
git clone https://github.com/HKUDS/FastCode.git cd FastCode -
Install Dependencies
Option A: Using uv (Recommended)
# Install uv
pip install uv
# create new env with uv
uv venv --python=3.12
source .venv/bin/activate

# Install dependencies with uv
uv pip install -r requirements.txt
Option B: Using pip
pip install -r requirements.txt
-
Configure Environment
cp env.example .env
nano .env  # or use your preferred editor
Add your API keys:
OPENAI_API_KEY=your_openai_api_key_here
MODEL=gpt-5.2
BASE_URL=https://api.openai.com/v1
-
Launch FastCode
# Web UI (Recommended)
python web_app.py --host 0.0.0.0 --port 5000

# Or use the CLI
python main.py --repo /path/to/your/repo --query "Your question here"
🍎 macOS Installation
- Python 3.12 or higher
- Git
-
Clone FastCode
git clone https://github.com/HKUDS/FastCode.git cd FastCode -
Install Dependencies
Option A: Using uv (Recommended)
# Install uv
pip install uv
# create new env with uv
uv venv --python=3.12
source .venv/bin/activate

# Install dependencies with uv
uv pip install -r requirements.txt
Option B: Using pip
pip install -r requirements.txt
-
Configure Environment
cp env.example .env
nano .env  # or use: open -e .env
Add your API keys:
OPENAI_API_KEY=your_openai_api_key_here
MODEL=gemini-3-flash
BASE_URL=https://...
-
Launch FastCode
# Web UI (Recommended)
python web_app.py --host 0.0.0.0 --port 5000

# Or use the CLI
python main.py --repo /path/to/your/repo --query "Your question here"
Note for Apple Silicon (M1/M2/M3): All dependencies are compatible with ARM architecture.
💻 Windows Installation
- Python 3.12 or higher
- Git
-
Clone FastCode
git clone https://github.com/HKUDS/FastCode.git cd FastCode -
Install Dependencies
Option A: Using uv (Recommended)
# Install uv
pip install uv
# create new env with uv
uv venv --python=3.12
.venv\Scripts\activate

# Install dependencies with uv
uv pip install -r requirements.txt
Option B: Using pip
pip install -r requirements.txt
-
Configure Environment
copy env.example .env
notepad .env
Add your API keys:
OPENAI_API_KEY=your_openai_api_key_here
MODEL=qwen/qwen3-coder-30b-a3b-instruct
BASE_URL=https://api.openai.com/v1
-
Launch FastCode
# Web UI (Recommended)
python web_app.py --host 0.0.0.0 --port 5000

# Or use the CLI
python main.py --repo C:\path\to\your\repo --query "Your question here"
Troubleshooting:
- If you get SSL errors:
pip install --upgrade certifi - For permission errors, run Command Prompt as Administrator
- If
faiss-cpufails to install:pip install faiss-cpu --no-cache-dir - If you run
./run_nanobot.sh(bash script) on Windows, use Git Bash or WSL, and keep.shfiles in LF line endings. This repo enforces LF for*.shvia.gitattributes, but older clones may need a one-time re-checkout.
The Web UI provides the most intuitive experience:
-
Launch the server:
python web_app.py --host 0.0.0.0 --port 5000
-
Open your browser: Navigate to http://localhost:5000
-
Load a repository: Use the sidebar to index your codebase
-
Start asking questions:
- "Where is the authentication logic implemented?"
- "How does the payment processing flow work?"
- "What files would be affected if I change the User model?"
- "Explain the dependency between module A and module B"
For automation and scripting:
# Single repository query
python main.py --repo /path/to/repo --query "Your question"

# Multi-repository query
python main.py --repos /path/to/repo1 /path/to/repo2 --query "Your question"

# With custom model
python main.py --repo /path/to/repo --query "Your question" --model gpt-4-turbo
REST API
Integrate FastCode into your tools with the comprehensive REST API:
# Start the API server
python api.py --host 0.0.0.0 --port 8000
The API provides all features available in the Web UI. Visit http://localhost:8000/docs for interactive API documentation.
Key API Endpoints:
Repository Management
# List available and loaded repositories
GET /repositories

# Load a repository from URL or local path
POST /load
{
  "source": "https://github.com/user/repo",
  "is_url": true
}

# Index the loaded repository
POST /index?force=false

# Load and index in one call
POST /load-and-index
{
  "source": "/path/to/repo",
  "is_url": false
}

# Load multiple existing indexed repositories
POST /load-repositories
{
  "repo_names": ["repo1", "repo2"]
}

# Index multiple repositories at once
POST /index-multiple
{
  "sources": [
    {"source": "https://github.com/user/repo1", "is_url": true},
    {"source": "/path/to/repo2", "is_url": false}
  ]
}

# Upload repository as ZIP file
POST /upload-zip
Content-Type: multipart/form-data
file: <zip_file>

# Upload and index in one call
POST /upload-and-index?force=false
Content-Type: multipart/form-data
file: <zip_file>

# Delete repositories and their indexes
POST /delete-repos
{
  "repo_names": ["repo1", "repo2"],
  "delete_source": true
}

# Get repository summary
GET /summary
Query & Conversation
# Query repository (single response)
POST /query
{
  "question": "How does authentication work?",
  "filters": null,
  "repo_filter": ["repo1"],
  "multi_turn": false,
  "session_id": null
}

# Query with streaming response (SSE)
POST /query-stream
{
  "question": "Explain the database schema",
  "multi_turn": true,
  "session_id": "abc123"
}

# Start a new conversation session
POST /new-session?clear_session_id=old_session

# List all conversation sessions
GET /sessions

# Get conversation history
GET /session/{session_id}

# Delete a conversation session
DELETE /session/{session_id}
System & Status
# Health check
GET /health

# Get system status
GET /status?full_scan=false

# Clear cache
POST /clear-cache

# Get cache statistics
GET /cache-stats

# Refresh index cache
POST /refresh-index-cache

# Unload current repository
DELETE /repository
Example Usage:
import requests

# Start a session and query
response = requests.post("http://localhost:8000/load-and-index", json={
    "source": "https://github.com/user/repo",
    "is_url": True
})

# Query the repository
response = requests.post("http://localhost:8000/query", json={
    "question": "Where is the main entry point?",
    "multi_turn": False
})

result = response.json()
print(result["answer"])
print(f"Tokens used: {result['total_tokens']}")FastCode works with multiple LLM providers:
OpenAI
OPENAI_API_KEY=sk-...
MODEL=gpt-4
BASE_URL=https://api.openai.com/v1
OpenRouter (Multiple Models)
OPENAI_API_KEY=sk-or-...
MODEL=google/gemini-flash-1.5
BASE_URL=https://openrouter.ai/api/v1
Local Models (Ollama)
OPENAI_API_KEY=ollama
MODEL=qwen3-coder-30b_fastcode
BASE_URL=http://localhost:11434/v1FastCode automatically detects and parses:
- 🐍 Python
- 📜 JavaScript / TypeScript
- ☕ Java
- 🦀 Rust
- 🐹 Go
- ⚙️ C / C++
- 💎 C#
FastCode can be integrated with a Feishu (Lark) bot via Nanobot, enabling conversational code repository queries directly within Feishu.
Feishu User ←→ Feishu Open Platform ←→ Nanobot (WebSocket) ←→ FastCode API
                                        (port 18791)            (port 8001)
- FastCode Container: Provides the code analysis REST API (port 8001)
- Nanobot Container: Connects to Feishu via WebSocket and invokes FastCode tools (port 18791)
- Both containers communicate over Docker's internal network — no public IP required
# One-command launch (automatically builds images and generates config on first run)
./run_nanobot.sh

# Subsequent runs auto-detect the current state:
# - Services running → show status + health check
# - Services stopped → auto-restart
# - Images not found → auto-build and start
Configuration
All API keys and model settings are centralized in the .env file, shared by both services:
# ===== Shared API Configuration =====
OPENAI_API_KEY=sk-or-v1-xxx        # Shared by both services
BASE_URL=https://openrouter.ai/api/v1

# ===== FastCode Model (Code Analysis) =====
MODEL=google/gemini-3-flash-preview

# ===== Nanobot Model (Agent Reasoning / Feishu Conversations) =====
NANOBOT_MODEL=minimax/minimax-m2.1
The API key is automatically injected into the Nanobot container via docker-compose.yml environment variables — no need to duplicate it in nanobot_config.json.
config/config.yaml— FastCode retrieval and indexing settings
run_nanobot.sh auto-generates this file. You only need to configure Feishu credentials and the systemPrompt here; API keys and model settings are managed centrally via .env.
{
  "channels": {
    "feishu": {
      "enabled": true,
      "appId": "cli_xxxxxxxxx",
      "appSecret": "your_app_secret"
    }
  }
}
Feishu App Setup
Nanobot receives Feishu messages via a WebSocket long-lived connection — no public IP or webhook required.
Go to the Feishu Open Platform → Create a Custom Enterprise App → Note the App ID (cli_xxx) and App Secret.
Navigate to App Settings → App Features → Enable the "Bot" capability.
Add the following permissions under Permission Management:
| Permission | Description |
|---|---|
im:message |
Read messages |
im:message:send_as_bot |
Send messages as the bot |
im:resource |
Access resource files in messages |
im:chat |
Retrieve group chat information |
⚠️ Note the order: You must start Nanobot to establish the WebSocket connection first, then configure event subscriptions in the Feishu admin console.
- Enter
appIdandappSecretinnanobot_config.json, then start the service (./run_nanobot.sh) - Verify the log shows
connected to wss://msg-frontier.feishu.cn, confirming a successful connection - Go back to the Feishu admin console → Events & Callbacks → Select "Receive events via long-lived connection" → Save
- Add event:
im.message.receive_v1(Receive messages)
Go to Version Management → Create a version → Submit for review (internal enterprise apps can be self-approved) → Once published, you can chat with the bot in Feishu.
Docker Compose Structure
services:
  fastcode:          # FastCode API (port 8001)
    build: .
    volumes:
      - ./.env:/app/.env:ro
      - ./config:/app/config:ro
      - ./data:/app/data
      - ./repos:/app/repos

  nanobot:           # Nanobot Gateway (port 18791 → 18790)
    build: ./nanobot
    command: ["gateway"]
    volumes:
      - ./nanobot_config.json:/root/.nanobot/config.json:ro
    environment:
      - FASTCODE_API_URL=http://fastcode:8001
      # API key and model injected from .env
      - NANOBOT_PROVIDERS__OPENROUTER__API_KEY=${OPENAI_API_KEY}
      - NANOBOT_AGENTS__DEFAULTS__MODEL=${NANOBOT_MODEL}
    depends_on:
      - fastcode
Management Commands
| Command | Description |
|---|---|
./run_nanobot.sh |
Smart launch (auto-detects state) |
./run_nanobot.sh --build |
Force rebuild images |
./run_nanobot.sh --fg |
Run in foreground (view live logs) |
./run_nanobot.sh stop |
Stop all services |
./run_nanobot.sh restart |
Restart all services |
./run_nanobot.sh logs |
View live logs |
./run_nanobot.sh status |
View service status + health check |
./run_nanobot.sh config |
Re-check / regenerate Nanobot config |
./run_nanobot.sh clean |
Stop and remove containers and images |
Registered FastCode Tools in Nanobot
On startup, Nanobot automatically registers the following tools via the FASTCODE_API_URL environment variable:
| Tool Name | Function |
|---|---|
fastcode_load_repo |
Load and index a code repository (GitHub URL or local path) |
fastcode_query |
Query code using natural language, with multi-turn conversation support |
fastcode_list_repos |
List loaded / available repositories |
fastcode_status |
View FastCode system status |
fastcode_session |
Manage conversation sessions (create / list / history / delete) |
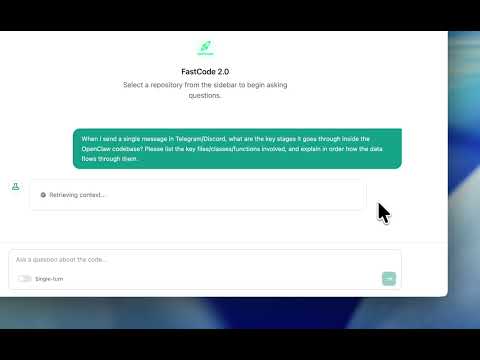
Chat with the bot in Feishu:
User: https://github.com/user/repo
Bot:  ✓ Repository loaded and indexed (152 files, 3847 code elements)

User: How is the authentication logic implemented in this project?
Bot:  This project uses JWT for authentication... [detailed analysis]

User: Which files would be affected by changes to the User model?
Bot:  The following 8 files would be affected... [impact analysis]
FastCode uses a novel scouting-first approach that fundamentally differs from traditional code reasoning systems:
Question → Load Files → Search → Load More Files → Search Again → ... → Answer
💸 High token cost from repeated file loading
Question → Build Semantic Map → Navigate Structure → Load Targets → Answer
💰 Minimal token cost with precise targeting
Query: "How does user authentication work in this application?"
FastCode Process:
- 🗺️ Scouts for authentication-related structures
- 🔍 Identifies
auth.py,middleware.py,user_model.py - 📊 Traces dependencies between these files
- 📖 Loads only relevant functions
- ✅ Provides comprehensive answer
Query: "What would break if I change the User model schema?"
FastCode Process:
- 🗺️ Locates User model definition
- 🔗 Traces all imports and usages
- 📊 Maps dependency graph
- 📖 Loads affected code sections
- ✅ Lists all impacted files and functions
We welcome contributions! FastCode is built for the community, by the community.
- 🐛 Report Bugs - Found an issue? Let us know!
- 💡 Suggest Features - Have ideas? We'd love to hear them!
- 📝 Improve Documentation - Help others understand FastCode better
- 🔧 Submit Pull Requests - Code contributions are always welcome
FastCode is released under the MIT License. See LICENSE for details.
If FastCode saves you tokens and time, consider giving us a star! ⭐
Built with ❤️ for developers who value efficiency
Thanks for visiting ✨ FastCode!