Creating Custom Components
Metl comes with a large set of prepackaged components. These components cover a broad set of functional capabilities commonly used in etl/elt and service based integration scenarios. However, if a unique need arises, custom components can be created to implement specialized needs. Building custom components is straight forward and done in the same manner as Metl’s prepackaged components. The basic steps to build a component are as follows:
-
Create a Java Project - The java project will contain the source code and related files for the custom component
-
Create the Component Definition - The component definition defines the basic aspects of the component including the name, description, type, source file, message and resource types, settings, etc.
-
Create the Component User Interface Definition - The user interface definition defines aspects of the user interface including icons, and if needed, custom ui java classes
-
Implement the Component Methods - Every component implements an interface that tells the component what to do on startup, when a message is received, and on shutdown
-
Package the component - Files in the java project are packaged into .jar files or .zip files for deployment
-
Deploy the Component - Provide the packaged component to Metl via uploading it directly to the running Metl instance or loading it into a maven repository accessible to that Metl instance.
The core Metl engine including its prepackaged projects are built in java. In order to create a custom component, first create a java project to hold the source code and related files for the component. The java project will need to have a dependency on the metl-core library which can be found in the JumpMind maven repository (http://maven.jumpmind.com/repo). Sample gradle and maven dependencies are as follows:
build.gradle
repositories {
    maven { url "http://maven.jumpmind.com/repo" }
}

dependencies {
    compileOnly 'org.jumpmind.metl:metl-core:2.0.6.r.65'
}
pom.xml
<repositories>
  <repository>
    <id>JumpMind</id>
    <name>JumpMind Repo</name>
    <url>http://maven.jumpmind.com/repo</url>
  </repository>
</repositories>

<dependencies>
  <dependency org="org.jumpmind.metl" name="metl-core" rev="2.0.6.r.65" />
</dependencies>
A typical Metl custom component project structure is depicted below.
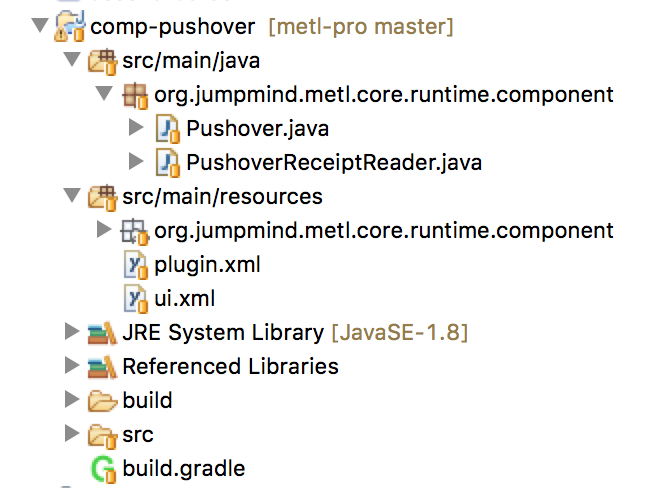
The project should contain the following parts:
-
plugin.xml - Used to create the component definition
-
ui.xml - Used to create the ui definition
-
One or more java class(es) that implements the component(s) - Used to implement the component methods
The component definition is created by creating a plugin.xml file. This xml file must conform to the components.xsd which can be found here.
An example plugin.xml is shown below.
plugin.xml
<definitions>
  <component category='PROCESSOR'
             id='Pushover'
             inputMessageType='any'
             inputOutputModelsMatch='false'
             outputMessageType='any'
             supportsMultipleThreads='false'
             resourceCategory='none'>
    <name>Pushover Message</name>
    <className>org.jumpmind.metl.core.runtime.component.Pushover</className>
    <keywords>message,notification</keywords>
    <description></description>
    <settings>
    <setting id='run.when'
               required='false'
               type='choice'>
        <name>Run When</name>
        <defaultValue>PER UNIT OF WORK</defaultValue>
        <choices>
          <choice>PER UNIT OF WORK</choice>
          <choice>PER MESSAGE</choice>
        </choices>
      </setting>
      <setting id='token'
               required='true'
               type='text'>
        <name>Token</name>
      </setting>
      <setting id='user'
               required='true'
               type='text'>
        <name>User Key</name>
      </setting>
      <setting id='message'
               required='false'
               type='multiline_text'>
        <name>Message</name>
        <defaultValue>Message</defaultValue>
      </setting>
      <setting id='device'
               required='false'
               type='text'>
        <name>device</name>
      </setting>
      <setting id='title'
               required='false'
               type='text'>
        <name>Title</name>
      </setting>
      <setting id='url'
         required='false'
         type='text'>
         <name>URL</name>
      </setting>
      <setting id='url.title'
               required='false'
               type='text'>
        <name>URL title</name>
      </setting>
      <setting id='priority'
               required='false'
               type='choice'>
        <name>Priority</name>
        <defaultValue>1</defaultValue>
        <choices>
        	<choice>-2</choice>
        	<choice>-1</choice>
        	<choice>0</choice>
        	<choice>1</choice>
        	<choice>2</choice>
        </choices>
      </setting>
      <setting id='retry'
               required='false'
               type='text'>
        <name>Retry</name>
      </setting>
      <setting id='expire'
               required='false'
               type='text'>
        <name>Expire</name>
      </setting>
      <setting id='sound'
               required='false'
               type='choice'>
        <name>Sound</name>
        <defauldValue>pushover</defauldValue>
        <choices>
        	<choice>pushover</choice>
        	<choice>bike</choice>
        	<choice>bugle</choice>
        	<choice>cashregister</choice>
        	<choice>classical</choice>
        	<choice>cosmic</choice>
        	<choice>falling</choice>
        	<choice>gamelan</choice>
        	<choice>incoming</choice>
        	<choice>intermission</choice>
        	<choice>magic</choice>
        	<choice>mechanical</choice>
        	<choice>pianobar</choice>
        	<choice>siren</choice>
        	<choice>spacealarm</choice>
        	<choice>tugboat</choice>
        	<choice>alien</choice>
        	<choice>climb</choice>
        	<choice>persistent</choice>
        	<choice>echo</choice>
        	<choice>updown</choice>
        	<choice>none</choice>
        </choices>
      </setting>
    </settings>
  </component>
</definitions>The ui definition for the component including the icon used for the component as well as the component editor for the component is created by creating a ui.xml file. A custom component can use the standard Metl component ui which displays all settings defined in the plugin.xml, or it can create its own custom ui by implementing its own java ui class. Two sample ui.xml files are shown below, one using the standard metl component ui, and the other using a custom ui.
ui.xml (using standard Metl component UI)
<ui>
    <component-ui id="Pushover Message" componentId="Pushover">
        <iconImage>org/jumpmind/metl/core/runtime/component/Pushover.png</iconImage>
    </component-ui>
</ui>
ui.xml (using a custom UI)
<ui>
    <component-ui id="Mapping UI" componentId="Mapping">
        <iconImage>org/jumpmind/metl/core/runtime/component/metl-mapping-48x48-color.png</iconImage>
        <className>org.jumpmind.metl.ui.mapping.EditMappingPanel</className>
    </component-ui>
</ui>Component methods are implemented by creating a java class that implements the IComponentRuntime interface, usually by extending the AbstractComponentRuntime class.
The methods defined in the IComponentRuntime interface are as follows:
-
create - Method executed when component instance is created by the Metl framework
-
start - Method executed when the component is started
-
handle - Method executed when the component is given an input message. This method also defines the components functionality
-
flowCompleted - Method executed when the flow is completed successfully
-
flowCompletedWithErrors - Method executed when the flow results in error(s)
-
stop - Method executed when the component stops running
An example start method is shown below.
Pushover.java
@Override
    public void start() {
        Component component = getComponent();
        runWhen = properties.get(RUN_WHEN, PER_MESSAGE);
        token = component.get(TOKEN);
        user = component.get(USER);
        message = component.get(MESSAGE);
        device = component.get(DEVICE);
        title = component.get(TITLE);
        url = component.get(URL);
        urlTitle = component.get(URL_TITLE);
        priority = component.get(PRIORITY);
        if (priority.equals("2")) {
        	retry = component.get(RETRY);
        	expire = component.get(EXPIRE);
        }
        if (!priority.equals("-2") || !priority.equals("-1")){
        	sound = component.get(SOUND);
        }
    }
The start method should implement the definitions given in the plugin.xml file
An example handle method is shown below.
exampleComponent.java
@Override
	public void handle(Message inputMessage, ISendMessageCallback callback, boolean unitOfWorkBoundaryReached) {

		if (inputMessage instanceof ControlMessage && PER_UNIT_OF_WORK.equals(runWhen)) {
			if (message.isEmpty()) {
				throw new MisconfiguredException("A message must be provided for the pushover notifaction");
			}
			pushoverNotification();
			if (outboundPayload.size() > 0) {
				callback.sendTextMessage(inputMessage.getHeader(), outboundPayload);
			}
		} else if (inputMessage instanceof TextMessage && PER_MESSAGE.equals(runWhen)) {
			TextMessage msg = (TextMessage)inputMessage;
			if (msg.getPayload().size() > 0) {
				for (int i = 0; i < msg.getPayload().size(); i++) {
					message = msg.getPayload().get(i);
					pushoverNotification();
				}
				if (outboundPayload.size() > 0) {
					callback.sendTextMessage(inputMessage.getHeader(), outboundPayload);
				}
			}
		}
	}
The handle method will vary greatly depending on the function of the custom component but should contain all the code necessary for the component to run.
The project for the custom component should be packaged into either a .jar or .zip file. The file should contain all the project artifacts.
In order to deploy the component, you can either provide the packaged component to Metl via uploading it directly to the running Metl instance or load it into a maven repository accessible to that Metl instance.
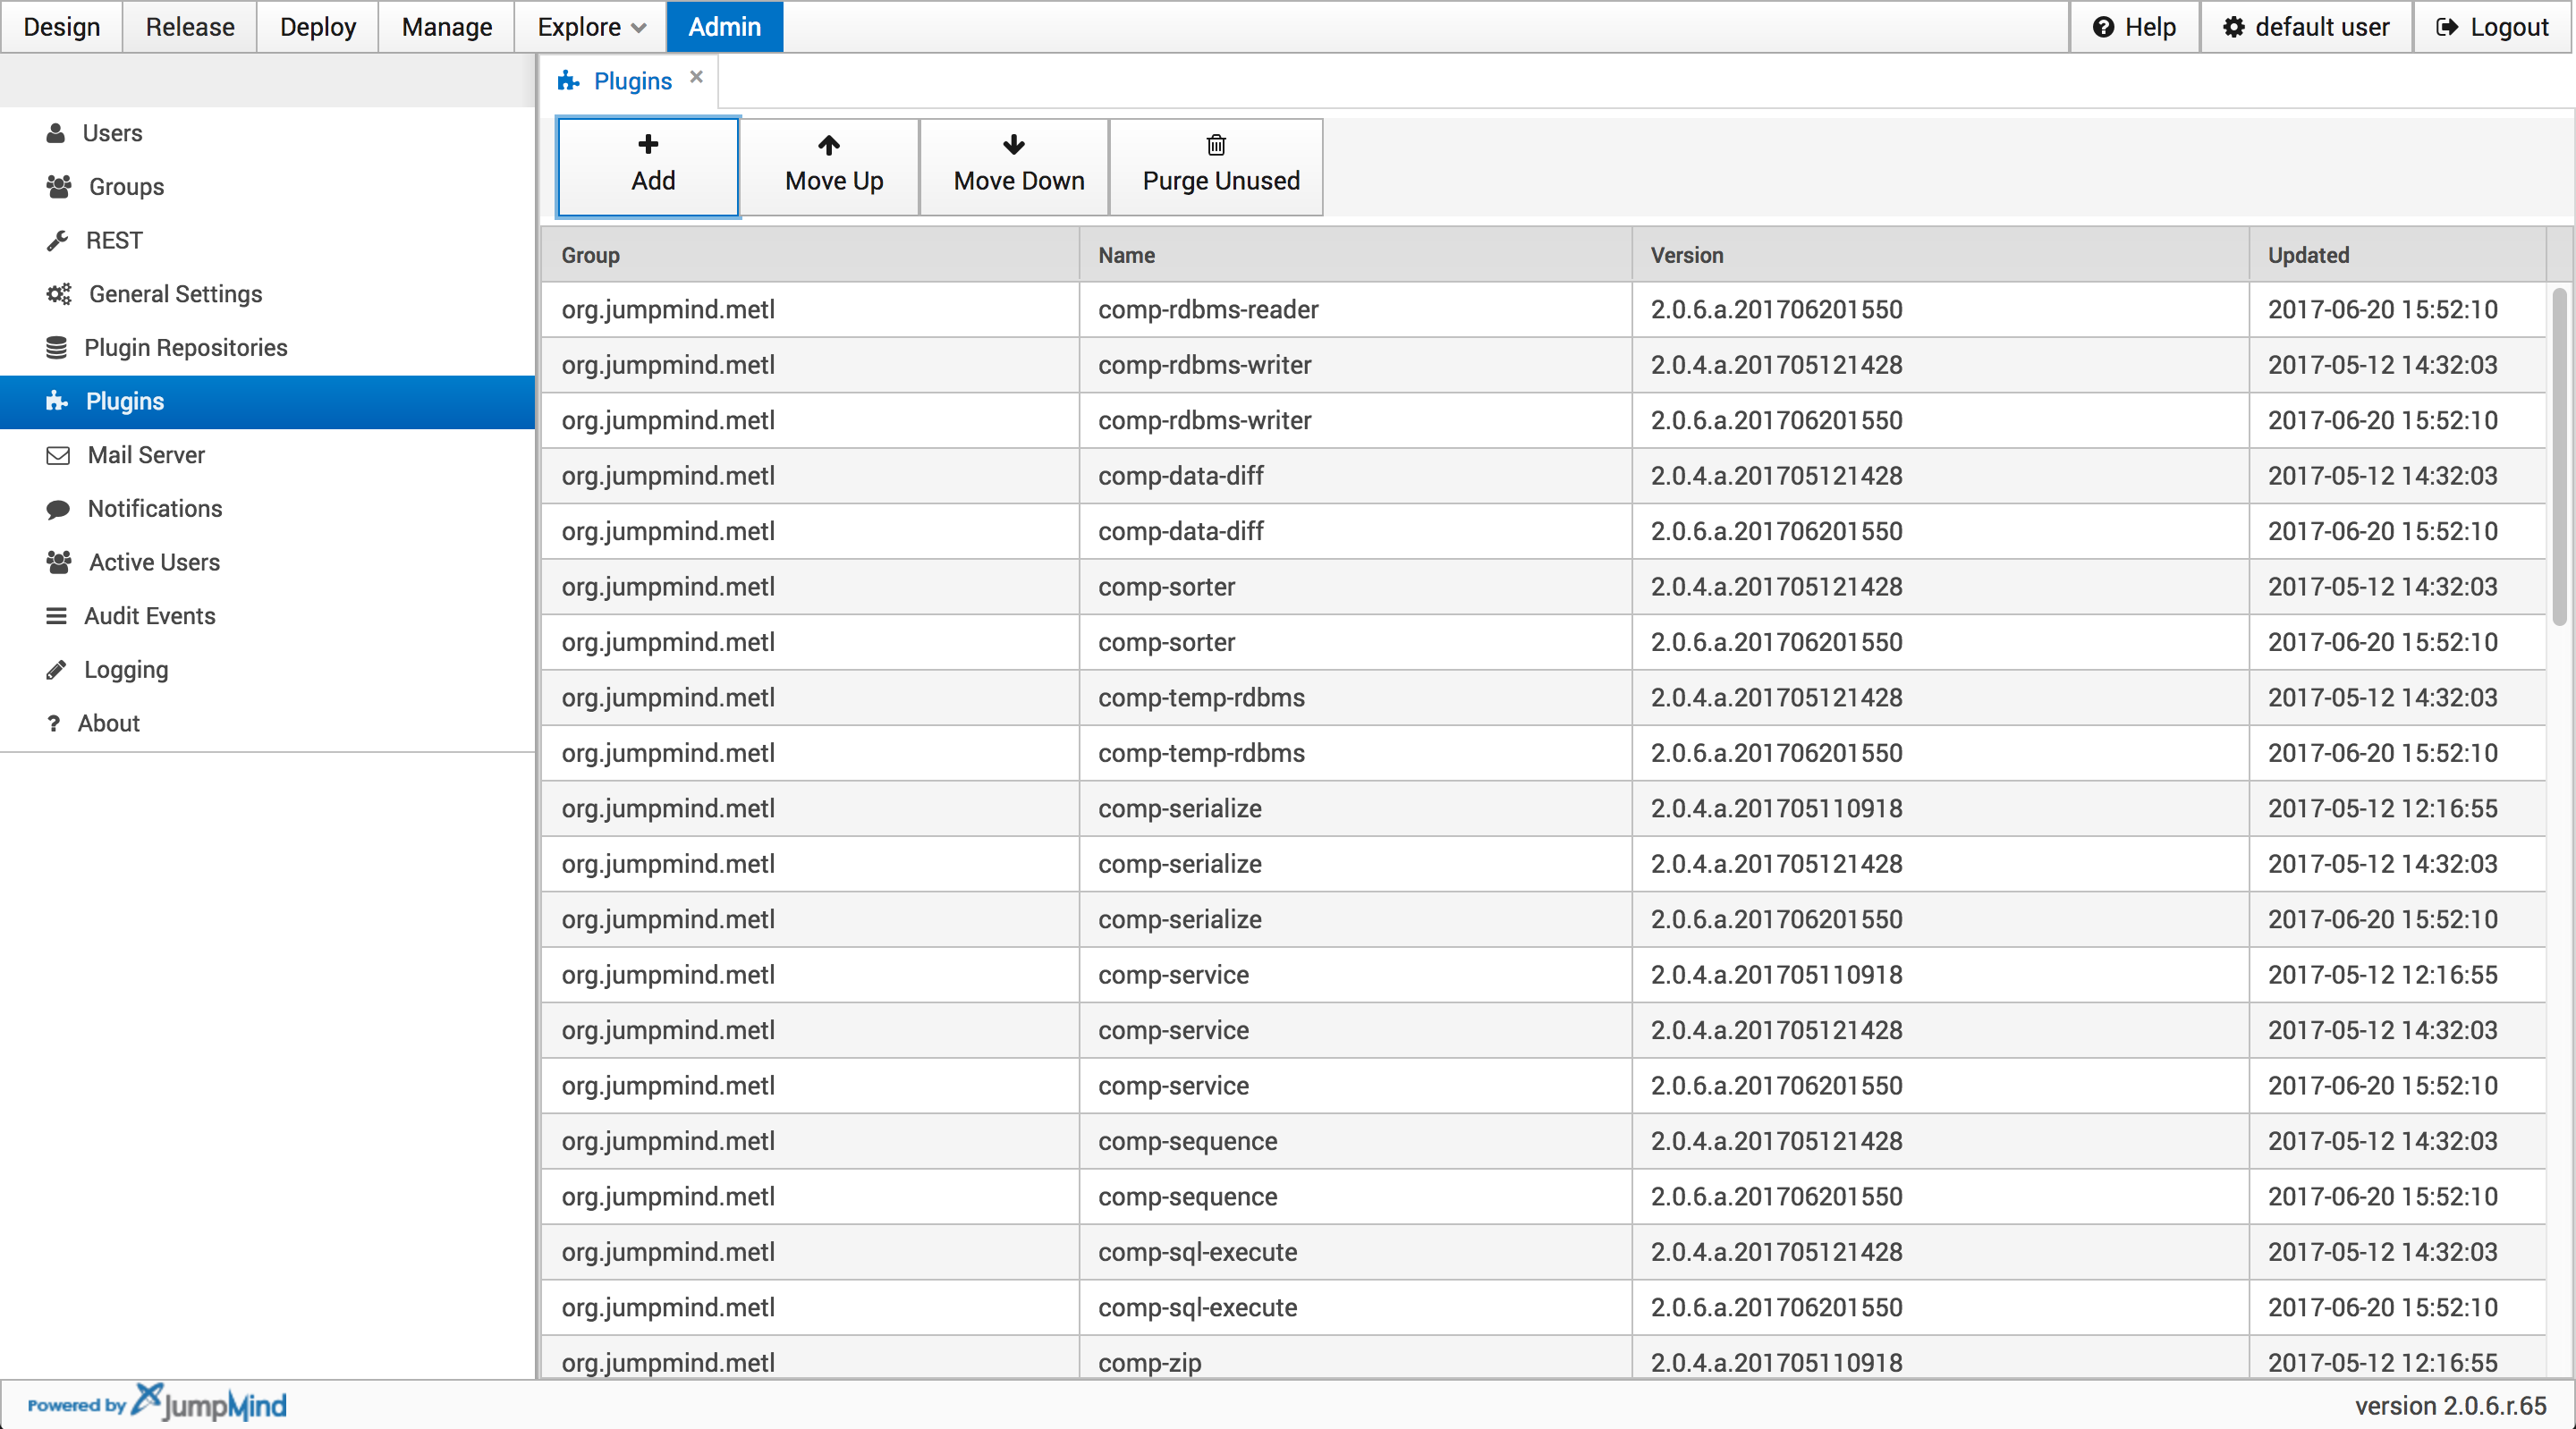
In order to upload the component directly to the running Metl instance navigate to the Admin tab and select Plugins then click the Add button
In the popup window click on the Upload tab and fill in the required fields with the Group, Component name, and Software Version.
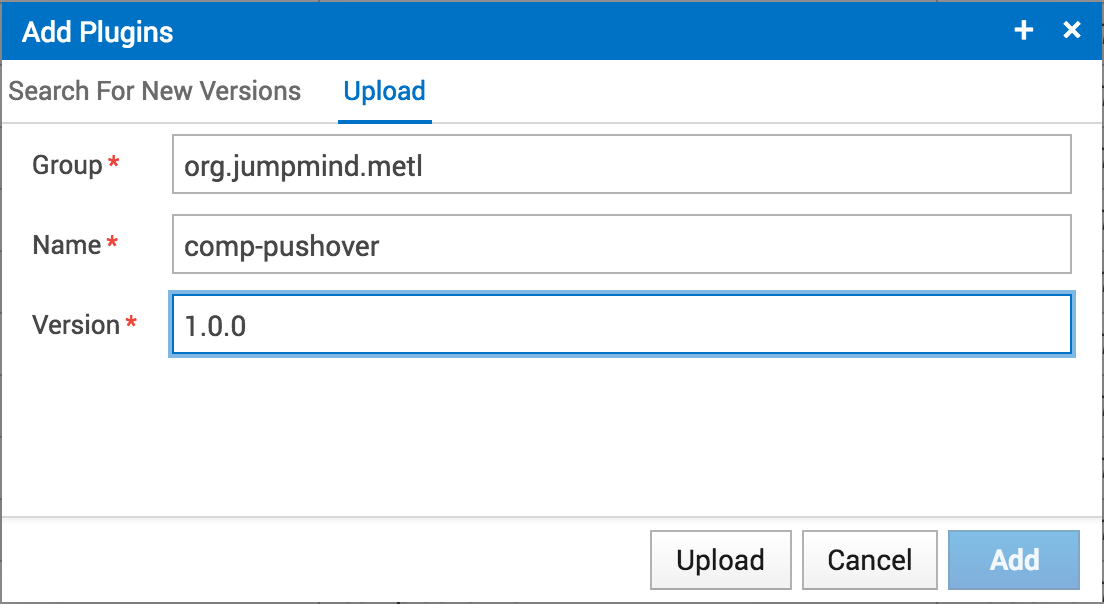
Click the upload button and navigate to the components class file. Once the class file has been uploaded click Add to finish adding the custom component to the Metl instance.
In order to upload the component via a maven repository navigate to the Admin tab and select Plugin Repositories then click add.
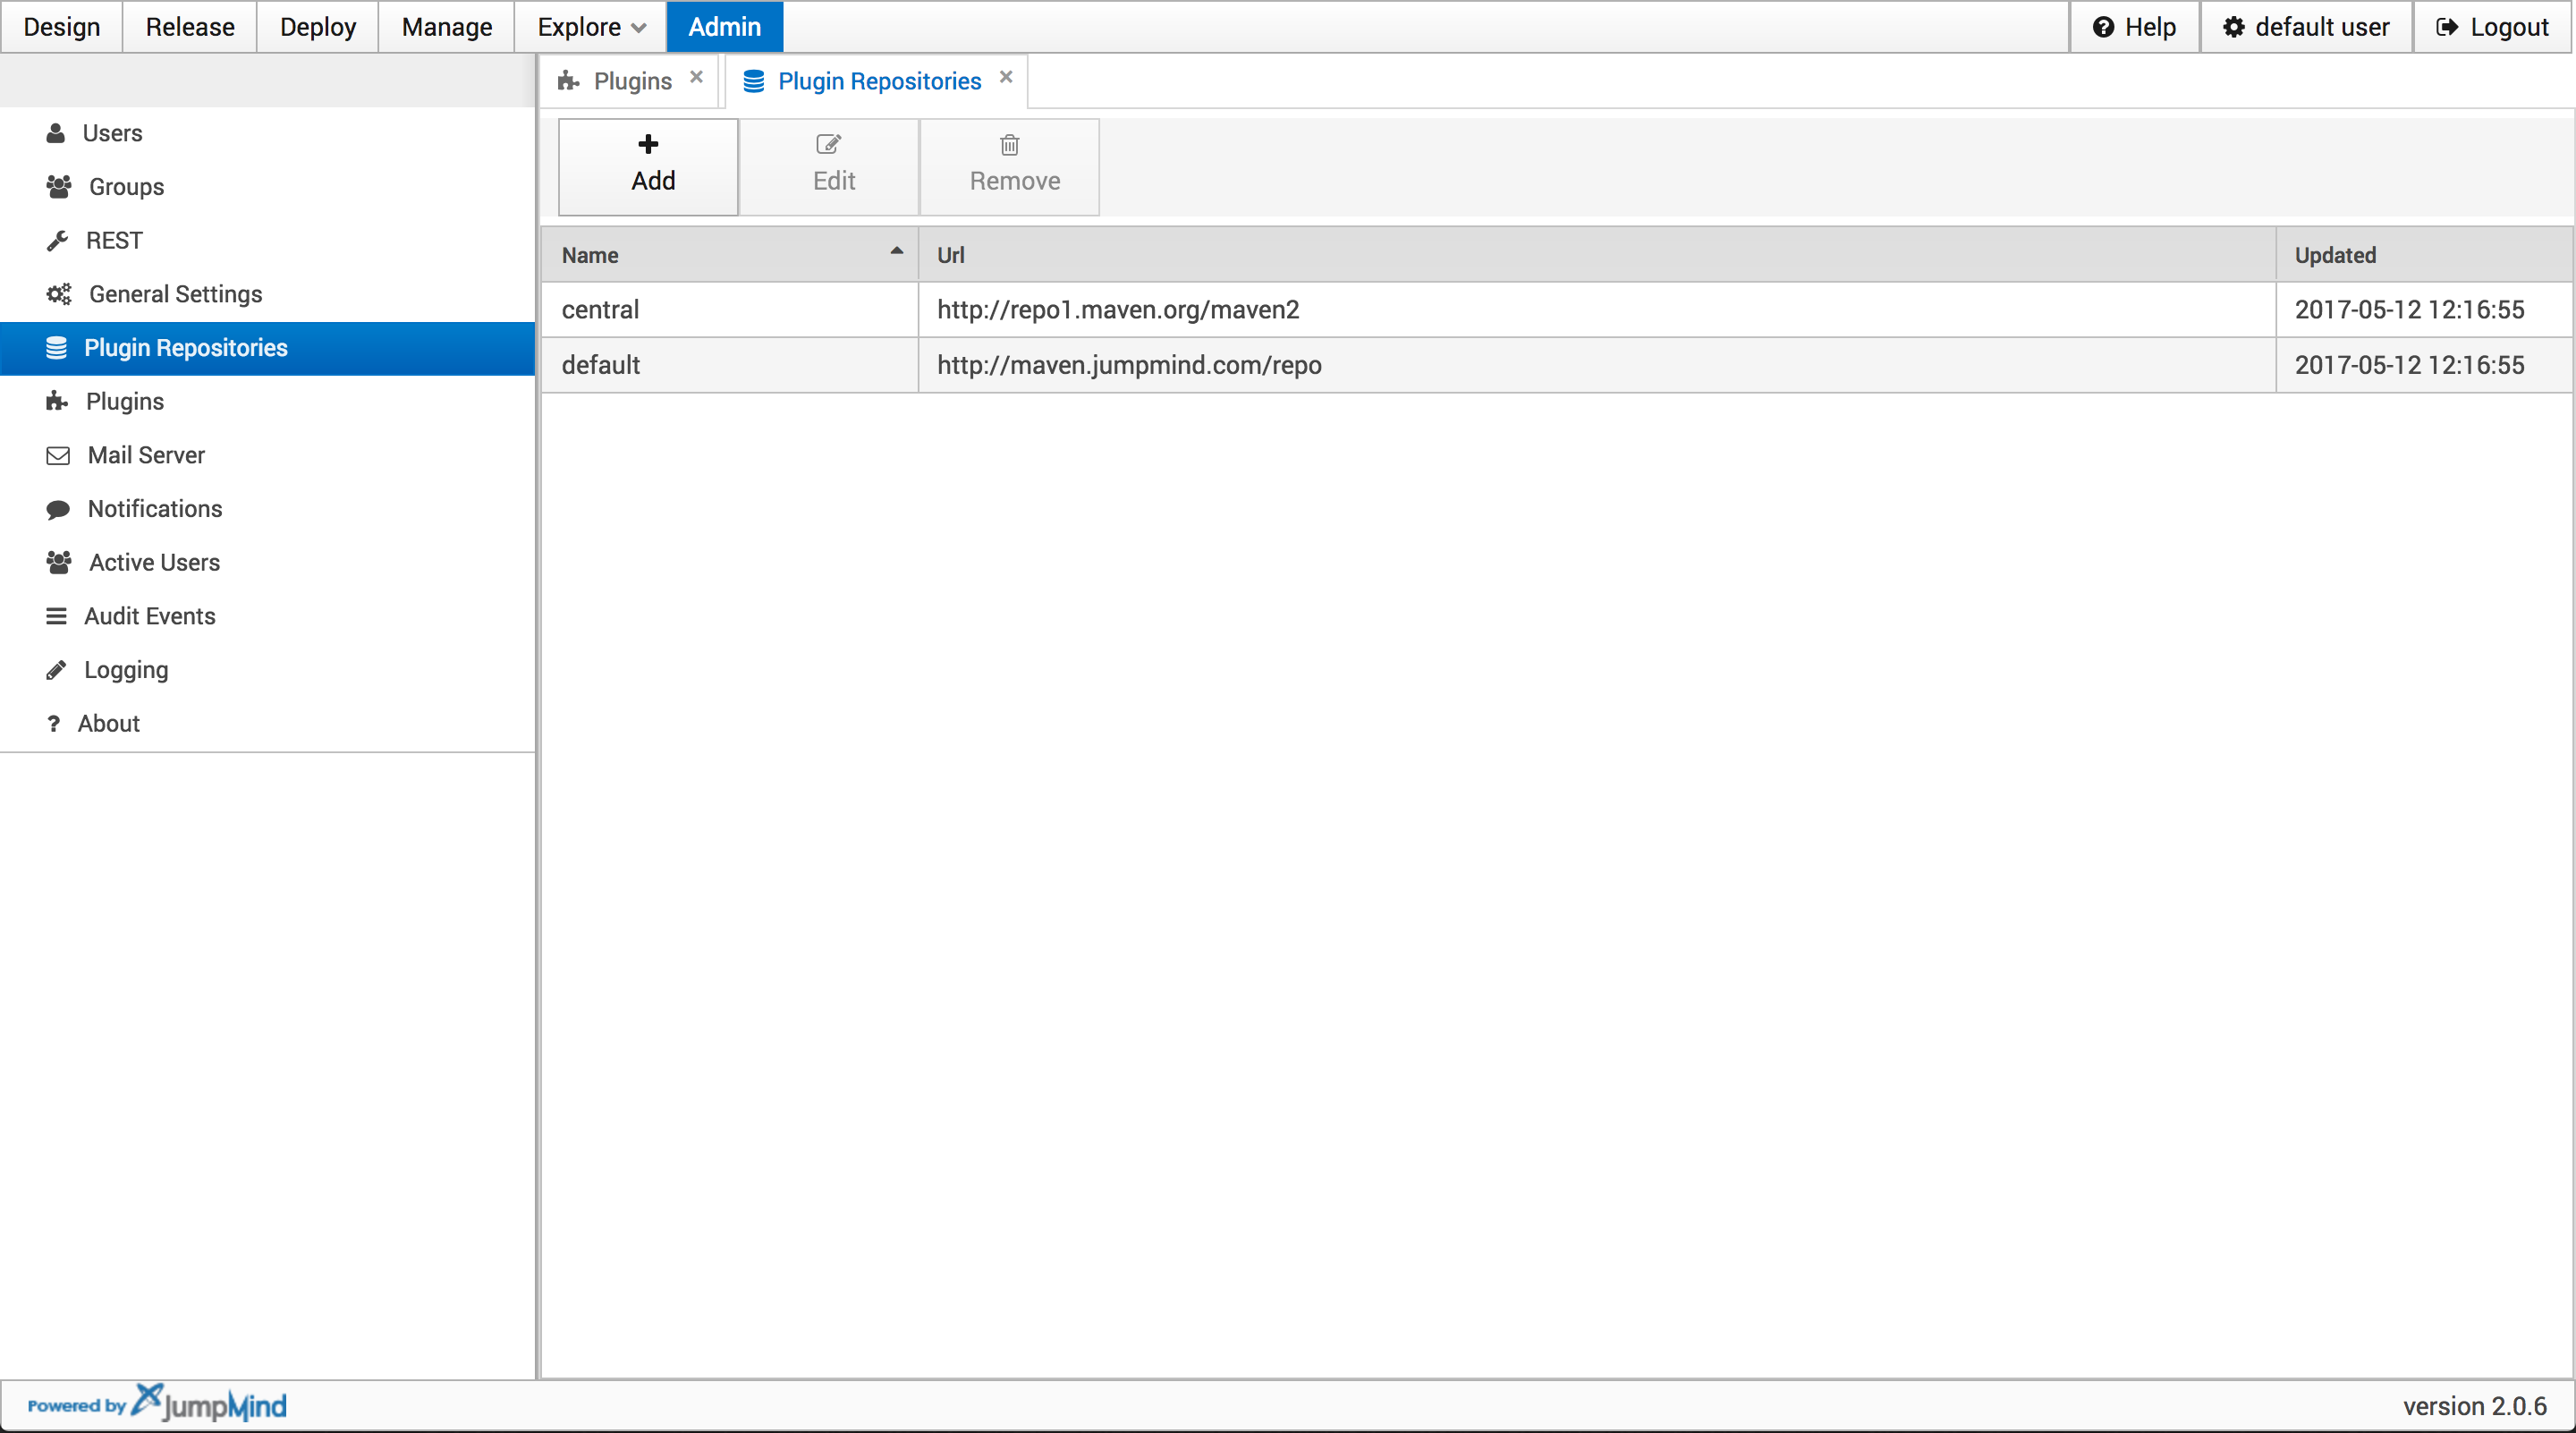
In the edit tab fill in the fields with the name of the component as well as the URL of the repository.
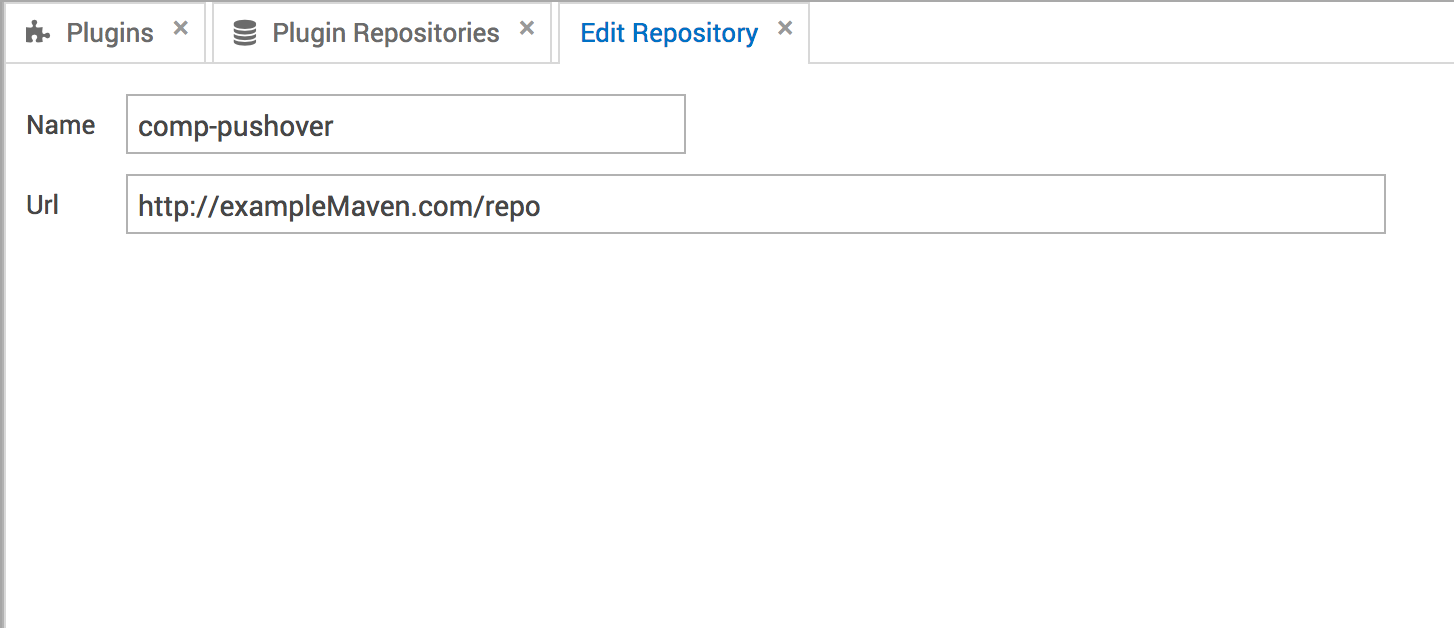
Exit the tab and the repository will be saved