React + Vite app built with ArcGIS Maps SDK, ArcGIS Assistant components, and an MCP hub.
The setup steps below include command equivalents for macOS, Linux, and Windows to reduce shell-specific onboarding errors.
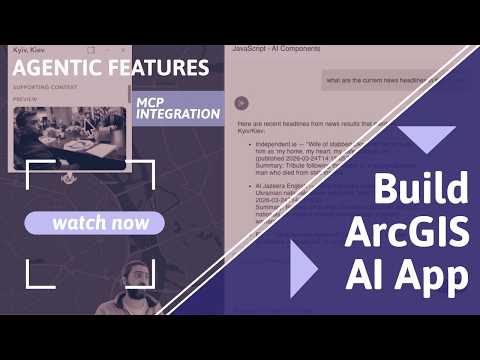

This video walks through local setup, authorization, running the app, ArcGIS agents, and MCP integration.
Most of this app has been vibe coded with various coding agents. Review the code, configuration, and deployment choices before using it beyond demos or internal experimentation.
- Sign in with ArcGIS and load an existing WebMap or create a new one.
- Use built-in map-aware assistant tools for navigation and data exploration.
- Use MCP-backed tools for external workflows such as weather, catalog, or custom server tasks.
- Render MCP geography on the map when results include places, ranked city lists, or bounding boxes — each map pin shows a popup sourced from the specific article or record that mentioned that place, not a generic summary.
- Create and manage hosted feature layers from assistant results.
- Customise the app header and chat panel via the theme editor (
?mode=edit) — changes persist across browser refreshes vialocalStorage.
- Node.js 18+
- An ArcGIS OAuth client ID
- A WebMap item ID to load, or permission to create WebMaps in your ArcGIS org
git clone https://github.com/ralouta/ArcGIS-JavaScript-AI-Component.git
cd ArcGIS-JavaScript-AI-Componentnpm installmacOS and Linux:
cp .env.example .env.local
cp mcp-hub.config.example.json mcp-hub.config.json
Windows PowerShell:
Copy-Item .env.example .env.local
Copy-Item mcp-hub.config.example.json mcp-hub.config.json
Windows Command Prompt:
copy .env.example .env.local
copy mcp-hub.config.example.json mcp-hub.config.jsonEdit .env.local in the project root:
VITE_ARCGIS_OAUTH_APP_ID=your-client-id
VITE_ARCGIS_PORTAL_URL=https://www.arcgis.com
VITE_APP_NAME=ArcGIS Agent Components Demo
Update mcp-hub.config.json with the MCP servers you want to use and any local-only API keys.
- Sign in to your ArcGIS portal and create a new credential item:
- Click
New item. - In the
New itempopup, clickDeveloper credentials.
- Click
- Choose the credential type:
- Select
OAuth 2.0 credentialfor user authentication. - Click
Next.
- Select
- Add the local redirect URLs:
http://localhost:5173http://localhost:4173- Leave the remaining settings at their defaults.
- Click
Next.
- Fill in the credential metadata in a way that is easy for you or your team to identify later.
For the workshop, you can use values like:
- Title:
<your_title> - Tags:
<tag1>,<tag2>,<tag3> - Summary:
Developer credentials for AI Workshop client app exercise.Then clickNext.
- Title:
- Review the summary page and click
Create. - Copy the generated client ID and add it to
.env.localas the value ofVITE_ARCGIS_OAUTH_APP_ID.
Example:
VITE_ARCGIS_OAUTH_APP_ID=your-generated-client-idnpm run dev
npm run hub
npm run hub:dev
npm run build
npm run preview
npm run test:localRun the app and hub in separate terminals when using MCP features.
Terminal 1: start the Vite app
cd ArcGIS-JavaScript-AI-Component
npm run dev
Terminal 2: open a new terminal window or tab, change into the repo again, then start the MCP hub
cd ArcGIS-JavaScript-AI-Component
npm run hub
If you are editing the hub and want automatic restarts, use this in Terminal 2 instead:
cd ArcGIS-JavaScript-AI-Component
npm run hub:devThis workspace includes a local-only test harness in tests/.
- The directory is intentionally listed in
.gitignoreso ad hoc validation stays local. - The tests exercise the extracted pure MCP core logic used by the app, not browser-only ArcGIS component rendering.
- Run them with:
npm run test:localWhat the local tests currently cover:
- MCP endpoint normalization and hub server URL resolution
- MCP tool prompt construction
- JSON and fenced-JSON parsing
- geometry hint extraction from structured MCP payloads and plain text
- source-backed geometry derivation for points, extents, and countries
- Sign in with ArcGIS.
- Load a WebMap by item ID, or create a new map.
- Ask map questions, run MCP-backed prompts, or create/manage hosted layers.
Demo WebMap ID:
0cafaf0aa4174e5bac19113ab69bdc85
Example prompts:
Map & navigation
what layers are in this webmap?navigate me to baalbekzoom to the extent of the Streets layer
Create Feature Layer
create a point layer named Sites with fields: Name:string, Category:string, Status:stringcreate a polygon layer called Flood Zones with a Description fieldmake a new polyline layer named Roads with fields: Road_Name:string, Speed_Limit:integer
Manage Feature Layer (add / update / delete features)
add a point at the Eiffel Tower to the Sites layeradd a feature to the last created layer at Central Park, New Yorkdelete all features named "Test" from the Sites layerupdate the feature named "HQ" in the Sites layer — set Status to Active
Add Layer to Map
add the Utrecht Parks layer to the mapload the layer with item id 3e2f1ab4c8d94567890abcdef1234567add this layer to the map: https://services.arcgis.com/your-org/arcgis/rest/services/MyService/FeatureServer/0
The local hub in hub/server.ts aggregates multiple MCP servers behind one endpoint.
You can add servers in two ways from the MCP manager:
- Command-based
stdioservers such asnpx,node,python, oruvx - Direct HTTP MCP server URLs
Example remote bridge via mcp-remote:
Command:   npx
Arguments: mcp-remote https://your-remote-mcp-server.com/mcp
The hub runs on port 8808 by default and is proxied through Vite at /api/mcp during development.
- The assistant stays available even on empty maps.
- Map-aware built-in tools wait until the map is ready and assistant data has been prepared.
- Empty maps still support MCP and custom assistant workflows.
| Symptom | Fix |
|---|---|
| Sign-in fails | Check VITE_ARCGIS_OAUTH_APP_ID and redirect URLs |
| Map will not load | Verify the WebMap ID and sharing permissions |
| MCP tools are unavailable | Confirm you opened a second terminal, changed into the repo folder, and started npm run hub or npm run hub:dev |
| Feature layer creation fails | Verify the account can create hosted feature layers |
| Map-aware answers are weak | Refresh assistant data for the current map |
The only supported URL parameter is ?mode=edit.
Use it when you want the wider assistant panel and the theme editor controls:
http://localhost:5173/?mode=edit
In edit mode you can customise:
- Header title, subtitle, and font
- Header and chat panel background colors and borders
- Chat panel title and text colors
All changes are saved to localStorage and survive page refreshes. Use the Cancel button in the theme editor to revert to the values from when you opened the dialog.
The app is structured as a thin React orchestrator (App.tsx) wiring together focused hook and component modules:
| Layer | Files |
|---|---|
| Hooks | useAuth, useWebMap, useAssistantSetup, useTheme |
| Components | AppHeader, AssistantPanel, MapView, AccountMenu, SignInScreen, MapPickerScreen, SignOutDialog, ChangeMapDialog, NewMapDialog, ThemeEditorDialog |
| Agents | McpPassthroughAgent, mcpAgentCore, AddLayerToMapAgent, CreateFeatureLayerAgent, ManageFeatureLayerAgent |
| Utils | mcpGeoRenderer, arcgisMcp, arcgisOnline, featureLayerEdits, agentHelpers, mcpZodSchema, assistantStyler |
When an MCP tool call returns results, the pipeline:
- Runs a single LLM call (
extractAndSelectGeoEntities) to extract all geocodable place names from a compact digest of all source records. - Matches each place name directly to the source articles/records that mention it.
- Builds popup context from matched records (specific article title, description, and URL) rather than regex-matching against the raw JSON corpus — so "Tyre" shows the 2 articles about Tyre while "Lebanon" gracefully falls back to prose rather than repeating all 10 articles.
The .github/agents/ directory contains a specialist agent team for VS Code Copilot:
| Agent | When to use |
|---|---|
feature-orchestrator |
End-to-end feature delivery (PLAN → BUILD → TEST → SHIP) |
arcgis-calcite |
Calcite Design System and ArcGIS 5.0 web components |
mcp |
MCP hub, passthrough agent, geo renderer |
testing |
Code quality, slot validation, accessibility, JS correctness |
docs |
README and inline documentation |
github-manager |
Branch naming, commits, PRs |
typescript |
Type errors, generics, Zod schemas |
react-architect |
Component extraction, hooks, project structure |
html |
Semantic HTML, accessibility, slot composition |
code-security |
OWASP checks, secret detection, security audits |