Repository navigation
Usage
Click a key in the picture – or press it on the device – and choose what it does. Every change is saved immediately and applied by the daemon; there is no "apply" button.
| Element | Purpose |
|---|---|
| Device | the device to edit; untested devices are marked (untested) |
| Profile, Manage | choose the active profile; new, duplicate, rename, delete |
| Layer M1–M3 | the layer shown and edited; switches the device as well |
| Device picture | click a key to edit it; bound keys carry a dot, pressed keys light up |
| Tabs | Key, Backlight, Stick (G13), LCD (devices with LCD), Macros |
| Status bar | whether the daemon runs and the device is connected; start or restart the daemon |
Closing the window keeps the tray icon running; the daemon works without the application. GNOME shows tray icons only with the extension AppIndicator and KStatusNotifierItem Support (preinstalled on Ubuntu); without it the application simply runs without a tray icon.
- A profile holds the bindings of one device, any number of profiles per device.
- Each profile has three layers, M1–M3. The M keys on the device switch the layer, the M LEDs show it.
- The active profile and layer are remembered across restarts.
- Profiles can be switched in the application, from the tray, by a key on the device, or from a script (Scripting with D-Bus).
The Key tab edits the selected key in the current layer:
| Action | Effect |
|---|---|
| Not bound | the key does nothing in this layer |
| Key | one key; press and release follow the G key |
| Key combination | several keys pressed together, e.g. Ctrl+Shift+T (captured by pressing them) |
| Mouse button | a mouse button |
| Macro | a macro from the library: run once, repeat while held, start/stop with each press, or run several times |
| Switch layer | M1, M2 or M3 |
| Switch profile | a profile by name, next or previous |
| LCD page | next or previous page, or a specific page (devices with LCD) |
Bindings store physical key positions, not characters. Your keyboard layout applies as usual, so a binding behaves like the same key on your normal keyboard.
Keys with a fixed function cannot be bound: M1–M3, MR, the round LCD button (BD, always the next LCD page) and keys the device handles itself (backlight button).
The Macros tab holds the macro library, shared by all profiles and devices.
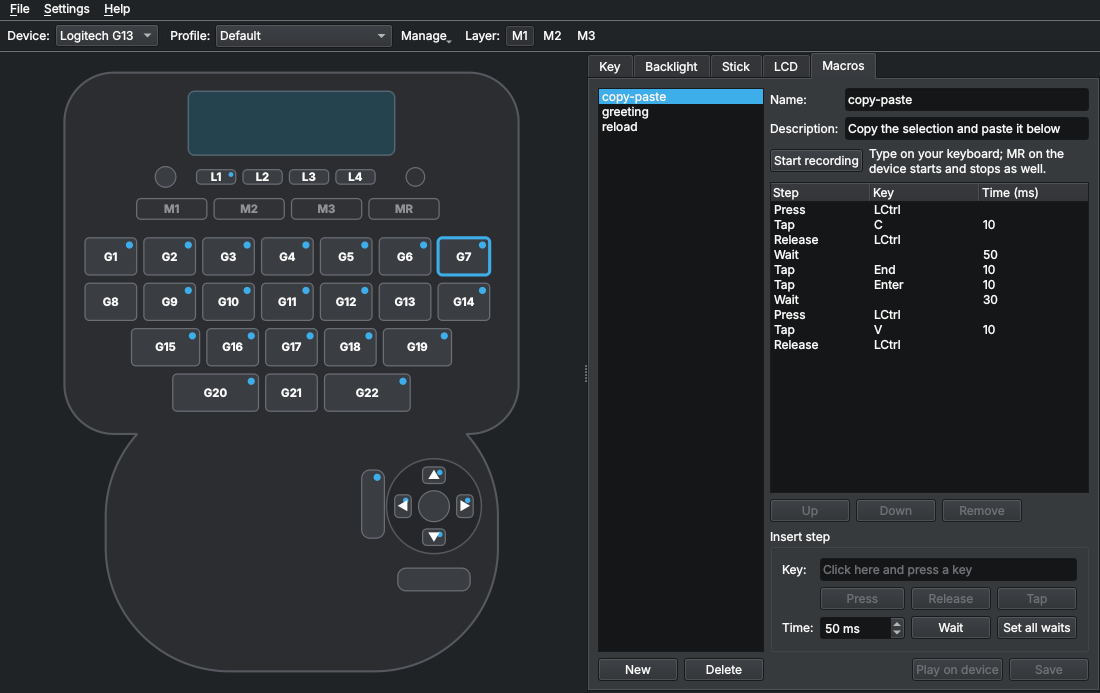
- Record: Start recording, then type on your keyboard; MR on the device starts and stops recording as well and lights the MR LED. Times between the keys are recorded.
- Edit: steps are press, release, tap (press and release) and wait. Times can be edited in place, all waits can be set at once, steps can be inserted, moved and removed.
- Play on device runs the macro through the daemon.
- The repeat mode belongs to the binding, not to the macro, so one macro can be bound in different ways. Pressing the key again stops a running macro.
- Switching profile or layer stops running macros and releases all keys.
The Backlight tab sets the backlight of the profile; it is applied whenever the profile becomes active.
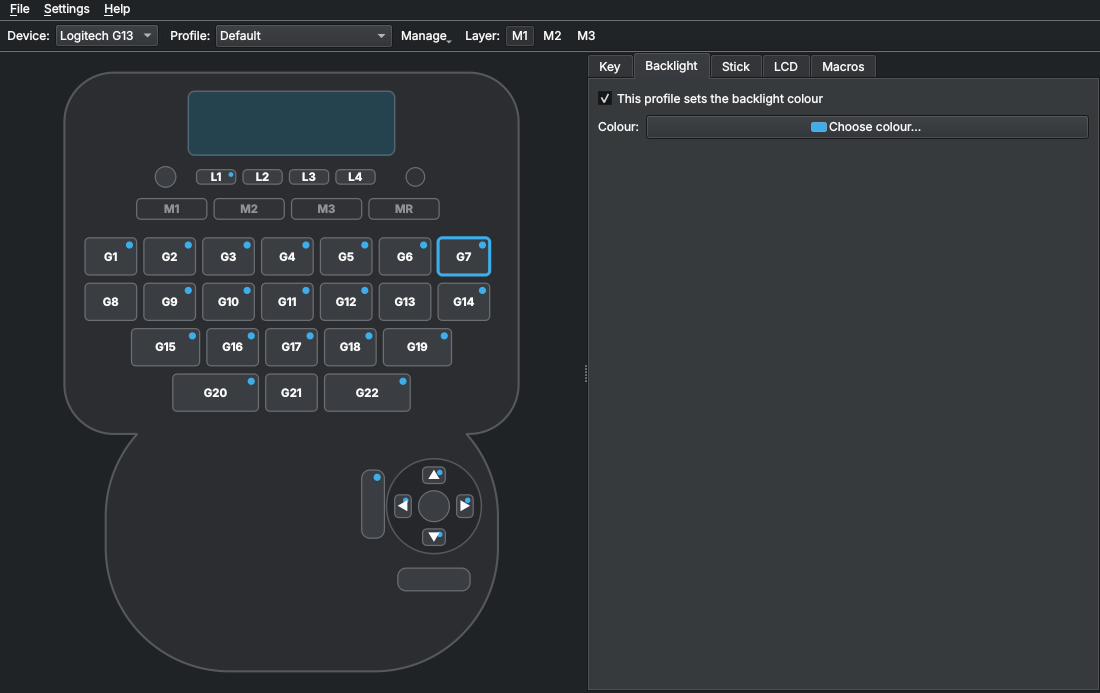
- G13, G510: a colour (live preview on the device while choosing).
- G11, G15, G15 v2: brightness Off / Dim / Bright; on G15 and G15 v2 separately for the keys and the LCD.
Without the group gkey the LEDs cannot be changed; the tab offers to set this up
(Installation).
Device-specific functions are described on the device pages: Logitech G13, Logitech G510, Logitech G15, Logitech G15 v2, Logitech G11.