Provide a VM name and an image with an admin credentials and whether to -deploy or -destroy.
Supported images:
Windows 7, 10, 11, 11 with Office Pre-installed
Windows Server 2012R2, 2016, 2019 and 2022
Ubuntu Server 18.04
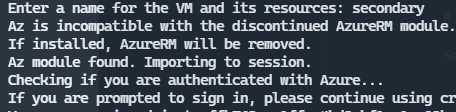
If the legacy AzureRM module is installed, it will be removed as it cannot exist side-by-side with the new Az module.
If the Az powershell module isnt installed, it will be and will be imported.
If not connected to azure, script will prompt you to sign in to whichever tenant you have rights to deploy on.

It will ask you to specify a username and password for the admin user and will continue on from there.
Deploys to "East US" Location by default. At this time "-location" can be specified on the command line but it wont find your network security group and the machine will not have the security rules applied.
Image is selected with "-windows10" or "-server2022", etc Alterantely, images can be specified using the "-image" flag and the image resource, but this is mmore for testing than a supported feature. It may take some fiddling to get this to work with a managed image or shared image but it's something in the works.
Resource Group is created from the VMName, as well as the VNET, subnet and NSG.
Powershell retrieves your current public IP address and uses this to create rules to allow all traffic from your location and deny rules for anything else.
NSG allow rules are applied at the subnet level.
VM is created into the VNet and subnet behind the NSG, using the admin username and password.
RDP session will be initiated to the machine after it is finished deploying, unless Ubuntu is selected. SSH in to the IP provided.
Resources can be deallocated or destroyed by pressing up arrow on your keyboard and changing -deploy to -destroy:

Open powershell.exe, navigate to the folder and run:
# Windows11 with Office

Set-ExecutionPolicy Bypass .\BlastBox.ps1 -office -deploy

# Windows 11

Set-ExecutionPolicy Bypass .\BlastBox.ps1 -windows11 -deploy

# Windows 10:

Set-ExecutionPolicy Bypass .\BlastBox.ps1 -windows10 -deploy

# Windows 7

Set-ExecutionPolicy Bypass .\BlastBox.ps1 -windows7 -deploy

# Server 2022:

Set-ExecutionPolicy Bypass .\BlastBox.ps1 -server2022 -deploy

# Server 2019

Set-ExecutionPolicy Bypass .\BlastBox.ps1 -server2019 -deploy

# Server 2016

Set-ExecutionPolicy Bypass .\BlastBox.ps1 -server2016 -deploy

# Server 2012R2

Set-ExecutionPolicy Bypass .\BlastBox.ps1 -server2012 -deploy
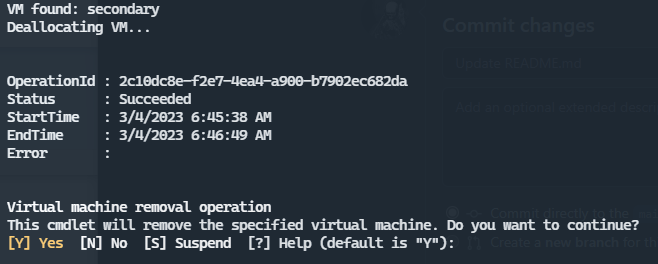
Use the destroy flag to deallocate and destroy the VM with it's associated Resources and Resource Group, including networking. You will be prompted for the VMname you chose earlier.
# Windows 10

Set-ExecutionPolicy Bypass .\BlastBox.ps1 -server2022 -destroy

# Server 2022

Set-ExecutionPolicy Bypass .\BlastBox.ps1 -windows10 -destroy
Any previous deployment can be destroyed as well by running the script with "-destroy" and then specifying the VMName.
Set-ExecutionPolicy Bypass .\BlastBox.ps1 -destroy
The script will take the VMName and destroy resources created from it.