Repository navigation
Plugged Coding
RobomationLAB
BLE Connection
Using Block Composer
Block Composer RaccoonBot Examples
RaccoonBot Joystick APP
RaccoonBot Update
RobomationLAB provides integrated authoring environment based on Chrome web browser.
It utilizes the 'Roboid model', which abstracts robot hardware into software, enabling real-time control of our robots through code interpretation and execution.
In addition, optimized interfaces and various example contents allow more efficient and intuitive coding education in the educational field.
Block Composer is a tool that allows users to easily and quickly control our robots through block coding and learn the fundamentals of robot control.
- Optimized authoring environment for Physical Computing
- Easy Coding for beginners using Drag & Drop blocks
- Learning Environment without syntax errors from basic concepts
- Automatic Conversion to JavaScript and Python script code
- Provides predefined function blocks and various hands-on examples for each robot
- Real-time result verification through code execution
- Improves problem-solving skills and creativity through block combinations
- Provides optimized feedback through AI-based script code analysis
Script Composer is a tool that allows users to easily and quickly control company robots through script coding and learn the fundamentals of robot control and coding.
- Provides both JavaScript and Python editors
- Supports Auto-Completion and Code Insertion features for each language
- Provides various hands-on example codes for each robot
- Real-time result verification through code execution
- Provides optimized feedback through AI-based script code analysis
- Based on the Chrome web browser, allowing use without OS (Operating System) restrictions.
- Controls robots directly through Mini Dongle+ using Web Serial Communication.
- Supports simultaneous connection and control of multiple robots without limitation on type or number.
This section explains how to connect RaccoonBot and Mini Dongle+ via BLE in the Block Composer program.
Prepare one RaccoonBot and one Mini Dongle+ to connect to Block Composer.
After connecting Mini Dongle+ to the PC, place RaccoonBot nearby. The Status LED of RaccoonBot turns blue, and RaccoonBot and Mini Dongle+ will automatically pair.
When pairing is successfully completed, the Mini Dongle+ LED turns blue or blinks rapidly.
However, to use RaccoonBot and Mini Dongle+ in Block Composer,
you must grant permission to Mini Dongle+ in the Chrome web browser.
You can grant web serial port permission for Mini Dongle+ as follows.
- Click the Dongle button in the top menu.
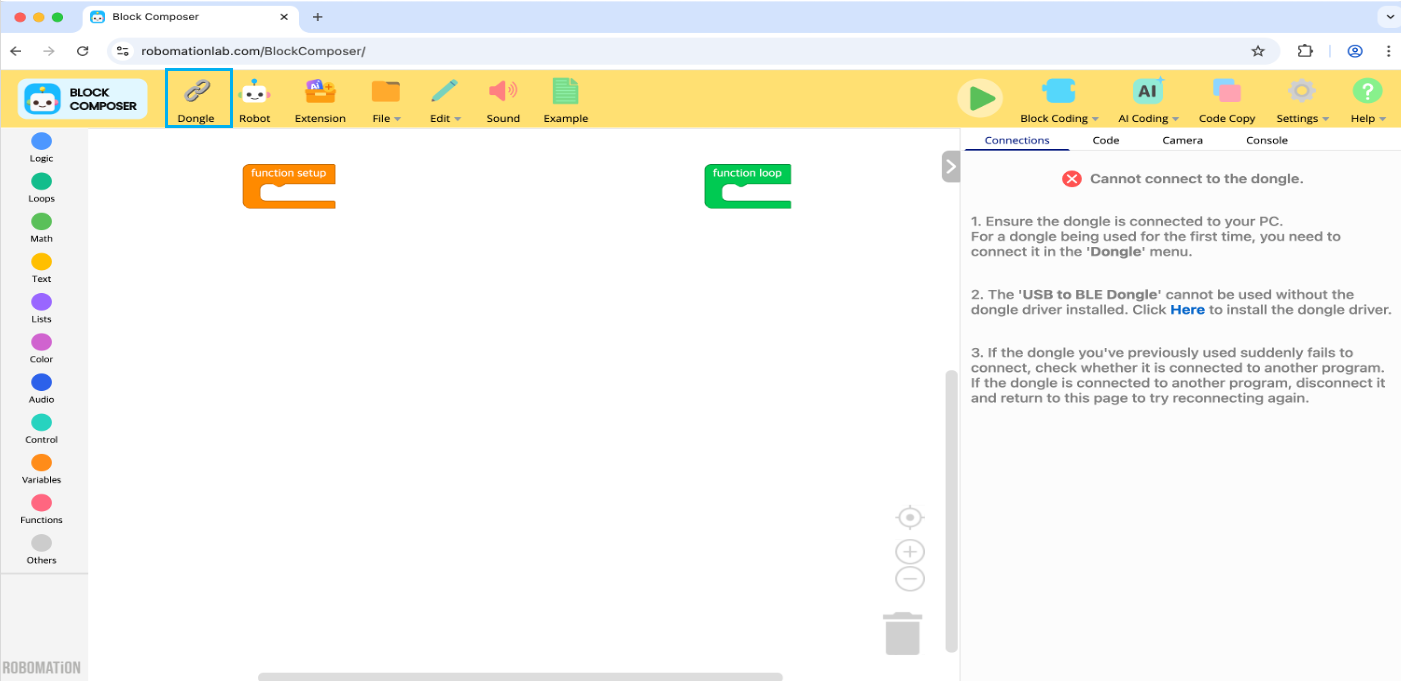
2. From the list that appears on the screen, select the Mini Dongle+ you want to connect to, and click the Connect button.
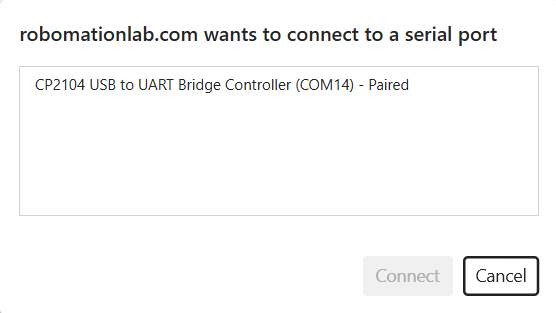
3. The screen refreshes, and you can now connect and use RaccoonBot and Mini Dongle+ in Block Composer.
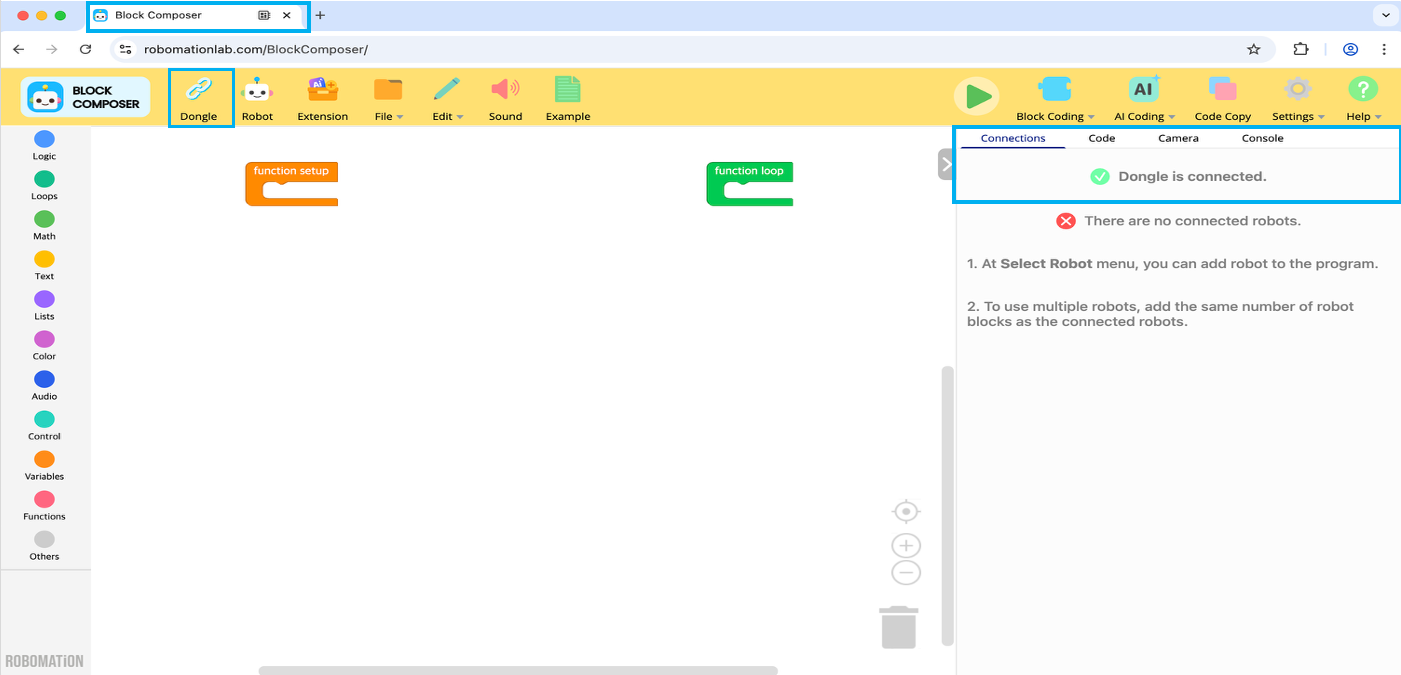
You can check the dongle connection status in the three locations shown in the figure below.
When the dongle is connected, a Serial Port icon appears in the browser tab, and a green indicator lights up in the lower-left icon.
You can also check the connection status in the Connections panel on the right side of the screen.
Once the dongle is connected, it will reconnect automatically without needing to search again.
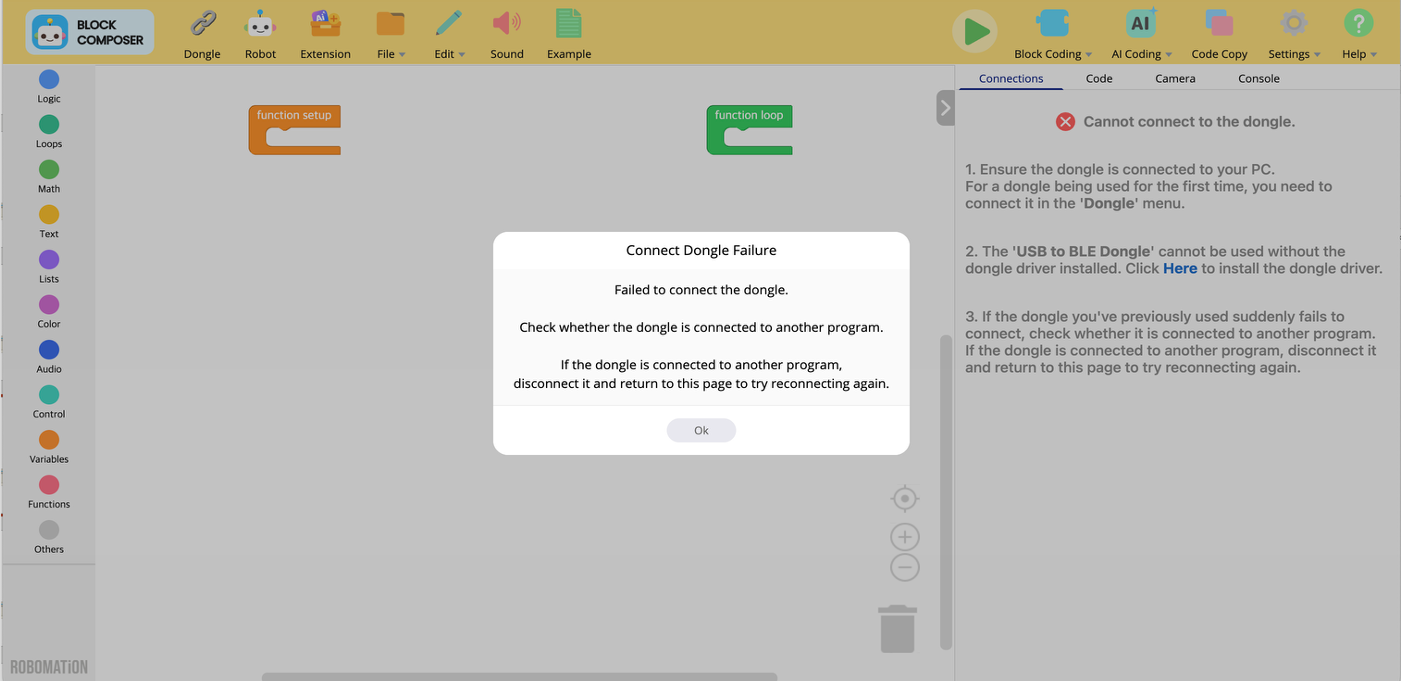
If the dongle is already connected to another program when accessing Block Composer, the connection will fail.
Disconnect the dongle from that program and try connecting again in Block Composer.
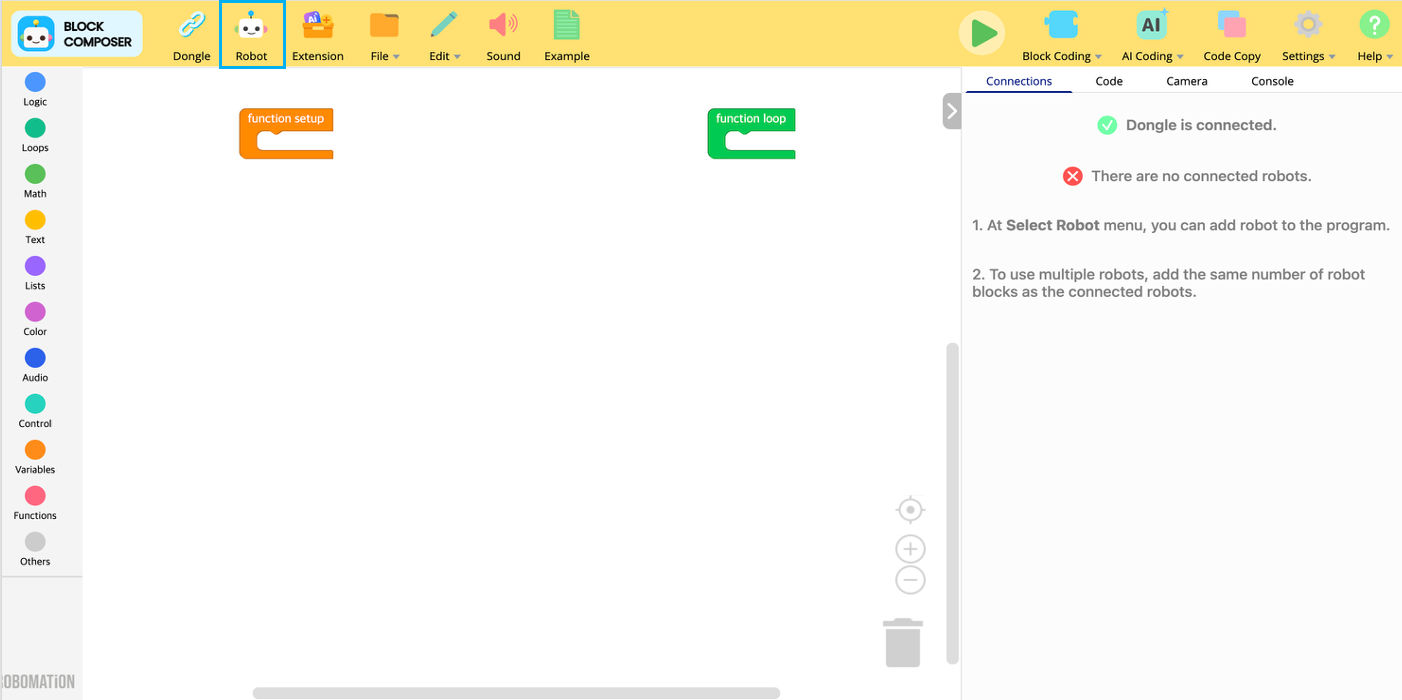
To control a robot in Block Composer, you must add the robot blocks to the program.
Follow the steps below to add RaccoonBot blocks.
- Click the Robot button in the top menu.
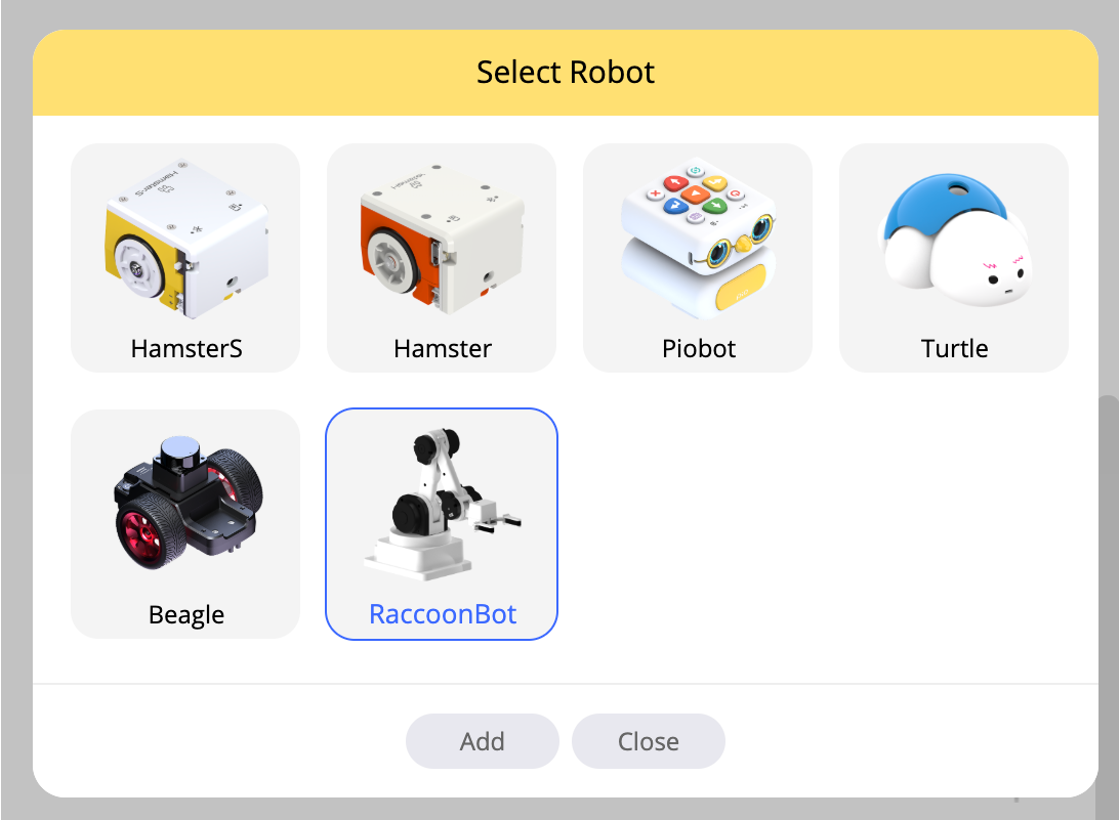
2. Select **RaccoonBot** from the list and click the **Add** button.
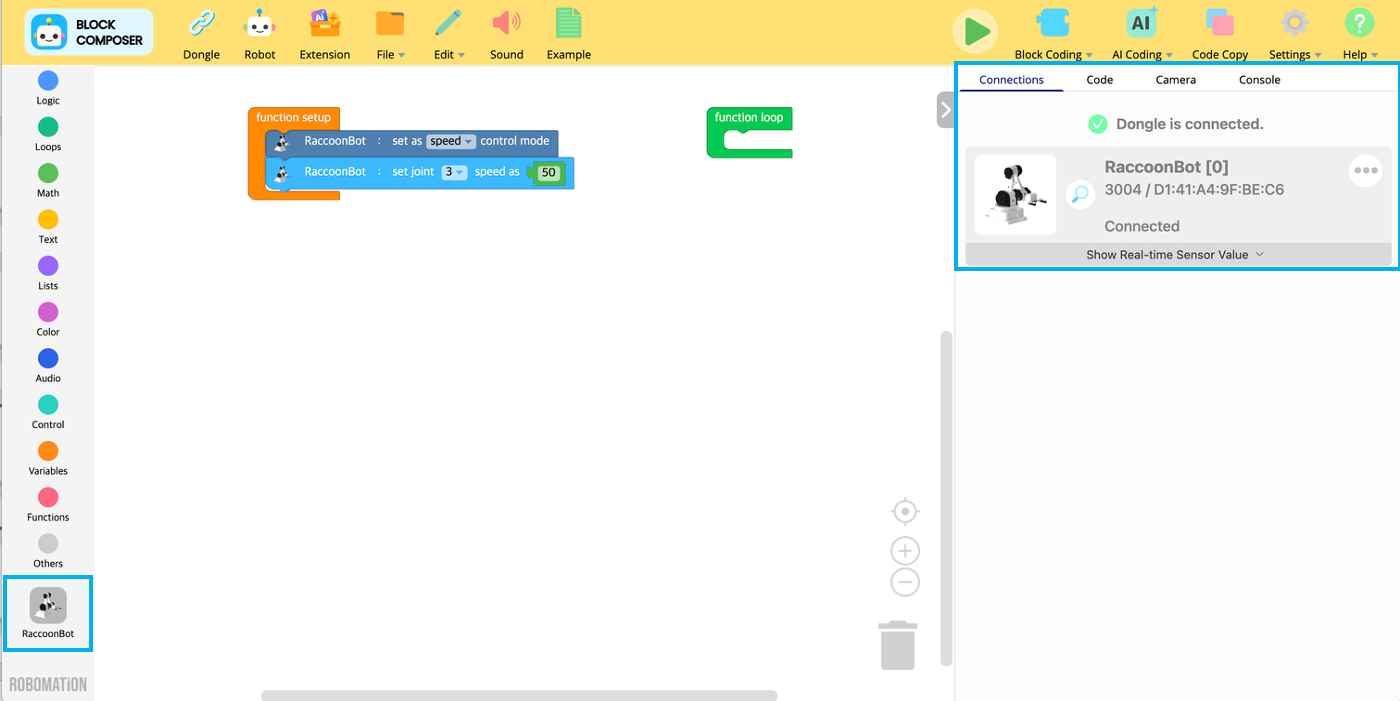
3. The RaccoonBot blocks will be added to the **Block Palette** on the left side, and you can check the connected robot information in the **Connections** panel on the right.
This section explains the basic usage required to operate Block Composer.
-
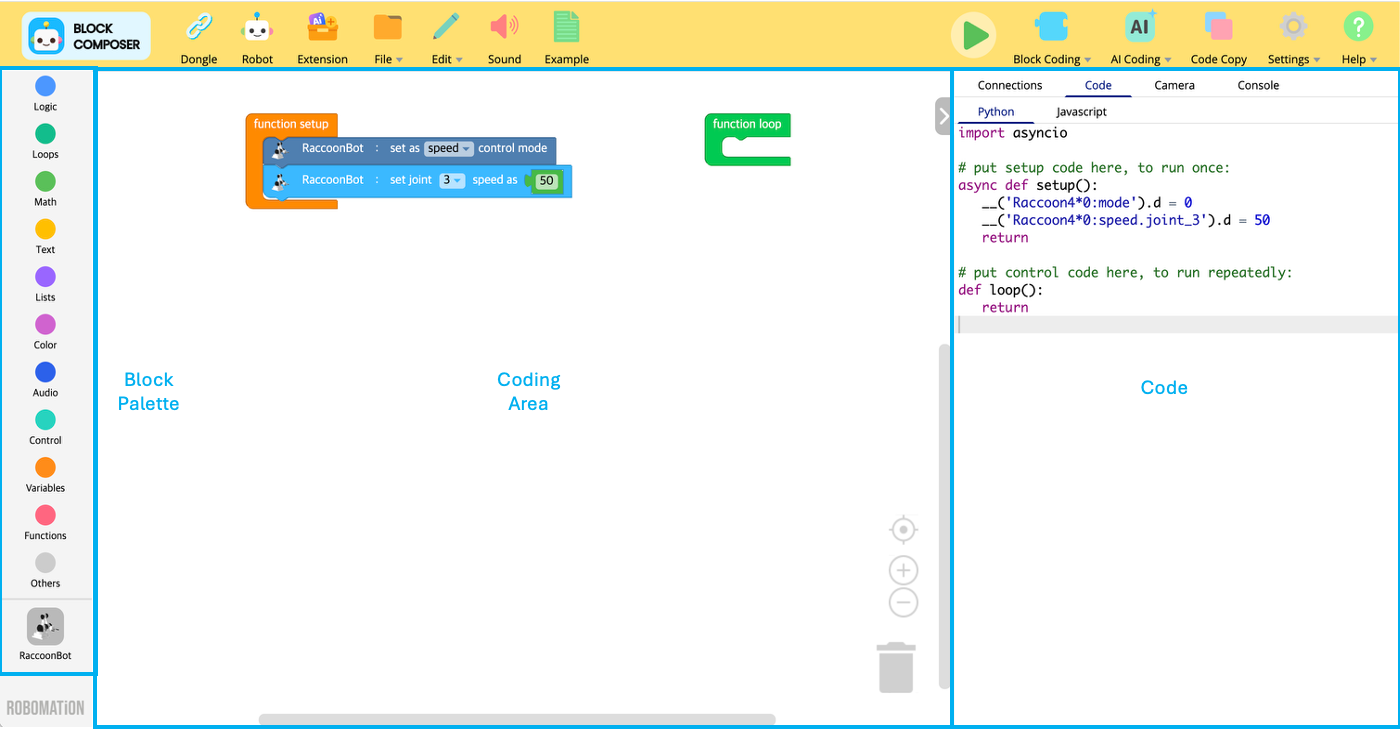
Drag a desired block from the Block Palette and drop it into the Coding Area.
Blocks must be properly connected to other blocks to be reflected in the code. -
In the Code panel, you can check how blocks are converted into JavaScript or Python code in real time.
💡 TIP:
To select multiple blocks at the same time, hold down the Shift key and click the block.
⚙️ Note:
Blocks must be connected to a Setup or Loop block to be reflected in the code.
Unconnected blocks will not be executed and will not be included in the code.
-
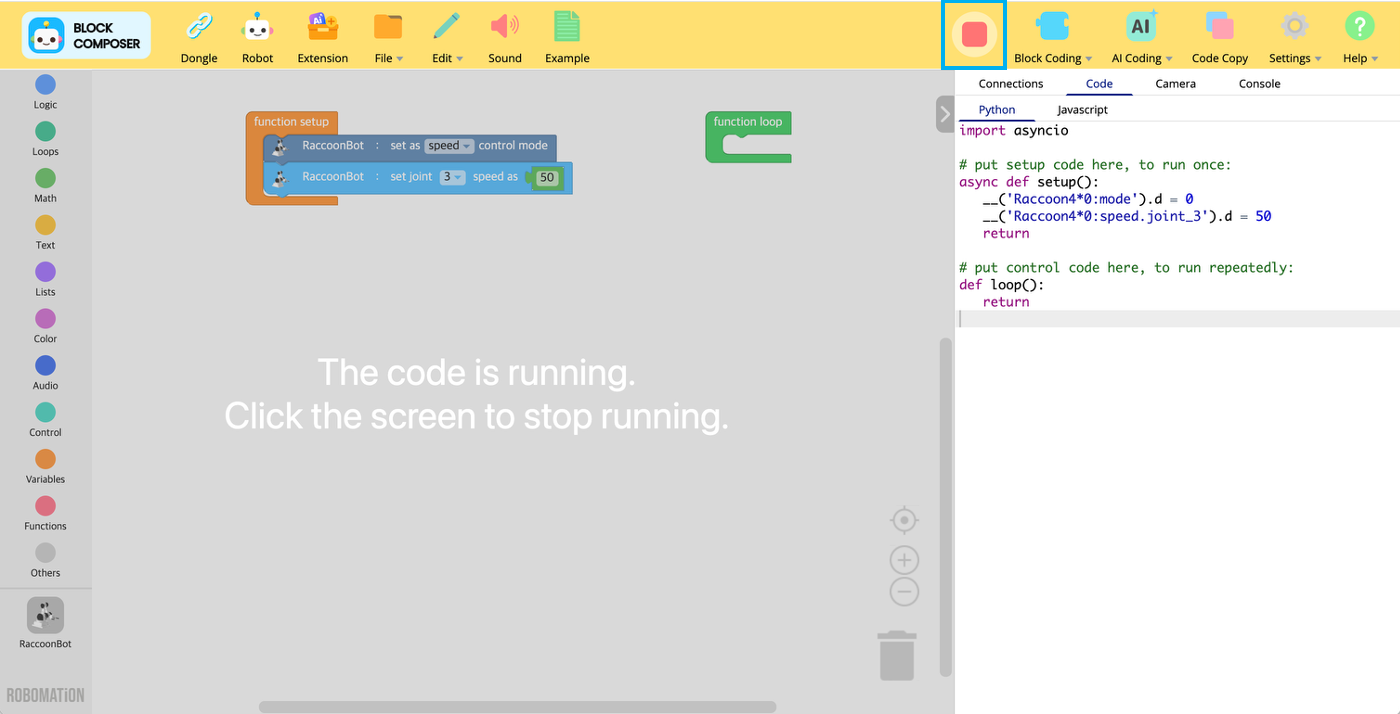
Click the Run button in the top menu to check how the code operates on the robot in real time.
-
Click the Run button again or click the Coding Area to stop execution.
-
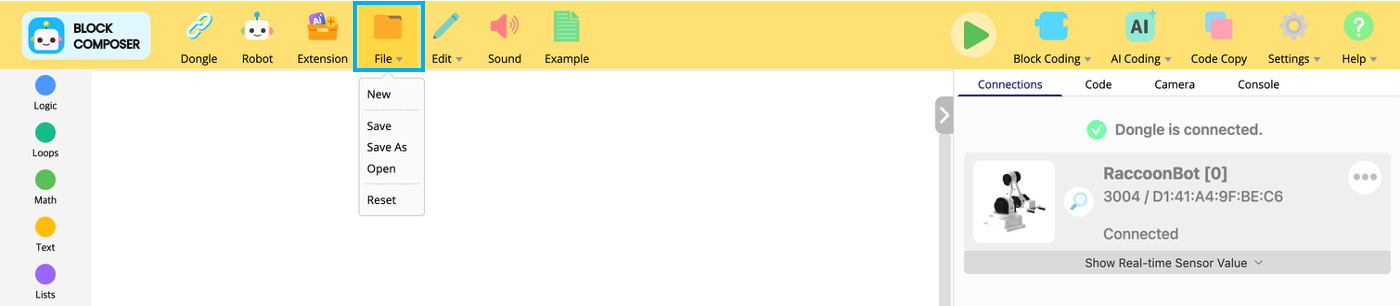
New: Clears the current code, while keeping program settings and added robots.
-
Save: Saves the current file to local storage.
-
Save As: Saves the current file to local storage with a specified name.
-
Load: Loads a file from local storage.
-
Reset: Initializes all current work and program data.
-
Undo: Cancels the last executed action. Shortcut: Ctrl+Z.
-
Redo: Re-executes the last canceled action. Shortcut: Ctrl+Y.

-
Language: Select the language used in the program (English or Korean(한국어)).
-
Dongle: Force disconnect or reconnect the dongle to the program.

Block Composer provides various hands-on examples to control RaccoonBot through block coding.
Follow the steps below to explore the examples.
-
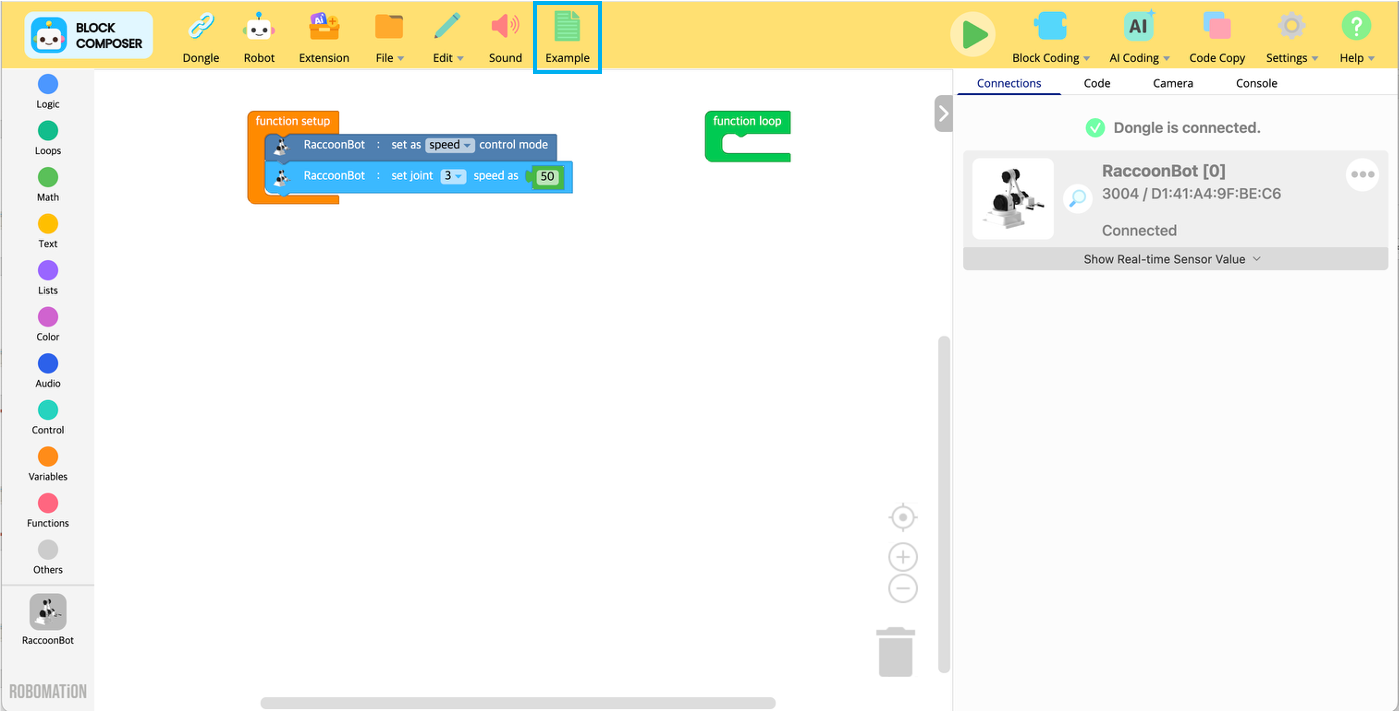
Add the RaccoonBot robot block to the program, then click the Example button in the top menu.
-
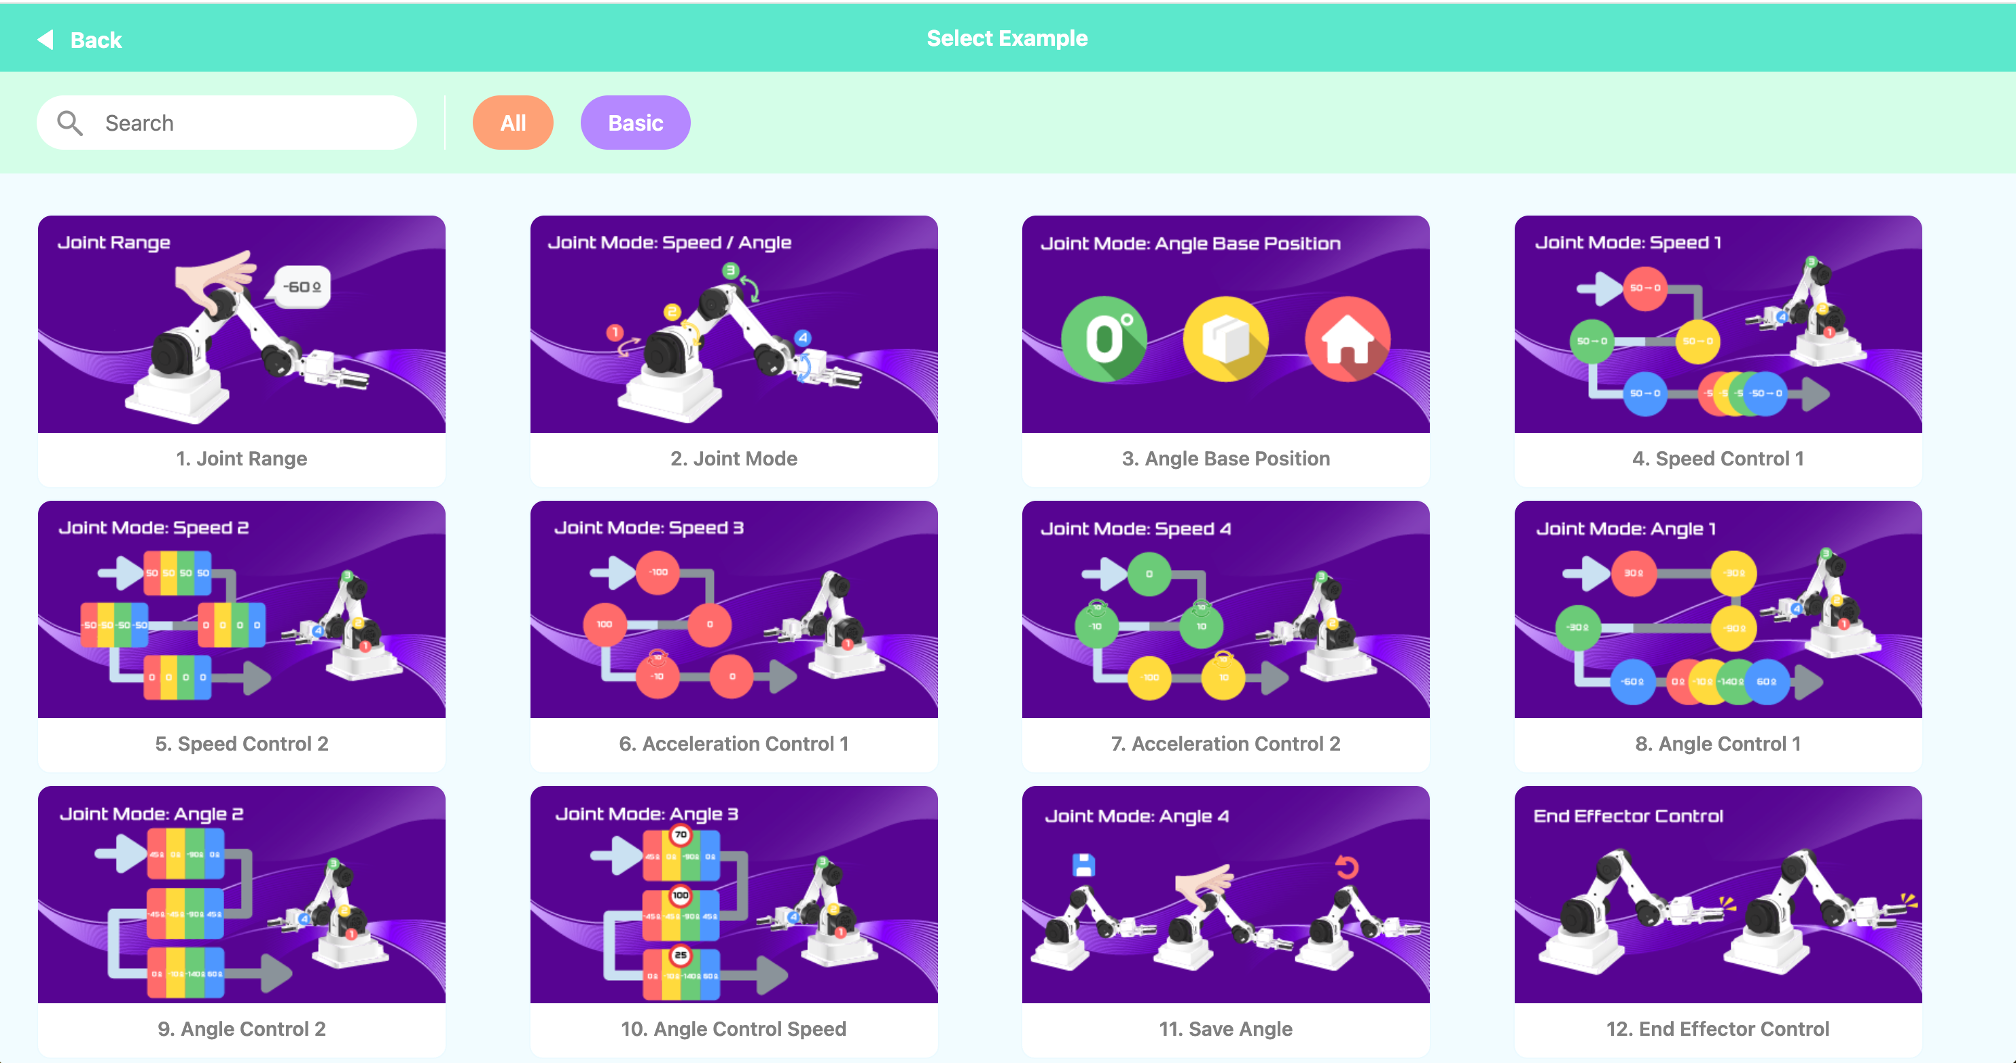
Select the example you want to learn from the list displayed on the screen.
-
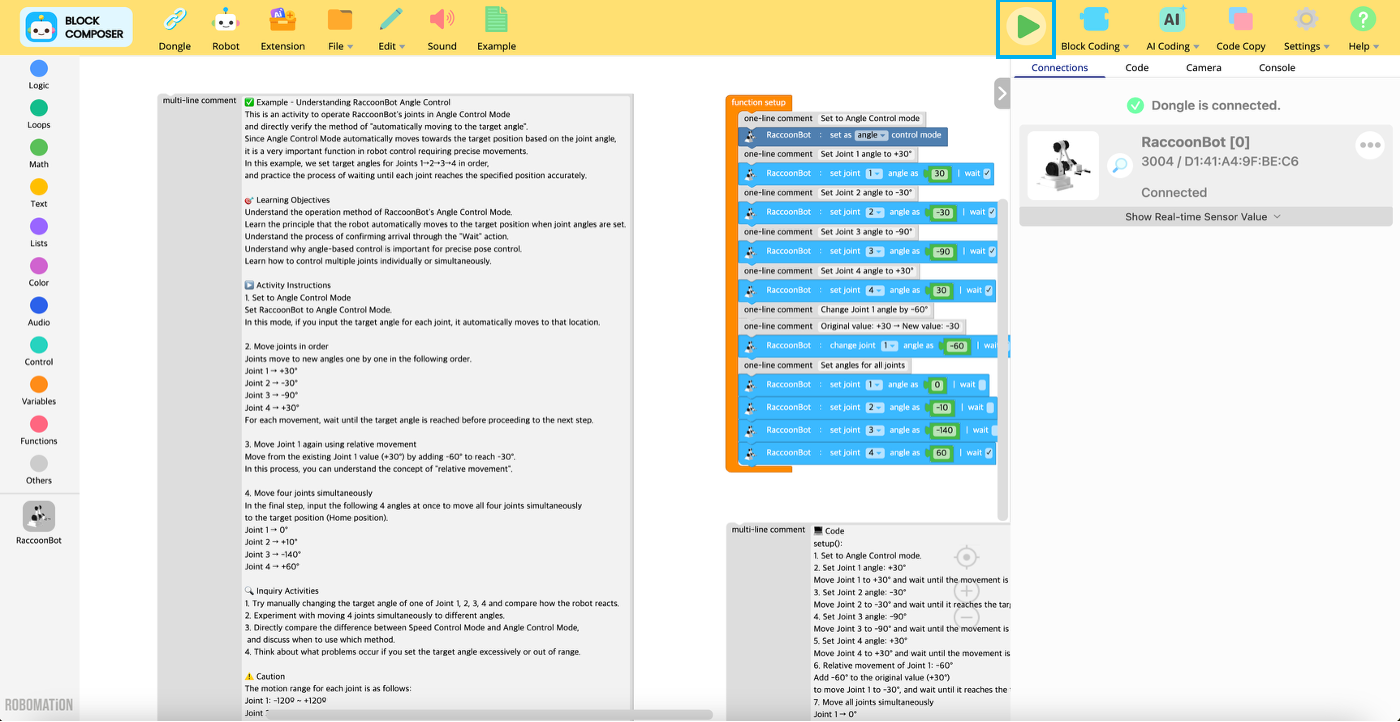
The screen refreshes, and you can check the blocks of the selected example in the Coding Area.
You can review explanations of the example and code in the multi-line comment block.
Click the Run button to check how the example operates in real time.
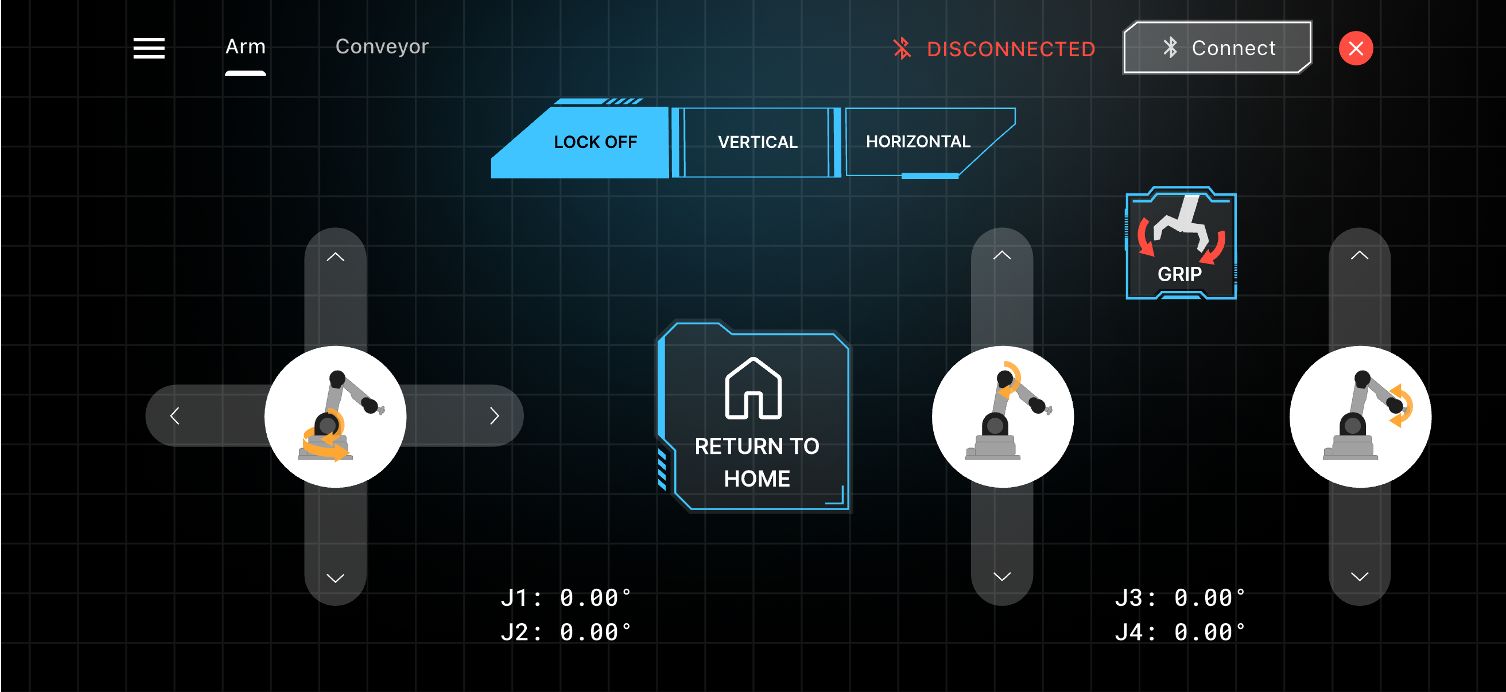
RaccoonBot provides a dedicated mobile app that allows easy control via smartphone.
By running the app, users can freely move each joint of RaccoonBot to Pick and Place objects at desired positions or experience various motions directly.
When connected with Peripheral Devices, such as a conveyor, more advanced robot control practice is possible.
Through this, users can easily understand actual robot control and automation principles beyond simple manipulation experience.
The app supports both iOS and Android, and can be downloaded easily by scanning the QR code below.
RaccoonBot provides a dedicated mobile app that allows easy updates of the latest firmware and features via smartphone.
The app supports both iOS and Android, and can be downloaded easily by scanning the QR code below.
Alternatively, check the link below for detailed instructions on app installation and usage.