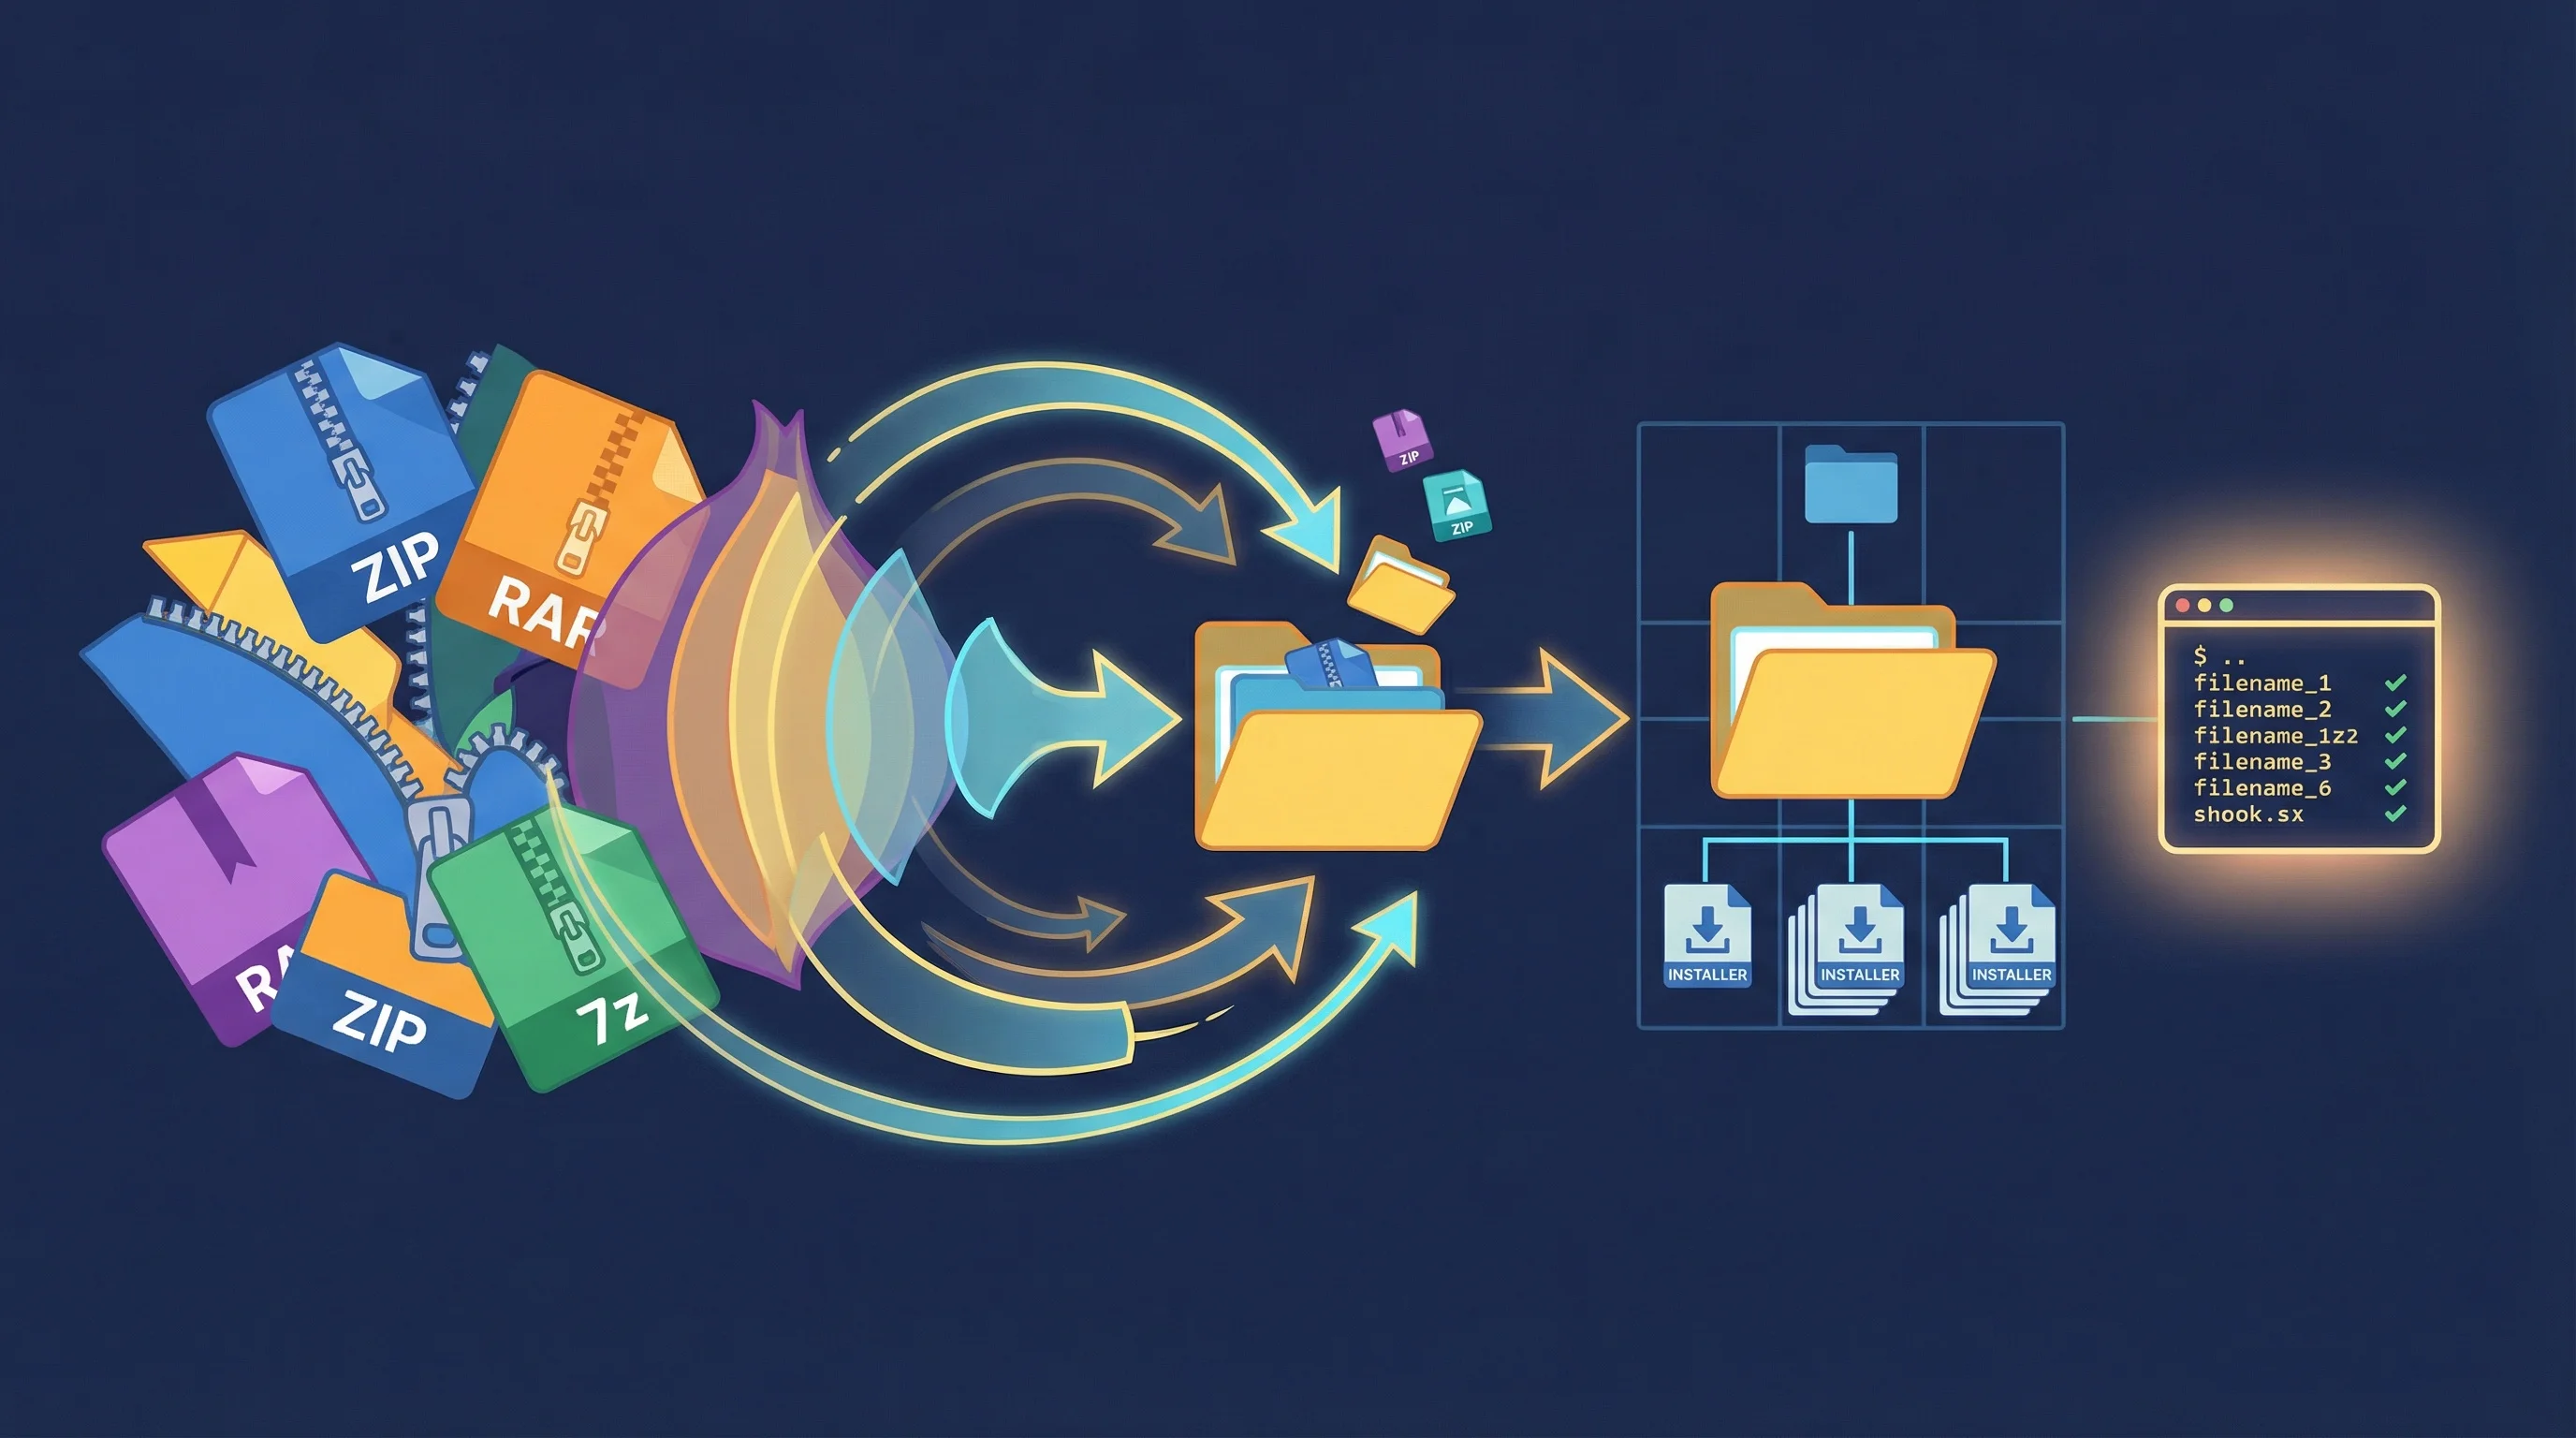
Recursively extract nested archives and run every installer. One command, zero hassle.
BEFORE                                    AFTER
downloads/                                downloads/
  Gigabyte_LAN_Driver.zip                   Gigabyte_LAN_Driver/
    -> LAN_Driver_v2.1.rar                    setup.exe
        -> setup.exe                          readme.nfo
        -> readme.nfo                       ASUS_Audio_v6.0/
  ASUS_Audio_v6.0.zip                         install.exe
    -> audio_driver.zip                       release.txt
        -> install.exe                      MSI_BIOS_Update/
        -> release.txt                        flash.exe
  MSI_BIOS_Update.7z                          info.nfo
    -> bios_v1.4.rar
        -> flash.exe
        -> info.nfo

  15 archives, nested 2-3 deep              Clean folders, ready to run
  + .sfv, .par2, .r00-.r99 clutter          All archives and junk removed
One command:
peelx downloads/
PeelX extracts every archive (including archives inside archives), cleans up all the leftovers, and drops you into an interactive selector where you can run each executable in sequence.
Recursive nested extraction - Archives within archives within archives. PeelX keeps extracting until there's nothing left to unpack, up to 50 levels deep.
Split archive support - Handles multi-part archives (.r00-.r99, .z01-.z99, .001-.999, .7z.001, etc.) automatically. Extracts from the main archive file and cleans up every split part.
Interactive executable selector - After extraction, a curses-based interface shows every executable found across all your extracted folders. Navigate with arrow keys, preview NFO/README files in a side panel, and run installers directly. It also tracks which ones you've already run.
Automatic cleanup - Removes all archive files, split parts, checksums (.sfv, .md5, .sha1, .sha256, .crc), and parity files (.par2) after extraction. NFO files and extracted content are preserved.
Cross-platform - Windows, Linux, macOS, and WSL. On WSL, PeelX auto-detects the environment and converts paths so Windows executables launch correctly.
Safety first - Dry-run mode lets you preview every action without touching files. Backup mode copies archives before deletion. A hard limit of 50 extraction iterations prevents runaway loops.
# Core install (ZIP, TAR, GZ, BZ2, XZ support built-in)
pip install peelx

# Full install with RAR and 7z support
pip install peelx[all]Download peelx.exe from the Releases page. No Python required, just drop it in your PATH or run it directly.
git clone https://github.com/TheDecipherist/PeelX.git
cd PeelX
pip install -e .[all]
peelx# Run in the current directory
peelx .
# Run against a specific folder
peelx ~/Downloads/drivers/
# Preview what would happen (no files modified)
peelx ~/Downloads/drivers/ --dry-run
# Detailed output showing every file
peelx ~/Downloads/drivers/ --debugThat's it. PeelX scans the target directory, finds every folder containing archives, extracts recursively, cleans up, and launches the interactive selector.
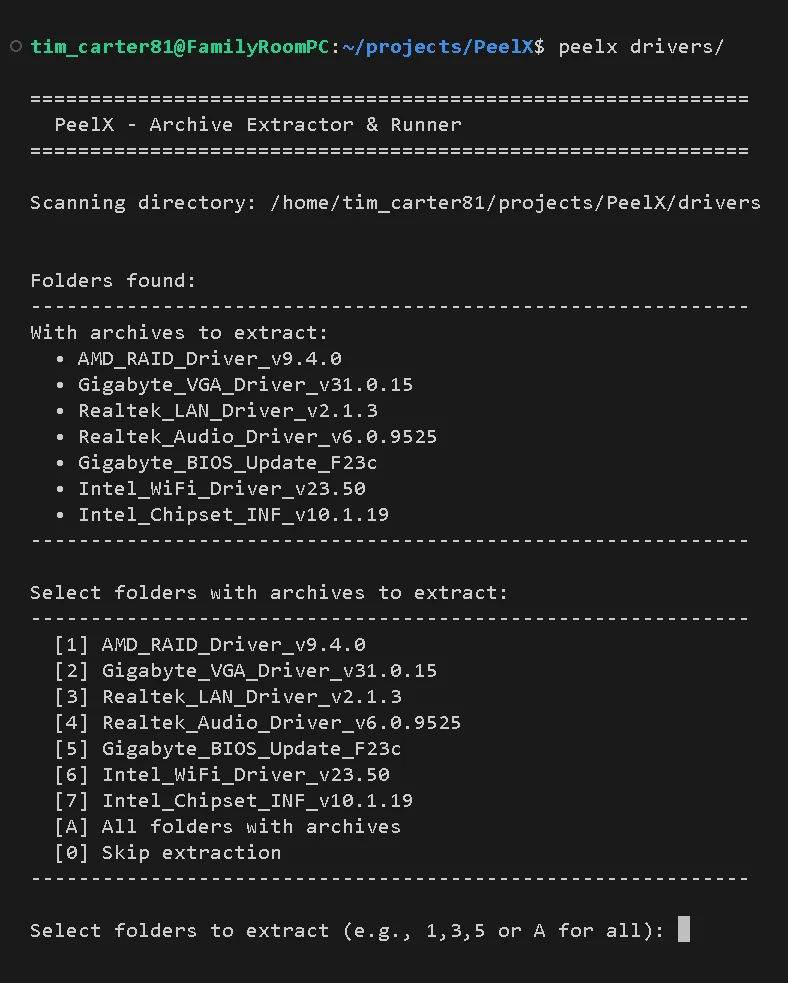
PeelX scanning a drivers folder and listing all detected archives:
You've been there. Everyone has.
You just built a new PC or you're setting up a fresh Windows install, so you head to Gigabyte's support page to grab drivers. Fifteen downloads later your Downloads folder is full of ZIP files. You open the first one. Inside: another ZIP. Or a RAR. You extract that too. Now you've got a setup.exe buried two folders deep alongside a pile of .sfv and .r00 files you don't need.
Multiply that by fifteen. That's thirty manual extractions, fifteen rounds of "find the installer," and fifteen cleanup passes to get rid of the archive junk. Tedious, repetitive, and exactly the kind of thing a script should handle.
It's not just a motherboard driver problem either. Firmware updates, game mods, driver packs, software collections - anything distributed as nested archives hits the same wall. Double-wrapped ZIPs are everywhere.
PeelX was built to make this a one-command operation:
peelx ~/Downloads/drivers/Every archive extracted. Every nested archive extracted. All the .sfv, .par2, and .r00 files cleaned up. Every setup.exe found and presented in a clean interface so you can run them one by one.
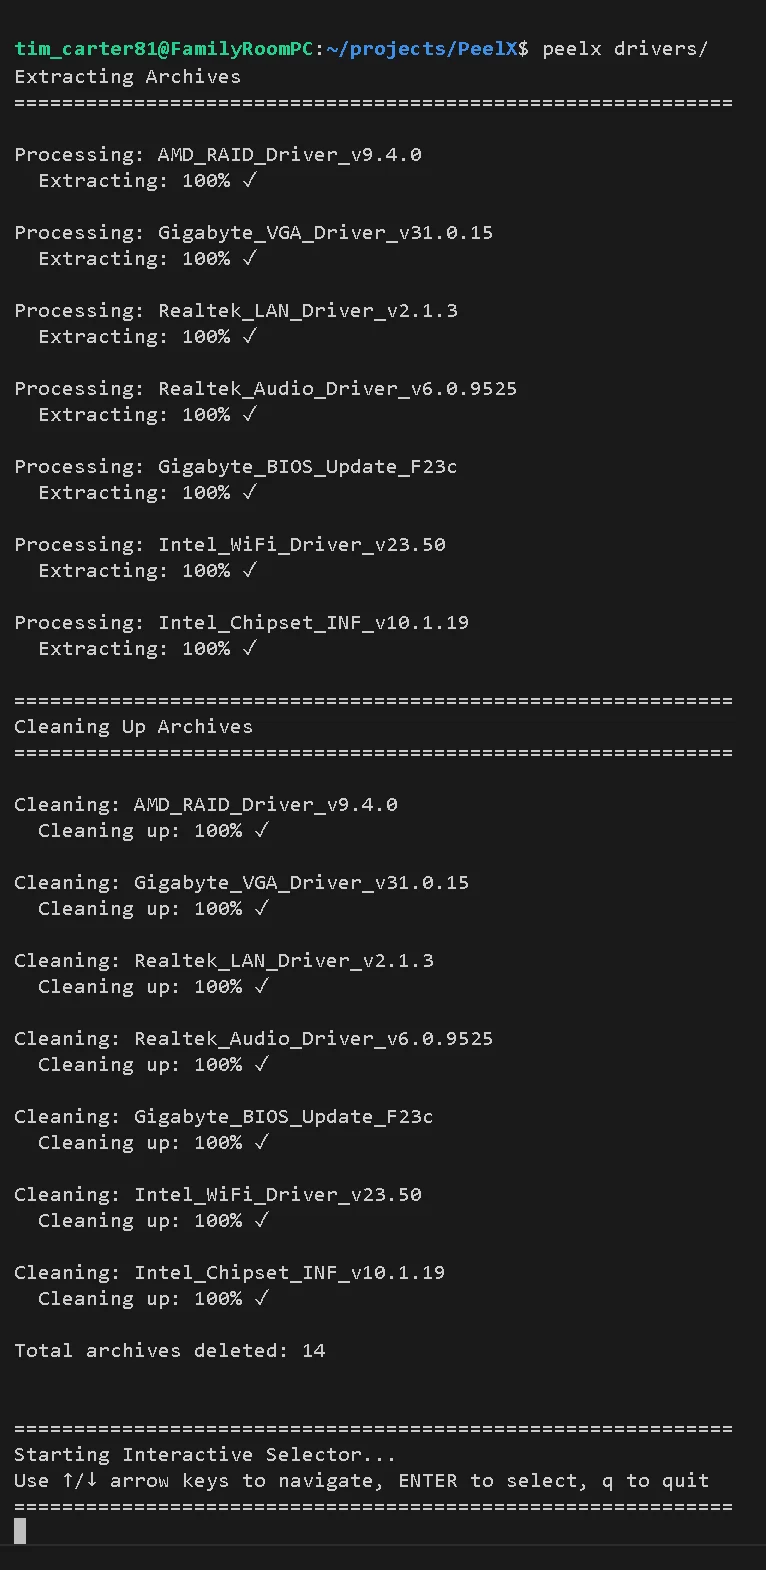
PeelX extracting all 7 driver archives, cleaning up, and launching the interactive selector:
After extraction, PeelX launches an interactive curses-based UI with two display modes:
Split-screen mode with executable list on the left and NFO preview on the right:
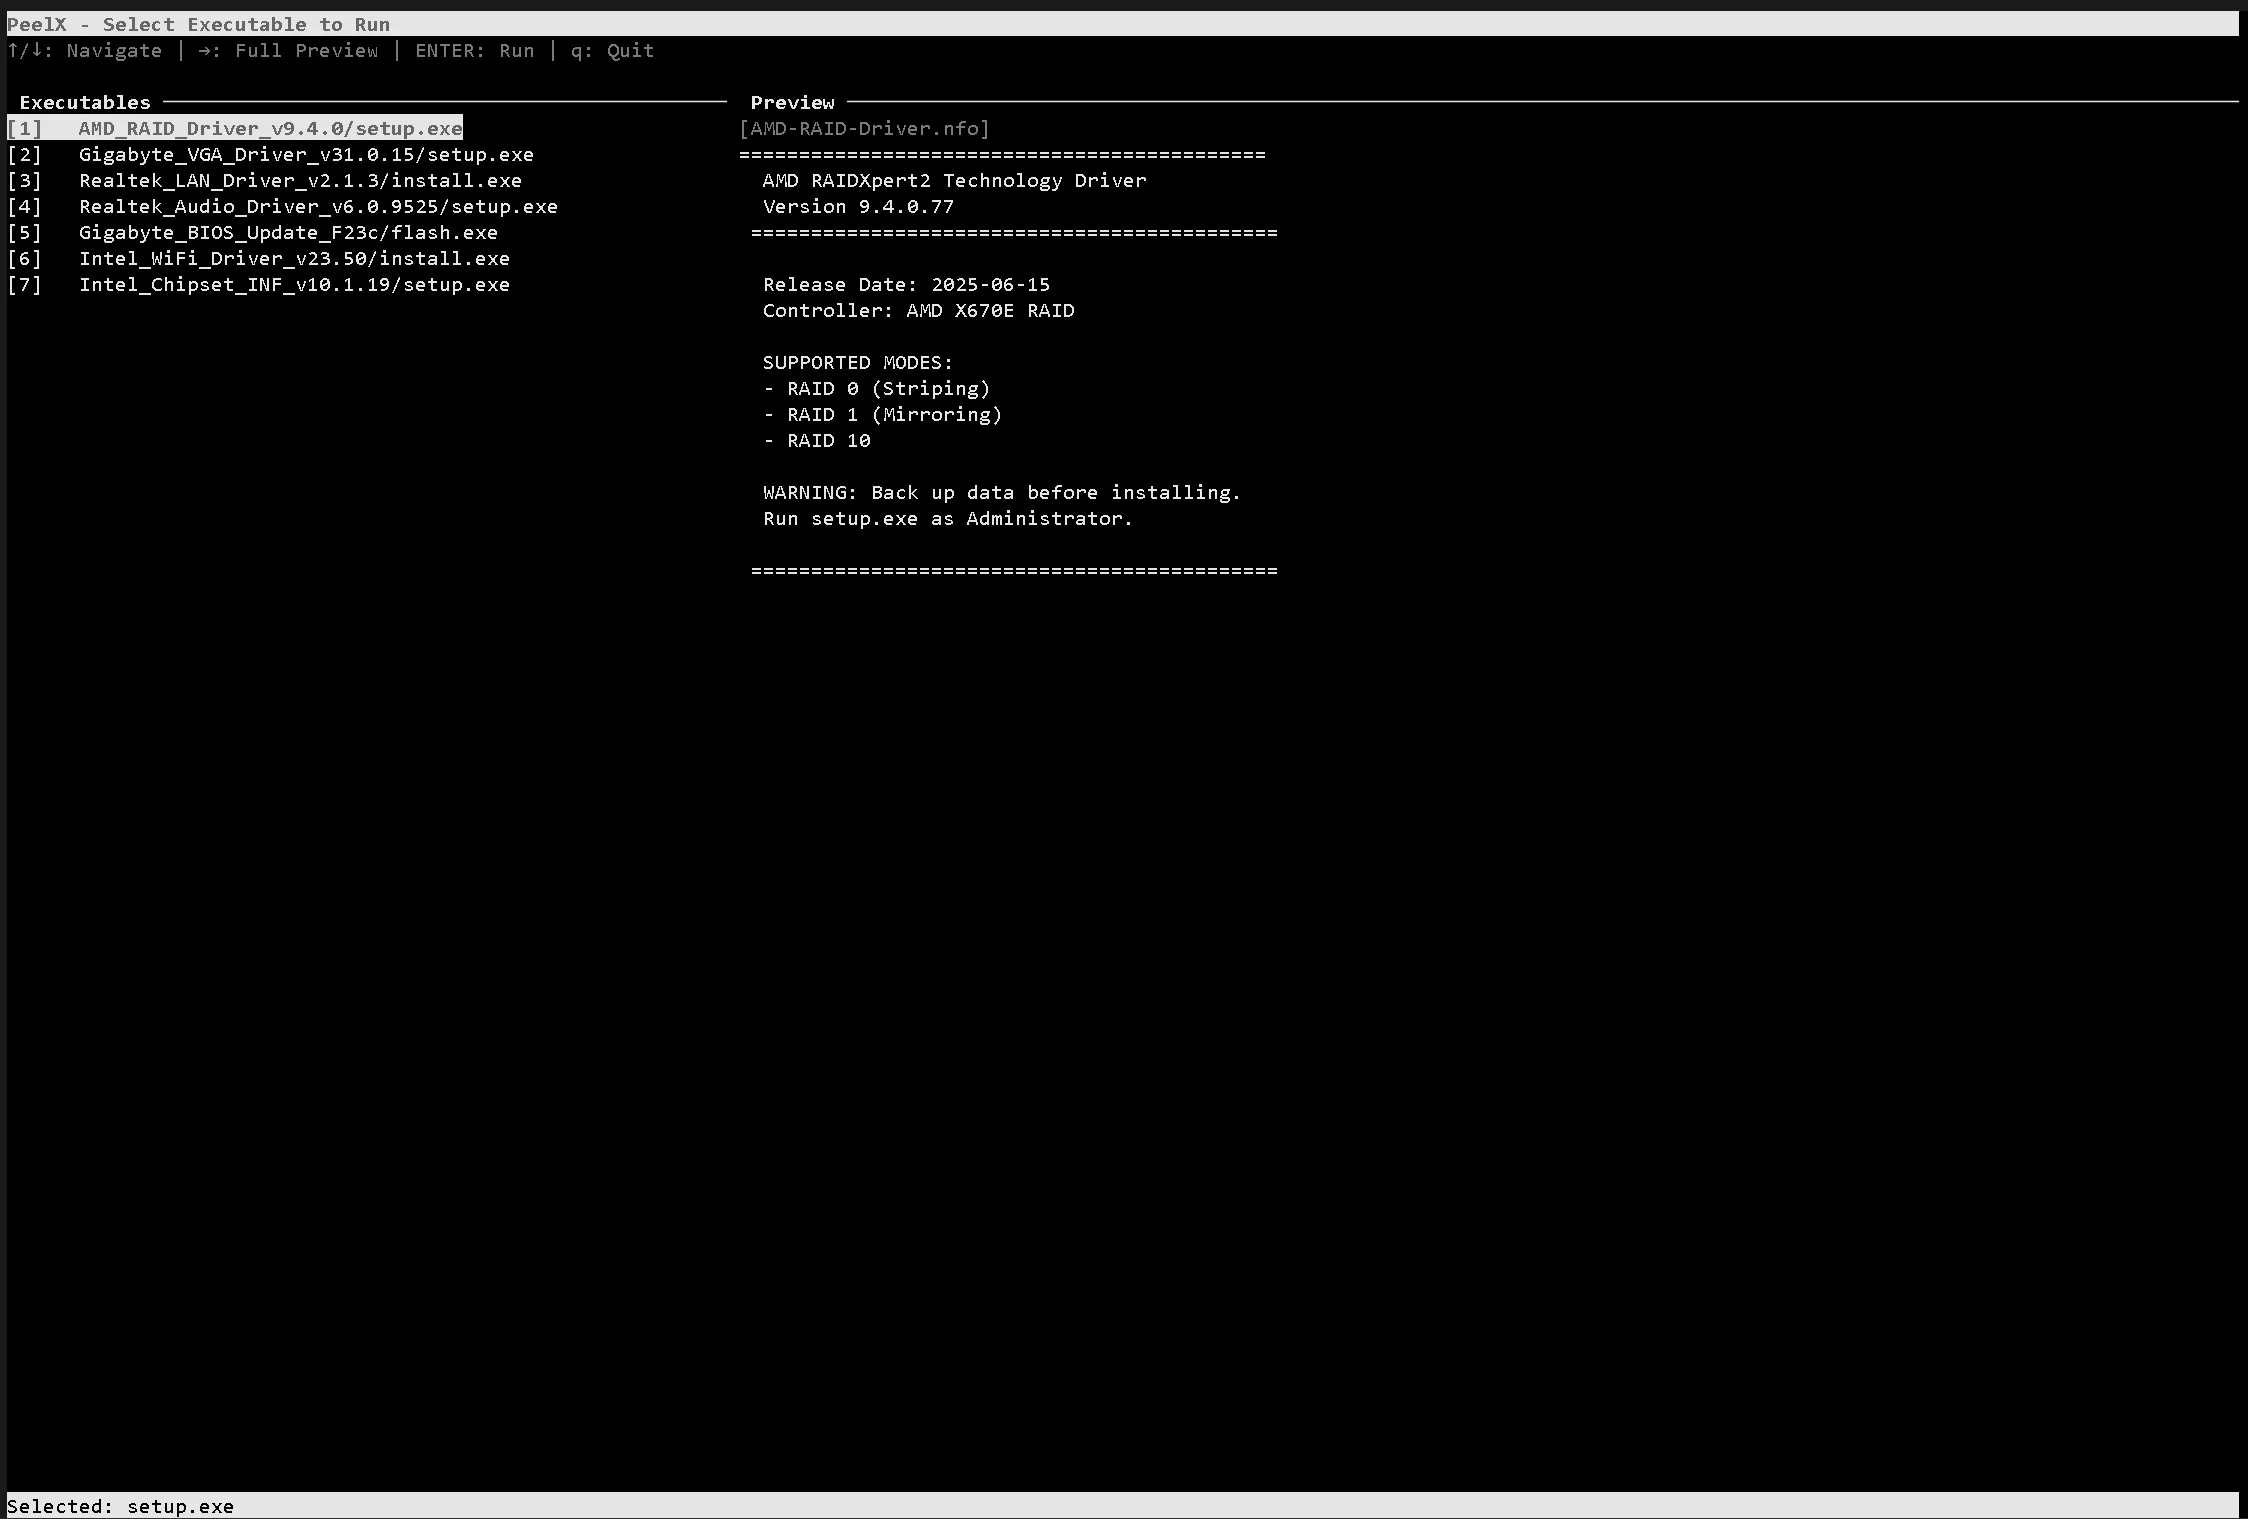
Navigate with arrow keys, hit Enter to run. Press the right arrow to expand the NFO preview to full screen, left arrow to go back.
- NFO/README auto-detection - Finds .nfo, .txt, .diz, and .readme files associated with each executable. Uses priority-based matching: exact name match, common readme filenames, any info file in the same directory, then parent directory search.
- Execution tracking - Executables you've already run show up highlighted in green with a run count. State saves to
executions.logso it persists across sessions. - Multi-encoding support - Reads info files with UTF-8, Latin-1, CP437, CP1252, and ISO-8859-1 fallback so NFO art renders correctly.
| Format | Extensions | Notes |
|---|---|---|
| ZIP | .zip | Built-in, no dependencies |
| TAR | .tar, .tgz, .tbz2 | Built-in, no dependencies |
| GZ | .gz | Built-in, no dependencies |
| BZ2 | .bz2 | Built-in, no dependencies |
| XZ | .xz | Built-in, no dependencies |
| RAR | .rar, .r00-.r99 | Requires rarfile package or system unrar |
| 7z | .7z, .7z.001+ | Requires py7zr package or system 7z |
Split archive variants (.r00, .r01, .z01, .z02, .001, .002, etc.) are all detected and handled automatically.
peelx [directory] [options]

Positional:
  directory              Directory to scan (default: archives)

Options:
  --dry-run              Preview all actions without extracting or deleting
  --backup               Create backup copies before deleting archives
  --no-interactive       Use simple text menu instead of curses UI
  --debug                Show detailed output with individual file names
  -h, --help             Show help message
PeelX includes a build script that packages everything into a standalone .exe using PyInstaller:
# If installed via pip
peelx-build-exe

# Or from source
python build_exe.py
The build script installs any missing dependencies (PyInstaller, rarfile, py7zr, windows-curses) and produces a single-file executable at dist/peelx.exe. Has to be run on Windows since PyInstaller builds for the current platform.
PeelX relies on external tools for RAR and 7z formats. You need to have them installed and added to your system PATH so PeelX can find them.
- Install WinRAR and/or 7-Zip
- Add their install paths to your PATH environment variable:
- WinRAR: typically
C:\Program Files\WinRAR - 7-Zip: typically
C:\Program Files\7-Zip
- WinRAR: typically
- Open a new terminal and verify they work:
unrar
7z
If either command isn't recognized, the PATH isn't set correctly. Go to Settings > System > About > Advanced system settings > Environment Variables, find Path under System variables, and add the install directories.
Install the system packages:
# Ubuntu/Debian
sudo apt-get install unrar p7zip-full

# macOS
brew install unrar p7zip
Or install the Python libraries instead:
pip install peelx[all]PeelX tries to set execute permissions automatically, but you may need to do it manually:
chmod +x /path/to/executablePeelX is released under the MIT License.