This is a demo project that is hosted on AWS that shows the time. It is accessible over HTTP and HTTPS servers over the public internet. For this demo, I’ve created a simple web app “app.py” which I would be MANUALLY deploying on AWS. It’s on purpose as the major reason for this project is to show how resources are provisioned and interconnected for a better understanding of the deployment process.
What you’ll need A python workspace where you can edit and test the python app locally if need be An AWS account
Resources created are:
Virtual Private Cloud (VPC)
Autoscaling Group (ASG)
Application Load balancer (ALB)
Security Groups (SG)
CloudWatch
S3 Bucket
Lambda Function
Simple Notification Service (SNS)
Internet Gateway
Virtual Private Network (VPN)
The high-level architecture for the project is illustrated in the diagram below:
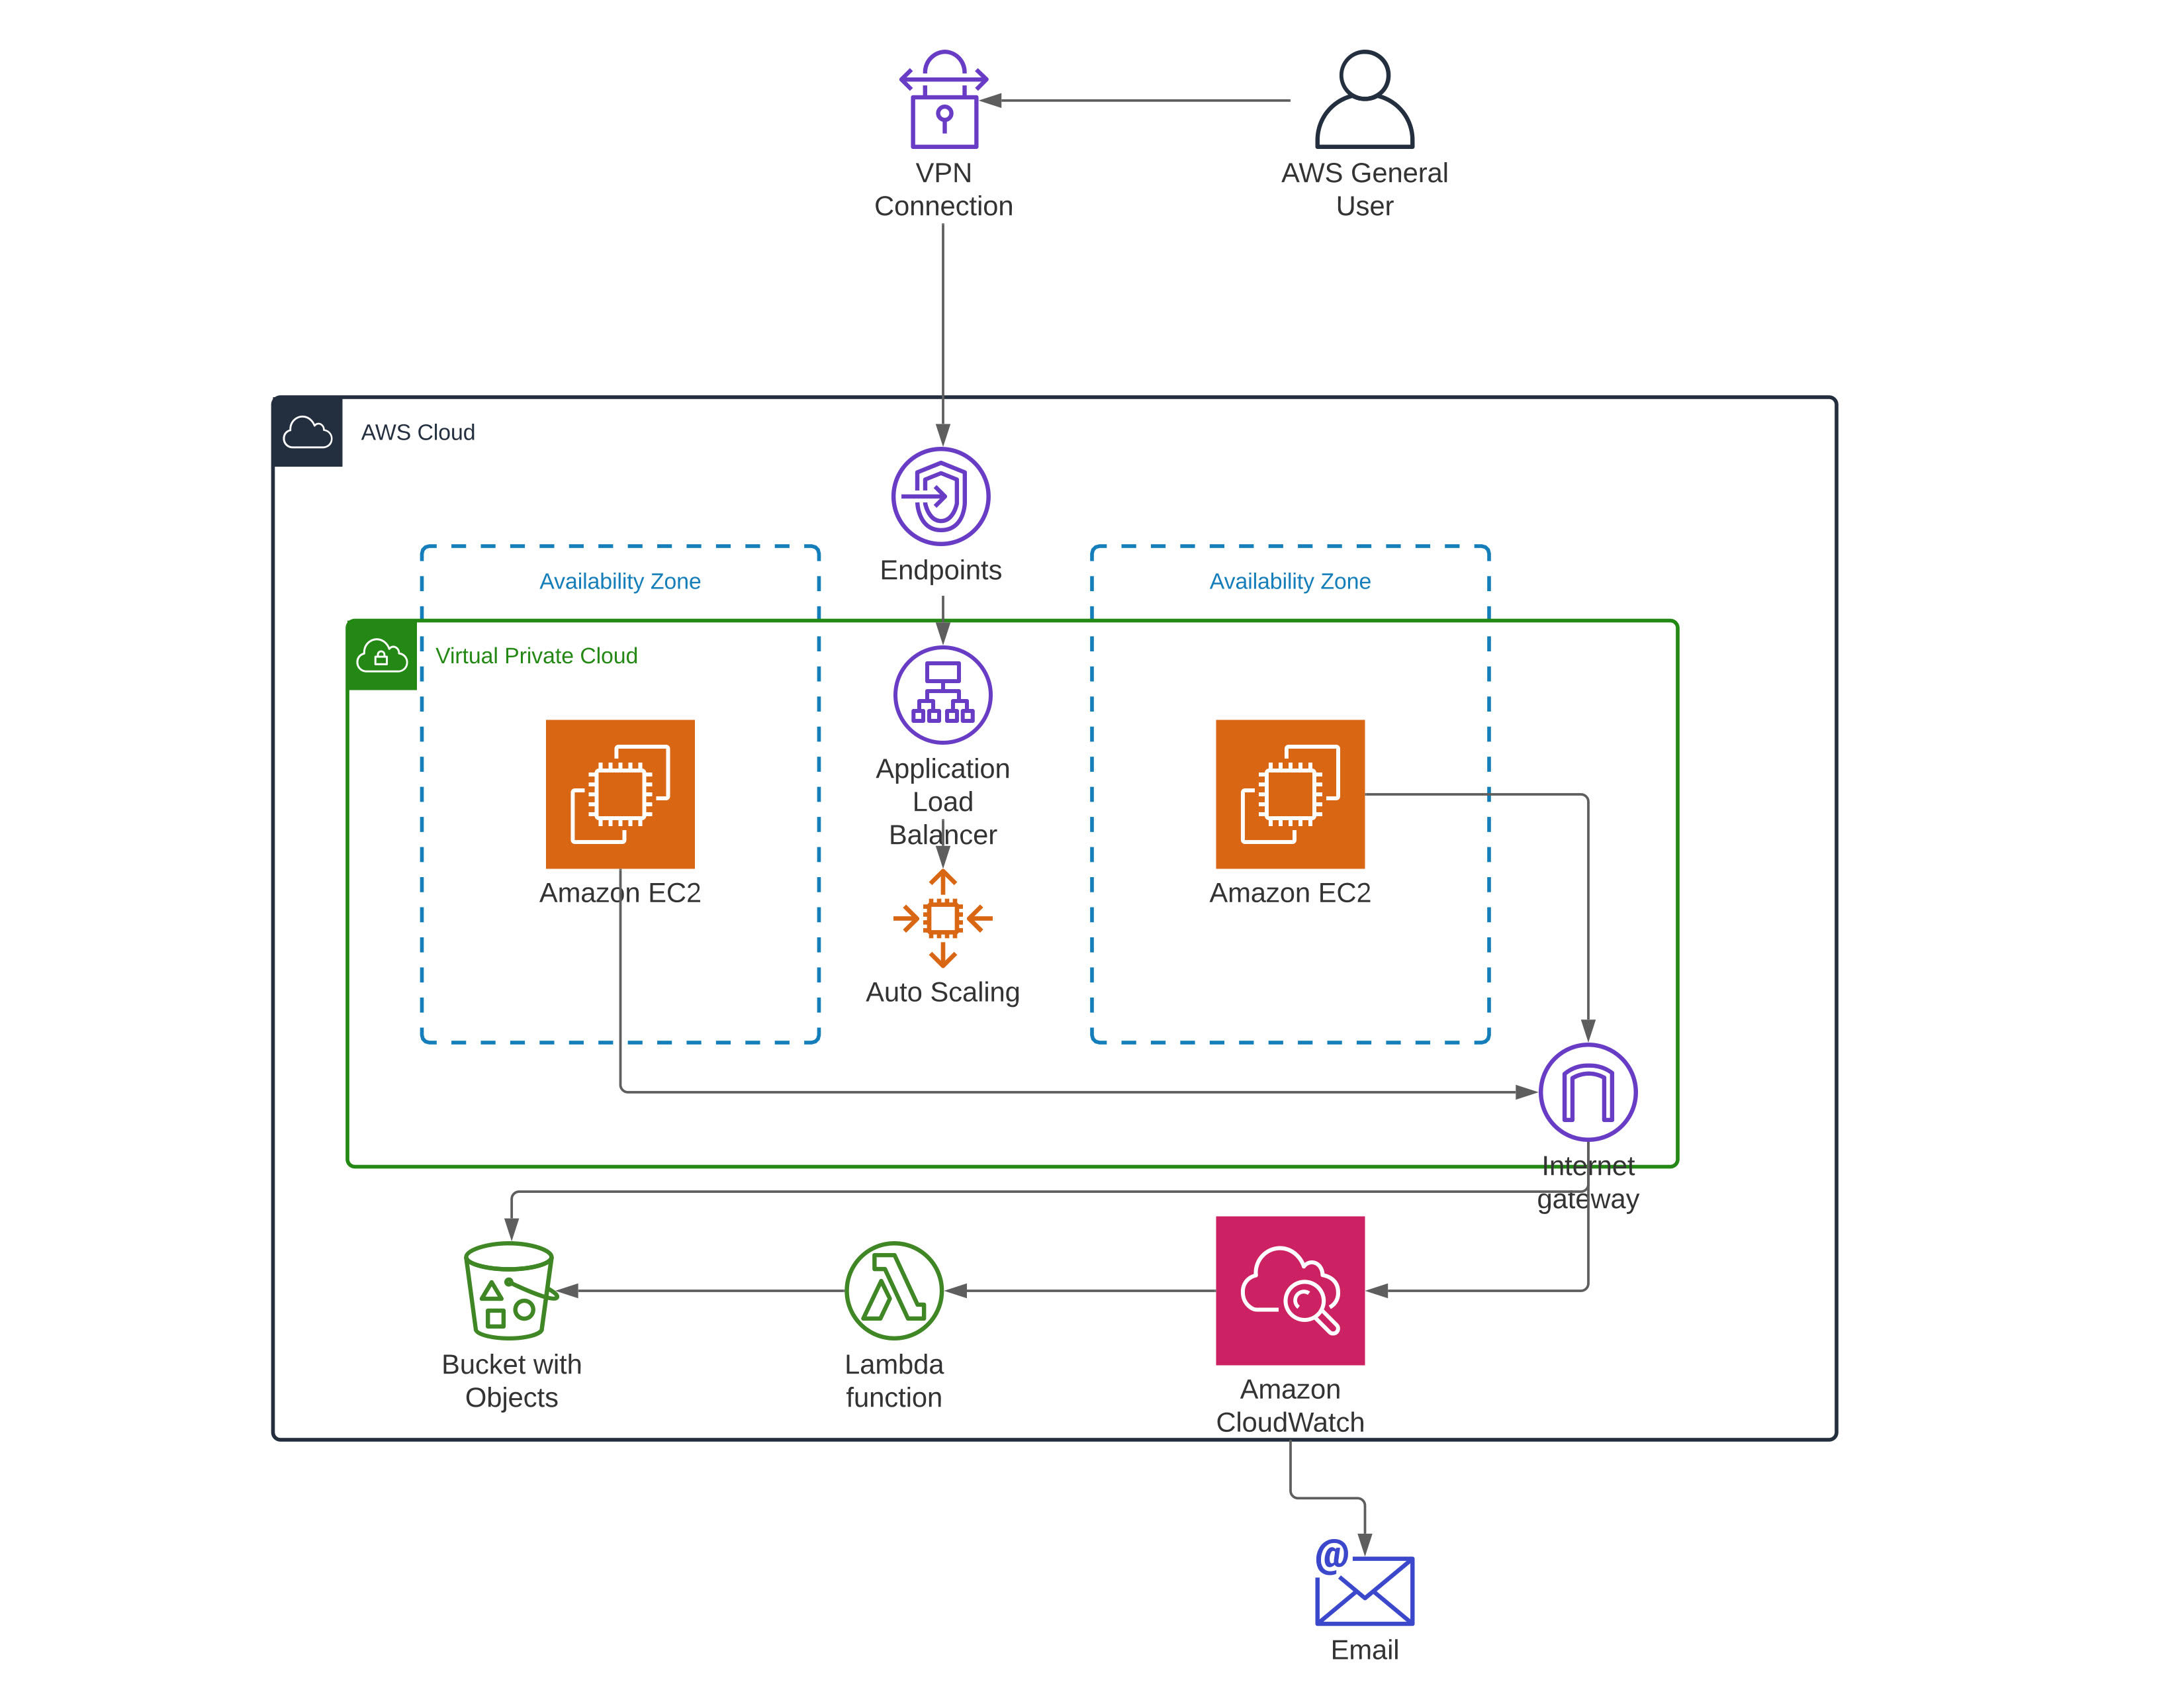
Virtual Private Cloud: This enables me to launch the AWS resources into a virtual secured network.
Amazon Ec2: They are used to run the base server. I would be using a Linux distro for this demo. They would be automatically provisioned by the autoscaling group in different availability zones for higher availability.
S3 Bucket: This is where all the data for this project would be saved (Applications file, logs and so on).
Auto Scaling: This is the resource that automatically creates and configures the EC2 instance using a lunch template. Should in case an instance goes down it would automatically provision a replica in the same AZ.
Application Load Balancer: This resource directs incoming traffic to the least active instance, hence balancing traffic.
Internet Gateway: This is a highly available VPC component that allows communication between the VPC and the internet.
Virtual private network Connection: This is a fully-managed remote access solution used to securely access the AWS resources.
Region: The region I selected was us-east-1 because it is the default and seems to be a bit affordable from my experience.
Step 1: First, you create an S3 bucket and configure its permission adequately. Then upload the python application “app.py” so it can be accessed by EC2 when required.
Step 2: Create security groups to control traffic in and out of the auto scaling group and load balancer about to be created.
Step 3: Create an auto scaling group with user data
#!/bin/bash
sudo aws s3 cp s3://webclock-bucket/app.py /home/app.py
sudo yum update -y
sudo yum install -y awslogs
sudo service awslogsd start &
sudo pip3 install flask
sudo chmod +rwx /home/app.py
sudo nohup python3 /home/app.py >>log.txt 2>&1 &
With the commands in the user data, the system is updated, flask is installed and the python app which I have uploaded into the S3 bucket previously is downloaded and run.
Step 4: Create an application load balancer and attach it to the auto scaling group previously created, so that it would equally distribute the incoming traffic amongst the running instances.
Step 5: Create IAM roles for each resource and give them adequate policies to manage and control Inter-resource communication
Step 6: Create a CloudWatch event and attach it to the auto scaling group to monitor its activities and log them
Step 7: Create a Lambda Function to collect logs at intervals from the CloudWatch to the S3 bucket
Step 8: Create an SNS topic and attach it to the auto scaling so alarms can be sent via email