This is WIES-PaaS iothub example-code include the sso and rabbitmq service。
cf-cli
https://docs.cloudfoundry.org/cf-cli/install-go-cli.html
python3
https://www.python.org/downloads/
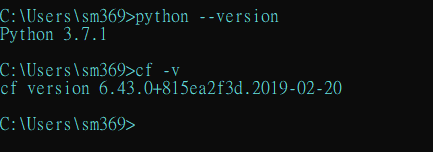
python3 package(those library you can try application in local):
#mqtt
pip3 install paho-mqtt
#python-backend
pip3 install Flask
git clone https://github.com/WISE-PaaS/example-py-iothub-sso.git
First we need to login to the WISE-PaaS use cf login,and we need to chech out the domain name ex:wise-paas.io,and you need to have WISE-PaaS/EnSaaS account。

#cf login -skip-ssl-validation -a {api.domain_name}  -u "account" -p "password"

cf login –skip-ssl-validation -a api.wise-paas.io -u xxxxx@advtech.com.tw -p xxxxxx

#check the cf status
cf target
This is a simple backend application use flask,you can run it use python3 index.py and listen on localhost:3000,and the port can get the 3000 or port on WISE-PaaS。
vcap_services can get the application config on WISE-PaaS,it can help get the credential of your (iothub)mqtt service instance,client=mqtt.connect can help us connect to mqtt and when we connect we will subscribe the /hello topic in on_connect,on_message ca n receivec the message what we send。
from flask import Flask
import os

app = Flask(__name__)

#port from cloud environment variable or localhost:3000
port = int(os.getenv("PORT", 3000))

@app.route('/')
def hello_world():
    if(port==3000):
        return 'hello world! iam in the local'
    elif(port==int(os.getenv("PORT"))):
        return 'Hello World! i am in the cloud'


if __name__ == '__main__':
    # Run the app, listening on all IPs with our chosen port number
    app.run(host='0.0.0.0', port=port)


#mqtt config
vcap_services = os.getenv('VCAP_SERVICES')
vcap_services_js = json.loads(vcap_services)

#need to same as rabbitmq service name on WISE-PaaS
service_name = 'p-rabbitmq'
broker = vcap_services_js[service_name][0]['credentials']['protocols']['mqtt']['host']
username = vcap_services_js[service_name][0]['credentials']['protocols']['mqtt']['username'].strip()
password = vcap_services_js[service_name][0]['credentials']['protocols']['mqtt']['password'].strip()
mqtt_port = vcap_services_js[service_name][0]['credentials']['protocols']['mqtt']['port']


def on_connect(client, userdata, flags, rc):
    print("Connected with result code "+str(rc))
    client.subscribe("/hello")
    print('subscribe on /hello')


def on_message(client, userdata, msg):
    print(msg.topic+','+msg.payload.decode())


client = mqtt.Client()

client.username_pw_set(username, password)
client.on_connect = on_connect
client.on_message = on_message

client.connect(broker, mqtt_port, 60)
client.loop_start()
Notice:The service name need to be same on your WISE-PaaS Service name in Service List

Thie file help buildpack download the package for our application in WISE-PaaS。
Flask
paho-mqtt
open manifest.yml and editor the application name to yours,because the appication can't duplicate。
check the service instance name same as WISE-PaaS


This is the sso applicaition,open templates/index.html and editor the ssoUrl to your application name,
If you don't want it,you can ignore it。
#change this **`python-demo-try`** to your **application name**
var ssoUrl = myUrl.replace('python-demo-try', 'portal-sso');
<!DOCTYPE html>
<html>

<head>
    <meta charset="UTF-8">
    <title>SSO Tutorial</title>

</head>

<body>
    <h1>hello</h1>
    <div id="demo"></div>

    <button class="btn btn-primary" id="signInBtn" style="display: none;">Sign in</button>
    <button class="btn btn-primary" id="signOutBtn" style="display: none;">Sign out</button>
    <button class="btn btn-primary" id="management" style="display: none;">Management Portal</button>
    <h1 id="helloMsg"></h1>

    <script src="https://code.jquery.com/jquery-3.3.1.min.js"></script>
    <script src=""></script>
</body>
<script>
    $(document).ready(function(){


        var myUrl = window.location.protocol + '//' + window.location.hostname;
        var ssoUrl = myUrl.replace('python-demo-try', 'portal-sso');
        var manageUrl = 'https://portal-management.wise-paas.io/organizations'
        document.getElementById('demo').innerHTML = myUrl;

        $('#signInBtn').click(function () {
            window.location.href = ssoUrl + '/web/signIn.html?redirectUri=' + myUrl;

        });

        $('#signOutBtn').click(function () {
            window.location.href = ssoUrl + '/web/signOut.html?redirectUri=' + myUrl;
        });
        $('#management').click(function () {
            window.location.href = manageUrl;
        });

        $.ajax({
            url: ssoUrl + '/v2.0/users/me',
            method: 'GET',
            xhrFields: {
                withCredentials: true
            }
        }).done(function (user) {
            $('#signOutBtn').show();
            $('#management').show();
            $('#helloMsg').text('Hello, ' + user.firstName + ' ' + user.lastName + '!');
        }).fail(function (jqXHR, textStatus, errorThrown) {

            $('#signInBtn').show();

            $('#helloMsg').text('Hi, please sign in first.');
        });

    });
</script>

</html>
#cf push {application name}
cf push python-demo-try

#get the application environment
cf env python-demo-try > env.json

- bokrer:"VCAP_SERVICES => p-rabbitmq => externalHosts"
- port :"VCAP_SERVICES => p-rabbitmq => mqtt => port"
- username :"VCAP_SERVICES => p-rabbitmq => mqtt => username"
- password: "VCAP_SERVICES => p-rabbitmq => mqtt => password"
This file can send mqtt message to the topic /hello and we send random number you can change it to other thing
Publisher.py
import paho.mqtt.client as mqtt
import random
#externalHosts
broker="xx.81.xx.10"
#mqtt_port
mqtt_port=1883
#mqtt_username
username="xxxxxxxx-b76f-43e9-8b35-xxxxx83bf941:7b166606-142c-4d00-8f8c-ab7fee64d6db"
password="xxxxxxxxbWGXpuOK5MyxMhgDk"
def on_publish(client,userdata,result):             #create function for callback
    print("data published")

client= mqtt.Client()                           #create client object

client.username_pw_set(username,password)

client.on_publish = on_publish                          #assign function to callback
client.connect(broker,mqtt_port)                                 #establish connection
client.publish("/hello",random.randint(10,30))
open two terminal
#cf logs {application name}
cf logs python-demo-try
.
python publisher.py

https://github.com/WISE-PaaS/example-python-iothub-sso/blob/master/source/README.md