Home
VariaMos is a tool that is continuously and incrementally built through research results into a single tool that allows engineering and simulation of systems and families of systems (Self-Adaptive).
VariaMos can be used in different roles:
Product line designer: The primary function is creating product lines and using the languages to create models. Language developer: The primary function is to create, modify or extend the capability of the languages. Core developer: The primary function is to create, modify or extend the core capabilities.
This wiki shows how to setup the developping environment to be able in particular to run the different tests for the application.
Github Actions is used to complete static analisis of the code. In this project, the jobs megalinter and sonarcloud will verify different elements like synthax errors, code standards, code smells, etc... As shown below, when the jobs is complete, the console will print a small report to give the status of the code.
+----SUMMARY-----+--------------------------+---------------+-------+-------+--------+--------------+
| Descriptor     | Linter                   | Mode          | Files | Fixed | Errors | Elapsed time |
+----------------+--------------------------+---------------+-------+-------+--------+--------------+
| ✅ ACTION      | actionlint               | list_of_files |     3 |       |      0 |        0.03s |
| ❌ COPYPASTE   | jscpd                    | project       |   n/a |       |     36 |        3.18s |
| ✅ CREDENTIALS | secretlint               | project       |   n/a |       |      0 |         1.2s |
| ❌ CSS         | stylelint                | list_of_files |     6 |     5 |      1 |        1.41s |
| ✅ DOCKERFILE  | dockerfilelint           | file          |     1 |       |      0 |        0.27s |
| ✅ DOCKERFILE  | hadolint                 | file          |     1 |       |      0 |        0.07s |
| ✅ GIT         | git_diff                 | project       |   n/a |       |      0 |        0.05s |
| ❌ HTML        | htmlhint                 | list_of_files |     2 |       |      6 |         0.3s |
| ❌ JAVASCRIPT  | eslint                   | list_of_files |     3 |     0 |      6 |        3.55s |
| ❌ JAVASCRIPT  | standard                 | list_of_files |     3 |     2 |      1 |        2.22s |
| ✅ JSON        | eslint-plugin-jsonc      | list_of_files |     7 |     1 |      0 |         2.7s |
| ❌ JSON        | jsonlint                 | file          |     7 |       |      1 |        2.34s |
| ✅ JSON        | prettier                 | list_of_files |     7 |     4 |      0 |        1.79s |
| ✅ JSON        | v8r                      | file          |     7 |       |      0 |        9.22s |
| ✅ MARKDOWN    | markdownlint             | list_of_files |     1 |     0 |      0 |        0.42s |
| ✅ MARKDOWN    | markdown-link-check      | list_of_files |     1 |       |      0 |        1.52s |
| ✅ MARKDOWN    | markdown-table-formatter | list_of_files |     1 |     0 |      0 |         0.3s |
| ❌ SPELL       | cspell                   | list_of_files |    84 |       |    426 |        3.78s |
| ✅ SPELL       | misspell                 | list_of_files |    84 |     9 |      0 |        0.14s |
| ✅ TSX         | eslint                   | list_of_files |    34 |     3 |      0 |        5.08s |
| ✅ TYPESCRIPT  | eslint                   | list_of_files |    25 |     0 |      0 |        3.32s |
| ❌ TYPESCRIPT  | standard                 | list_of_files |    25 |    24 |      1 |        4.91s |
| ✅ YAML        | prettier                 | list_of_files |     3 |     3 |      0 |        0.69s |
| ✅ YAML        | v8r                      | file          |     3 |       |      0 |        2.39s |
| ✅ YAML        | yamllint                 | list_of_files |     3 |       |      0 |         0.2s |
+----------------+--------------------------+---------------+-------+-------+--------+--------------+
Moreover, megalinter will produce artifacts which consist in a zip file containing a report for each linter used during the job as depicted below. Finally, Github Actions can also run our tests suites before building and deploying VariaMos if required.
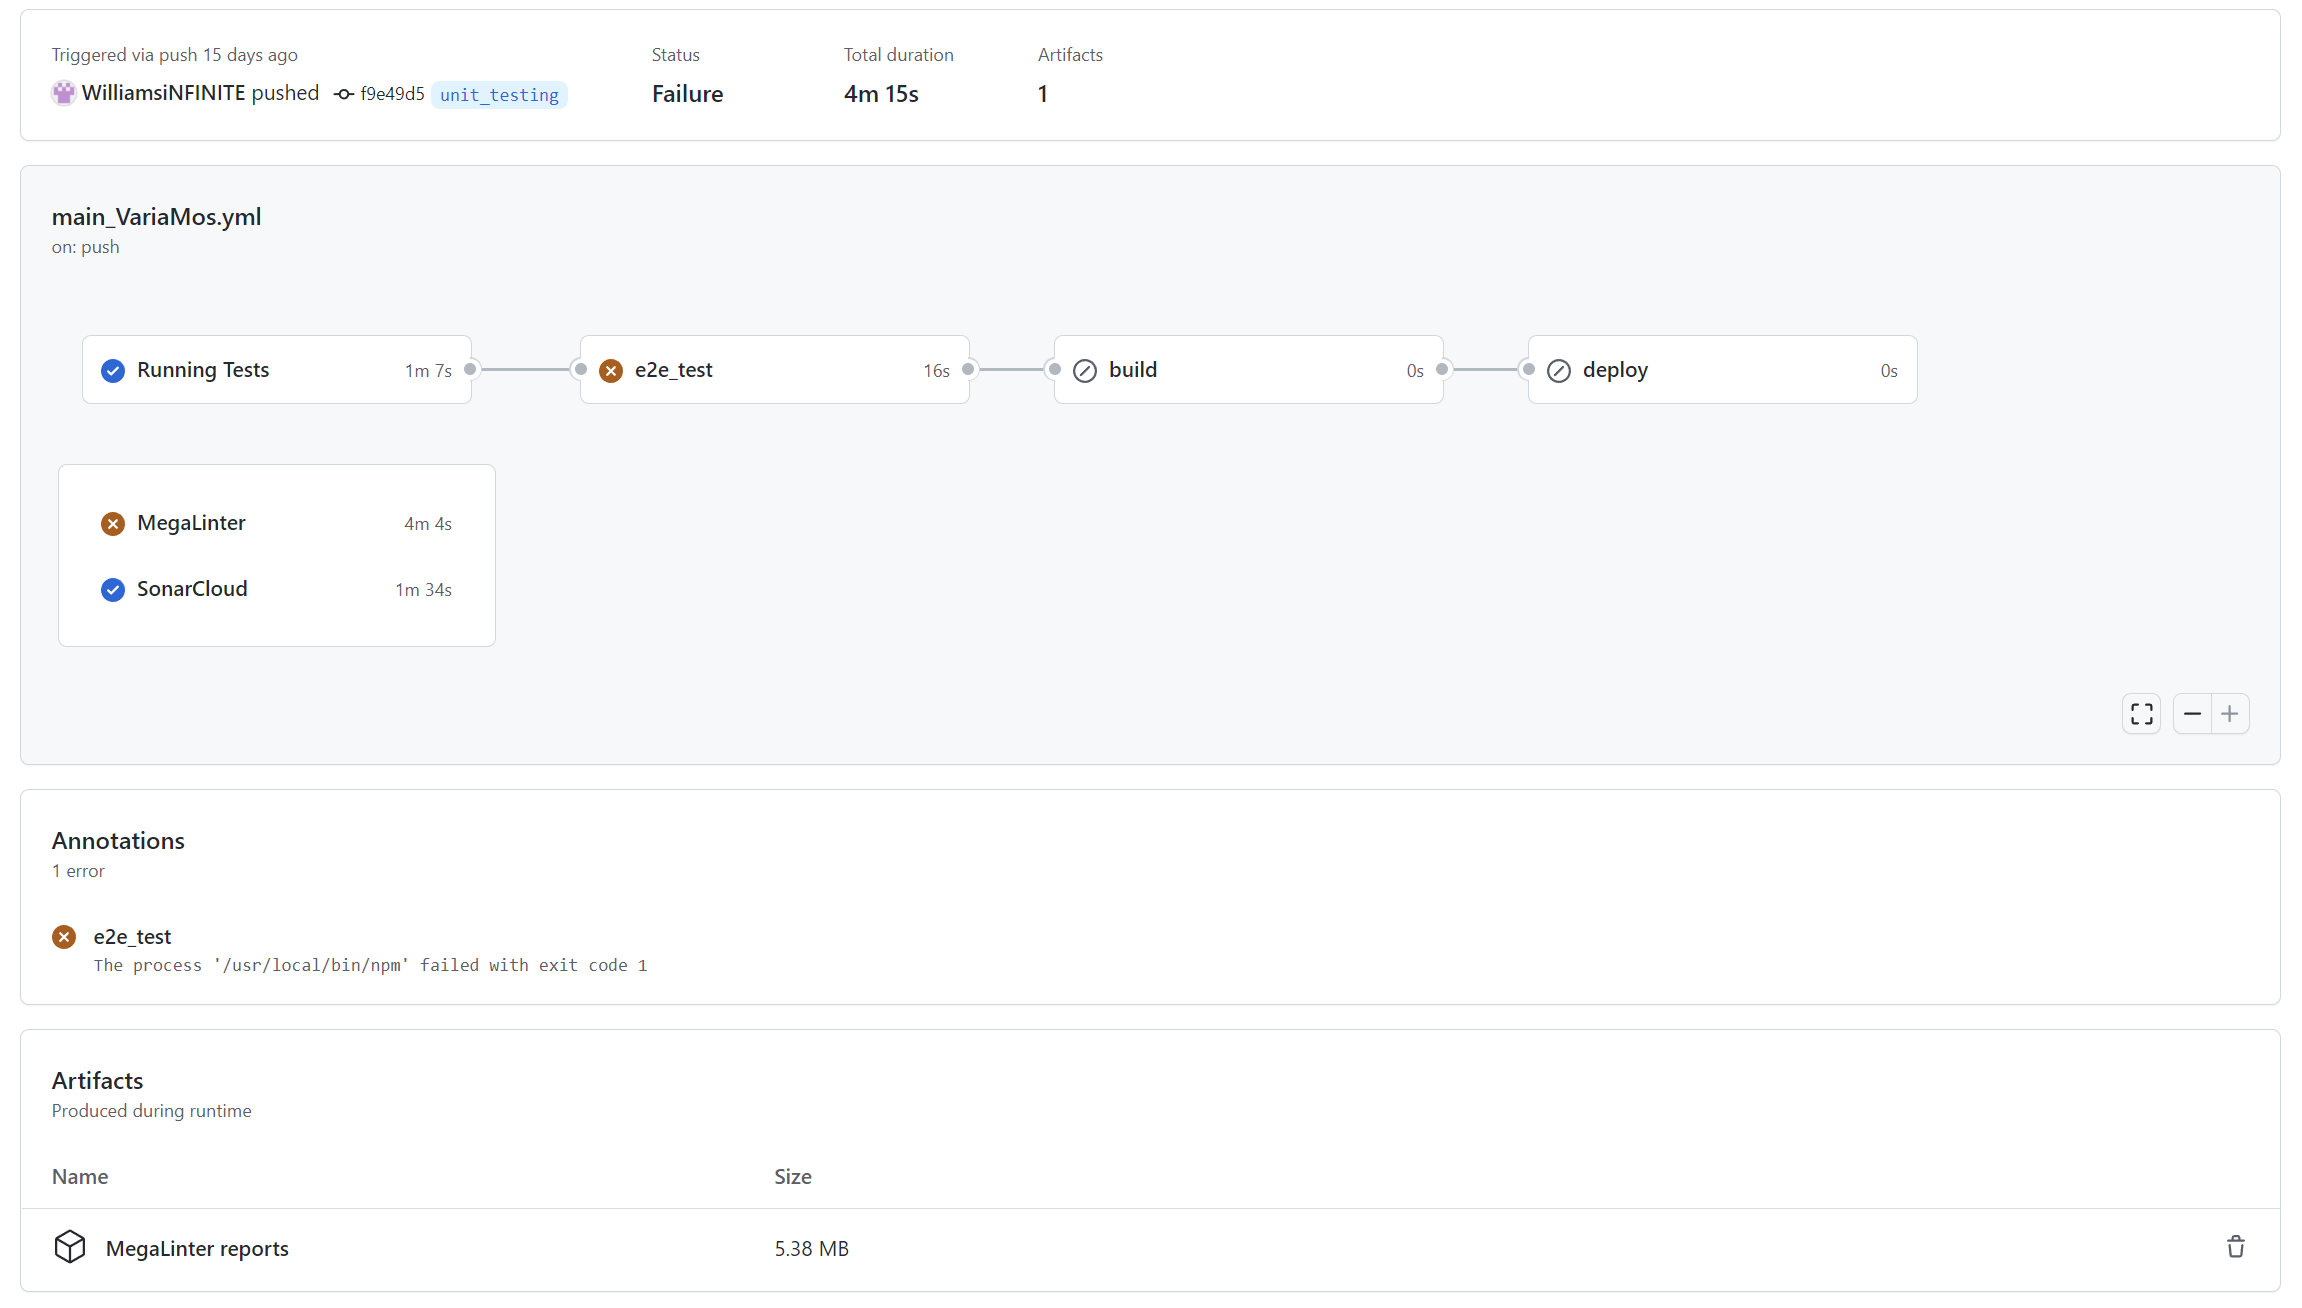
It is possible to choose when to run the workflows. For instance, in the file .github/workflows/main_VariaMos.yaml, the workflow will be executed on each push on the branch 'main' or will be executed manually.
on:
  push:
    branches:
      - main
  workflow_dispatch:
If you clone or fork this repository, you will have to manually activate Github Actions. Go to the dedicated tab 'Actions' then click on 'I understand my workflows, go ahead and enable them'.
Then you will be able to run the different workflows
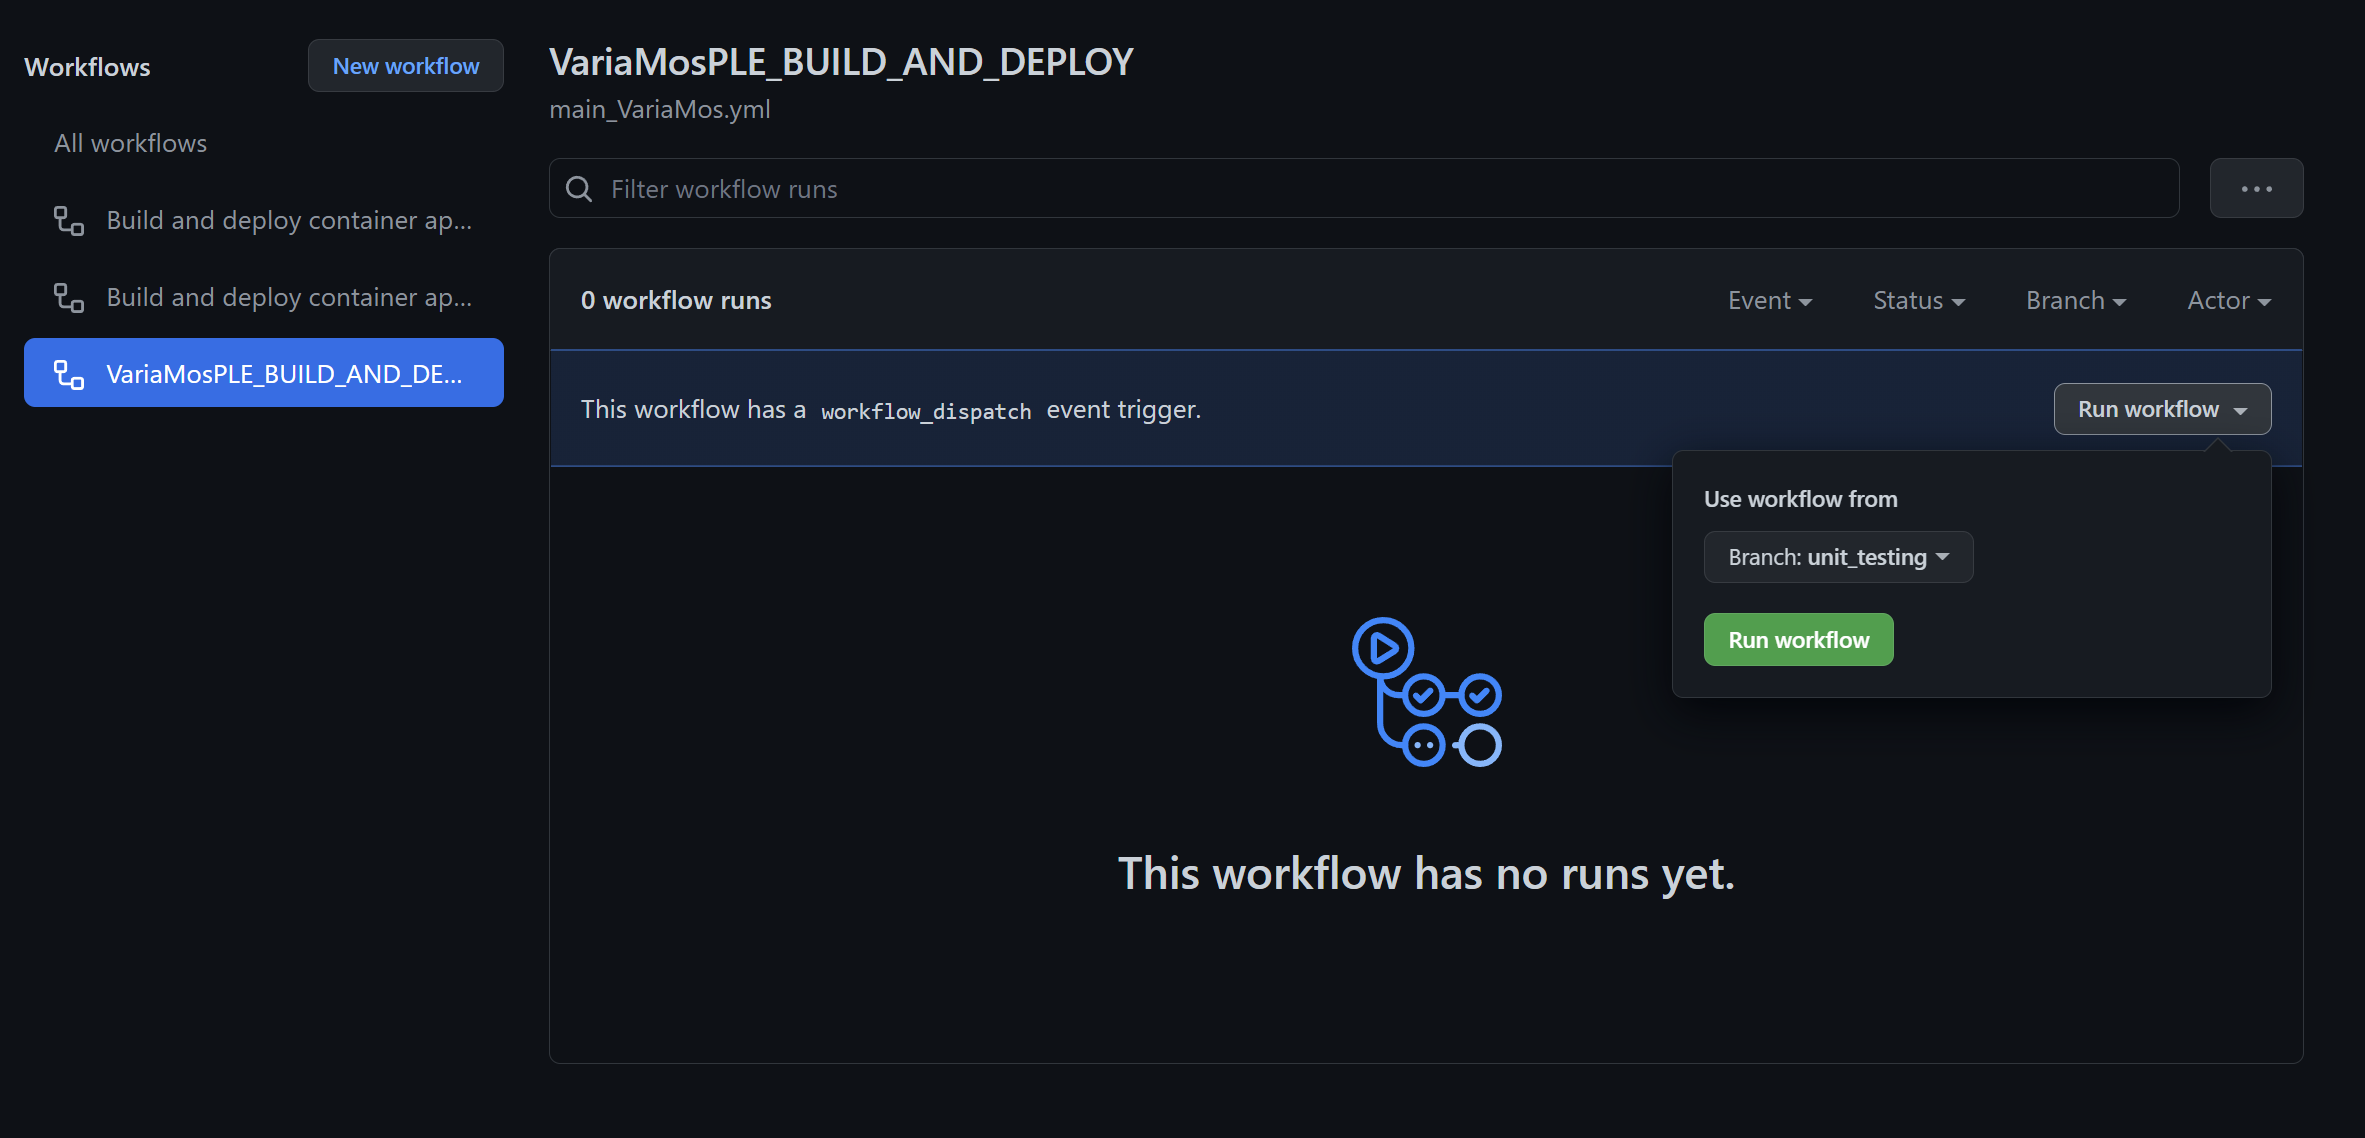
Each following jobs can be found in the file .github/workflows/main_VariaMos.yaml
There are the differents steps in this jobs :
- Checkout Code, to checkout the code
- Dependencies, to install the dependencies
- Megalinter, to analyse ('lint') the code
- Archive production artifacts, to create the downloadable artifacts which contain the report for each linter that has been used during the analysis
- Create Pull Request with applied fixes & Create PR output, to create a pull request
- Prepare commit & Commit and push applied linter fixes, to commit
In this job, you can set env variables to configure the analysis. For instance, to enable only eslint for typescript the syntax will be the following :
jobs:
  megalinter:
    name: MegaLinter
    runs-on: ubuntu-latest
    steps:
      - name: Checkout Code
#...
      - name: Dependencies
#...
      - name: MegaLinter
        env:
          ENABLE_LINTERS: TYPESCRIPT_ES
To learn more about how to configure megalinter please visit Megalinter official documentation.
This job is used to keep the quality gate updated after each workflow
This job will run the unit & integration tests with coverage
This job will run the end-to-end tests with cypress. To record the tests, it is necessary to have a secret key in your github project. Visit the Github documentation for more information about it.
This job builds the app
This job deploys the app
You can clone this repository with this command :
git clone https://github.com/WilliamsiNFINITE/VariaMosPLE.gitTo install the dependencies, run the commands :
cd .\VariaMosPLE\git checkout origin/mainnpm installUnit Tests with Jest
To run the tests related to modified files since the last commit use the command :
npm testTo run all the tests use the command :
npm test -- --watchAllTo run all the tests with coverage use the command :
npm test -- --watchAll --coverageTo specify a directory in which you want to execute the tests use the option --testMatch 'my_directory'. For example, to use the tests in /src/Addons/ use the command :
npm test -- --watchAll --testMatch '**/src/Addons/**/?(*.)+(test).[tj]s?(x)'To see more options, please visit the official documentation on the Jest website.
Once the tests with coverage are done, you can visit the report at /coverage/lcov-report/index.html
Mutation Tests with Stryker
To run the mutation tests you can use the command :
stryker runMutation testing can take a while depending on the file your are testing, the number of tests and mutants. With my current configuration, 197 tests and 3384 mutants the running time was 9 hours 36 minutes 46 seconds.
To reduce the running time, try to run mutation tests on specific directory. For example, to use the mutants in /src/Addons/ try the command :
stryker run --mutate src/Addons/**/*.ts To see more options, please visit the official documentation on the Stryker website.
Once the mutation tests are done you can consult the report at /reports/mutation/mutation.html
End-to-End Tests with Cypress
To run the end-to-end tests you have to start the application with the command :
npm startThen open a new terminal in your project repository and use the command :
npx cypress runTo have a test with headed browser run the command :
npx cypress run --headedTo prevent the browser from quitting run the command :
npx cypress run --headed --no-exitTo see more options, please visit the official documentation on the Cypress website.
Once the E2E tests are done, you will find a video in the folder /cypress/videos
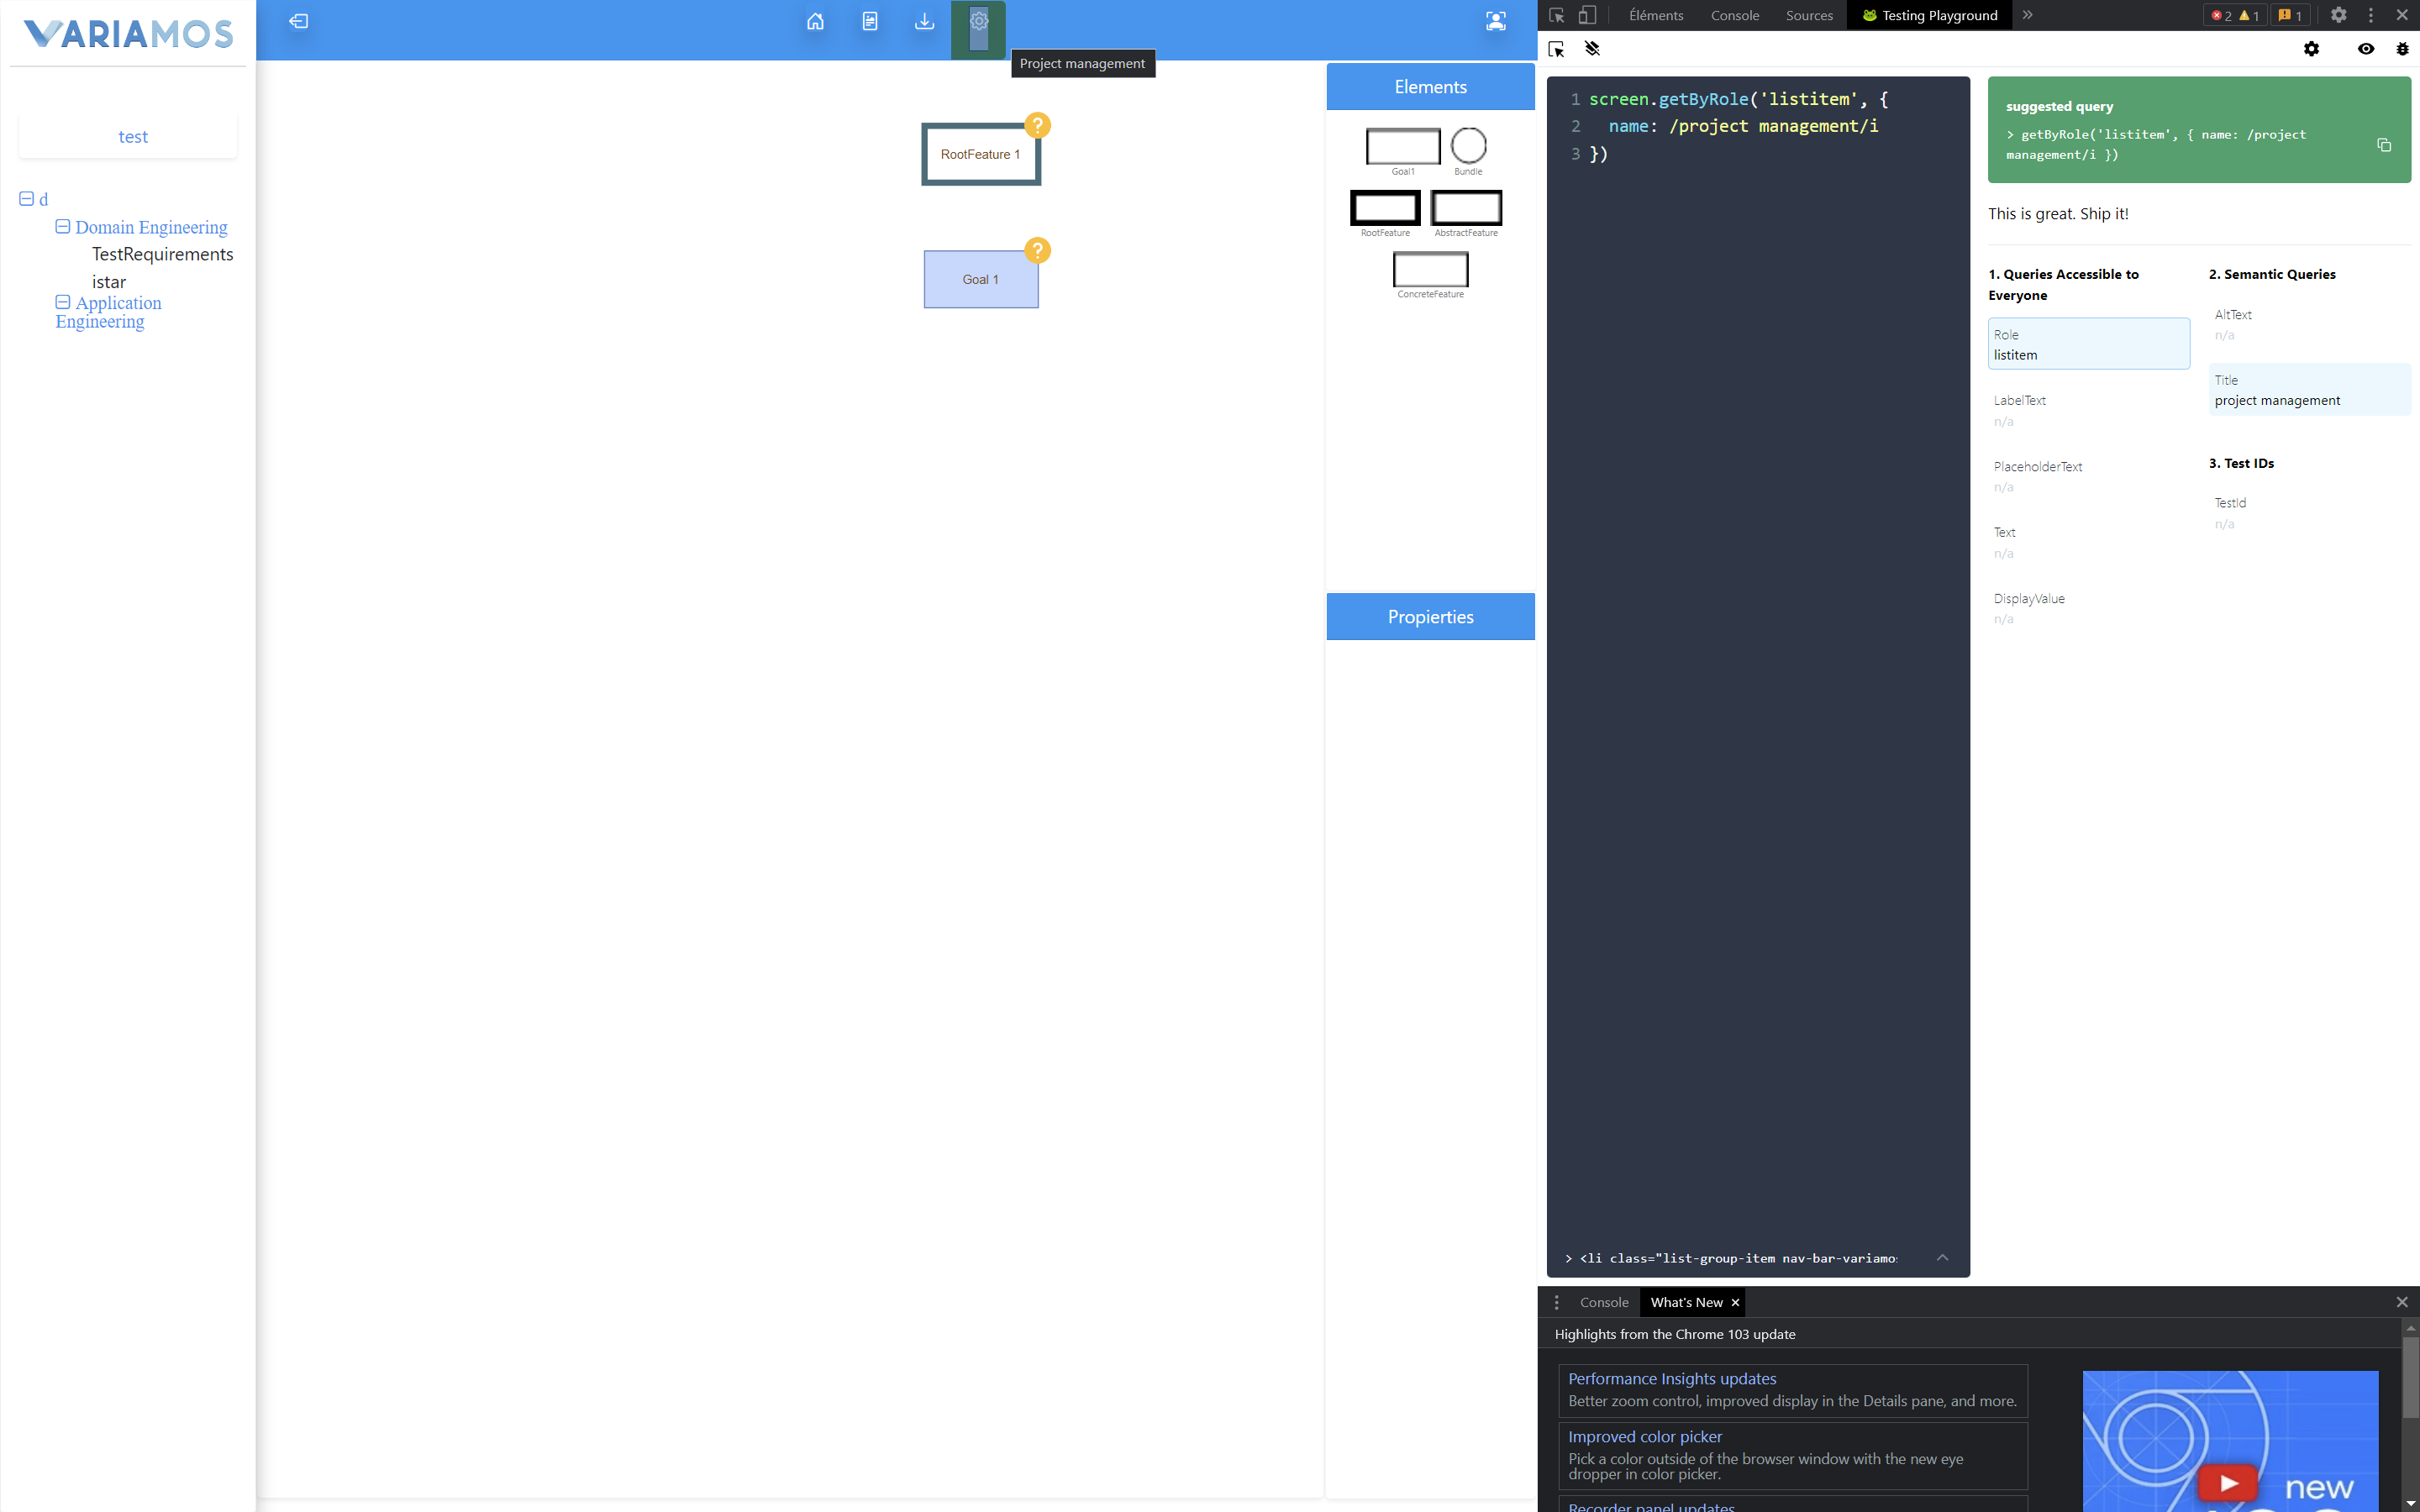
I highly recommand using Testing Playground when coding end-to-end test with cypress. It has a Firefox and Chrome extension so you can have 'good testing practices' and avoid mistakes. On the example below, the suggested query is
screen.getByRole('listitem', {
  name: /project management/i
})
We should write this in our cypress test as :
cy.findByRole('listitem', {
  name: /project management/i
})
Cypress dashboard can be used to track the results from the tests run by cypress in Github Action or locally. Here is the link to be added to the dashboard (expires on 19 August 2022) : https://dashboard.cypress.io/invitation/8a5232bc-eeb0-4255-a9e3-bebbfc68cce8
For any request, send me a mail
To run the end-to-end tests locally with cypress you need to run the following commands
npx cypress run --record --key 39e6749b-822a-4c03-8157-1c881620f6efMake sure the application is running in an other terminal with the command
npm start
Tests are currently run automatically in Github Action after each push on the main branch. It can also be run manually is required.
All runs can be found there
After the test suites are run locally or on Github Actions, cypress will give a link to the run as shown bellow :
====================================================================================================
  (Run Finished)
SpecTestsPassingFailingPendingSkipped
  ┌────────────────────────────────────────────────────────────────────────────────────────────────┐
  │✖documentation.spec.js01:3417134--│
  └────────────────────────────────────────────────────────────────────────────────────────────────┘
✖1 of 1 failed (100%)01:3417134--
───────────────────────────────────────────────────────────────────────────────────────────────────────
  Recorded Run: https://dashboard.cypress.io/projects/uzvtfu/runs/16
Error: Cypress tests: 4 failed
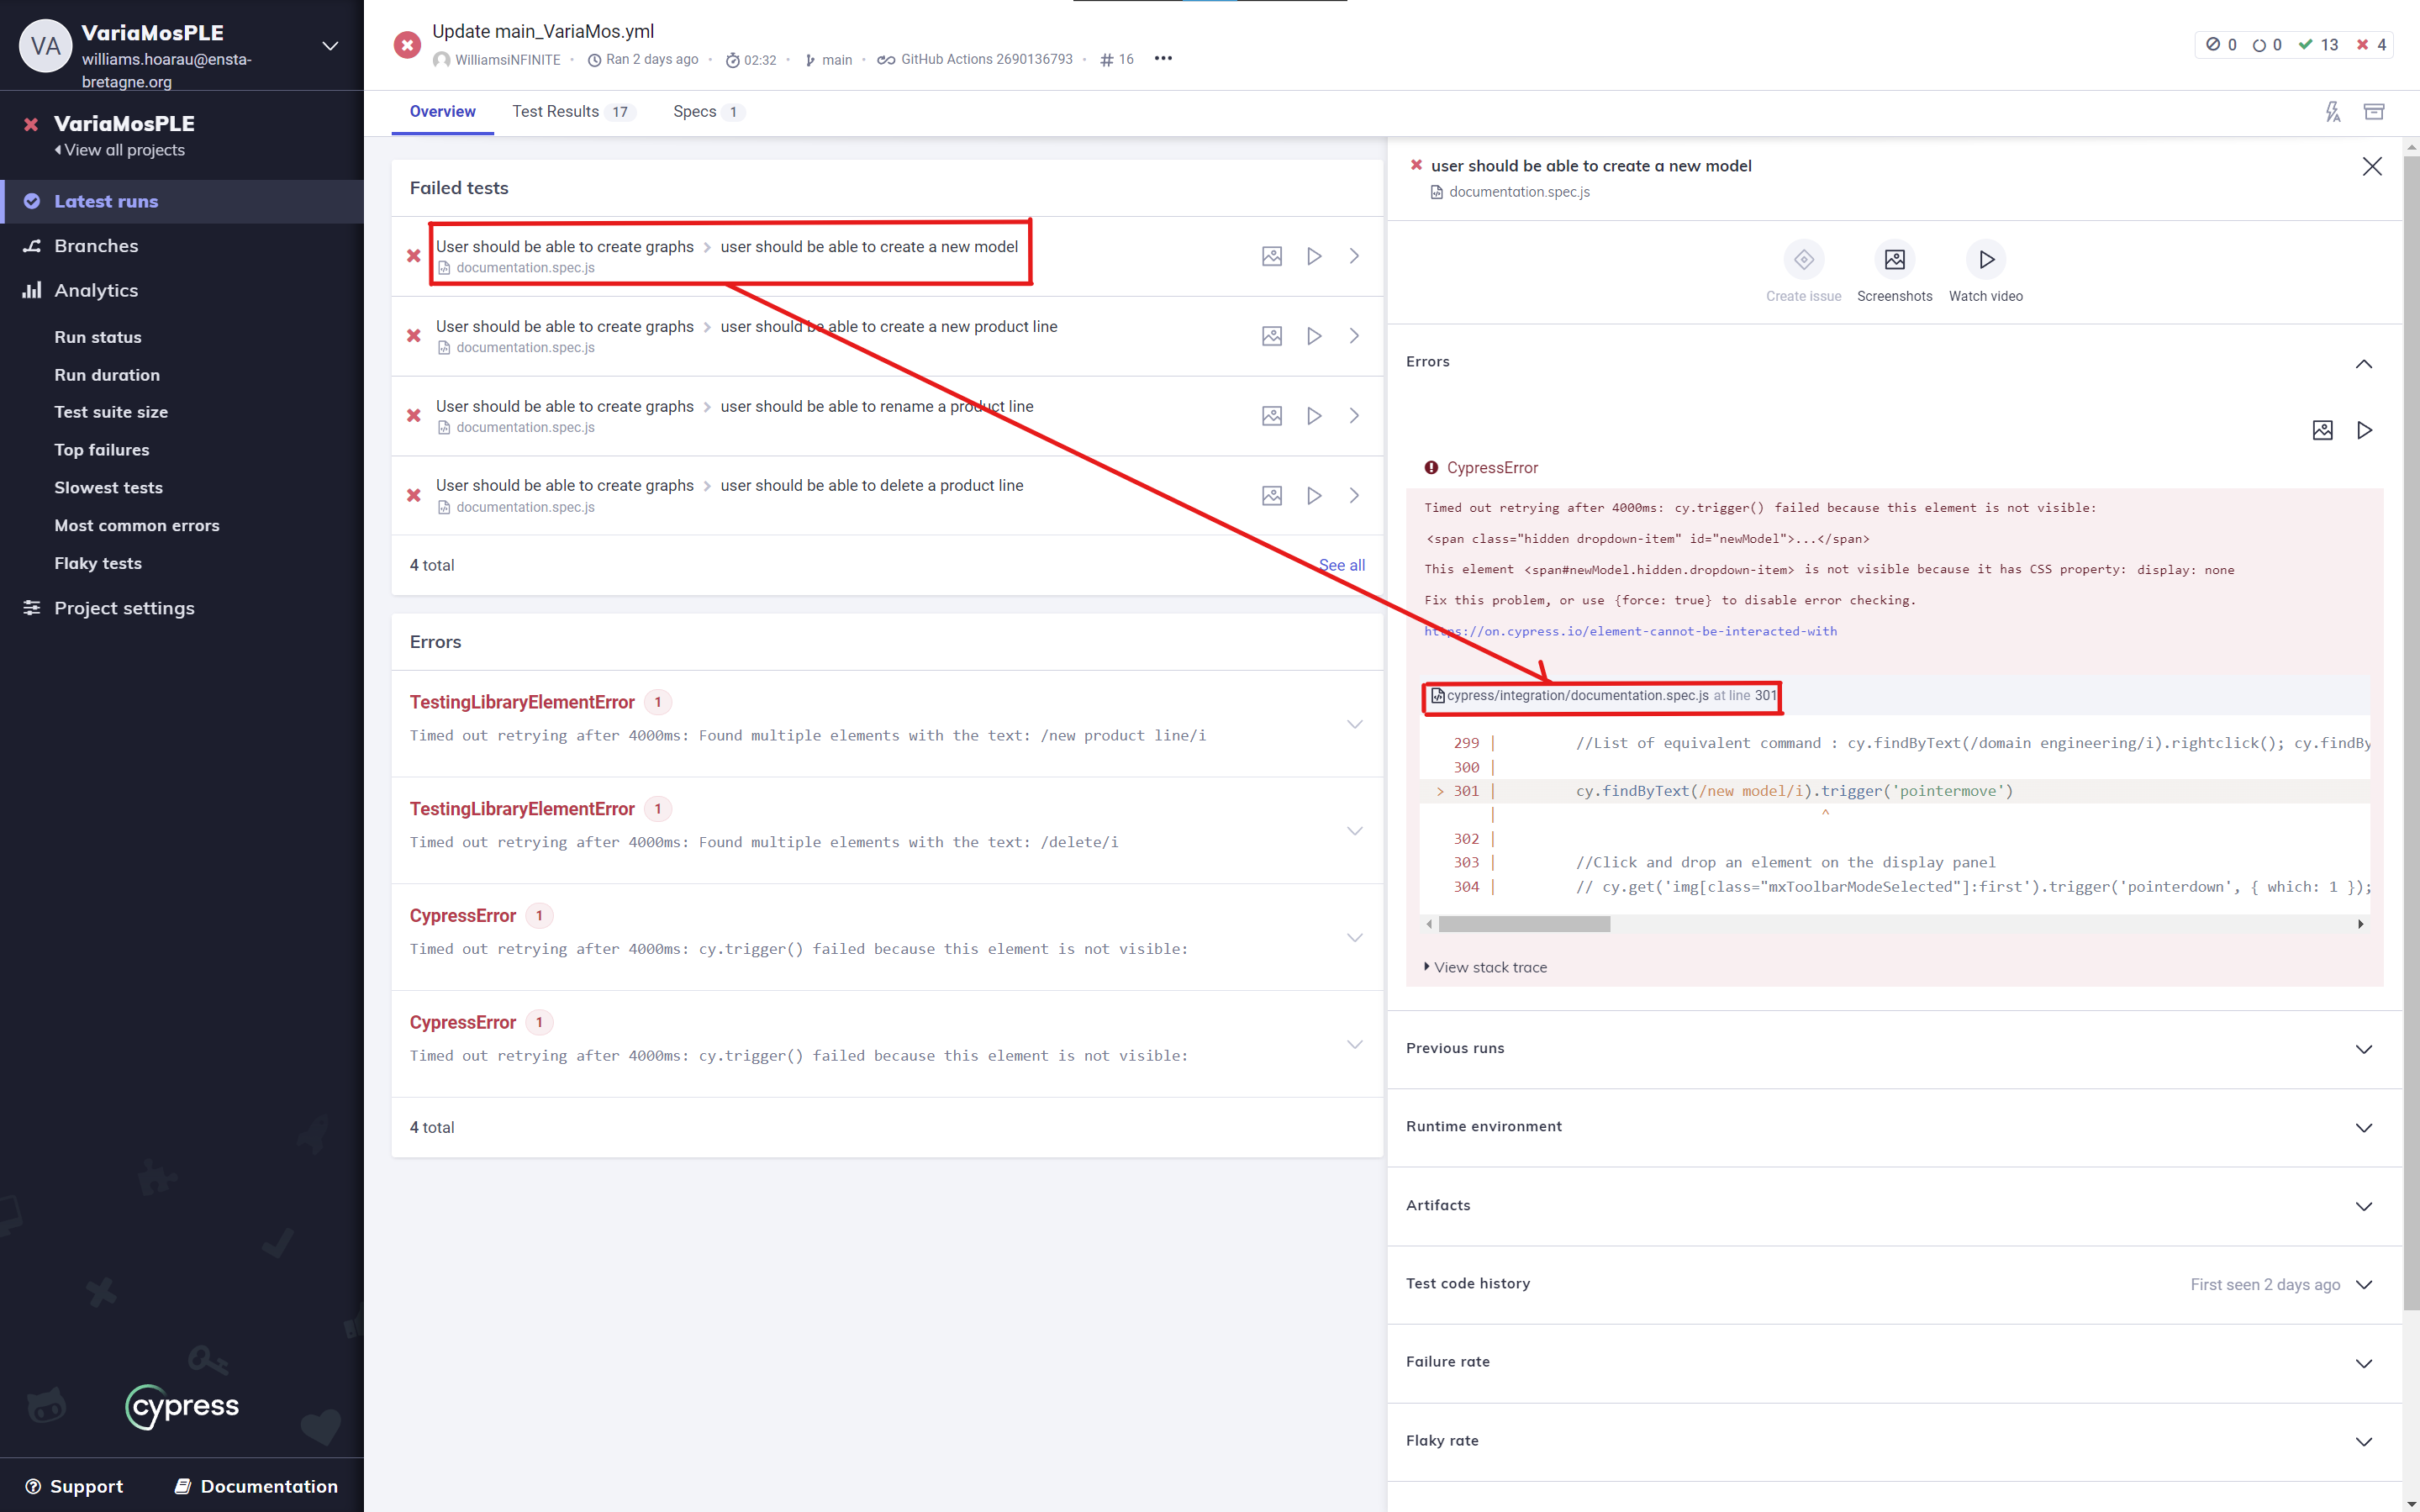
After clicking on the link, you will be taken to a webpage similar to the following, where you will have an overview with the failing tests :
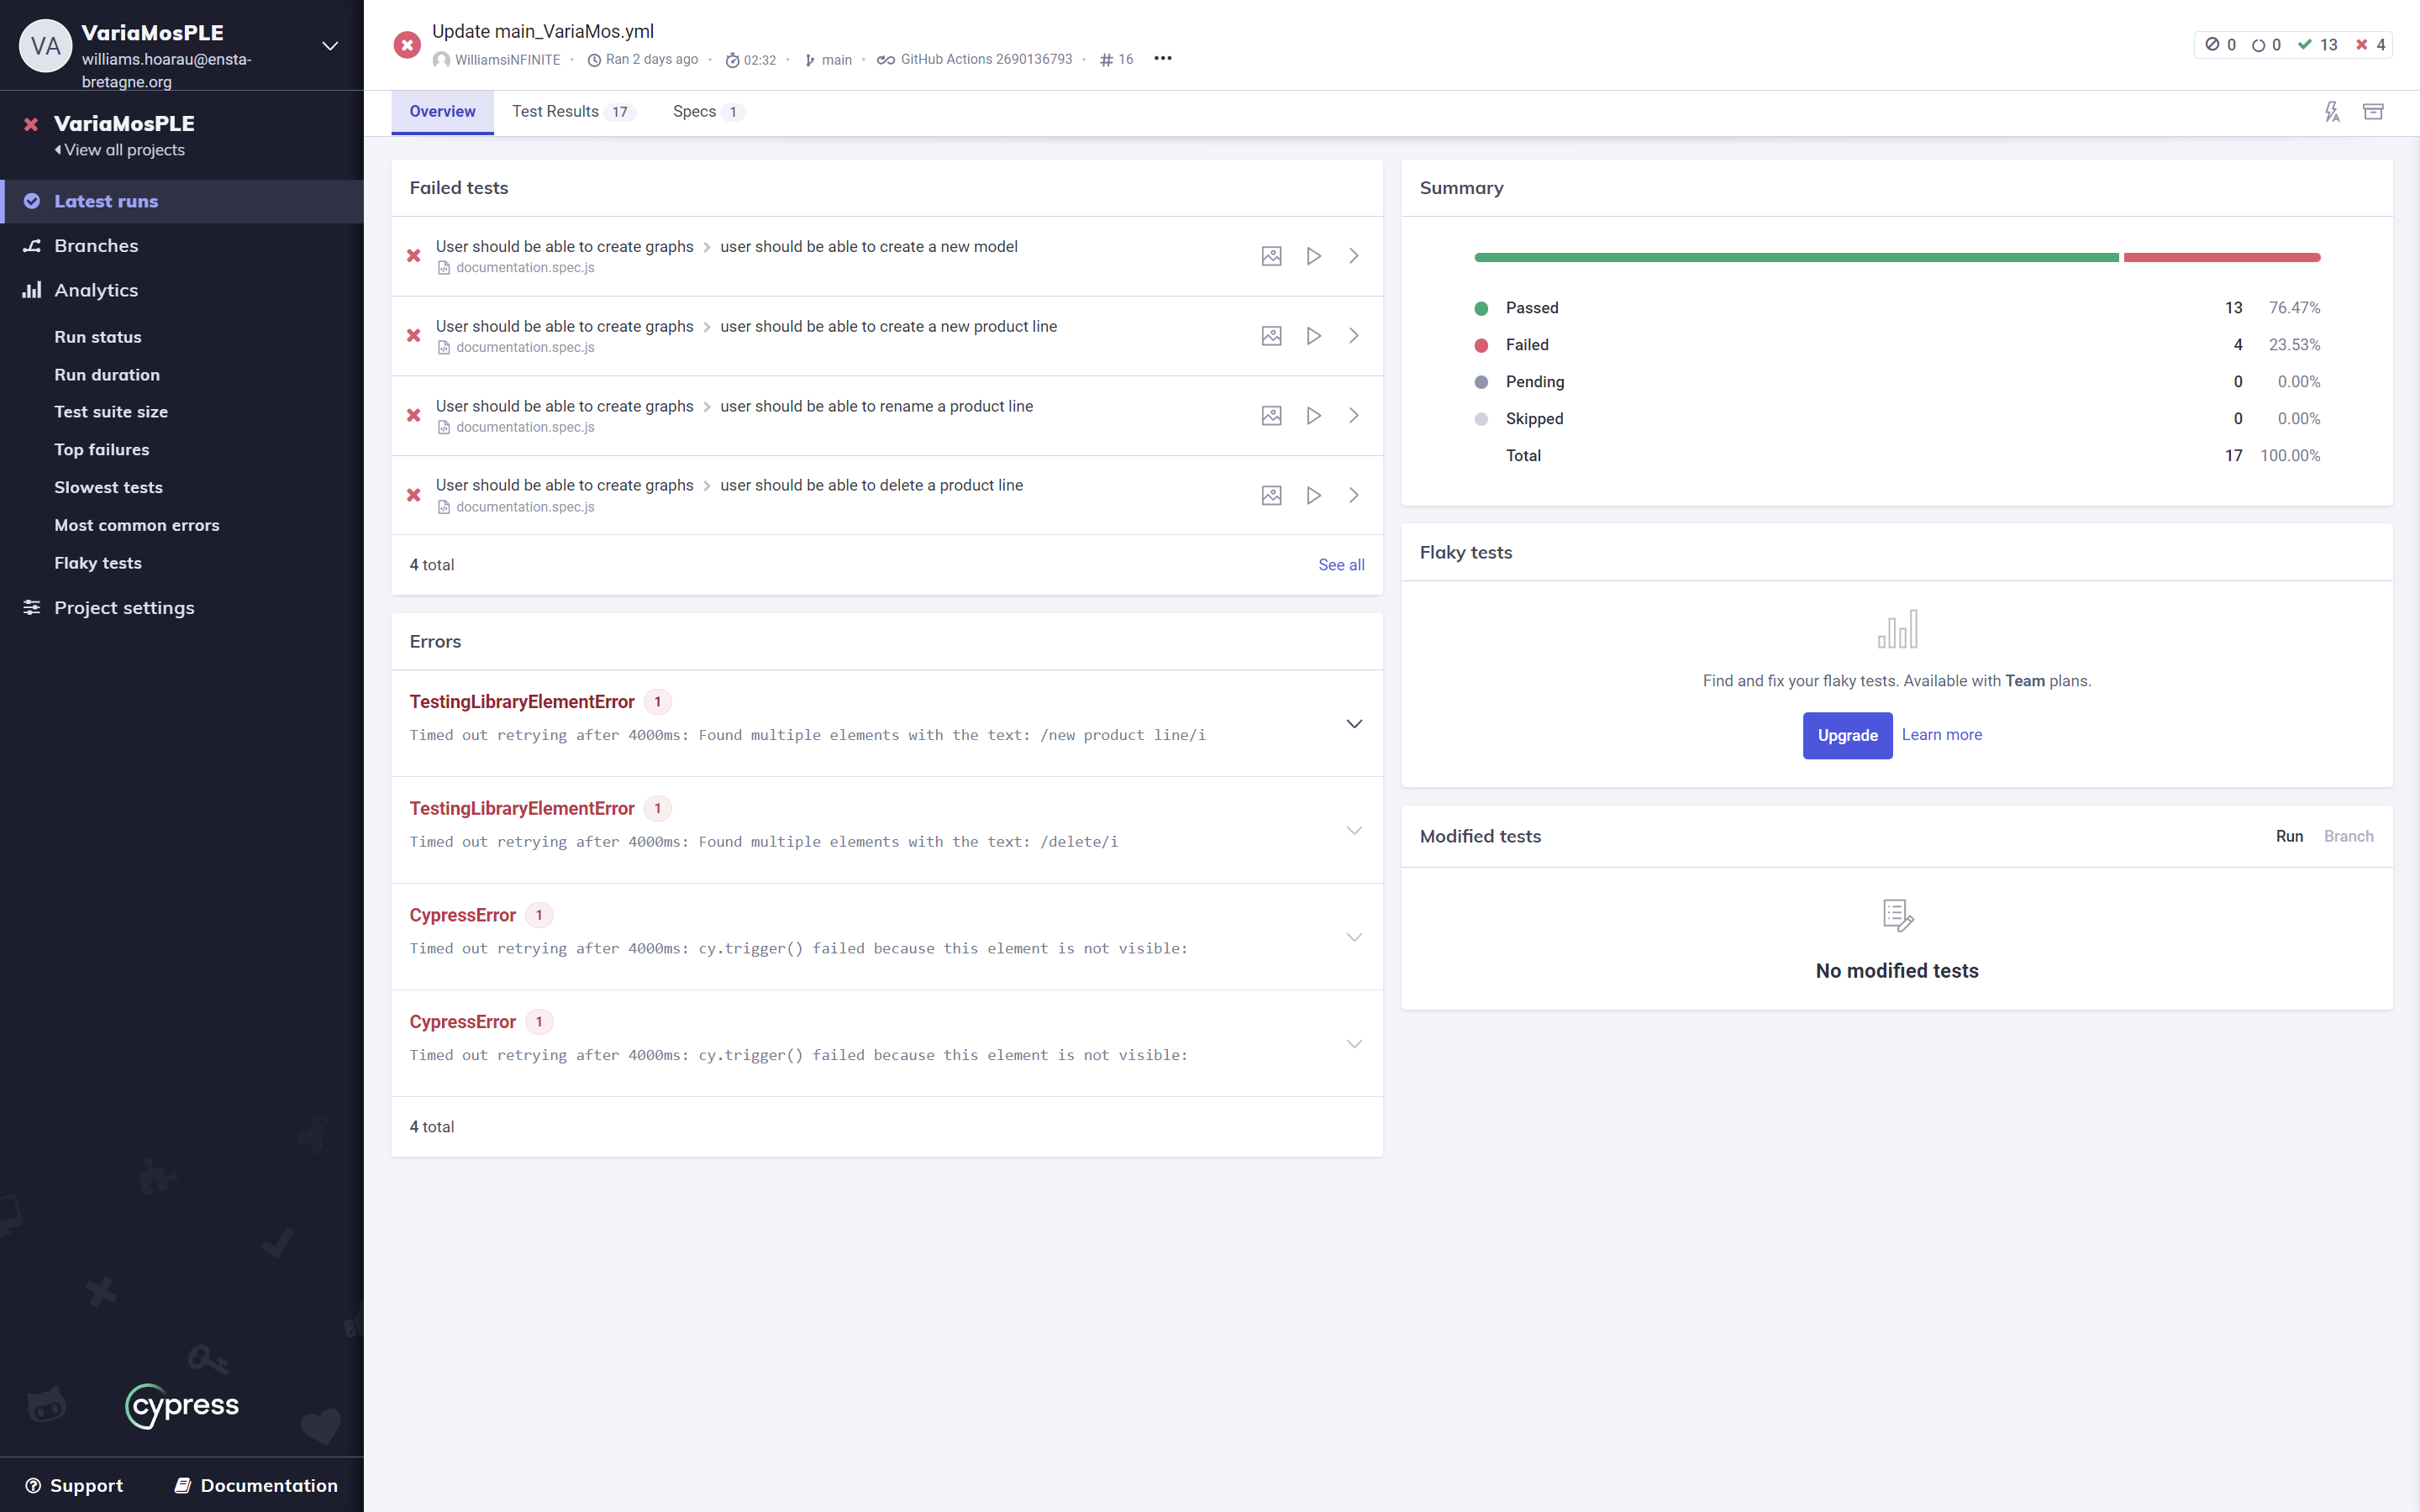
If you click on one error, you can directly open github to the line that is responsible for it :
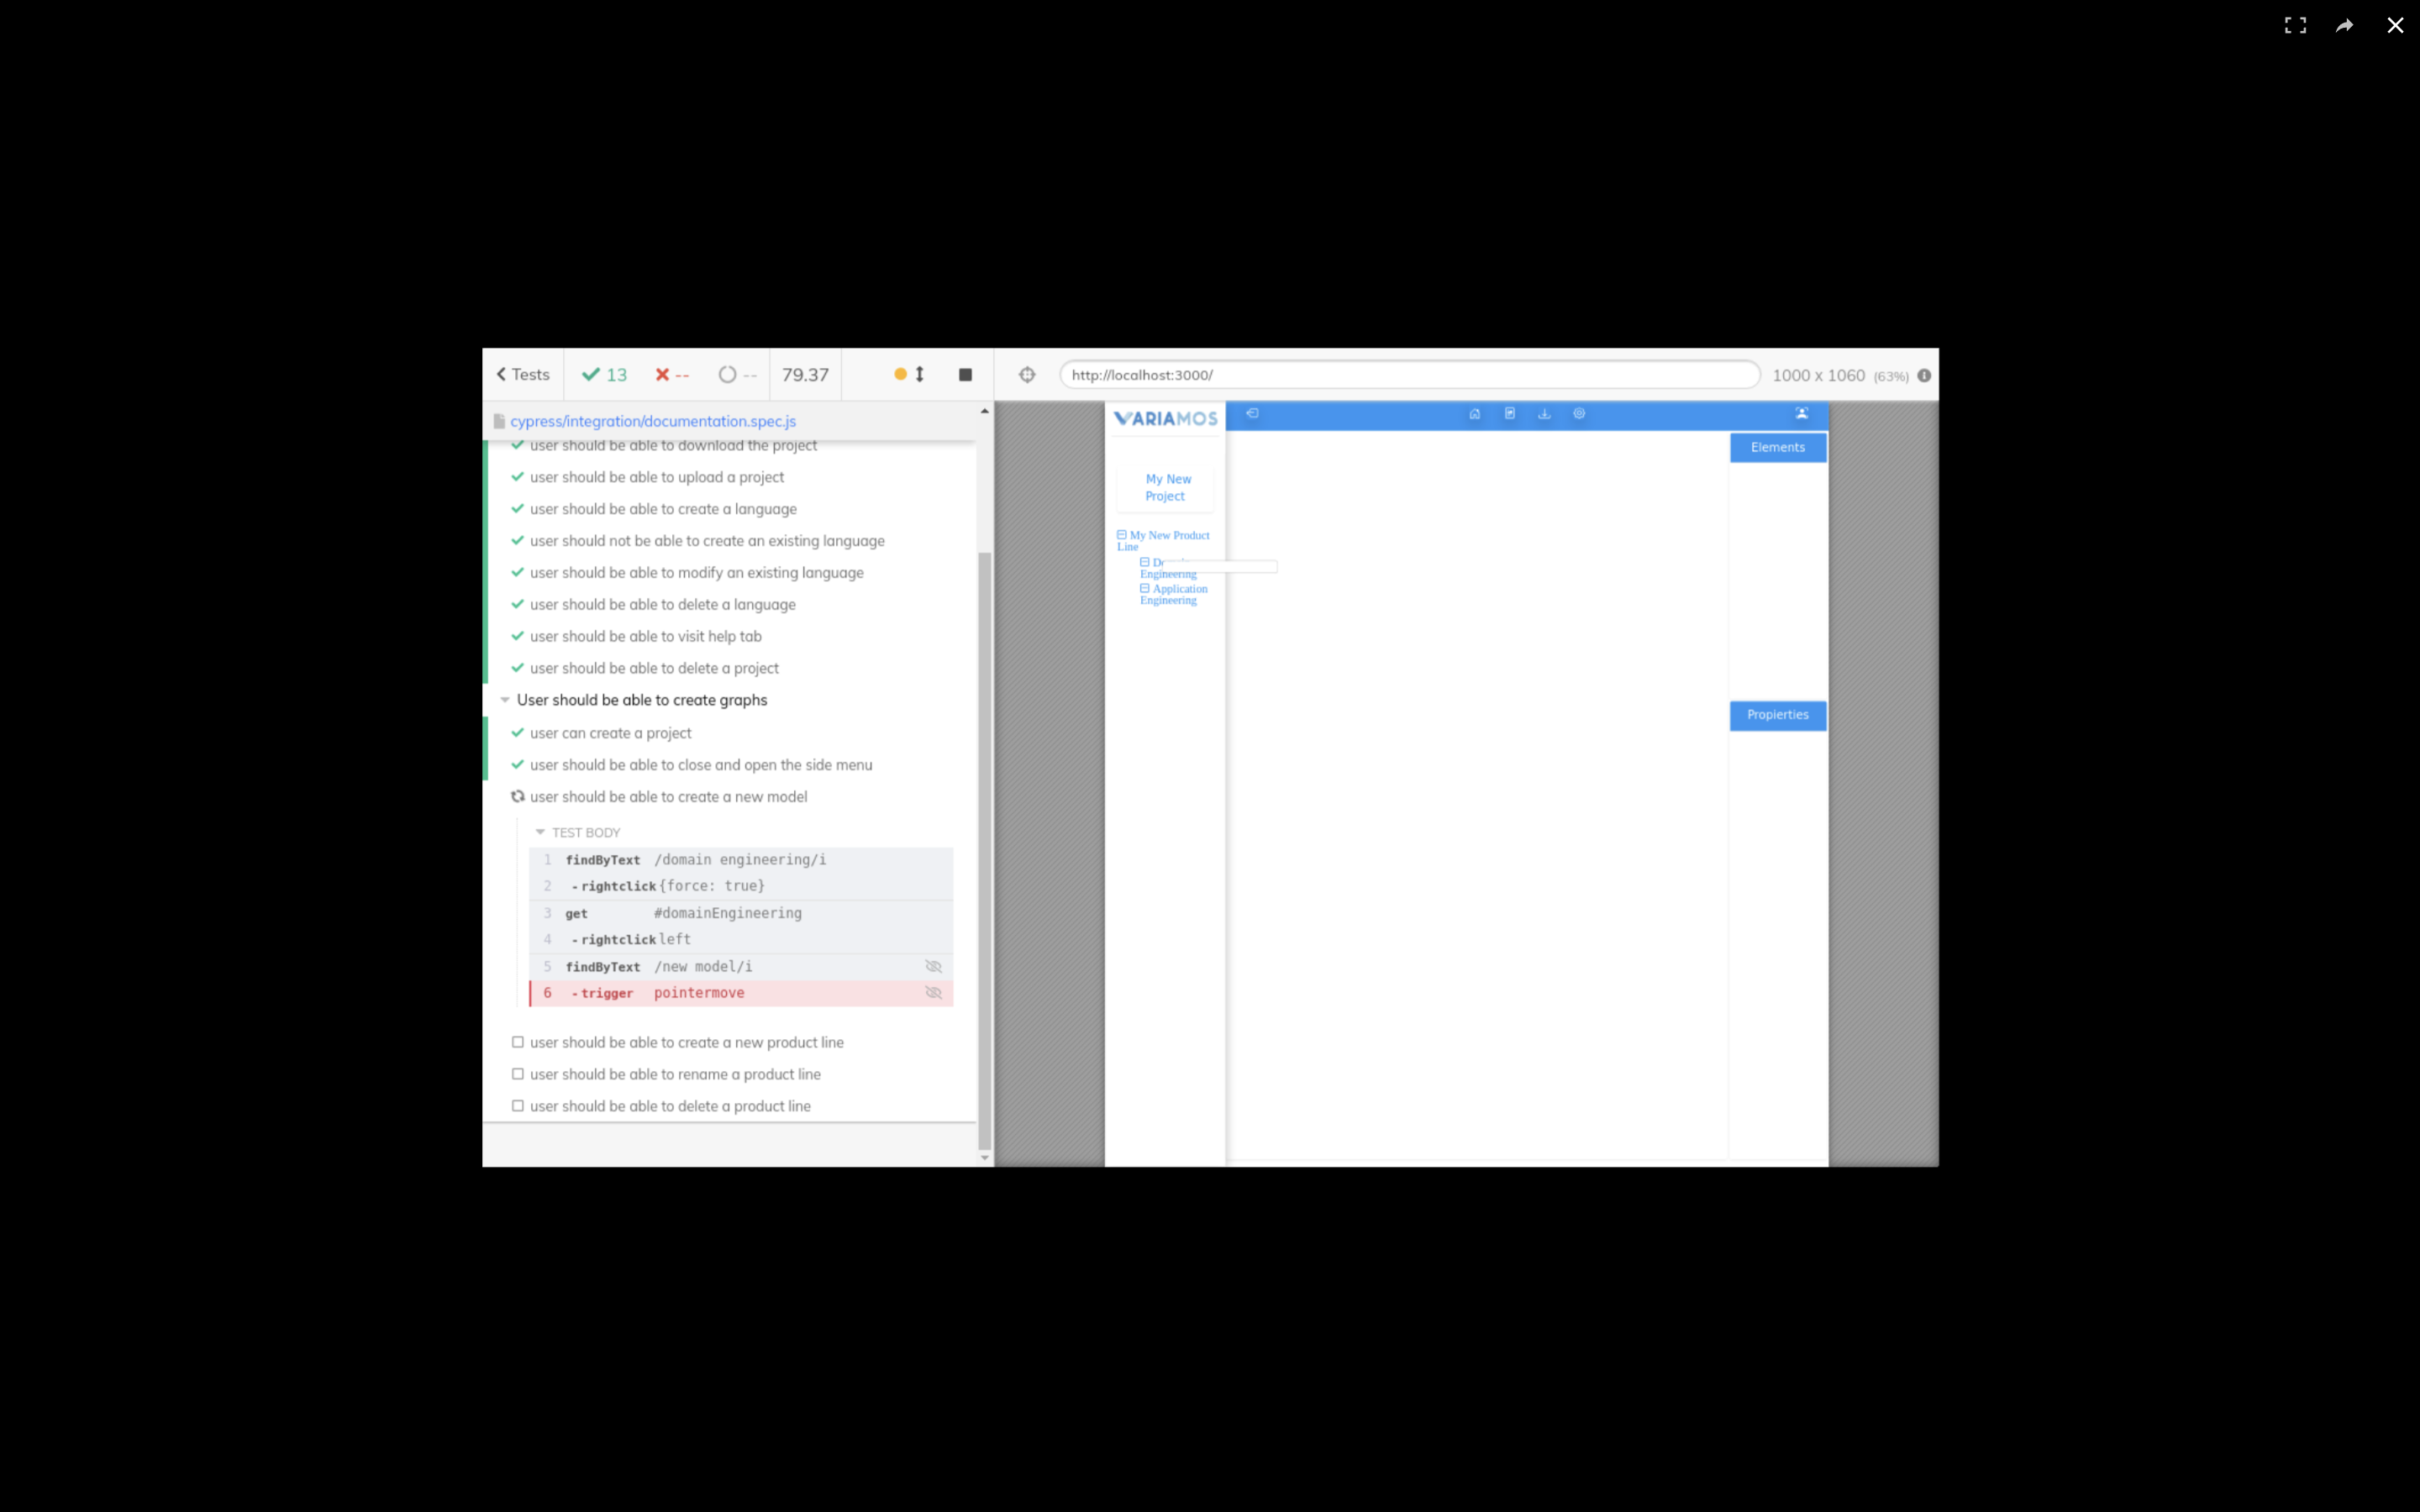
Moreover, you will have the possibility to see a screenshot or a video of what went wrong :
You can take a look to my youtube videos which will give you more details.
Jest covarage rules can be modified in the file package.json. It allows the unit test job (unit_integration_tests) to fail and to prevent the built and deployment of the application if the requirements are not met.
  "jest": {
    "coverageThreshold": {
      "global": {
        "branches": 1,
        "functions": 1,
        "lines": 1,
        "statements": 1
      }
    }
},The cypress config file is cypress.json
The stryker config file is stryker.conf.json
Click to see the configuration used for the mutation tests
 - Windows 10 Famille 64 bits
 - AMD Ryzen 7 5800H (Octo-Core 3.2 GHz / 4.4 GHz Turbo - 16 Threads - Cache 16 Mo)
 - NVIDIA GeForce RTX 3050 Ti Studio 4Go GDDR6
 - 16 Go DDR4
Contact me for any question :