Stripe API Payment Gateway Middleware
| Icon | Title | Description | Link |
|---|---|---|---|
| 📘 | Stripe Docs | Explore our guides and examples to integrate Stripe | Open |
| 💻 | API Reference | Complete reference documentation for the Stripe API | Open |
| 🛟 | Support | Get help with all of your Stripe products | Open |
-
Browse sample projects - Explore the library of sample projects using Stripe.
-
Accept a payment with Stripe CheckoutView in GitHub - Redirect to a Stripe-hosted payment page using Stripe Checkout.
-
- Introduction to collecting online payments
Initial setup: First, create a Stripe account or sign in.
Stripe-hosted page: View the text-based guide Explore a full, working code sample of an integration with Stripe Checkout where customers click a button on your site and get redirected to a payment page hosted by Stripe. The example includes client- and server-side code, and the payment page is prebuilt.
Try it out: Click the checkout button to be redirected to the Stripe Checkout page. Use any of these test cards to simulate a payment.
Payment succeeds : 4242 4242 4242 4242
  after success - initiated success URL (user specified type:documet):
  GET - https://docs.stripe.com/checkout/quickstart?success=true
  Redirect Header: referer: https://checkout.stripe.com/
  Preview:
    Checkout Session completed
    Listen for the `payment_intent.succeeded` webhook event to know when to fulfill the order.
    Once webhooks is desigend in Murchant-Applicaiton Server - Call inquiry link for the status

Payment requires 3DS authentication : 4000 0025 0000 3155
  OTP - Popup confirmation Popup with data:
   3D Secure 2 Test Page
   This is a test 3D Secure 2 authentication for a transaction with Stripe.
   In live mode, customers will be asked to verify their identity with a push notification, a text message, or another method chosen by their bank.
   * Buttons [complete] [fail]
     * [complete] = https://docs.stripe.com/checkout/quickstart?success=true
     * [Fail] stripe payment page with warning message: We are unable to authenticate your payment method. Please choose a different payment method and try again.


Payment is declined : 4000 0000 0000 9995
  stripe page validation fail :: Your credit card was declined because of insufficient funds. Try paying with a debit card instead.
  you can click on Back-Link from the Stripe page.
    https://docs.stripe.com/checkout/quickstart?canceled=true
      referer: https://checkout.stripe.com/
    Preview:
      Checkout Session canceled
      Create a new Checkout Session if your customer changes their order details before paying.
Integrating Stripe Checkout a complete practical Guide Published Jan 20, 2026 by Ashutosh Kumar Singh
|
|---|
 |
Store your API keys When you sign up for a Stripe account, we create three types of API keys for you:
| Type | Safe to expose | Description |
|---|---|---|
Restricted API key (RAK)rk_...
|
No | API key with customizable permissions. Use RAKs to limit the impact if a key is compromised and assign different keys to different parts of your application. |
| Publishable API key | Yes | API key that is safe to use in front-end code or distributed client applications. |
Secret API keysk_...
|
No | API key with unrestricted access to all Stripe APIs. Recommended only for existing integrations; new integrations should prefer restricted API keys (RAKs). |
Organization API keysk_org_...
|
No | API key that operates at the organization level, allowing management of multiple Stripe accounts with organization-wide access. |
Webhook signing secrets aren’t API keys—they’re per-webhook secrets that your webhook receiver uses to authenticate that webhooks actually came from Stripe. You can find the signing secret for each webhook endpoint in the Webhooks section of the Dashboard.
If you created your Stripe account before May 2026, you might not have any restricted API keys. We recommend creating RAKs and migrating from secret keys.
Get familiar with the Stripe CLI and our server-side SDKs.
Stripe’s server-side SDKs and command-line interface (CLI) allow you to interact with Stripe’s REST APIs. Start with the Stripe CLI to streamline your development environment and make API calls.
The Stripe CLI is also available as a Docker image. To install the latest version, run: docker run --rm -it stripe/stripe-cli:latest
Listen for events from Stripe on your webhook endpoint so your integration can automatically trigger reactions.
Create an event destination to receive events at an HTTPS webhook endpoint. After you register a webhook endpoint, Stripe can push real-time event data to your application’s webhook endpoint when events happen in your Stripe account. Stripe uses HTTPS to send webhook events to your app as a JSON payload that includes an Event objectCreate an event destination to receive events at an HTTPS webhook endpoint. After you register a webhook endpoint, Stripe can push real-time event data to your application’s webhook endpoint when events happen in your Stripe account. Stripe uses HTTPS to send webhook events to your app as a JSON payload that includes an Event object
Receiving webhook events helps you respond to asynchronous events, such as when a customer’s bank confirms a payment, a customer disputes a charge or a recurring payment succeeds.
Get started To start receiving webhook events in your app:
- Create a webhook endpoint handler to receive event data POST requests.
- Test your webhook endpoint handler locally using the Stripe CLI.
- Create a new event destination for your webhook endpoint.
- Secure your webhook endpoint.
You can register and create one endpoint to handle several different event types at the same time, or set up individual endpoints for specific events.
Create a handler Set up an HTTP or HTTPS endpoint function that can accept webhook requests with a POST method. If you’re still developing your endpoint function on your local machine, it can use HTTP. After it’s publicly accessible, your webhook endpoint function must use HTTPS.
Set up your endpoint function so that it:
Handles POST requests with a JSON payload consisting of an event object. For organisation event handlers, it inspects the context value to determine which account in an organisation generated the event, then sets the Stripe-Context header corresponding to the context value. Quickly returns a successful status code (2xx) prior to any complex logic that might cause a timeout. For example, you must return a 200 response before updating a customer’s invoice as paid in your accounting system. Note Use our interactive webhook endpoint builder to build a webhook endpoint function in your programming language. Use the Stripe API reference to identify the thin event objects or snapshot event objects your webhook handler needs to process.Create a handler Set up an HTTP or HTTPS endpoint function that can accept webhook requests with a POST method. If you’re still developing your endpoint function on your local machine, it can use HTTP. After it’s publicly accessible, your webhook endpoint function must use HTTPS.
Set up your endpoint function so that it:
- Handles POST requests with a JSON payload consisting of an event object.
- For organisation event handlers, it inspects the context value to determine which account in an organisation generated the event, then sets the Stripe-Context header corresponding to the context value.
- Quickly returns a successful status code (2xx) prior to any complex logic that might cause a timeout. For example, you must return a 200 response before updating a customer’s invoice as paid in your accounting system.
Note: Use our interactive webhook endpoint builder to build a webhook endpoint function in your programming language. Use the Stripe API reference to identify the thin event objects or snapshot event objects your webhook handler needs to process.
| Receive Stripe events in your webhook endpoint | This code snippet is a webhook function configured to check for received events from a Stripe account, handle the events, and return a 200 responses. Reference the snapshot event handler when you use API v1 resources, and reference the thin event handler when you use API v2 resources. |
|
Handle the event:s soon as you have the event object, check the type to know what kind of event happened. You can use one webhook to handle several different event types at once, or set up individual endpoints for specific events. Return a 200 response: Send a successful 200 response to Stripe as quickly as possible because Stripe retries the event if a response isn’t sent within a reasonable time. Write any long-running processes as code that can run asynchronously outside the webhook endpoint. Test the webhook - Locally using CLI http://localhost:4242/webhook.
java -cp target/sample-jar-with-dependencies.jar com.stripe.sample.Server
stripe login
stripe listen --forward-to localhost:4242/webhook
stripe trigger payment_intent.succeeded
|
public class Server {
    public static void main(String[] args) {
        port(4242);
        // This is a public sample test API key.
        StripeClient client = new StripeClient("sk_test_tR3PYbcVNZZ796tH88S4VQ2u");
        // Replace this endpoint secret with your endpoint's unique secret
        // If you are testing with the CLI, find the secret by running 'stripe listen'
        // If you are using an endpoint defined with the API or dashboard, look in your webhook settings
        // at https://dashboard.stripe.com/webhooks
        String endpointSecret = "whsec_...";
        post("/webhook", (request, response) -> {
            String payload = request.body();
            Event event = null;
            try {
                event = ApiResource.GSON.fromJson(payload, Event.class);
            } catch (JsonSyntaxException e) {
                // Invalid payload
                System.out.println("⚠️  Webhook error while parsing basic request.");
                response.status(400);
                return "";
            }
            String sigHeader = request.headers("Stripe-Signature");
            if(endpointSecret != null && sigHeader != null) {
                // Only verify the event if you have an endpoint secret defined.
                // Otherwise use the basic event deserialized with GSON.
                try {
                    event = client.constructEvent(
                        payload, sigHeader, endpointSecret
                    );
                } catch (SignatureVerificationException e) {
                    // Invalid signature
                    System.out.println("⚠️  Webhook error while validating signature.");
                    response.status(400);
                    return "";
                }
            }
            // Deserialize the nested object inside the event
            EventDataObjectDeserializer dataObjectDeserializer = event.getDataObjectDeserializer();
            StripeObject stripeObject = null;
            if (dataObjectDeserializer.getObject().isPresent()) {
                stripeObject = dataObjectDeserializer.getObject().get();
            } else {
                // Deserialization failed, probably due to an API version mismatch.
                // Refer to the Javadoc documentation on `EventDataObjectDeserializer` for
                // instructions on how to handle this case, or return an error here.
            }
            // Handle the event
            switch (event.getType()) {
                case "payment_intent.succeeded":
                    PaymentIntent paymentIntent = (PaymentIntent) stripeObject;
                    System.out.println("Payment for " + paymentIntent.getAmount() + " succeeded.");
                    // Then define and call a method to handle the successful payment intent.
                    // handlePaymentIntentSucceeded(paymentIntent);
                    break;
                case "payment_method.attached":
                    PaymentMethod paymentMethod = (PaymentMethod) stripeObject;
                    // Then define and call a method to handle the successful attachment of a PaymentMethod.
                    // handlePaymentMethodAttached(paymentMethod);
                    break;
                default:
                    System.out.println("Unhandled event type: " + event.getType());
                break;
            }
            response.status(200);
            return "";
        });
    }
} |
After testing your webhook endpoint function, use the API or the Webhooks tab in Workbench to register your webhook endpoint’s accessible URL so Stripe knows where to deliver events. You can register up to 16 webhook endpoints with Stripe. Registered webhook endpoints must be publicly accessible HTTPS URLs.Register your endpoint After testing your webhook endpoint function, use the API or the Webhooks tab in Workbench to register your webhook endpoint’s accessible URL so Stripe knows where to deliver events. You can register up to 16 webhook endpoints with Stripe. Registered webhook endpoints must be publicly accessible HTTPS URLs.
Webhook URL format:
The URL format to register a webhook endpoint is: https://<your-website>/<your-webhook-endpoint>
For example, if your domain is https://mycompanysite.com and the route to your webhook endpoint is @app.route('/stripe_webhooks', methods=['POST']), specify https://mycompanysite.com/stripe_webhooks as the Endpoint URL.
Create a new webhook endpoint: Stripe supports two endpoint types: Account and Connect. Create an endpoint for Account unless you’ve created a Connect application. You can register up to 16 webhook endpoints on each Stripe account.
Note: When you create an endpoint in the Dashboard, you can choose between your Account’s API version or the latest API version. You can test other API versions in Workbench using stripe webhook_endpoints create, but you must create a webhook endpoint using the API to use other API versions in production.
Use the following steps to register a webhook endpoint in the Developers Dashboard.
- Navigate to the Webhooks page.
- Click Create an event destination.
- Add your webhook endpoint’s HTTPS URL in Endpoint URL.
- If you have a Stripe Connect account, enter a description, then click Listen to events on Connected accounts. Select the event types you’re currently receiving in your local webhook endpoint in Select events.
- Click Add
endpoint.
Verify events are sent from Stripe: Without verification, an attacker could send fake webhook events to your endpoint to trigger actions like fulfilling orders, granting account access, or modifying records. Always verify that webhook events originate from Stripe before acting on them.
Use both of these protections:
- IP allowlisting: Stripe sends webhook events from a set list of IP addresses. Configure your server or firewall to only accept webhook requests from these addresses.
- Signature verification: Stripe signs every webhook event by including a signature in the Stripe-Signature header. Verify this signature using our official libraries or manually to confirm the event wasn’t sent or modified by a third party.
The following section describes how to verify webhook signatures:
- Retrieve your endpoint’s secret.
- Verify the signature.
Retrieving your endpoint’s secret Use Workbench and go to the Webhooks tab to view all your endpoints. Select an endpoint that you want to obtain the secret for, then click Click to reveal.
Stripe generates a unique secret key for each endpoint. If you use the same endpoint for both test and live API keys, the secret is different for each one. Additionally, if you use multiple endpoints, you must obtain a secret for each one you want to verify signatures on. After this setup, Stripe starts to sign each webhook it sends to the endpoint.
Preventing replay attacks A replay attack is when an attacker intercepts a valid payload and its signature, then re-transmits them. To mitigate such attacks, Stripe includes a timestamp in the Stripe-Signature header. Because this timestamp is part of the signed payload, it’s also verified by the signature, so an attacker can’t change the timestamp without invalidating the signature. If the signature is valid but the timestamp is too old, you can have your application reject the payload.
Our libraries have a default tolerance of 5 minutes between the timestamp and the current time. You can change this tolerance by providing an additional parameter when verifying signatures. Use Network Time Protocol (NTP) to make sure that your server’s clock is accurate and synchronizes with the time on Stripe’s servers.
Common mistake: Don’t use a tolerance value of 0. Using a tolerance value of 0 disables the recency check entirely.
Learn how to use SDKs, API keys, and integration tools.
Get familiar with the Stripe CLI and our server-side SDKs.
Stripe’s server-side SDKs and command-line interface (CLI) allow you to interact with Stripe’s REST APIs. Start with the Stripe CLI to streamline your development environment and make API calls.
Use the SDKs to avoid writing boilerplate code. To start sending requests from your environment, choose a language to follow a quickstart guide.
stripe-java Java client library for the Stripe API.
Runtime & Framework
We support LTS versions of the JDK. Currently, that's Java versions:
REQUIRED:
├─ Java 8+ (Java 8, 11, 17 all supported)
│  └─ LTS versions recommended: (LTS for stability)
│     ├─ Java 11 LTS (Long Term Support)
│     ├─ Java 17 LTS (Latest LTS)
│     └─ Java 8: Yes, supported but older
Maven users: Add this dependency to your project's POM:
<dependency>
  <groupId>com.stripe</groupId>
  <artifactId>stripe-java</artifactId>
  <version>32.1.0</version>
</dependency>
Configuring automatic retries: The library can be configured to automatically retry requests that fail due to an intermittent network problem or other knowingly non-deterministic errors. This can be enabled globally:
StripeClient client = StripeClient.builder()
        .setMaxNetworkRetries(2)
.build();The Stripe API uses API keys to authenticate requests. You can view and manage your API keys in the Stripe Dashboard.
Test secret keys have the prefix sk_test_ and live mode secret keys have the prefix sk_live_. Alternatively, you can use restricted API keys for granular permissions.
Best practices for managing secret API keys
Secret API keys are a form of account credentials, like a username and password. Unlike publishable keys, which are safe to include in webpages and apps, secret keys must stay in your server environment. If an unauthorized party obtains your secret API key, they can make unauthorized charges, access customer data, or disrupt your integration.
Best practice: Never expose secret or restricted API keys in source code or client-side applications; store them securely using a server-side secrets vault or environment variables instead.
- Rotate secret API keys periodically: Define and practice a process for rotating your Stripe API keys. Periodic rotation confirms that you know where each key is used and that your team can replace a key on short notice.
Use your API key by passing it when creating StripeClient. The client then automatically sends this key in each request.
// Initialize StripeClient - Test mode key; don't put live keys in code. use secrets-vault/environment-variables
StripeClient client = new StripeClient("sk_test_tR3PYbcVNZZ796tH88S4VQ2u");.
Customize API access with restricted API keys: Instead of using secret API keys with broad access, create restricted API keys to assign specific privileges to the components of your applications. For example, you can give your invoicing system the ability to manage invoices and nothing else.
Limit the IP addresses that can send API requests: If your service sends API requests from stable IP addresses, you can restrict your secret or restricted API keys to those addresses.
Make all API requests over HTTPS. Calls made over plain HTTP fail. API requests without authentication also fail.
Error Types: The type of error returned. One of api_error, card_error, idempotency_error, or invalid_request_error
api_error |
API errors cover any other type of problem (e.g., a temporary problem with Stripe’s servers), and are extremely uncommon. |
card_error |
Card errors are the most common type of error you should expect to handle. They occur when the user enters a card that can’t be charged. |
idempotency_error |
Idempotency errors occur when an
Idempotency-Key is reused on a request
that doesn’t match the original request’s endpoint
and parameters.
|
invalid_request_error |
Invalid request errors occur when your request contains invalid parameters. |
HTTP Status Code Summary
| Status Code | Status | Description |
|---|---|---|
| 200 | OK | Everything worked as expected. |
| 400 | Bad Request | The request was unacceptable, often due to a missing required parameter. |
| 401 | Unauthorized | No valid API key was provided. |
| 402 | Request Failed | The parameters were valid but the request failed. |
| 403 | Forbidden | The API key doesn’t have permission to perform the request. |
| 404 | Not Found | The requested resource doesn’t exist. |
| 409 | Conflict | The request conflicts with another request, possibly due to using the same idempotency key. |
| 424 | External Dependency Failed | The request couldn’t be completed because of a failure in an external dependency. |
| 429 | Too Many Requests | Too many requests were sent too quickly. Use exponential backoff when retrying requests. |
| 500, 502, 503, 504 | Server Errors | Something went wrong on the server side. These errors are rare. |
Error handling: Catch and respond to declines, invalid data, network problems, and more.
Payment Intents : A PaymentIntent guides you through the process of collecting a payment from your customer. We recommend that you create exactly one PaymentIntent for each order or customer session in your system.
Create a PaymentIntent: Creates a PaymentIntent object.
StripeClient client = new StripeClient("sk_test_tR3PYbcVNZZ796tH88S4VQ2u");

PaymentIntentCreateParams params =
  PaymentIntentCreateParams.builder()
    .setAmount(2000L)
    .setCurrency("usd")
    .setAutomaticPaymentMethods(
      PaymentIntentCreateParams.AutomaticPaymentMethods.builder()
        .setEnabled(true)
        .build()
    )
    .build();

PaymentIntent paymentIntent = client.v1().paymentIntents().create(params);
Checkout Sessions: A Checkout Session represents your customer’s session as they pay for one-time purchases or subscriptions through Checkout or Payment Links. We recommend creating a new Session each time your customer attempts to pay.
Once payment is successful, the Checkout Session will contain a reference to the Customer, and either the successful PaymentIntent or an active Subscription.
You can create a Checkout Session on your server and redirect to its URL to begin Checkout.
POST /v1/checkout/sessionsStripeClient - creates a Checkout Session
line_items array of Maps Required conditionally: A list of items the customer is purchasing. Use this parameter to pass one-time or recurring Prices. The parameter is required for payment and subscription mode.
mode enum (Possible enum values payment, setup, subscription) Required: The mode of the Checkout Session. Pass subscription if the Checkout Session includes at least one recurring item.
StripeClient client = new StripeClient("sk_test_tR3PYbcVNZZ796tH88S4VQ2u");

SessionCreateParams params =
  SessionCreateParams.builder()
    .setSuccessUrl("https://example.com/success")
    .addLineItem(
      SessionCreateParams.LineItem.builder()
        .setPrice("{{PRICE_ID}}")
        .setQuantity(2L)
        .build()
    )
    .setMode(SessionCreateParams.Mode.PAYMENT)
    .build();

Session session = client.v1().checkout().sessions().create(params);
return_url string Required conditionally: The URL to redirect your customer back to after they authenticate or cancel their payment on the payment method’s app or site. This parameter is required if ui_mode is embedded_page or elements and redirect-based payment methods are enabled on the session.
For cancel_url, success_url: This parameter is not allowed if ui_mode is embedded_page or elements.
cancel_url string: If set, Checkout displays a back button and customers will be directed to this URL if they decide to cancel payment and return to your website.
success_url string Required conditionally: The URL to which Stripe should send customers when payment or setup is complete. If you’d like to use information from the successful Checkout Session on your page, read the guide on customizing your success page.
ui_mode enum(Possible enum values hosted_page,embedded_page,elements): The UI mode of the Session. Defaults to hosted_page.
currency enum Required conditionally: Three-letter ISO currency code, in lowercase. Must be a supported currency. Required in setup mode when payment_method_types is not set.
customer_email string: If provided, this value will be used when the Customer object is created. If not provided, customers will be asked to enter their email address. Use this parameter to prefill customer data if you already have an email on file. To access information about the customer once a session is complete, use the customer field.
Use Stripe to start accepting payments.
Payment options:
- Most popular (Accept online payments): Build a payment form or use a prebuilt payment page to accept online payments.
- Online (Build a checkout page): Use Checkout to set up a Stripe-hosted page, embed a payment form, or embed components.
Build a payments page : Create a payments page with prebuilt UIs using the Checkout Sessions API.
Stripe Checkout You can use three different payment UIs with the Checkout Sessions API The following images highlight which aspects of the checkout UI Stripe hosts in each option.
|
FULL PAGE
Recommended Full page Customers enter their payment details in a fully-featured payment page, either embedded on your site or via a redirect to a Stripe-hosted page. 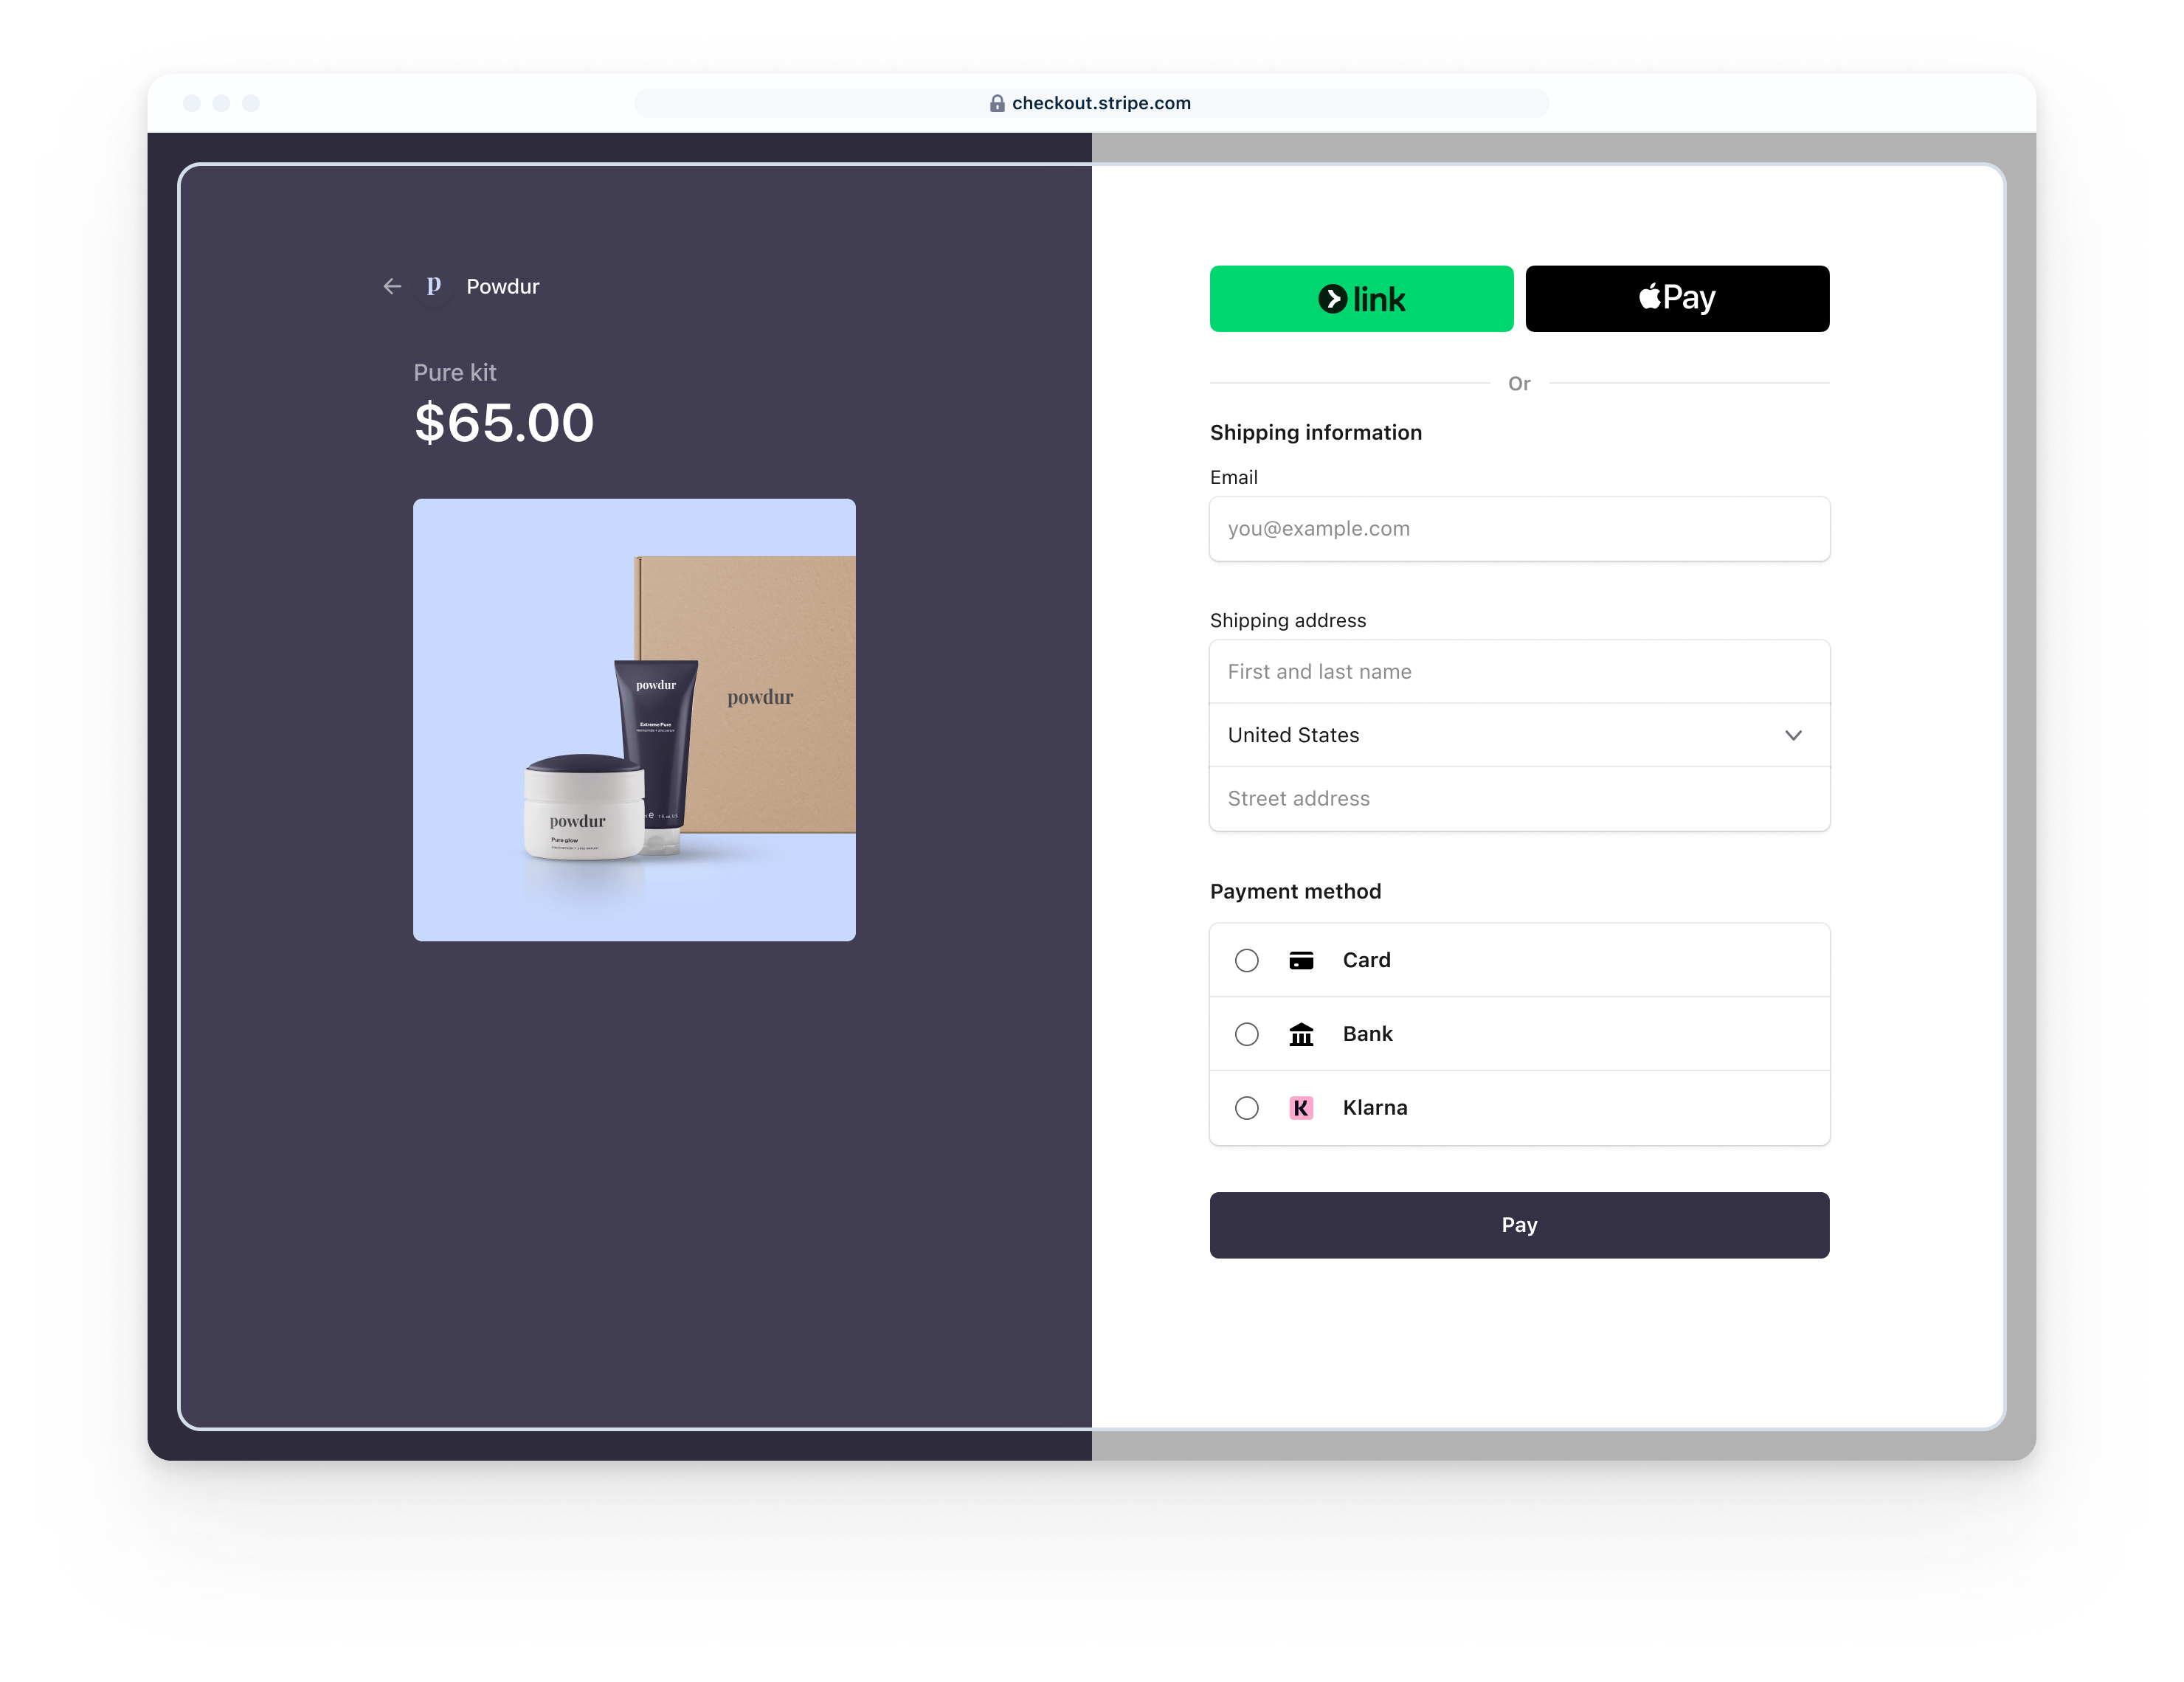
|
EMBEDDED FORM
Private preview Embedded form Customers enter their payment details in an embedded form on your site without redirection. 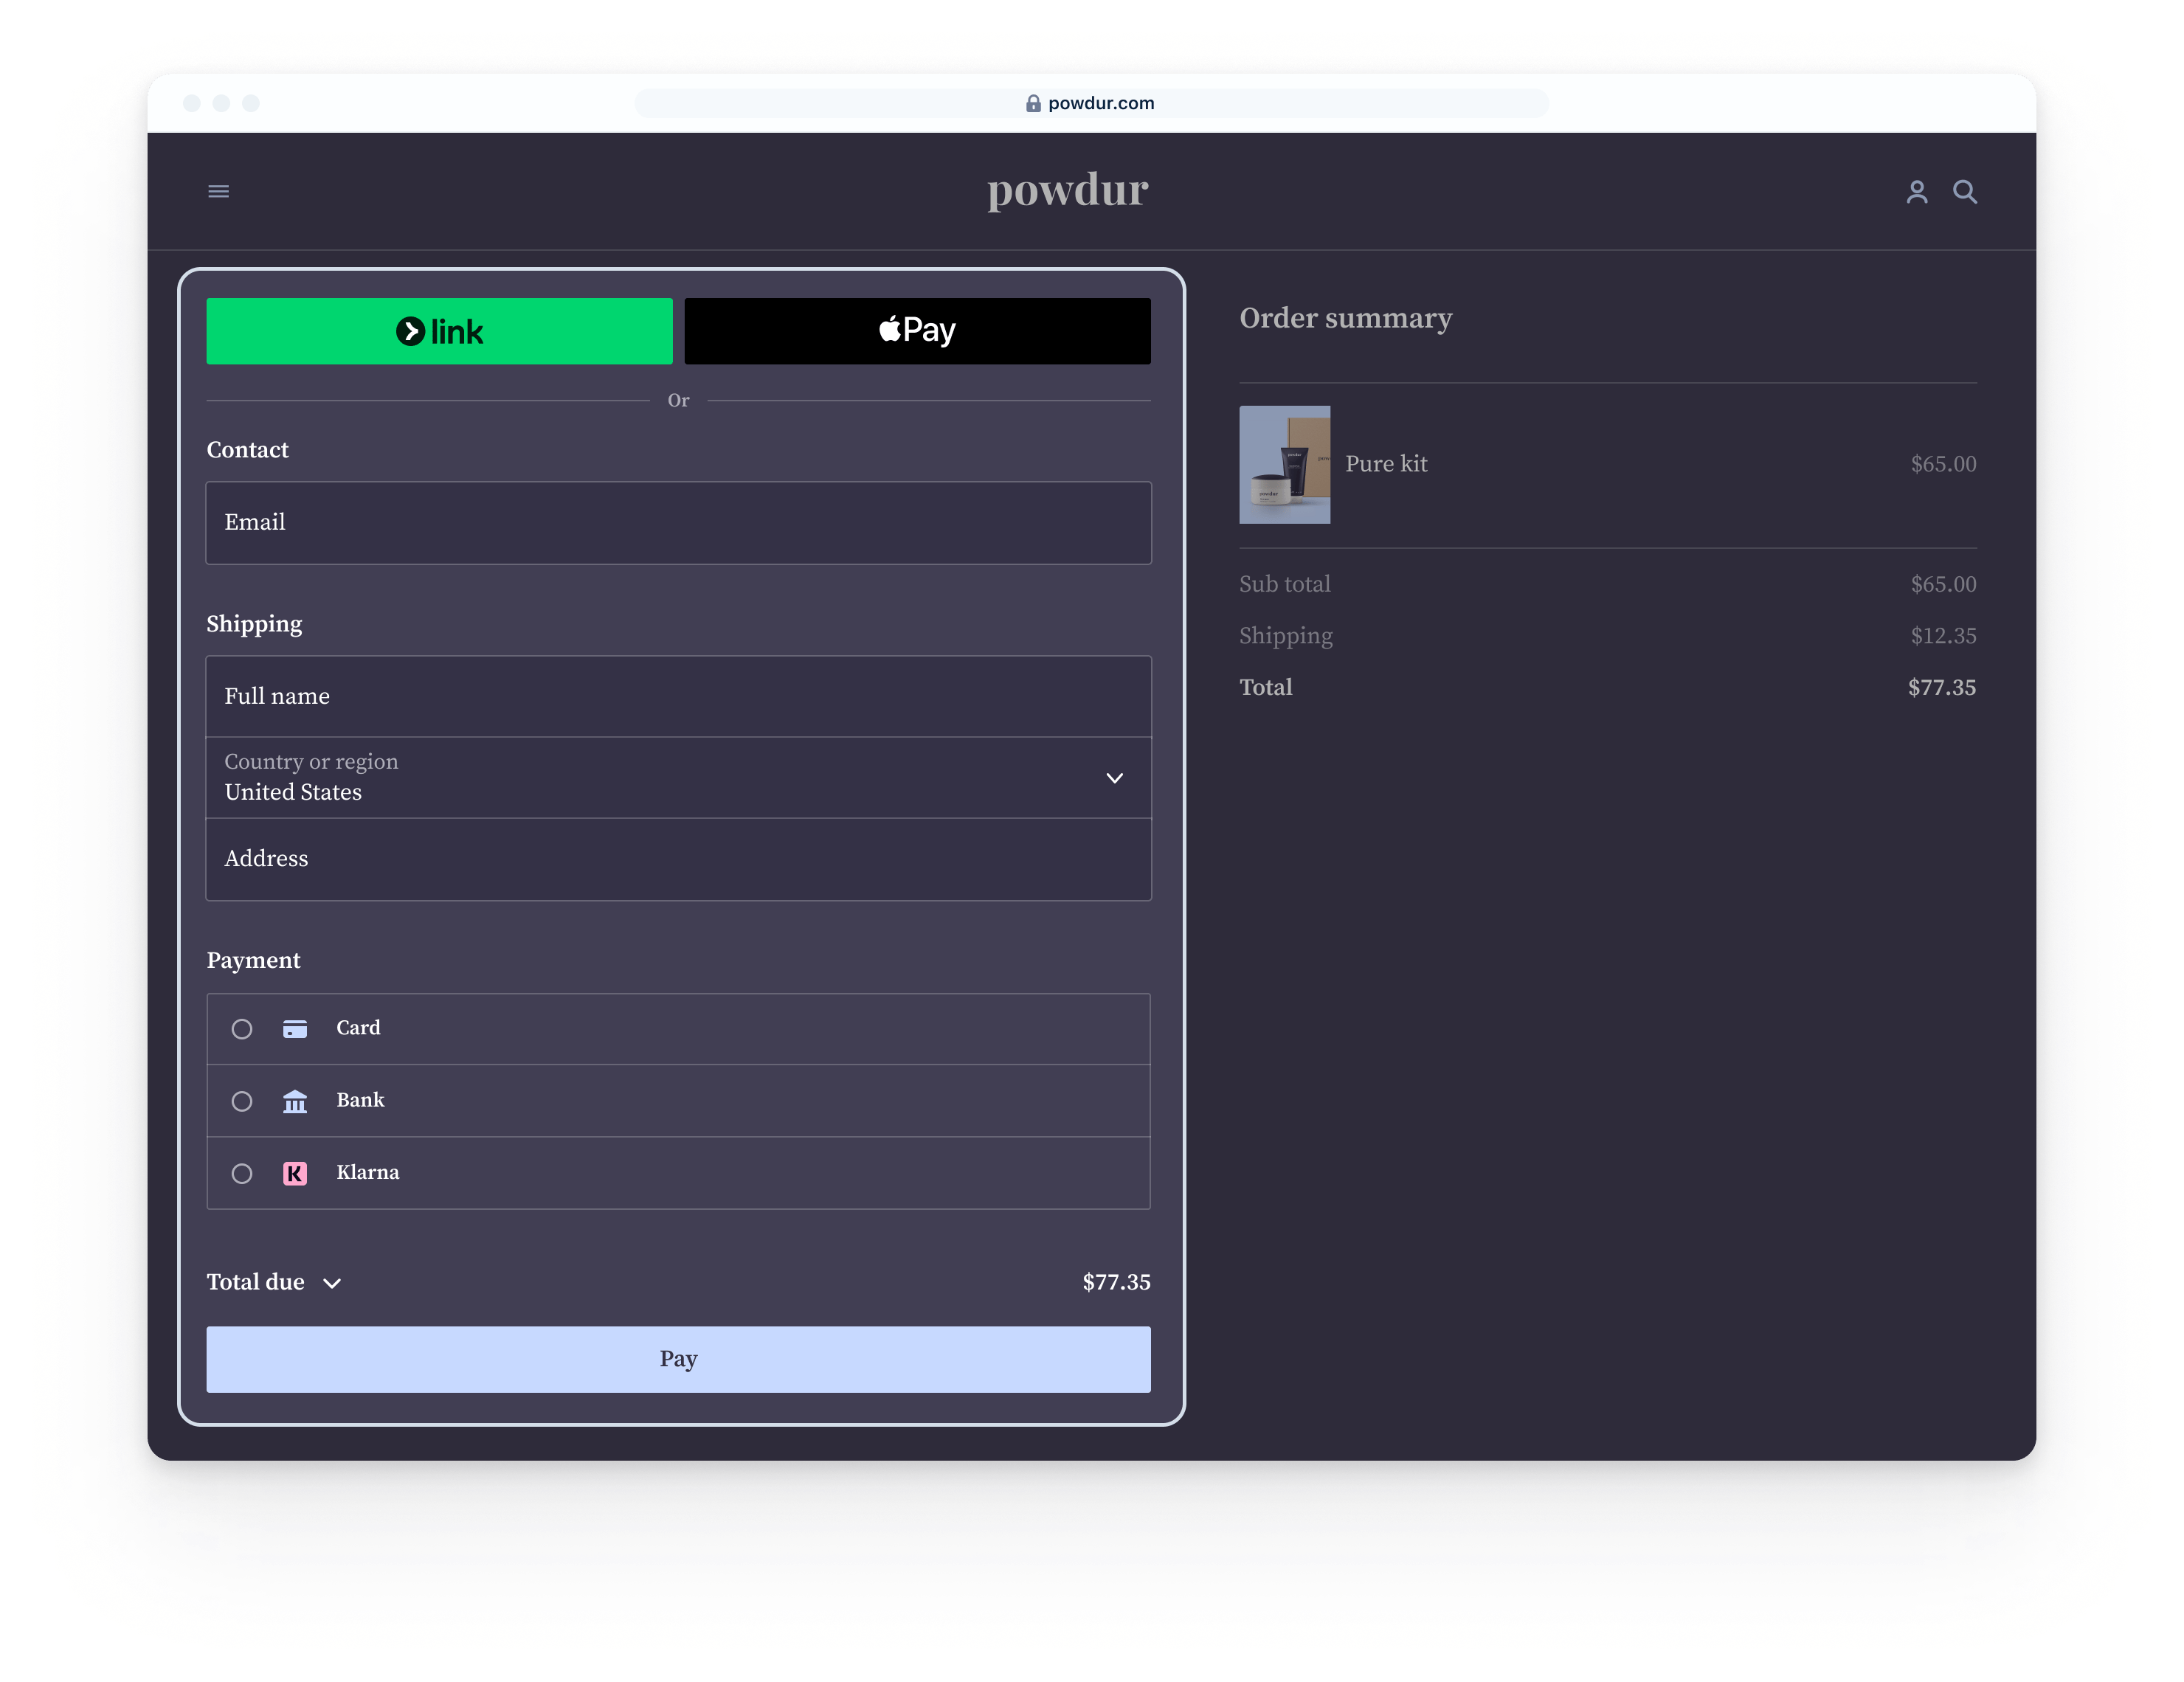
|
ELEMENTS
Elements Build a fully customized payment page using elements 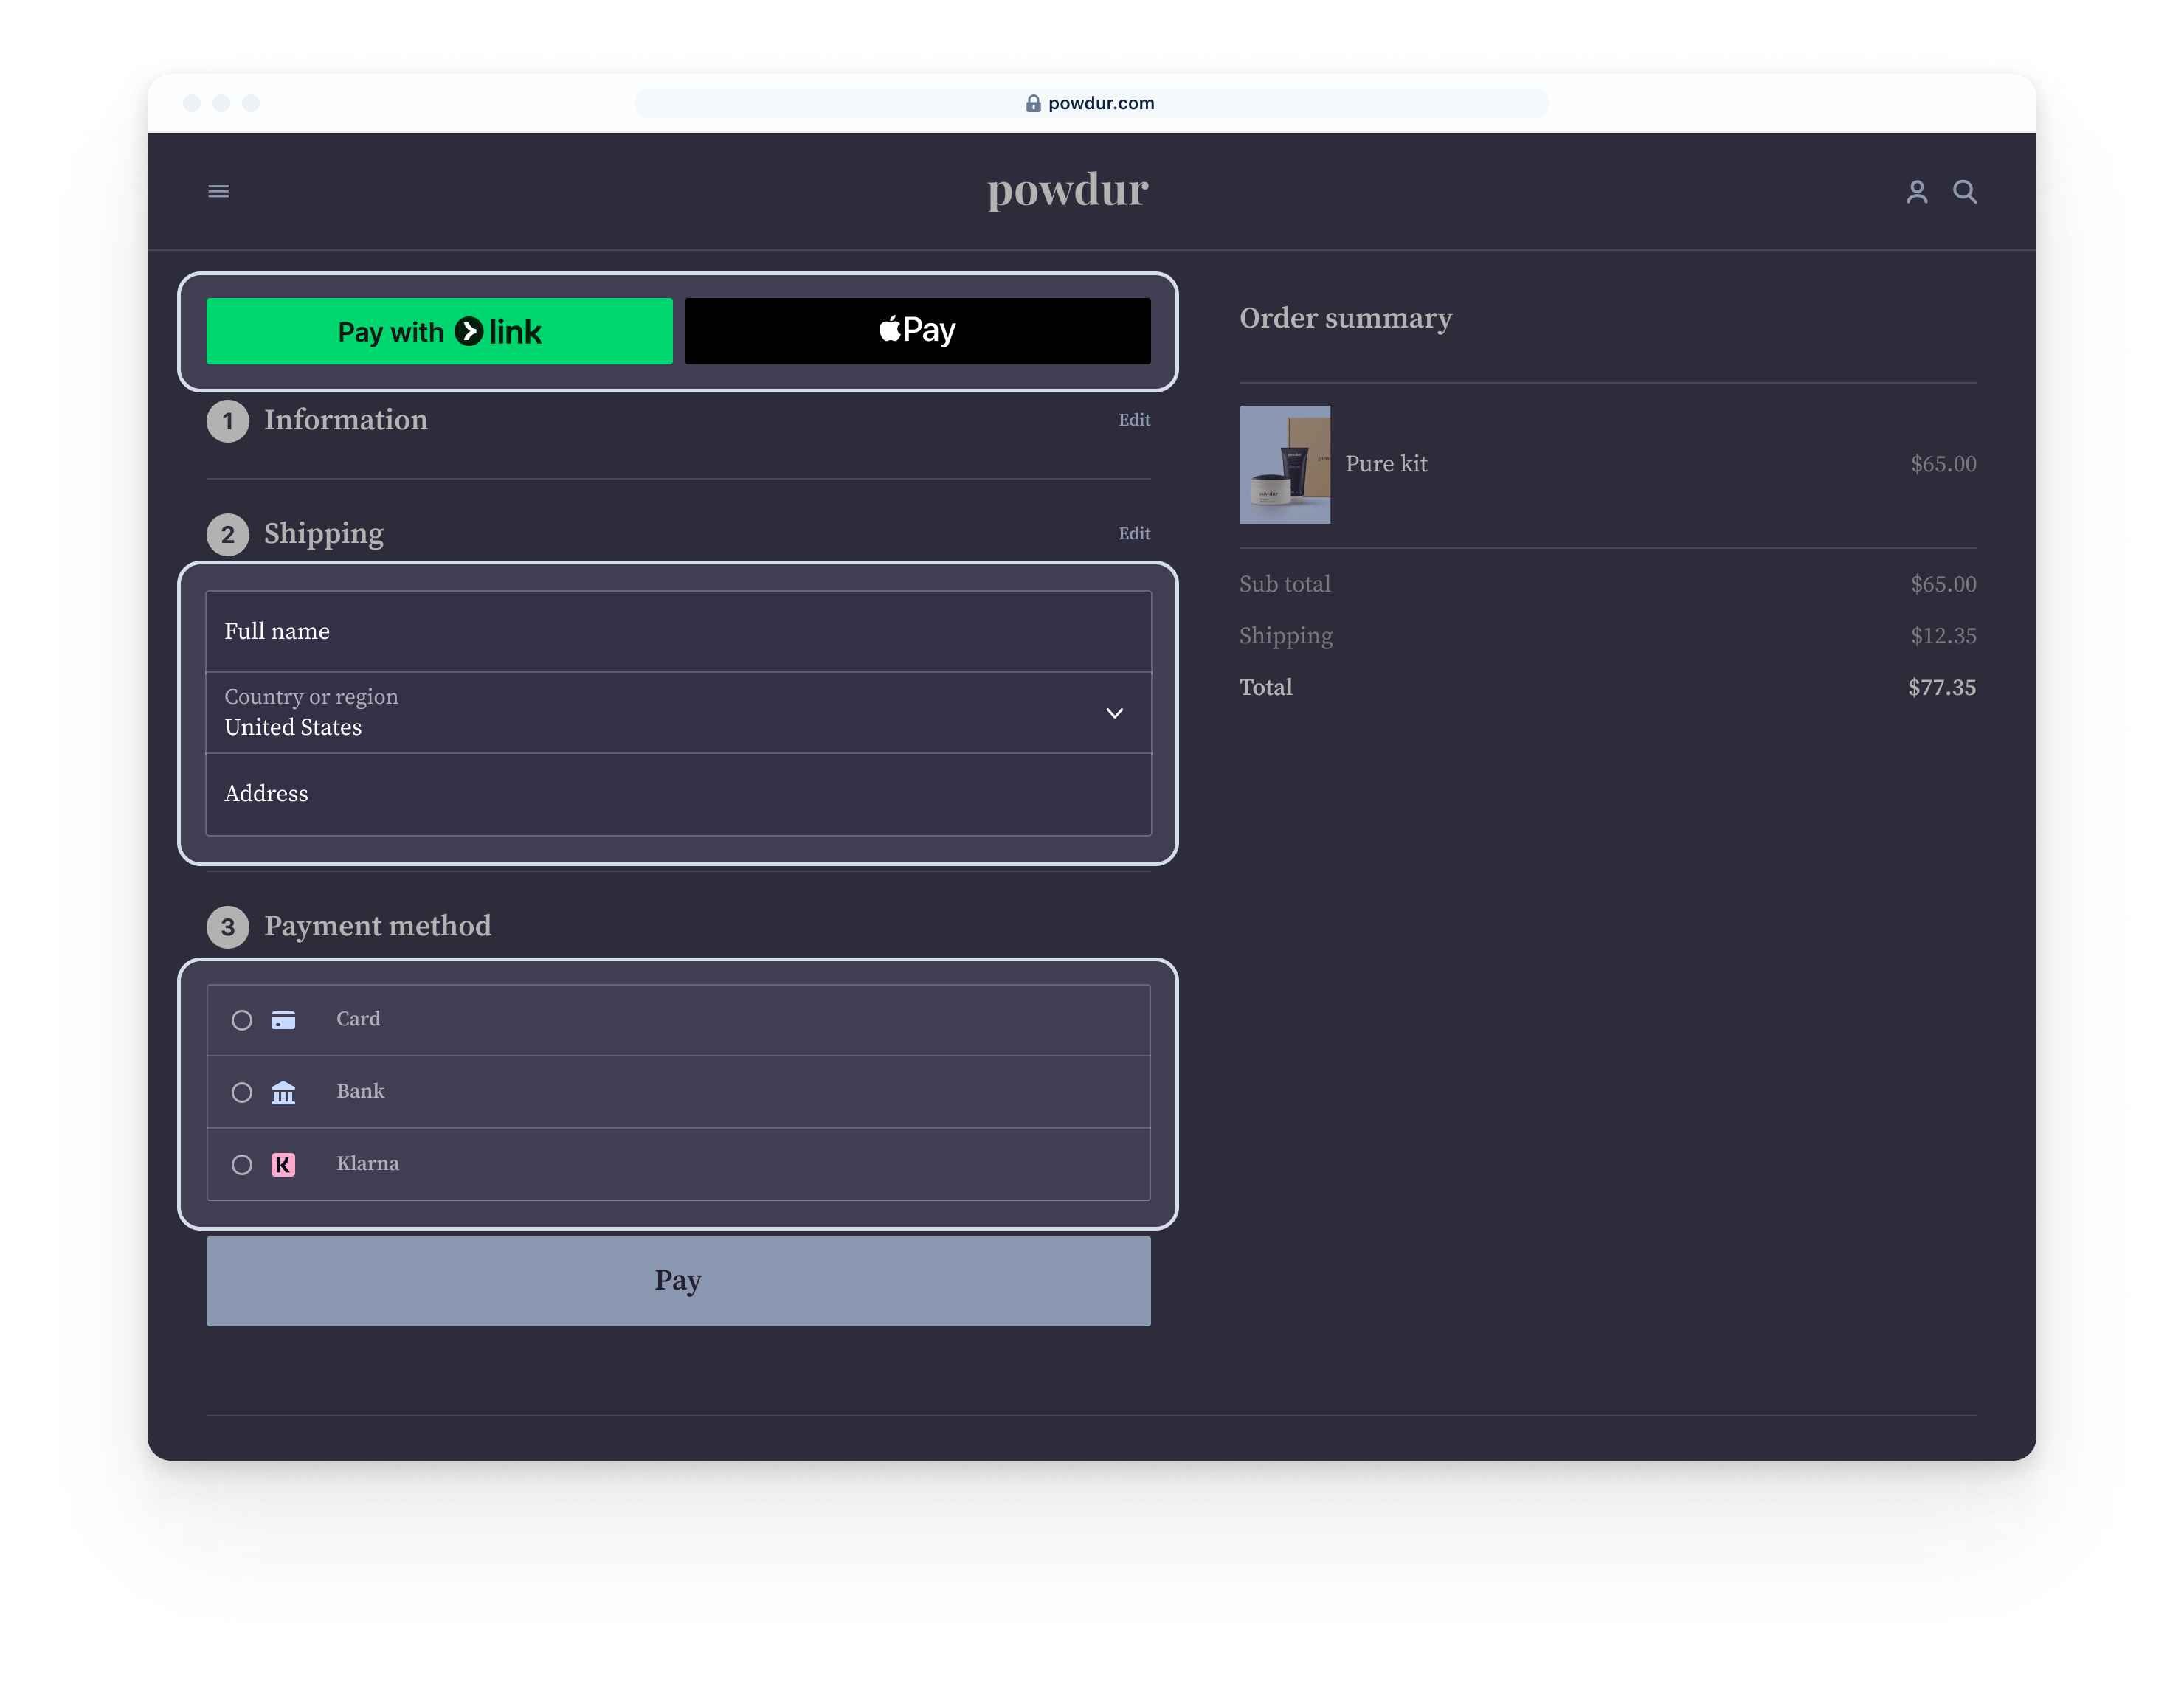
|
|
|---|---|---|---|
| API | Checkout Sessions | Checkout Sessions | Checkout Sessions |
| Feature list | Built-in UI support for Billing, Tax, Adaptive Pricing, Stripe Managed Payments, Link, dynamic payment methods, Surcharging, Split-tender | Built-in UI support for Billing, Tax, Adaptive Pricing, Stripe Managed Payments, Link, dynamic payment methods, Surcharging | Built-in UI support for Adaptive Pricing, Link, dynamic payment methods |
| Order summary | Includes full order summary with subtotals (including tax and shipping costs), cross-sells & upsells, free trials, discounts and promo codes | Limited order summary with subtotals (including tax and shipping costs), discounts and promo codes | No order summary |
| Ongoing maintenance required | Low | Some | Most |
| Hosting | Hosted or Embedded | Embedded | Embedded |
| Complexity | Low | Some | Most |
| Customization | 15 configurable settings via brand settings | 70 configurable settings via the Appearance API | Full CSS customization via the Appearance API |
stripe-samples checkout-one-time-payments - Accept payments with Stripe Checkout
| USD Cards Demo | EUR Cards & iDEAL Demo | MYR Cards & FPX Demo |
 |
 |
 |