Repository navigation
Getting Started
You need a HomePod mini or HomePod (2nd generation) running software 16.3 or newer, with Home Assistant able to reach it on your local network.
Have independently obtained administrator credentials and each accessory’s identifier and public key ready before starting. Follow the credential extraction guide to prepare the fields or selected export needed during setup.

- Select the button above, or open Settings → Marketplace and search the catalog for HomePod Sensor Link.
- Open HomePod Sensor Link, select Install, review the offered version and confirm.
- Restart Home Assistant if prompted. Continue the integration setup, or open Settings → Devices & services → Add integration → HomePod Sensor Link.
- Follow Guided flow below to select devices and import credentials.
Device names in the screenshots are anonymised.
-
Open Settings → Devices & services → Add integration → HomePod Sensor Link. The integration discovers public HomePod sensor services on the local network.
-
Select one or more HomePods.
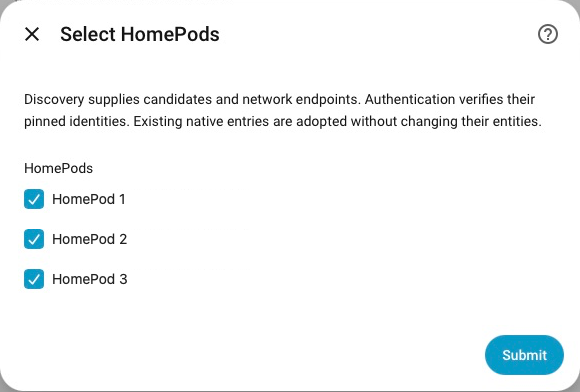
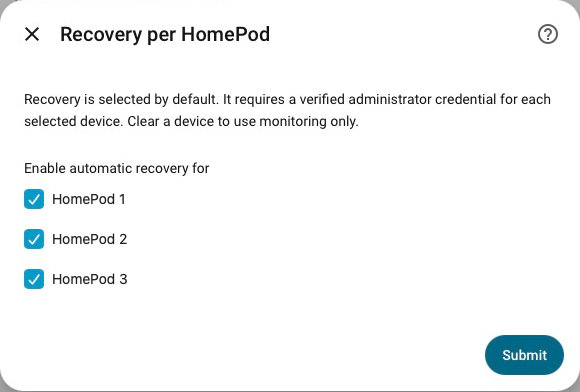
Recovery is on by default for each device; clear it for devices you want to monitor without recovery.
-
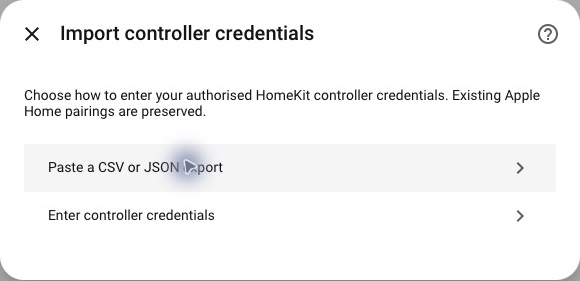
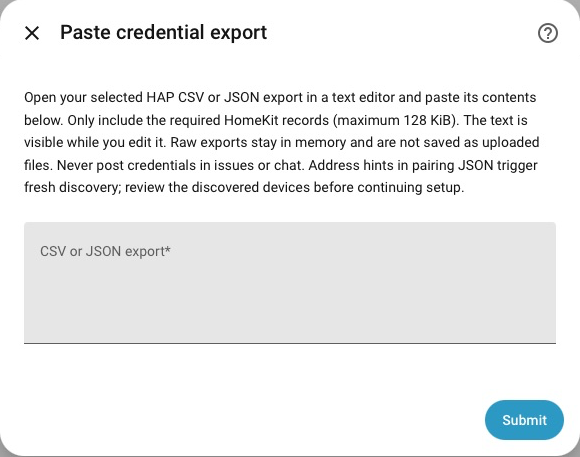
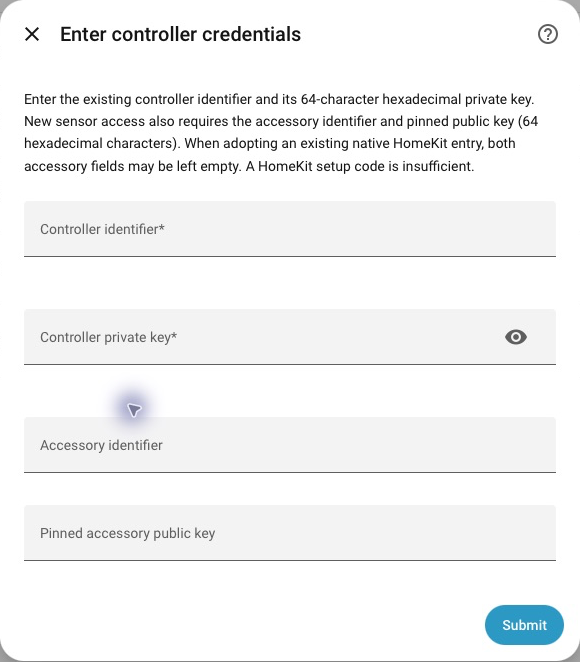
From a local HA administrator session, choose Paste a CSV or JSON export or Enter controller credentials in the standard setup dialog. Use HTTPS to protect credentials in transit; HTTP does not encrypt them.
-
Open the selected HAP CSV or JSON export in a text editor and paste its contents, or enter the controller and accessory fields manually. The manual private-key field is masked. Submit the form to continue.
Alternatively, enter the existing controller and accessory fields manually:
-
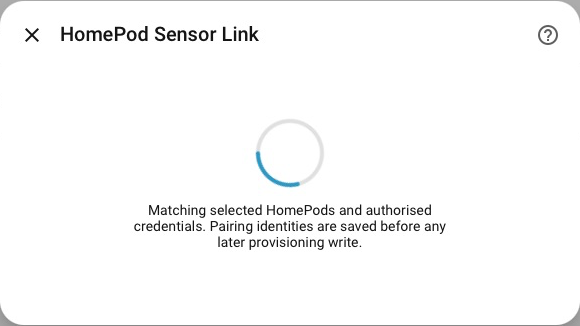
If the JSON includes address hints, setup discovers again and returns to Select HomePods. Review the new candidates and recovery choices before continuing. Then wait for each device’s setup result. Each selected HomePod receives a dedicated integration-owned regular User controller; native entries and history remain untouched.
-
Check that temperature and humidity readings appear for each device. You can change device names and assign areas from the integration’s device list. Devices still awaiting credentials or setup can be completed separately; see troubleshooting.
After an interrupted setup or restart, open Reconfigure → Manage existing devices, choose the HomePod, then select Resume setup. Cancel setup pauses its setup. Ready devices continue working independently.
If multicast browsing misses devices, open Reconfigure → Import pairing export to find missing devices. Paste your authorised aiohomekit pairing dictionary into the native export form and continue. Current HAP advertisements supply the endpoints; the exported port is never used. Already active devices stay configured and are omitted from the add-device selection.
Automatic recovery is enabled by default and requires administrator credentials. The integration checks connections every five minutes and attempts repair after repeated authentication failures. Network or discovery problems do not trigger pairing repairs.
Sensors created by the integration show as unavailable while setup is incomplete or readings are stale. An unchanged temperature can still be a fresh reading. Built-in monitoring alerts report when checks stop completing.
Administrator credentials are kept while setup is incomplete or recovery is enabled. Once setup finishes with recovery disabled, they are removed. Enabling recovery later requires importing them again.
Use Reconfigure to add devices, resume or cancel incomplete setup, change recovery settings, or remove devices. Each device can be managed without interrupting the others.
If prompted to update the integration's credentials, re-import your controller credentials from a local administrator session. Check Settings → System → Repairs for issues that need attention.
Removing a device deletes its stored credentials and recovery history. Removing the integration does this for all its devices. Existing HomeKit pairings, native HomeKit entries and their sensor history are kept. External backups and exports must be deleted separately. Restarting Home Assistant preserves the integration's data.