Repository navigation
Quick Start
This guide walks you through everything you need to do the first time you use the platform: signing in, installing the companion Chrome extension, importing your first class roster from PowerSchool, linking students to their accounts, and setting up daily practice and grading.
Follow it top to bottom. It should take about 15 minutes. You only do most of this once.

In Google Chrome, go to classicaltech.org.
Use Chrome specifically. The companion extension you'll install in Part 2 only runs in Chrome, and you'll want it available from the start.
In the top navigation bar, click Sign In. A Google sign-in window opens.
If you don't see a "Sign In" link, you may already be signed in as a student on this browser — click your name / "My Progress" and sign out first.
In the Google window, pick your @hartfordschools.org staff account.
- Staff accounts (
@hartfordschools.org) are recognized as teachers automatically. There is no approval step and nobody needs to add you — the first time you sign in, your teacher space is created for you. - Student accounts (
@students.hartfordschools.org) are not allowed into the teacher portal. - Personal Gmail or other-district accounts are rejected.
After Google returns you to the site, you land on the Teacher Portal. The first time, it shows a short Getting Started checklist. The rest of this guide is the long version of that checklist.
Your session stays signed in on this browser until you click Sign Out, so you won't have to repeat this every day.
Go to the Classes tab. At the top, under Your Profile, type your name and click Save. This is the name that appears on the student leaderboard and in a few other places.
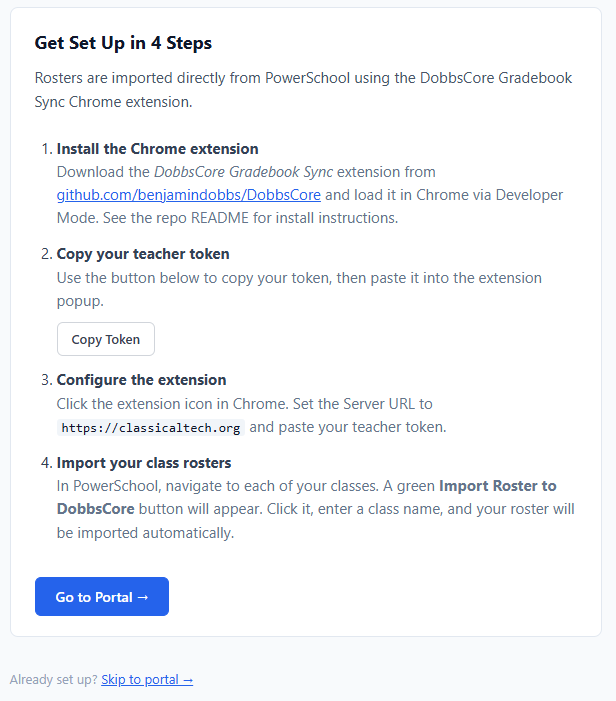
Rosters are pulled straight from PowerSchool by a small Chrome extension called DobbsCore Gradebook Sync. The same extension later pushes grades into PowerSchool and pulls attendance out of it. You need it before you can import a class the easy way.
If you would rather not use the extension at all, you can skip to Part 3, Option B and build classes by hand from a CSV file. The extension is strongly recommended — it does roster imports, grade pushes, and attendance in one place.
Download the extension from github.com/benjamindobbs/DobbsCore:
- On that page, click the green Code button, then Download ZIP.
- Unzip the downloaded file somewhere permanent — for example, a
DobbsCorefolder in your Documents. Do not delete this folder later; Chrome loads the extension from it every time it starts.
- In Chrome, go to
chrome://extensions(type it into the address bar). - Turn on Developer mode with the switch in the top-right corner.
- Click Load unpacked (top-left).
- Select the unzipped
DobbsCorefolder (the one that containsmanifest.json). - The extension appears in your list as "DobbsCore Gradebook Sync."

Click the puzzle-piece icon near Chrome's address bar, find DobbsCore Gradebook Sync, and click the pin so its icon stays visible. You'll click that icon to open its settings.
The extension needs a token so it can talk to the platform as you.
- Back on classicaltech.org, in the Teacher Portal, open the Classes tab and find the Chrome Extension box. Click Copy Token. (Your token is now on your clipboard.)
- Click the DobbsCore extension icon you pinned. A small settings popup opens.
- Set DobbsCore Server URL to exactly:
https://classicaltech.org - Paste your token into the Teacher Token field.
- Click Save. You should see "Saved."
The token is tied to your sign-in. If you sign out of the portal and back in, copy the token again and re-paste it. If grade syncs ever start failing with an authorization error, that's the fix.

You have two ways to do this. Option A (from PowerSchool, with the extension) is the recommended path and takes seconds. Option B builds a class by hand.
- Make sure you are logged into PowerSchool (PowerTeacher Pro) in another Chrome tab.
- Open one of your class sections in PowerSchool so you're looking at that section's page.
- The DobbsCore extension adds a button to that page: "Import Roster to DobbsCore." (It only appears on sections that aren't registered in DobbsCore yet.)
- Click it. The extension reads the live PowerSchool roster — every student's name, their district Student Number, and an internal PowerSchool ID used later for attendance matching — and creates a matching class in DobbsCore in one step.
- Switch back to the DobbsCore Teacher Portal, open the Classes tab, and refresh. Your new class is listed with all its students.
Repeat for each section you teach.

If a section's enrollment changes later in the year, you don't re-import — you use the Re-sync Roster button instead. See Managing Classes & Rosters.
- In the Teacher Portal, Classes tab, click + New Class.
- Type a class name and click Create.
- Click the class to open it. Click Import CSV and choose a file with two columns and no
header: the student's district Student ID in the first column, their full name in the
second. For example:
123456,Jordan Rivera 123457,Sam Park - The students appear on the roster.
You can also add students one at a time with the Student ID / Student Name / Add Student fields at the bottom of the roster.
A student on your roster and a student who has signed into the site are two separate records until they're linked. Grades only compute for linked students — an unlinked student always scores the "No Submission" grade.
Linking matches a roster row (by district Student ID) to an app account (by the account's username, which is the same district ID). It works only after a student has signed into the site at least once.
- Ask your students to go to classicaltech.org and sign in with their
@students.hartfordschools.orgaccount once. They don't have to do anything else — just sign in. - In the Teacher Portal, open the class and click Link Accounts.
- Every roster student who has signed in gets linked automatically. The Linked Account column fills in.
- Run Link Accounts again any time more students have signed in.
A student who never signs in stays unlinked and will always receive the No Submission grade, regardless of any work they think they did (their work has nowhere to attach).

Open the class in the Classes tab and scroll to Assignment Requirements.
Check the box for each activity you require:
- KenKen — the logic puzzles.
- SAT Math — adaptive SAT/PSAT math questions.
- SAT English — adaptive SAT/PSAT reading & writing questions.
- Ruler Game — tiered practice reading a ruler (see Ruler Game).
- Projections — tiered technical-drawing practice (see Projections).
If you check more than one, students must do all of them each day. If you check nothing, the class falls into "either" mode: doing either KenKen or SAT English satisfies the day.
For each checked activity, a "… / Day" field appears. Enter how many qualifying items count as a full day:
- KenKen — a game only counts if its score is at or above the student's own running average, so "completing" means real effort, not clicking through easy puzzles.
- SAT Math / SAT English — only correct answers count.
- Ruler Game / Projections — each correct answer counts.
If SAT Math or SAT English is checked, a SAT Requirement setting also appears. Leave it on Number correct, or switch it to Number correct + accuracy so students can't guess their way to the count: they must also get a minimum share of their last few answers right. Details: SAT accuracy mode.
Click Save Requirements.
Just above Assignment Requirements:
- Assessment — choose SAT, PSAT/NMSQT & PSAT 10, or PSAT 8/9. This decides which official question bank the class is served.
- SAT English Domains / SAT Math Domains — check the domains you want active. Leaving all four checked (or all four unchecked) means "all domains." Checking a subset restricts practice to those areas. Click Save Domains.
More detail: Daily Practice & Assignments.

These live in the Classes tab under Gradebook Settings, and they apply to all your classes. Three numbers:
| Setting | What it means |
|---|---|
| Assignment Max Score | The point value of a full-credit daily-practice assignment (e.g. 100, or 10). |
| Completion Score | The floor, as a percent of the max, for a day where the student did some but not all of that day's requirement. A day where they met the requirement is always full credit. |
| No Submission Score | The percent of the max for a day where the student submitted nothing (and for a student who isn't linked to an account). Often 0, or something like 50 if you don't want zeros. |
Each day in the assignment window is graded on its own, and the student's grade is the average of those days.
Click Save Settings.
Exactly how these combine with attendance, enrollment dates, and days the class didn't meet is covered in full — with worked examples — in How Grading Works. Read that page before you push your first real grades.
When it's time to grade:
- In PowerSchool, open the class section.
- The DobbsCore extension shows a Create DobbsCore Assignment button. Click it.
- Enter the assignment name, due date, max points, and PowerSchool category, then pick the date range the assignment covers.
- The extension creates the PowerSchool assignment and fills in every student's score from their DobbsCore activity over that range — no CSV, no manual entry.
Full walkthrough, including re-scoring an assignment that already exists and pulling attendance: The DobbsCore Extension.
- How Grading Works — the grading rules in detail. Don't skip this.
- Managing Classes & Rosters — mid-year enrollment changes, withdrawn students, manual enrollment dates.
- Daily Practice & Assignments — students in multiple classes, domain restrictions, how "either" mode behaves.
- Work-Based Learning Guide — if your program assesses real shop/job work.