Utilities
- Queue Display Utilities
- Text Case Converter
- Restructure Outline by Headings
- Set Next Heading Level
- Apply Heading Levels by Hierarchy (Table of Contents)
- Bulletize Inline Selected Text
- Find Rem — Reference or Open
- Open Source in Popup
- Omnibar Selection Recovery
A collection of powerups and commands incorporated into Incremental Everything (originally from the standalone Hide in Queue plugin), plus two new powerups — Remove Parent and Remove Grandparent — that improve how parent/ancestor Rems are rendered during queue review.
The 5 powerups originally from the Hide in Queue plugin (Hide in Queue, Remove from Queue, No Hierarchy, Hide Parent, Hide Grandparent) are gated by the Enable Hide-in-Queue powerups and commands setting in Plugin Settings.
⚠️ Important. Only enable this setting if you do NOT have the standalone Hide in Queue plugin installed. The powerup codes are identical, and RemNote throws a fatalDuplicated poweruperror if both plugins try to register the same code — Incremental Everything will fail to load. If you currently use the standalone plugin, uninstall it first, then enable the setting and reload RemNote.
The two new powerups — Remove Parent and Remove Grandparent — are always registered regardless of the setting, because the Cloze and Extract creators apply Remove Parent automatically to newly-created Rems.
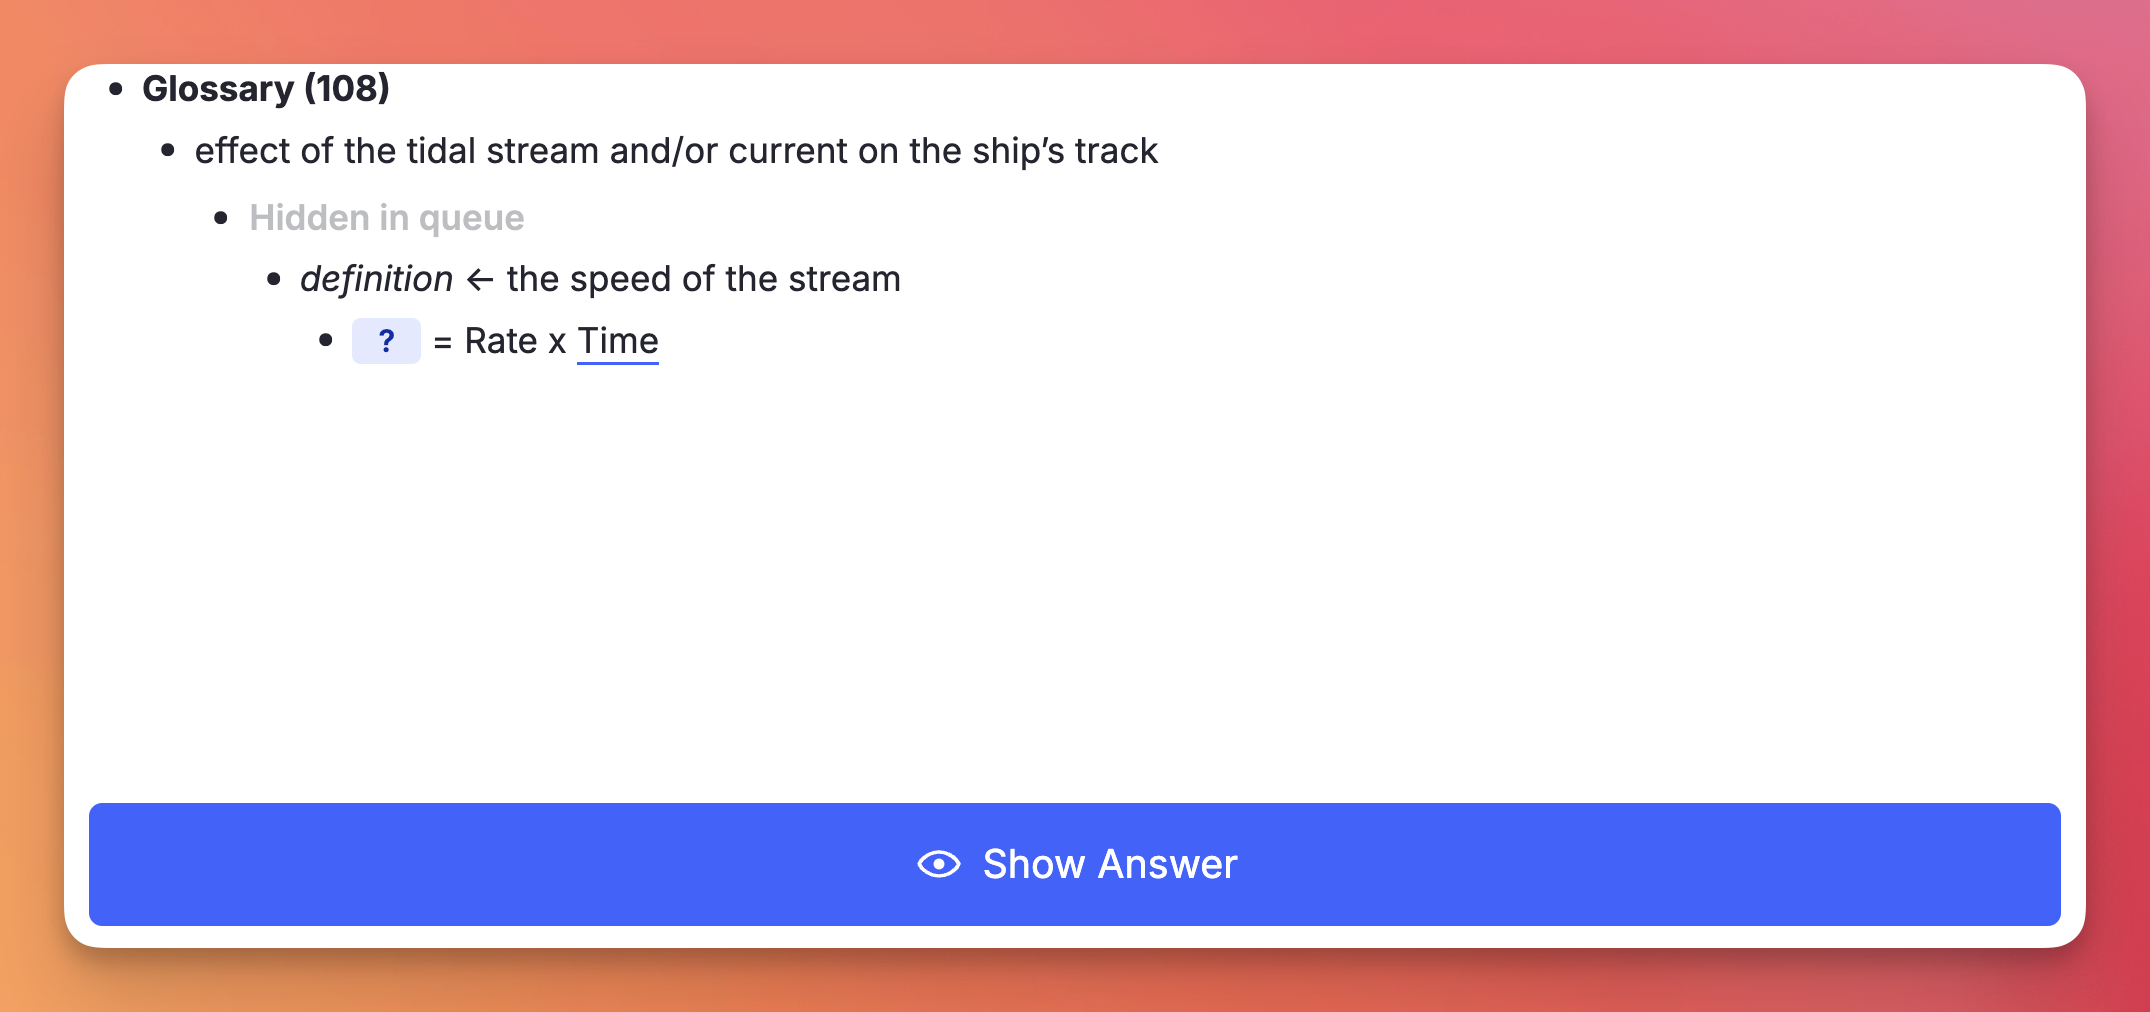
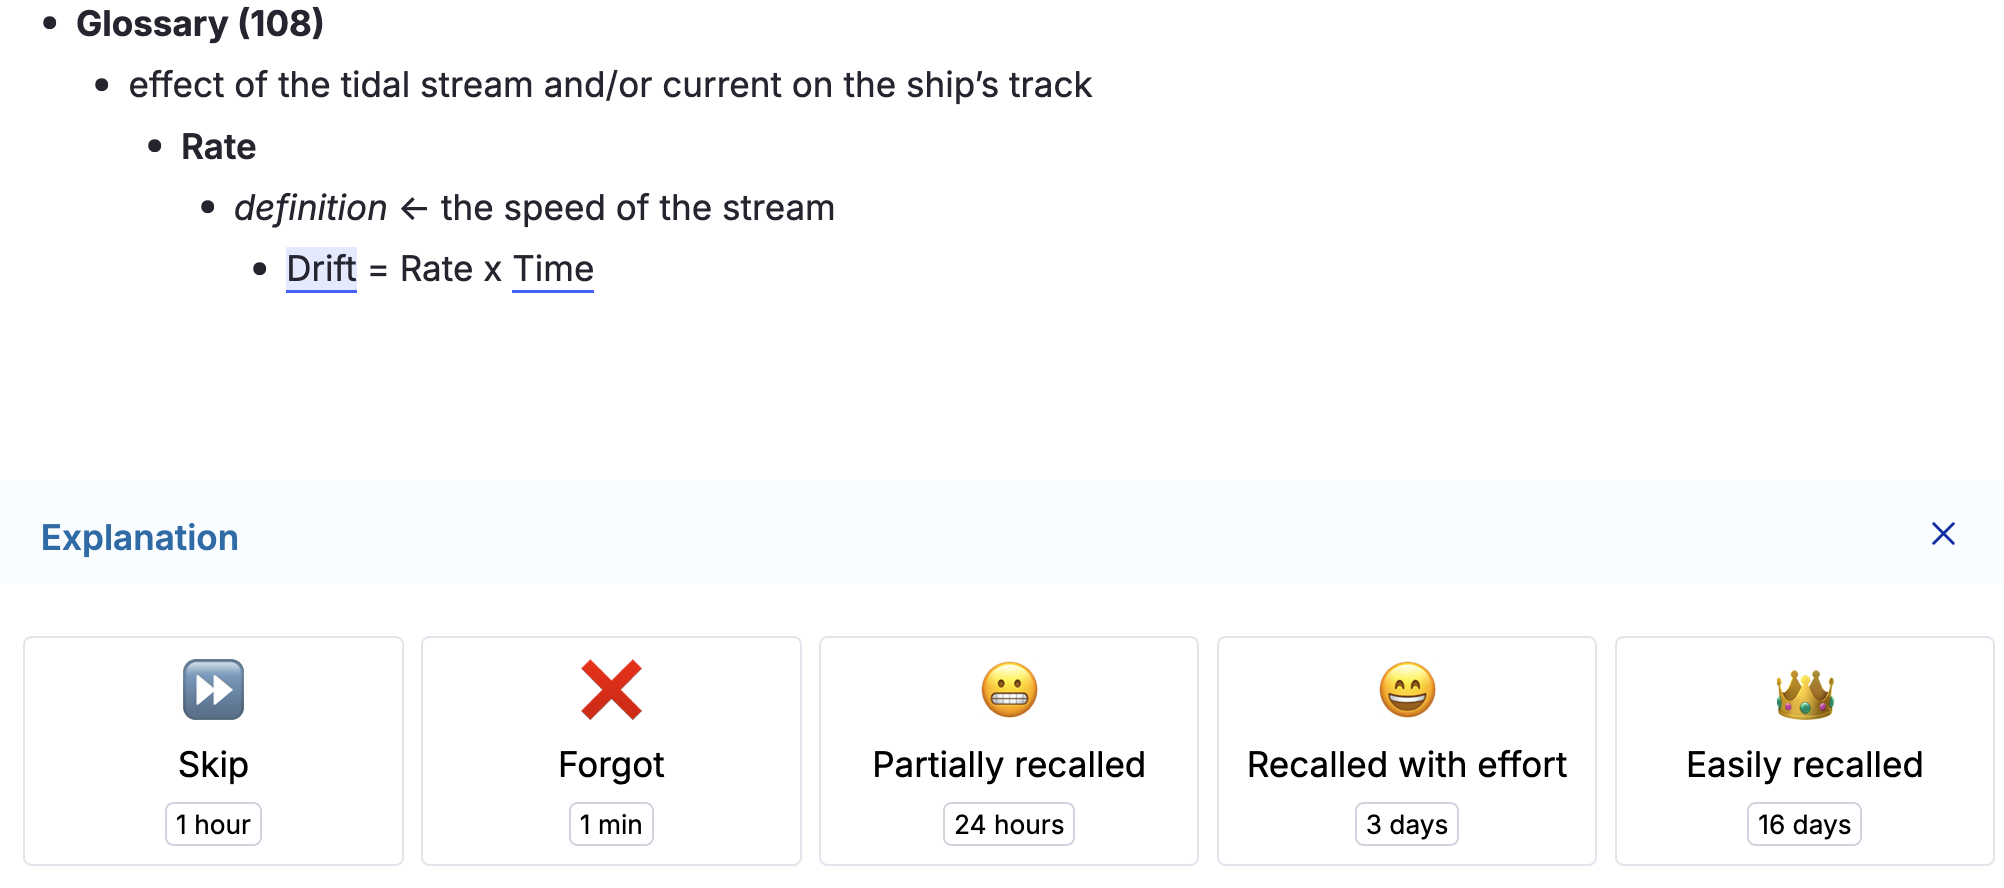
Tag any Rem with Hide in Queue (using the command). Its content will be replaced on the front of descendant flashcards with "Hidden in queue":
- The content of the tagged Rem is hidden, but the bullet point itself remains visible.
- Instead of the text, a ghosted/faded label saying "Hidden in queue" appears next to the bullet.
- Visual result: The user still sees the structural indentation and knows that something is there, but the actual information is obscured during the question phase. Good for hiding hints, spoilers, or context that would make retrieving the answer trivial.
Editor:

Queue:

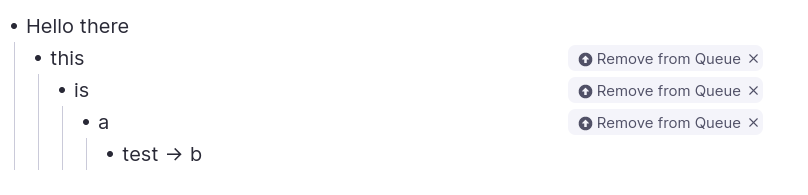
Tag any Rem with Remove from Queue (using the command). Its content will be completely removed from the flashcard's visual hierarchy of its descendants.
- Not only is the text gone, but any child Rems underneath it are pulled to the left, essentially collapsing the space.
- Visual result: It looks exactly as if that intermediate Rem never existed in your document hierarchy at all.
Editor:
Queue:
-
Hide in Queue (
hiq): content is hidden, but the bullet point structure remains visible with a "Hidden in queue" ghosted label. Use when you want to acknowledge the structural presence of a parent but obscure its text. -
Remove from Queue (
rfq): the Rem is completely removed from the visual hierarchy (display: none), and any children are shifted left to fill its space. Use to erase an intermediate parent level entirely as if it never existed.
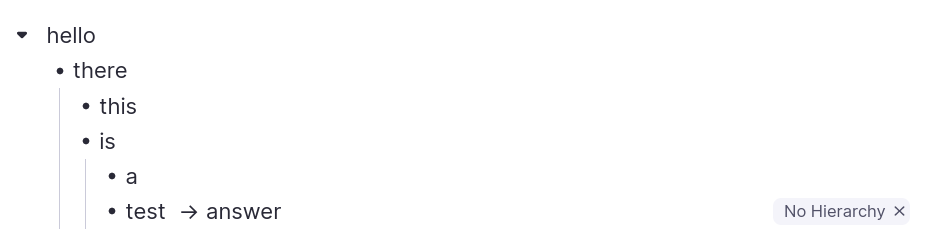
Tag any Rem with No Hierarchy (using the command). Any ancestors will be hidden on the front and back of the flashcard.
Editor:
Queue:
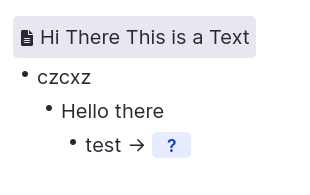
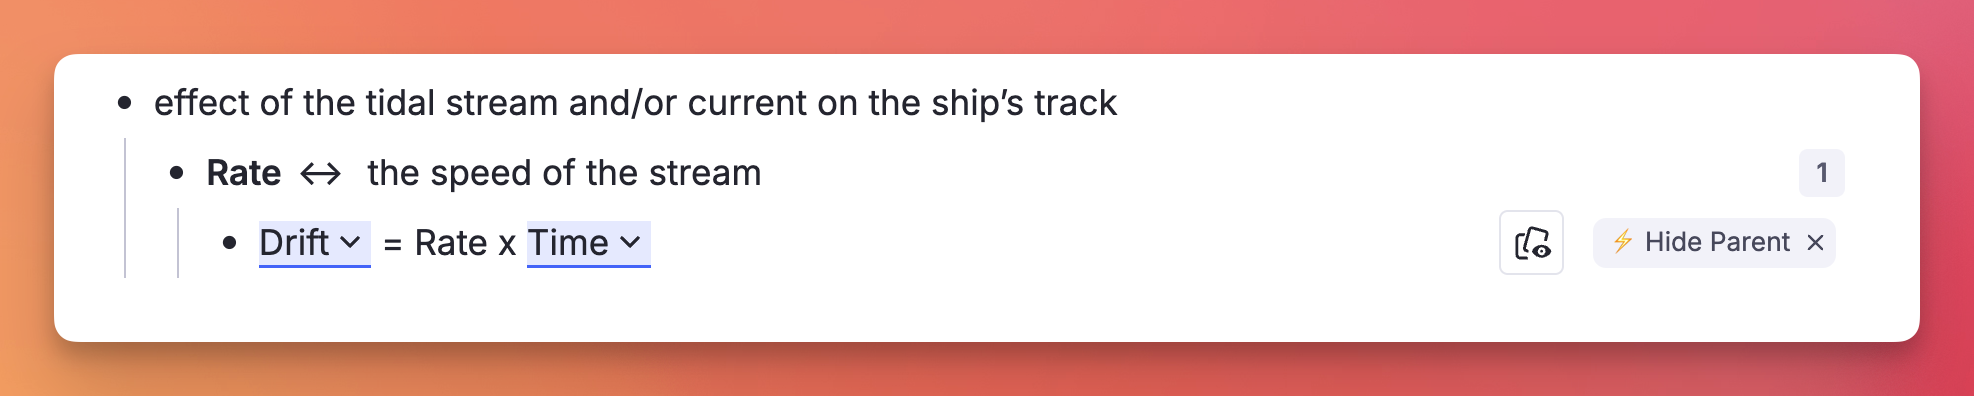
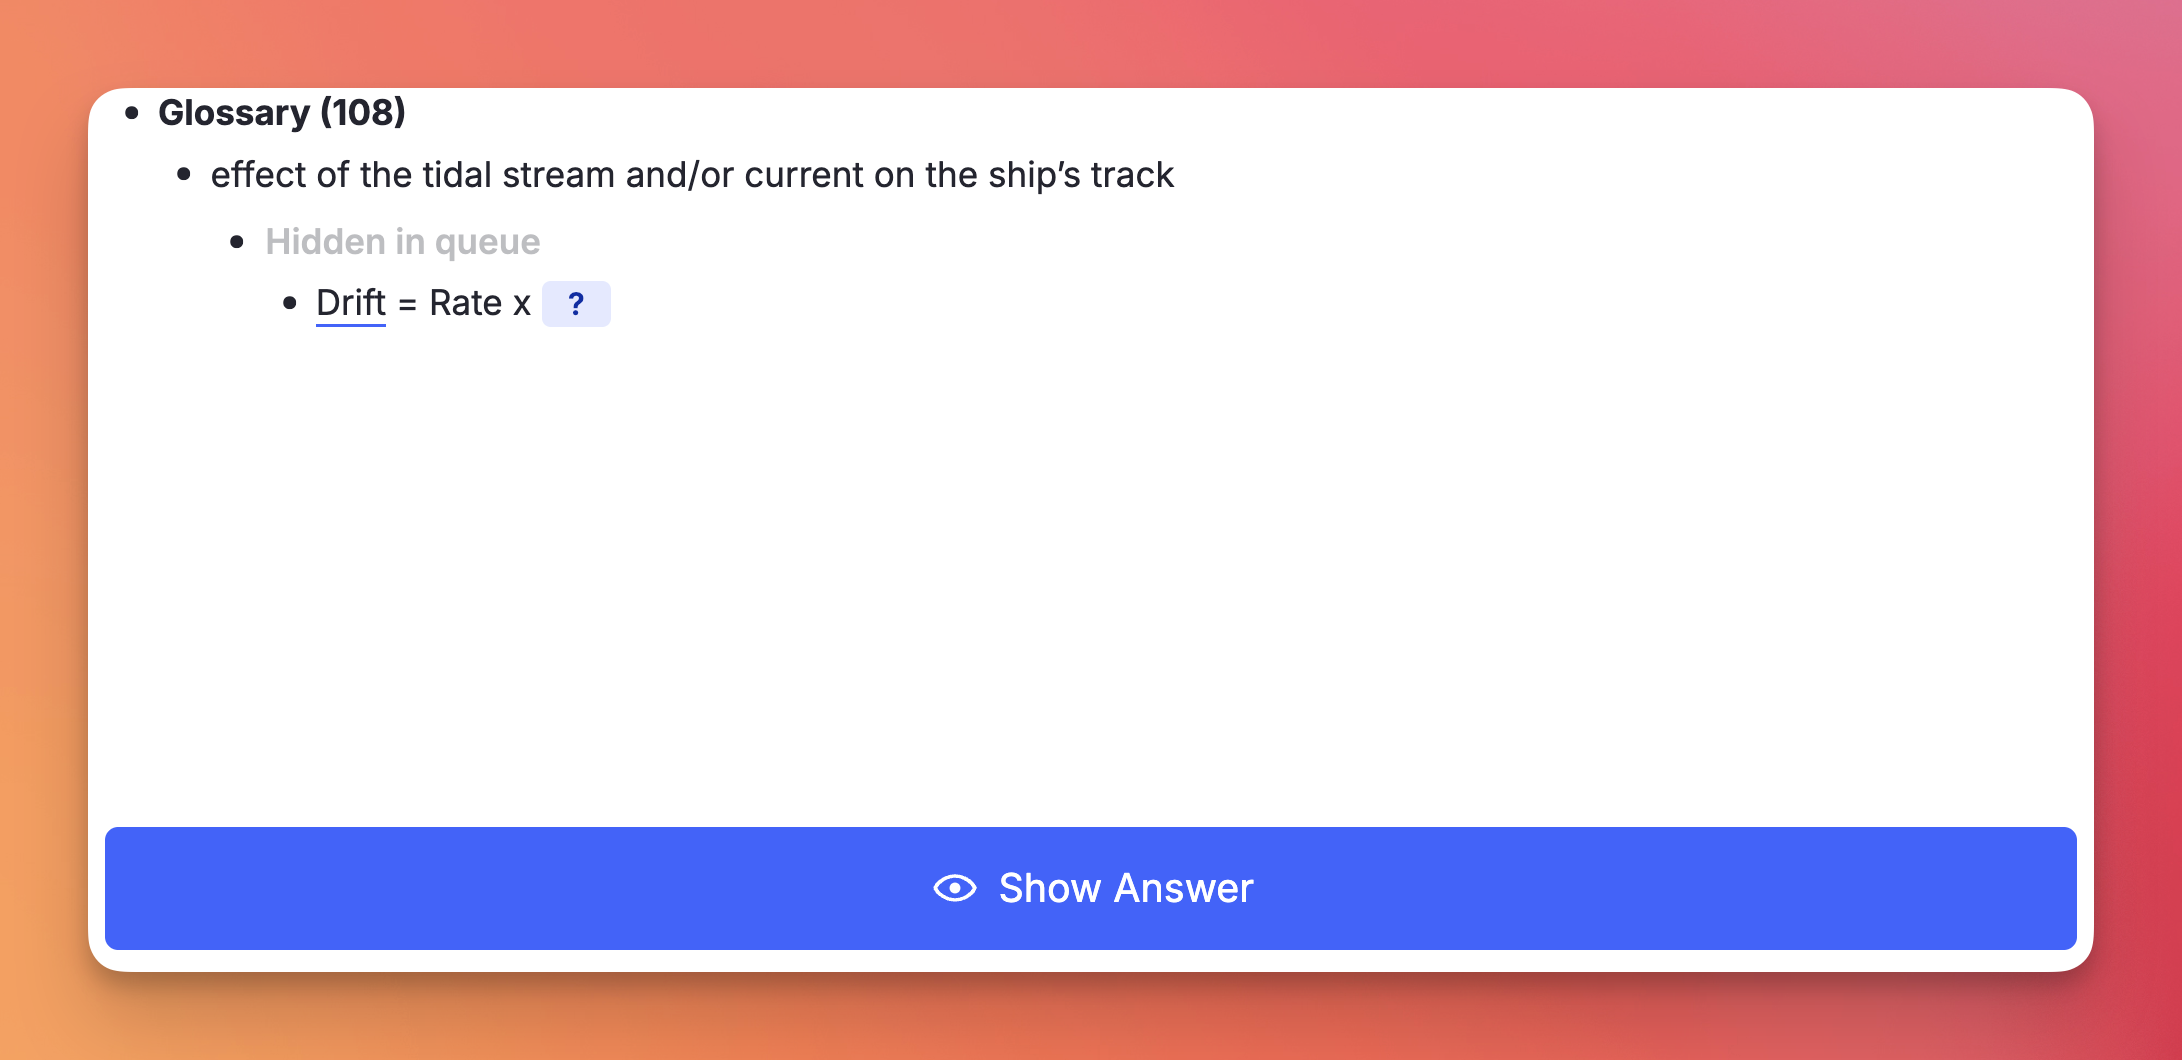
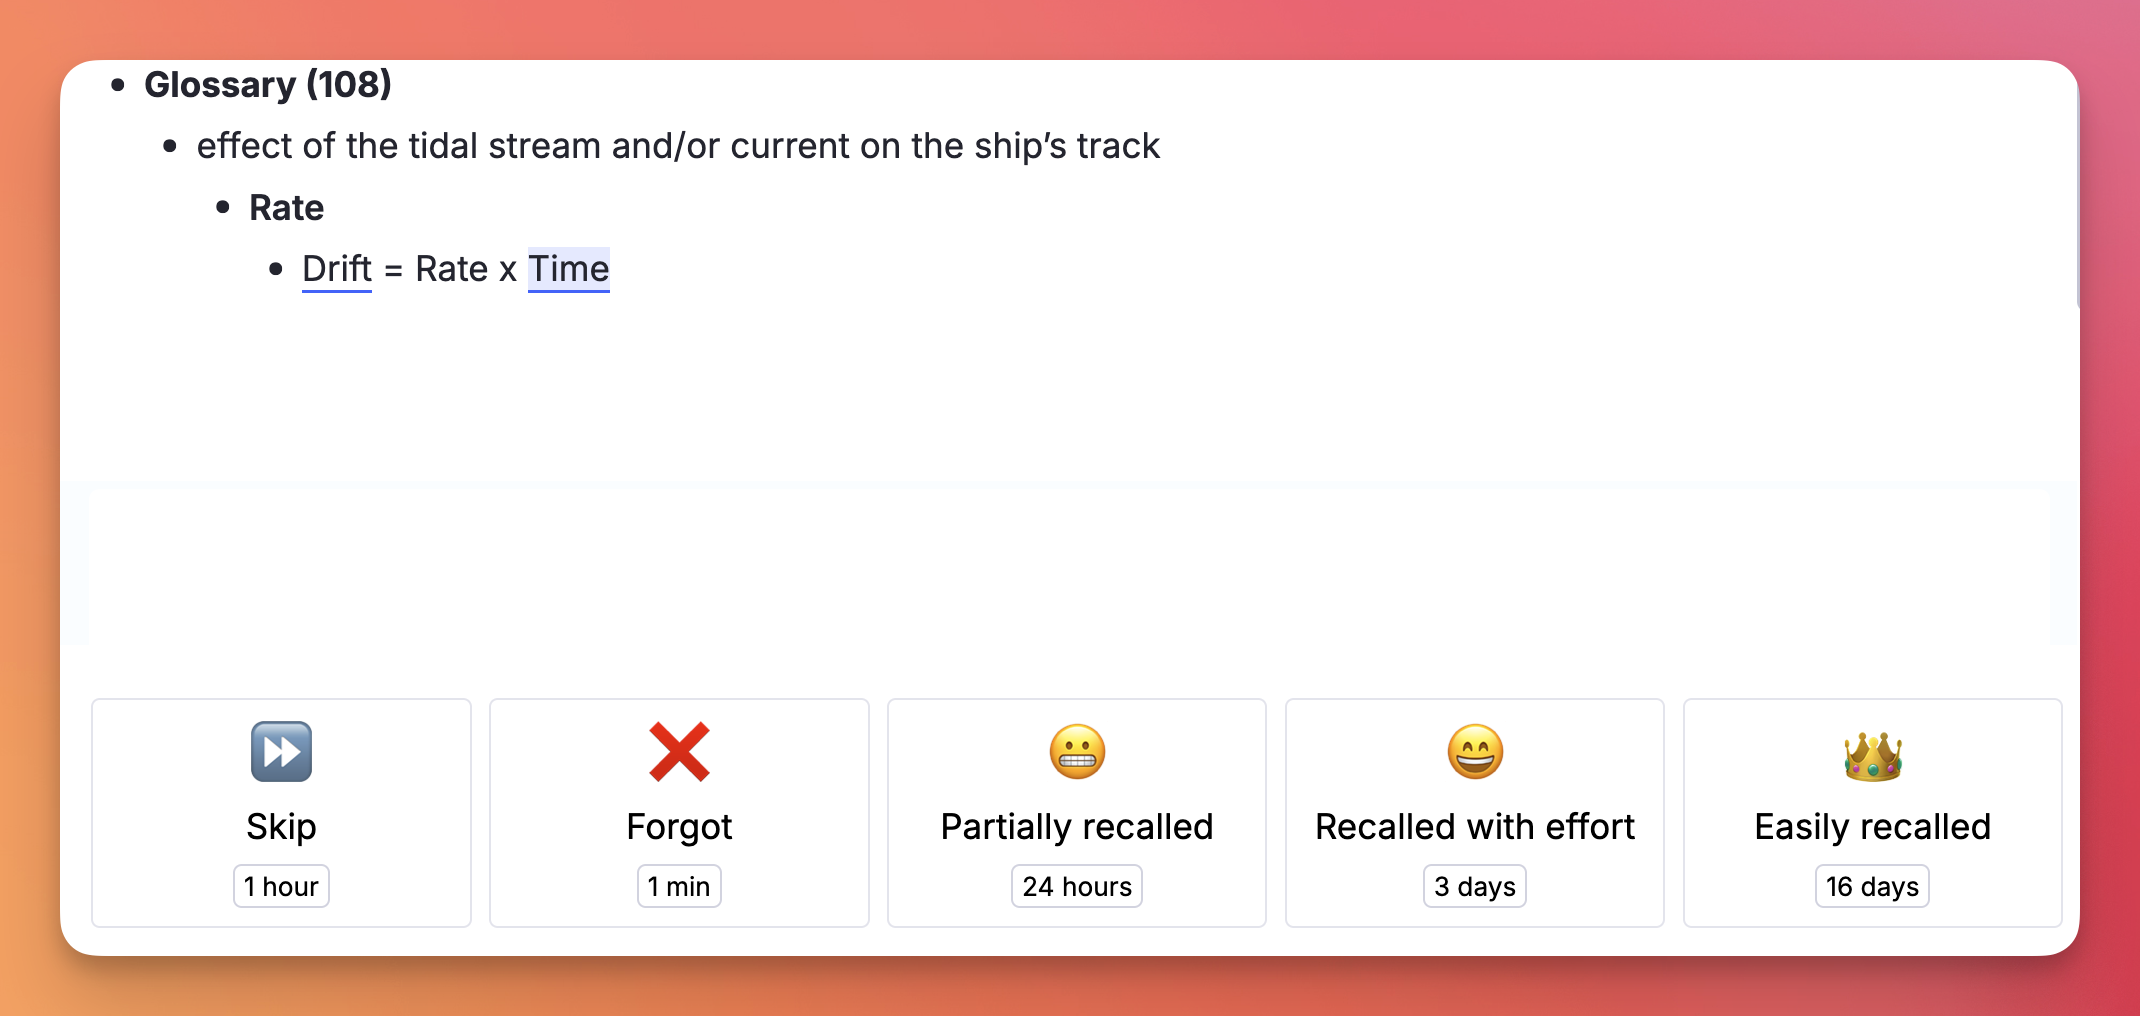
Tag any Rem with Hide Parent (using the command Hide Parent or /hp). Its immediate parent will be hidden on the front of the flashcard, but revealed on the back.
Similar to Hide in Queue, but instead of tagging the parent Rem, the user tags the specific flashcard Rem — so other flashcard descendants of the same parent Rem are not affected.
Editor:
Queue:
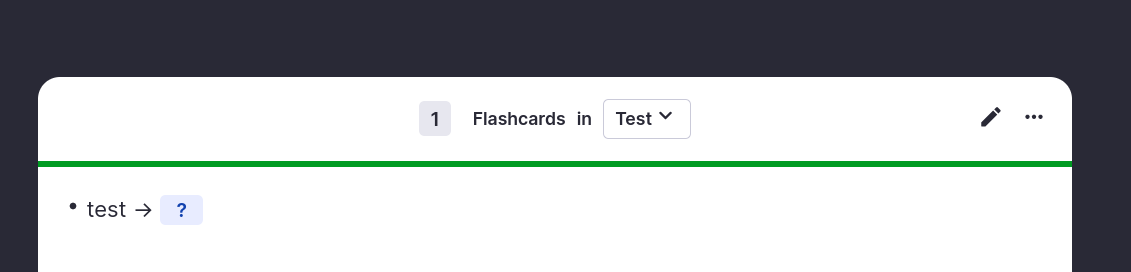
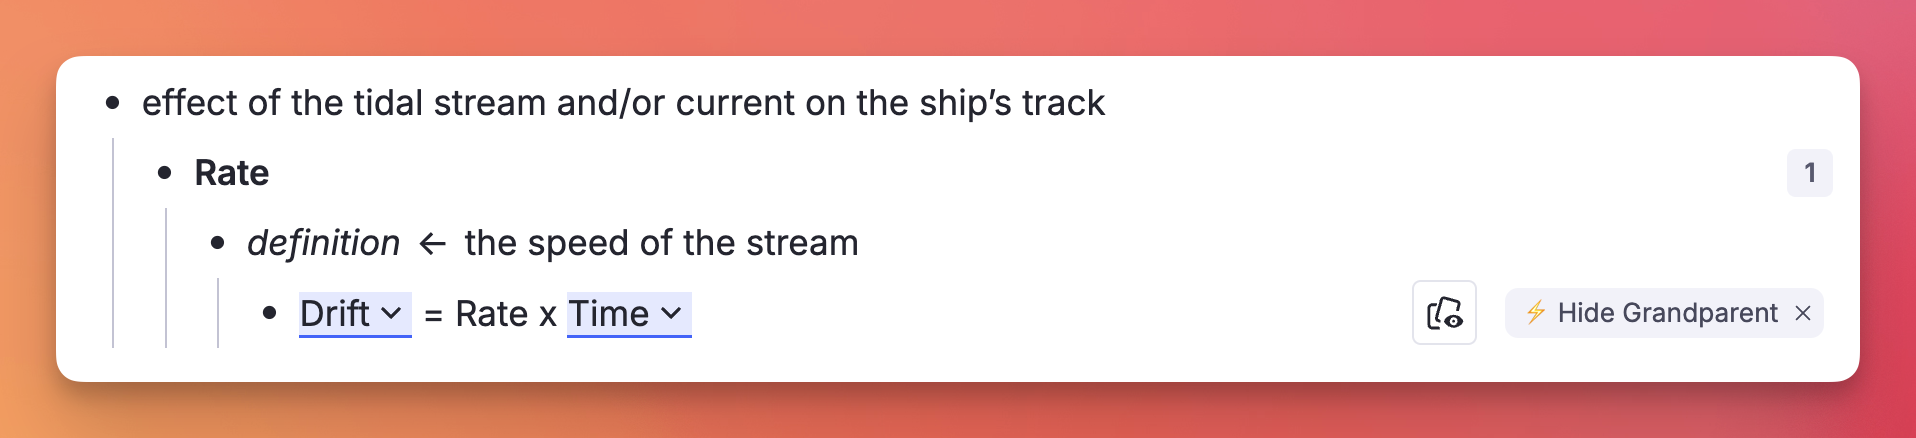
Tag any Rem with Hide Grandparent (using the command Hide Grandparent or /hgp). Its grandparent will be hidden on the front of the flashcard, but revealed on the back.
Editor:
Queue:
Like Hide Parent, but more aggressive: the immediate parent is completely removed from the queue display on both the front and back of the card — no "Hidden in queue" placeholder, no indented blank space.
The cloze creator (Alt+Z) applies this powerup automatically to the newly-created cloze Rem, so the source Rem isn't shown redundantly during review without also affecting other descendant flashcards (e.g. Descriptor children) that need the parent visible for context.
The extract creator (Alt+Shift+X) uses Remove Parent only as a fallback, when the Remove from Queue powerup isn't available. See Create Extract behavior below for the full rule.
You can also apply Remove Parent manually to any flashcard via the Remove Parent command or /rp.
Same as Remove Parent, but one level higher: the grandparent is fully removed from the queue display on both front and back of the card.
Apply via the Remove Grandparent command or /rgp.
When you create an Extract (Alt+Shift+X), the source Rem is automatically tagged so it doesn't show up redundantly during review of the extract. The plugin picks one of two strategies depending on what's available:
- Preferred path — Remove from Queue on the source. If the Remove from Queue powerup is registered (either via the Enable Hide-in-Queue powerups and commands setting above or via the standalone Hide in Queue plugin), it's applied directly to the source Rem. This survives extract relocation cleanly: if you later delete the source and let extracts stand on their own, the powerup goes with the source.
- Fallback path — Remove Parent on the extract. If Remove from Queue isn't registered (neither integration enabled nor standalone plugin installed), Remove Parent is applied to the extract instead. This works for normal review, but has a caveat: if you later move the extract under a different parent, that new parent will also be hidden. To recover, remove the powerup manually from the extract — or enable the Hide-in-Queue integration so future extracts land in the preferred path.
The cloze creator (Alt+Z) does not branch like this — it always applies Remove Parent to the newly-created cloze Rem, because clozes are tightly bound to their source via the pinned reference and aren't typically relocated independently.
All commands above can be triggered directly while reviewing a flashcard in the Queue, without needing to switch to the editor:
- No Hierarchy, Hide Parent, Hide Grandparent, Remove Parent, Remove Grandparent: automatically apply the powerup directly to the current card.
- Hide in Queue and Remove from Queue: since these are designed to be applied to parent/ancestor Rems rather than the flashcard itself (applying them to the current card would make the card vanish), triggering them in the queue opens a confirmation prompt offering to apply the powerup to the card's parent instead.
This incorportated utility cycles selected text through three case styles with a single shortcut — just like Shift+F3 in Microsoft Word.

Press Shift+F3 with text selected to cycle through:
| Step | Style | Example |
|---|---|---|
| 1st press | Title Case | Cyclone in Tropical Latitudes |
| 2nd press | UPPERCASE | CYCLONE IN TROPICAL LATITUDES |
| 3rd press | lowercase | cyclone in tropical latitudes |
The plugin auto-detects the current case of the selection and always advances to the next stage, so you never have to think about where you are in the cycle.
Title Case follows Chicago/APA style:
-
Always capitalised / Sempre maiúsculas:
- The first and last word of the selection.
- All nouns, verbs, adjectives and adverbs.
-
Kept lowercase / Mantidas em minúsculas (unless first or last word):
- Articles / Artigos: a, an, the · o, a, os, as, um, uma…
- Prepositions / Preposições: at, by, in, of, on, to, up, as, via · de, em, por, para, com, sem, sob, sobre…
- Conjunctions / Conjunções: and, or, nor, but, for, yet, so · e, ou, mas, nem, que, se, como, pois, logo…
- Portuguese contractions / Contrações portuguesas: do, da, dos, das, no, na, nos, nas, ao, aos, pelo, pela, pelos, pelas…
cyclone in tropical or subtropical latitudes→ Cyclone in Tropical or Subtropical Latitudes
princípios das radiocomunicações marítimas→ Princípios das Radiocomunicações Marítimas
- Formatting preserved / Formatação preservada: bold, italic, highlight and all other rich-text styles are kept intact through every transformation.
- Cross-element word boundaries / Palavras com formatação mista: words split across formatting runs (e.g. a bold first letter) are handled correctly — only the true first letter of each word is capitalised.
-
Multi-rem selections / Seleção de múltiplos rems: select one or more whole rems in the outline (instead of a text range) and
Shift+F3will cycle the case of each rem's text — and the back text of concept/descriptor rems — in a single shot. The current cycle stage is detected from the combined text of the batch so all rems advance together (Title → UPPER → lower), while Title Case is still computed per rem so each one's first/last-word rule is respected.
Re-nests a flat or mis-pasted document so that paragraphs and lower-level headings sit under their preceding higher-level heading. Built for the common case of pasting structured web content (with H1/H2/H3 headers) into RemNote, which often arrives either as a flat list of siblings or with mis-indented nesting (e.g. an H2 ending up under a paragraph instead of under its H1).

Run Restructure Outline by Headings (quick code roh) with one of the following selections:
- Single rem selected → operates on all descendants of that rem. The selected rem stays in place as the container root.
- Multiple rems selected (Shift+click in the outline) → operates on the selected rems plus all their descendants. The restructured subtree slots back into the selection's original position, preserving unselected sibling rems above and below it.
- No selection / cursor inside a rem → falls back to the focused rem and operates on its descendants (same as single-rem case).
The command is also fully Omnibar-friendly: press Cmd+/ → search roh → Enter, and the selection you had before opening the palette is preserved (see Omnibar Selection Recovery below).
A side-by-side popup opens before any change is applied:
- Left panel (Before): the current state of the selected subtree, exactly as it appears in RemNote.
- Right panel (After): the proposed restructured tree. Each row that would move is marked with an amber left-border and tinted background so you can scan at a glance what's changing.
Each rem row is labelled with a colored heading badge (H1 through H6) or a ¶ paragraph marker. The status bar at the top reports counts: "N headings · M paragraphs · K would move".
Non-heading rems that already have children (lists, sub-paragraphs, etc.) get an inline button in the After panel:
- ⏷ Preserve (default) — the rem keeps its existing children as an opaque subtree; they move with it when re-nested under a heading. Use this for legitimate nested content (e.g. bullet-list items that belong together).
- ⏵ Flatten — the rem's children are pulled into the candidate flow as independent items and get re-organized by the heading rules along with everything else. Use this for mis-pasted nesting where children ended up under a non-heading rem by accident.
Toggling this button re-runs the algorithm and re-renders the After tree in place, so you can experiment before committing.
- Apply (bottom-right): runs the reparenting and captures an undo snapshot.
- Cancel (or close the popup): no changes are made.
The restructure walks the candidate list in document order and tracks a heading stack:
- The smallest heading level present (e.g.
H2if there is noH1) becomes the implicit "top" — selections that don't start atH1are not broken. - Each heading
Hnpops the stack until the top has a strictly lower level, then becomes a child of that heading (or the container root if the stack is empty), and is pushed onto the stack. - Each paragraph attaches to whatever heading is currently on top of the stack (or the container root if no heading has been seen yet — "orphan paragraphs" before the first heading remain at the top level).
-
Heading level skips are handled: an
H1 → H3jump (noH2between) nests theH3directly under theH1.
All six RemNote heading levels are recognized: H1, H2, H3, H4, H5, H6.
After applying, an Outline Restructured notification appears in the sidebar (left side, in the SidebarEnd region) with the affected scope name, the count of moved rems, and a red Undo Restructure button.
- The Undo button restores every moved rem to its exact prior parent and position.
- The notification stays visible until you click Undo or dismiss it with
✕. - A second invocation is available as a command:
Revert Last Outline Restructure(quick coderolr) — identical effect, same single snapshot slot.
The snapshot is session-scoped and single-slot: starting a new restructure overwrites the previous undo. (Multi-step undo isn't supported; for that, rely on RemNote's native history.)
- No headings in the scope → the command shows the popup with an explanatory message ("no changes — no headings to anchor on") and disables the Apply button.
-
Powerup property rems (e.g. the auto-created
Sizerem RemNote attaches to every heading) are filtered out from both the walk and the preview, so they don't clutter the tree and aren't accidentally moved. - Portals, references, queries are treated as opaque paragraph candidates: they never get restructured internally and never get flattened.
Styles the selected rem(s) as one heading level deeper than their parent — a quick way to keep an outline's heading hierarchy consistent as you add content under an existing heading, without manually picking H1…H6 each time. If the parent is an H3, the selected rem becomes an H4; under an H4 it becomes H5, and so on, clamped at the deepest level RemNote supports.
It reuses the same heading detection and application logic as Restructure Outline by Headings, so it understands the full H1–H6 range — including H4/H5/H6, which RemNote stores in the Header powerup's Size slot rather than the H1–H3 font-size API.
Run Set Next Heading Level (quick code hn) with one of the following:
- One or more whole rems selected in the outline (Shift+click) → each selected rem is styled relative to its own parent.
- Cursor inside a rem (text selection or collapsed caret) → operates on that rem.
- No selection → falls back to the focused rem.
Like the other outline commands, it's Omnibar-friendly: Cmd+/ → search hn → Enter preserves the multi-rem selection you had before opening the palette (see Omnibar Selection Recovery).
For each target rem, the command looks at its parent's heading level:
-
Parent is a heading
Hn→ the rem is set toH(n+1). (AnH6parent keeps the child atH6— there's noH7.) - Parent is not a heading → see Grandparent fallback below.
- Neither parent nor grandparent is a heading (or the rem is top-level with no parent) → the rem is skipped, and a toast reports how many were skipped for lack of an ancestor heading.
If the immediate parent isn't a heading but the grandparent is, the command can't simply nest one level under a non-heading. Instead it offers to fix both levels at once via a confirmation dialog:
- Cancel → nothing changes.
-
OK → the parent is promoted to
H(n+1)and the selected rem toH(n+2), whereHnis the grandparent's level.
Example. Grandparent is
H2, parent is plain text, selected rem is plain text → on confirm, the parent becomesH3and the selected rem becomesH4.
When several rems are selected at once:
- Each rem with a heading parent is styled immediately (direct case).
- All grandparent-fallback cases are gathered and covered by a single confirmation dialog (not one prompt per rem). On confirm, every affected rem and its parent is styled; a parent shared by several selected siblings is promoted only once.
-
H4–H6 are fully supported on both detection and application — the command writes the deeper levels through the Header powerup's
Sizeslot, exactly as RemNote does internally. - Heading styling never aborts on a single failure: if applying a level throws, the command logs a warning and continues with the rest of the batch.
- A toast summarizes the result, e.g. "Set heading on 3 rem(s). 1 skipped (no ancestor heading)."
Turns a ready-made outline into a properly-leveled table of contents in one shot: select the rems and the command assigns heading levels (H1–H6) according to each rem's depth in the hierarchy, to a level range you choose (e.g. H1–H3, or H2–H4). Built for the moment when you've drafted the structure of a document as plain bullets and want it to look like a structured document without setting every heading by hand.
It shares its heading detection/application (and so the full H1–H6 range, including the H4/H5/H6 levels RemNote keeps in the Header powerup's Size slot) with Restructure Outline by Headings and Set Next Heading Level. Unlike Restructure, it never moves rems — it only changes their heading level.
Run Apply Heading Levels by Hierarchy (Table of Contents) (quick code htoc) with the outline rems selected:
- Select the outline's rems (Shift+click) — typically the whole subtree you want leveled. The selection is reduced to its forest roots (the topmost selected rems), which become the top level; everything beneath them is leveled by depth. Selecting a parent and its descendants is fine — the descendants aren't double-counted.
- Single rem / cursor inside a rem — that rem becomes the top level and its descendants are leveled beneath it.
- Omnibar-friendly (
Cmd+/→htoc), preserving the multi-rem selection (see Omnibar Selection Recovery).
You pick two bounds in the preview: a Top level and a Deepest level.
- The topmost selected rems get the Top level (e.g.
H1). - Each level deeper adds one (
H2,H3, …), up to the Deepest level. - Rems nested deeper than the range keep their current level — they're left untouched, not forced into a heading or stripped.
Example (Top = H1, Deepest = H3).
CAPÍTULO 1→H1, its1.1child →H2, the1.1.1grandchild →H3. Anything below that depth is left as-is.
Two companion commands shift the heading level of the selected subtree by one step. Because RemNote's outline selection reports only the top-level rems of a subtree, these (like the ToC command) walk the whole selected subtree and shift every heading within it; non-heading rems inside the subtree are left untouched (there's nothing to shift):
-
Demote Heading Level (one level deeper)(quickhdmt) —H2 → H3(bigger H number, visually smaller). -
Promote Heading Level (one level shallower)(quickhpmt) —H2 → H1.
Levels are clamped to H1–H6. These open the same preview as the ToC command.
Both flows open a side-by-side Before | After popup before anything changes:
-
Before shows each rem with its current level badge (
H1–H6, or¶for a paragraph). -
After shows the proposed result; rows whose level changes are marked with an amber border and an
old → newbadge transition. - The ToC variant adds Top level / Deepest level dropdowns that re-derive the preview live. The status bar reports "N of M rems would change".
- Apply commits the level changes; Cancel (or closing the popup) makes none. Apply is disabled when nothing would change.
After applying, a Heading Levels Applied banner appears in the sidebar (SidebarEnd) with the count of changed rems and a red Undo Heading Changes button that restores every rem's prior level (including reverting rems back to plain paragraphs). It uses its own snapshot slot, separate from the Restructure undo, so the two banners never clobber each other. The same revert is available as the Revert Last Heading Level Change command (quick code rlh). Single-slot and session-scoped: a new apply overwrites the previous undo.
-
Full H1–H6, on both detection and application — deeper levels are written through the Header powerup's
Sizeslot, exactly as RemNote does internally. - Never reparents. Only the heading level changes; the outline's structure (parents, positions) is untouched.
- The quick code is
htoc(nottoc, which is RemNote's built-in Table of Contents reference).
Toggles a • (bullet glyph + space) prefix at the start of each line within a single rem, across a multi-line selection. Built for the common case where a PDF highlight flattens a real bullet list into soft-wrapped text — RemNote keeps the visual lines inside one rem (joined by Shift+Enter soft line breaks) but drops the original bullet markers. Re-adding • by hand at every line start is tedious, especially when you're prepping a highlight to become an Incremental Rem.

Run Bulletize Inline Selected Text (quick code bul) or press Ctrl+Opt+Shift+8 / Ctrl+Alt+Shift+8.
The default binding is
Ctrl+Opt+Shift+8because plainer combos collide with glyphs on macOS —Opt+8types the•glyph itself andOpt+Shift+8types the degree symbol (°) — whileCtrl/Cmd+Shift+8is the "bulleted list" shortcut in Google Docs and Word, so this is the natural analog that avoids both. You can rebind it in RemNote's keyboard-shortcut settings.
It is a toggle, evaluated over the lines your selection touches:
- If every non-empty selected line already starts with
•, the prefix is stripped from all of them. - Otherwise,
•is added to the selected lines that don't already have it (lines already bulleted are left as-is, so you never get a double bullet).
Empty lines (e.g. the blank line a \n\n produces between a heading and its list) are skipped.
- Multi-line text selection → operates on every line the selection intersects. A partial selection still bulletizes whole lines: the start is expanded back to the beginning of its line, so you don't have to select from the exact line start.
- Collapsed cursor (no selection) or a whole-rem selection → bulletizes the rem's entire front text in one shot. Handy for "bulletize this whole rem" — click into it and hit the shortcut.
Before (one rem, soft line breaks; the first four lines were bulleted manually, the rest weren't):
a. Engine characteristics

• Type of engine and its BHP.
• Type of propeller – RH, LH or CPP.
• Critical RPM,
• Minimum number of consecutive start,
Astern power is %age of ahead power
Emergency full ahead to full astern time
...
RPM indicators in the bridge and outside bridge.
Select the list and press Ctrl+Opt+Shift+8 → the un-bulleted lines gain • , so the whole list is uniform. Press it again on the same selection → all bullets are stripped.
-
Formatting preserved. The toggle rebuilds the rem's rich text by character offset, so highlights, colors, bold/italic, references and other inline nodes are left intact. The bullet itself is inserted as a plain node, so on a PDF-highlight rem (where the line text is highlighted yellow) the
•glyph is not highlighted. If you'd prefer the bullet to match the line's highlight/color, that's a small change — open an issue. - Front text only for the whole-rem gesture. A multi-line selection works in either the front or the back text (the plugin detects which contains the selection), but the collapsed-cursor "bulletize the whole rem" path acts on the front text.
-
Why
•and not a native bullet: native RemNote bullets require separate rems. Inside a single rem (which is what a PDF highlight produces), the only way to simulate a list is the literal•prefix on each soft-wrapped line — which is exactly what this command automates.
A floating picker that finds a Rem by name even when RemNote's own reference search can't, then either inserts a reference to it at your cursor or opens it in a new pane. Built for the frustrating case where a perfectly normal Rem — even a Concept referenced dozens of times — simply never appears when you type its name in the [[ reference search.
Run Find Rem (insert reference / open in pane) (quick code fir) or press Opt+Shift+F / Alt+Shift+F. A compact box opens at your cursor.
-
Type a name → results appear as you type, with the best matches floated to the top (an
EXACTbadge marks an exact-name match). Each row shows the Rem's type badge, its back text (the definition side of a Concept↔definition card), and a short breadcrumb (root / … / parent) so you can tell which document it lives in when names collide. - Enter or click → inserts a reference to the selected Rem at your cursor.
- Ctrl+Enter / Cmd+Enter or Ctrl/Cmd+click → inserts the reference as a pin (the link chip without the referenced text). See Insert as a pin below.
- Shift+Enter or Shift+click → opens the selected Rem in a new pane beside your current one (without inserting anything).
- ↑/↓ navigate · Esc closes.
- Concepts only checkbox narrows results to Concept-type Rems.
RemNote's reference search builds its candidate list per token, with a cap. When every word in a Rem's name is high-frequency in your knowledge base (e.g. Navegação Interior, mar territorial — where both navegação/interior and mar/territorial appear in hundreds of Rems), the exact-name Concept never makes any token's candidate cut, so typing its full name returns a flood of partial matches but not the Rem itself. This is a property of the search ranking — not a corruption of the Rem — so "Reload Search Cache", retyping the name, or changing its type do not fix it. (You can confirm all of this on a specific Rem with the Search / Linkage Diagnostics tool in the Debug Widget.)
This picker sidesteps the limitation: it searches each word of your query separately, unions the results, keeps only the Rems whose name contains all your words, and floats exact-name matches to the top. Because a distinctive word (e.g. interior) does return the Rem, it reliably surfaces — then ranking puts the exact match first.
-
When RemNote's
[[search won't find a Rem you know exists (common-word names, heavily-referenced Concepts). UseOpt+Shift+Finstead of[[to insert the reference. - To open an "invisible" Rem. Shift+Enter / Shift+click jumps to the Rem in a new pane — the practical way to reach Rems the normal search buries.
- To reference a Rem inside a cloze deletion (see below).
A pin is a Rem reference that renders as just the link chip without the referenced Rem's text. In native RemNote, creating one is fiddly: you insert the reference with [[, then right-click it → Edit or Add Alias, clear the text, and press Enter. This picker does it in one keystroke — press Ctrl+Enter / Cmd+Enter (or Ctrl/Cmd+click a result) instead of plain Enter, and the reference is inserted with pin: true.
Pins are cloze-aware and selection-aware just like normal references: inside a cloze the pin stays inside the cloze, and a pin can replace selected text.
Both RemNote's native [[ and this picker would normally break a cloze deletion if you inserted a reference inside it — the new reference would land outside the cloze. This picker is cloze-aware: when your cursor (or selected text) sits inside a cloze, the inserted reference is stamped with that cloze's id, so it stays inside the cloze instead of splitting it.
-
Accent/diacritic-insensitive: typing
navegacao interiormatchesNavegação Interior. -
Selected text seeds the search: if you select text before invoking, the box opens pre-filled with it (and selected, so you can refine or overwrite). On insert, the selected text is replaced by the reference — exactly like RemNote's
[[behaviour where selected text becomes the link.
The reference is inserted into the editor that was focused when you opened the picker. In the rare case RemNote has no active editor caret at insertion time, the picker copies the reference to your clipboard instead and tells you to paste it.
Opens the PDF or web article behind a reference pin without leaving the queue. Built for the moment in review when a flashcard (or any Rem) carries a pin to a PDF highlight and you want to glance at the surrounding source — clicking the pin directly navigates away and tears down the queue (you lose your position and the ability to rate the card). This shows the source on top of (or beside) the queue instead, so you read it and dismiss it without interrupting the session.
It comes in two variants — a centered modal popup and a non-blocking floating window — that share the same reader; pick whichever fits the moment.
Both are triggered the same way — hover the reference pin, then press a shortcut — and both only act on genuine Reader sources (see What it opens).
| Modal popup | Floating window | |
|---|---|---|
| Command | Open Hovered Source in Popup |
Open Hovered Source in Floating Window |
| Shortcut | Opt+O / Alt+O |
Opt+Shift+O / Alt+Shift+O |
| Placement | Centered, large | Right portion of the screen (≈48% width) |
| Blocks the UI behind it | Yes — a backdrop covers/dims the card | No — the card/editor stays visible beside it |
| Best for | "Open → read → close → rate" in one focused glance | Peeking back and forth between source and card without close/reopen |
| Closes on |
✕, Esc, or clicking outside |
✕, Esc, or advancing to the next card (does not close on outside click, so you can highlight/select in the PDF) |
Why hover + a shortcut, instead of right-click? RemNote exposes a hover event for references to plugins but no right-click/context-menu event, and the plain left-click navigation can't be intercepted. So the queue-safe path is: hover to identify the reference, then a shortcut you own to open it. The plugin tracks only the last-hovered reference and resolves it when you press the key.
- Hover the reference pin (the link chip) you want to open. Hovering is the signal the plugin listens to — no click needed.
- With the pin still hovered, press
Opt+Ofor the modal popup, orOpt+Shift+Ofor the floating window. - The source renders inside RemNote's own PDF/web reader. The queue stays live; close it to return exactly where you were.
The command inspects the hovered reference's target and only acts on Reader sources (identical for both variants):
| Hovered reference points to… | Behavior |
|---|---|
| PDF highlight | Opens the host PDF and auto-scrolls to the highlight |
| HTML / web-article highlight | Opens the article (Reader Mode) at the highlight |
| PDF source document (the uploaded file Rem) | Opens the PDF at the top |
| HTML source (a non-YouTube Link Rem) | Opens the article |
| A plain Rem (no PDF/HTML source) | Nothing happens — you get a toast and default behavior is left untouched |
So you can hover any pin and press the shortcut safely; only genuine sources open a viewer.
For PDF/HTML highlights, the viewer auto-scrolls to the highlighted passage once the reader finishes mounting (the embedded PDF engine takes a few seconds to initialize, so the scroll is retried a few times). If you then scroll around the document and want to jump back, click the 🔖 Scroll to Highlight button in the header to re-center on the highlight at any time.
The floating variant is designed so the source sits beside your card while you study, which is why it behaves a little differently from the modal:
- Stays open while you use the PDF. Unlike a modal, clicking into the reader to highlight, select text, or click existing highlights will not dismiss it.
- Closes itself when you advance the card, so a previous card's source never lingers over the next one.
-
Esc closes it — without closing the queue. The plugin "steals" the Esc key while the float is open, so RemNote's queue doesn't act on it; Esc closes the float instead. (When focus is inside the PDF itself, the browser handles Esc within the reader; use the
✕button there.) - Not user-resizable. RemNote floating widgets have a fixed registered size; the window opens at ≈48% of the screen width on the right.
- Mid-review context check. While rating a flashcard that references a PDF highlight, open the source to re-read the paragraph it came from — then close and rate, without losing your queue position. (Modal is ideal for a quick look; floating if you need to glance repeatedly.)
- "What was I trying to recall?" Keep the floating window open beside the card so you can look from the source back to the card and forth, without the close/reopen churn a modal forces.
- Reviewing extracts and clozes that carry a bridging pin back to the original PDF source — see the figure or surrounding text without navigating into the document.
- Any pin to a long source where the inline hover-preview is too small but opening the full document in a pane is too disruptive.
Implemented as the Source Popup widgets — modal and floating — triggered by the Open Hovered Source in Popup / Floating Window commands. The default shortcuts
Opt+OandOpt+Shift+Ocan be rebound in RemNote's keyboard settings.
Internally, the plugin runs a small editor-selection cache so that commands invoked via the Cmd+/ Omnibar can still access the multi-rem selection you had before opening the palette. (Without this, RemNote blurs the editor when the Omnibar opens, and a plugin command's getSelection() call comes back empty — Add Tag-style internal commands sidestep this by capturing the selection synchronously when the palette opens, but plugins have no equivalent hook.)
Commands that benefit from this recovery:
-
Make Incremental (Extract) / Extract with Priority — multi-rem
Make Incrementalworks fromCmd+/. -
Dismiss Incremental Rem — multi-rem dismissal works from
Cmd+/. -
Paste Rem Sources — pasting onto multiple target rems works from
Cmd+/. -
Text Case Converter — multi-rem case cycling works from
Cmd+/. -
Restructure Outline by Headings — multi-rem restructure works from
Cmd+/.
The cache has a 30-second TTL and is only written on positive selection events, so opening the Omnibar (which fires a clear-selection event) doesn't wipe what you just selected.