This repository is an effort to get other engineers / tinkerers / humans up-and-going with Raspberry Pi Pico boards.
After using them in a few hardware projects, I am convinced that anyone who finds writing software that interacts with hardware in the real world fascinating needs to know that these cheap little microcontrollers are a tool they should have in their belt.
As with most engineering, there are several different ways to get to the same end result. I am sharing the specific path I have gone down and am really enjoying, as an entrypoint into this kind of tinkering for others.
- Exercise 0
- Get your local environment setup
- Get your Pico configured
- Run a tiny script to print the serial number for your board
- Exercise 1
- Wire in a single LED
- Light up the LED with code
- Exercise 2
- Wire in a button to your breadboard
- Use the button to execute code when pressed
- Exercise 3
- Wire in a rotary encoder
- Use the rotary encoder to increment and decrement a value in code
- Exercise 4
- Combine the button, rotary encoder, and LED to dynamically blink the LED
- Exercise 5
- Wire in a second LED
- Use the rotary encoder to change the brightness of the new LED
- Exercise 6
- Explore some of the functionality of the Maker Pi Pico
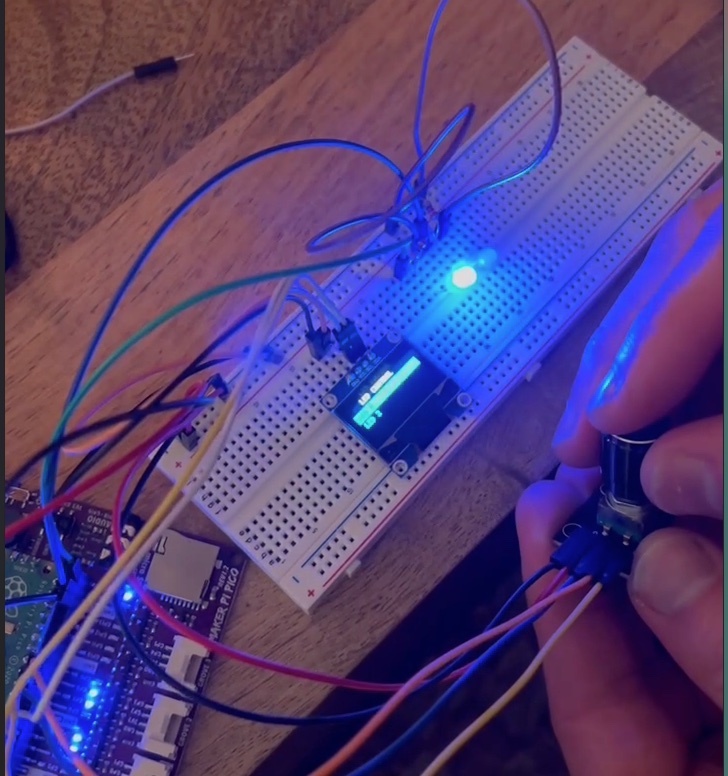
- Exercise 7
- Wire in an OLED display
- Render text to the new display
- Exercise 8
- Combine all of the learnings to dynamically light the two LEDs via an interactive menu
While you are searching around for documentation for some of the things covered in this project, you'll either find them for MicroPython or CircuitPython. CircuitPython is a fork of MicroPython which changes a small amount of things and adds some useful helpers. The full story is here.
Please be aware as you work with your Pico that some MicroPython code you find in your searching won't work when run through CircuitPython, which can make for some confusing debugging. With some wrangling, you should be able to get almost any MicroPython code to work with CircuitPython.
Before getting started, you'll need to secure all of the materials listed out below. I am listing out my favorite places to purchase these, but you can get them from anywhere as long as you confirm they are the same or very similar. You may even need to do that, if the links die or you run into inventory issues. That said, you'll need:
- 220Ω Resistors, from Adafruit.
- [Optional, but strongly encouraged] A Maker Pi Pico, available at Adafruit
- Think of this board like a socket for your Pico. It has some real quality of life value-adds and neat functionality, and I can't overstate how great these things are for prototyping.
- Long Breadboard, available at Adafruit
- Raspberry Pi Pico, available at Adafruit. For convenience you probably want to buy one with headers already soldered on, but you absolutely can buy one without headers and solder them on yourself.
- Jumper Wires (two sets, notice the difference in the connectors), one of these from Adafruit and these from Adafruit.
- Rotary Encoder, available at Micro Center
- OLED Display, available at Amazon
- I'd prefer not to support Amazon, but they have the screen I use in this project, and I quite like this specific one. Of you'd like to shop elsewhere, you can purchase this one from Adafruit (make sure to grab the suggested connector cable). Please note that the Adafruit screen does not have the dual monochromatic sections, see exercise 7 for more details on that.
- LEDs, available at Amazon
- Mostly any LED will work, and you only will need two.