Repository navigation
Boards
The box needs two radios in one chip, Wi-Fi to reach Home Assistant and Bluetooth to reach the lights, and room for the Bluetooth mesh stack beside two copies of the firmware so that updates can roll back. Two Espressif chips fit: the ESP32-S3 and the ESP32-C6. So the requirement is an ESP32-S3 or ESP32-C6 board with 8 MB of flash or more and the chip's native USB port brought out to a connector, which is what the flasher page talks to. PSRAM is not needed; a board that has it leaves it unused.
The flasher page carries two firmware images, one for every ESP32-S3 board and one for the ESP32-C6, and picks the right one from the chip it finds on the port. You never choose.
Each of these has run the whole path, flashed from the flasher page by someone who had never seen it before that week, joined Wi-Fi from the page, imported fixtures and driven a light from Home Assistant.
| Board | Chip | Flash / PSRAM | Port to use | Install mode | Notes | Buy |
|---|---|---|---|---|---|---|
| M5Stack ATOMS3 Lite | S3 | 8 MB / none | its one USB-C port | hold the side button about two seconds until the LED turns green; a short press is reset | Enclosed, one button, 24 × 24 × 13 mm. The author's production box. The top face is the user button, not BOOT. | Amazon |
| Seeed XIAO ESP32S3 | S3 | 8 MB / 8 MB | its one USB-C port | hold B, tap R | The smallest board here, and the only one with an external antenna: snap it on before you start, the board has none of its own. Bare board, no case. | Amazon (its listing's memory figures are garbled; it is the 8 MB board), or a 3-pack, which at the time of writing cost little more than two singles: the way to get a spare |
| ESP32-S3 N16R8 devkit (HiLetgo and the many identical ones) | S3 | 16 MB / 8 MB | USB, not COM | hold BOOT, tap RST | The classic two-port devkit. The extra flash and PSRAM go unused. Its on-board RGB LED is left off by the firmware. | Amazon |
| Freenove ESP32-S3-WROOM (N8R8) | S3 | 8 MB / 8 MB | USB-OTG, not USB-UART | hold BOOT, tap RESET | Fresh out of the bag the OTG port is silent until you put the board in install mode, which is why that step comes first. The UART port can flash it but can never show the Wi-Fi step. | Amazon |
| Waveshare ESP32-C6 dev kit (N8) | C6 | 8 MB / none | its one USB-C port | hold BOOT, tap RESET | The other chip family; the page picks the C6 image for it. One port, so nothing to get wrong there. | Amazon |
Which one? The ATOMS3 Lite if you want something you can put on a shelf and forget: it is enclosed and tiny. The XIAO if the box will sit far from the lights and you want an antenna. The devkits if you already have one in a drawer.
The buttons and ports named in the table, on the boards themselves.
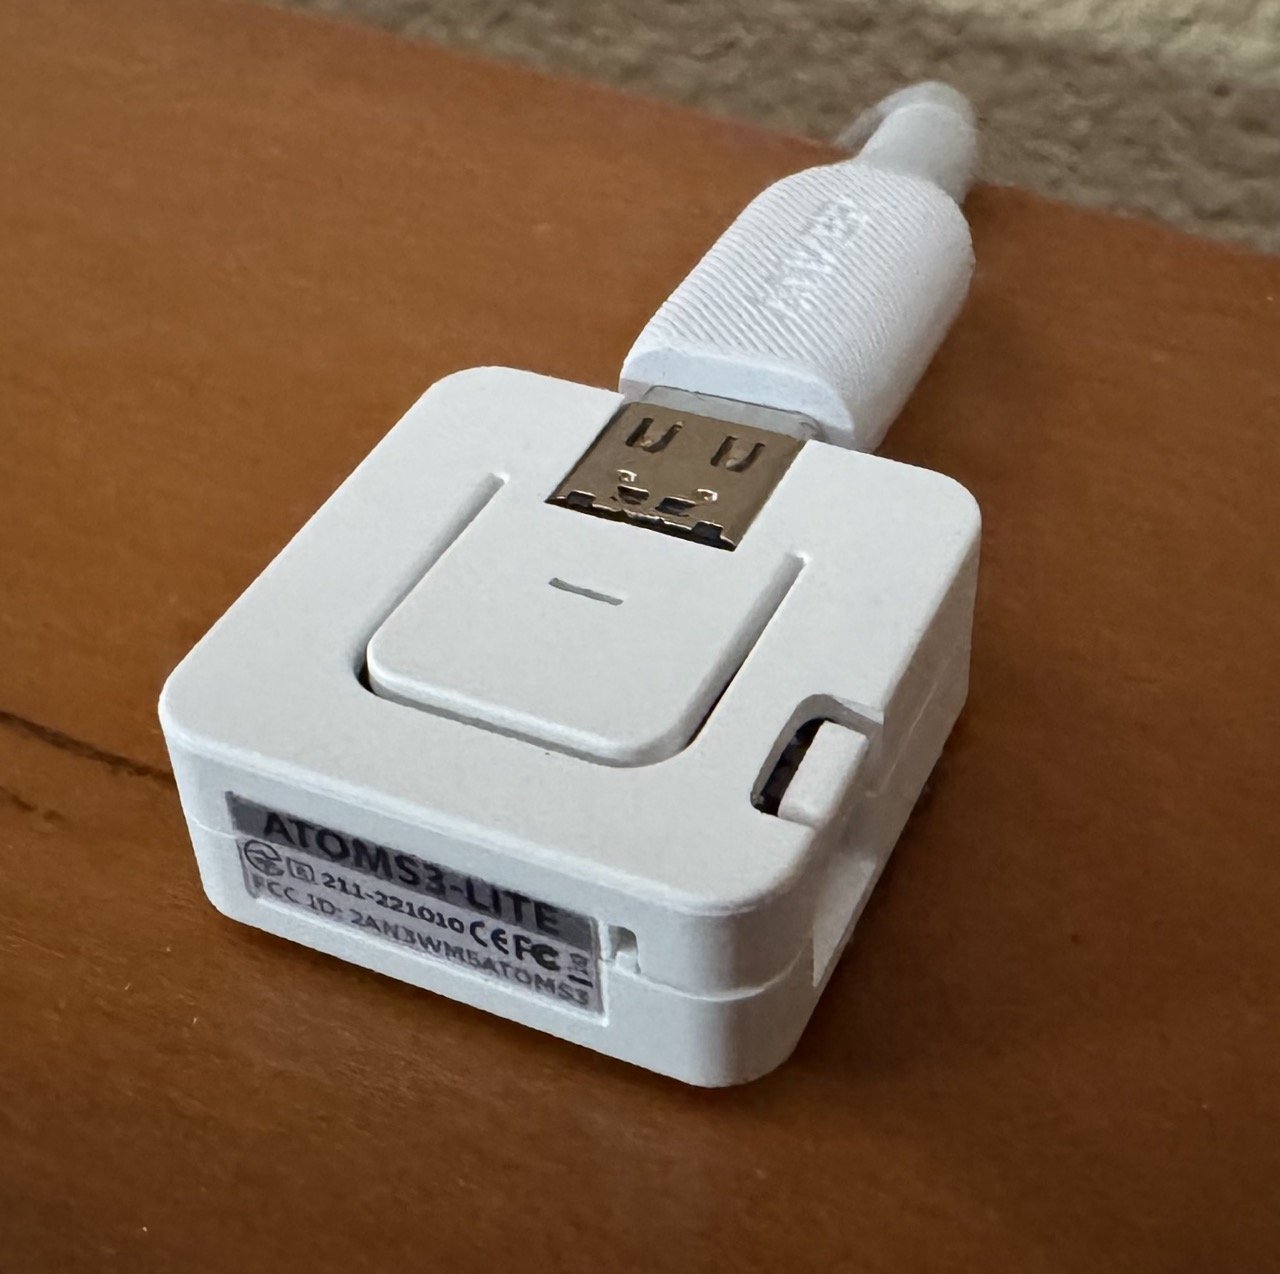
The USB-C port is on the end. The large top face is a user button that amble-home does not use. The small button on the side, next to the port, is the one that matters: hold it for about two seconds until the LED turns green for install mode; a short press is reset.

USB-C at the top, with the two tiny buttons beside it: R (reset) on the left and B (boot) on the right. The gold socket at the bottom edge takes the antenna.

The antenna that comes in the box clips onto that socket. The board has no antenna of its own, so snap it on before the first flash.
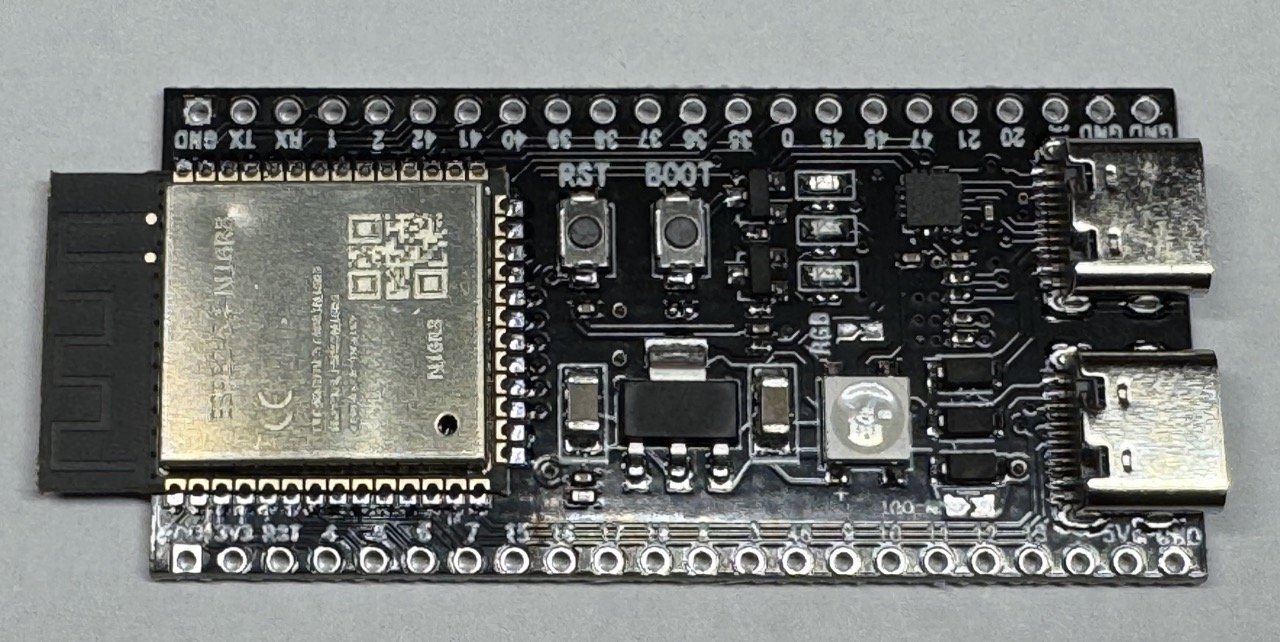
RST and BOOT sit beside the module; the two USB-C ports are at the other end.
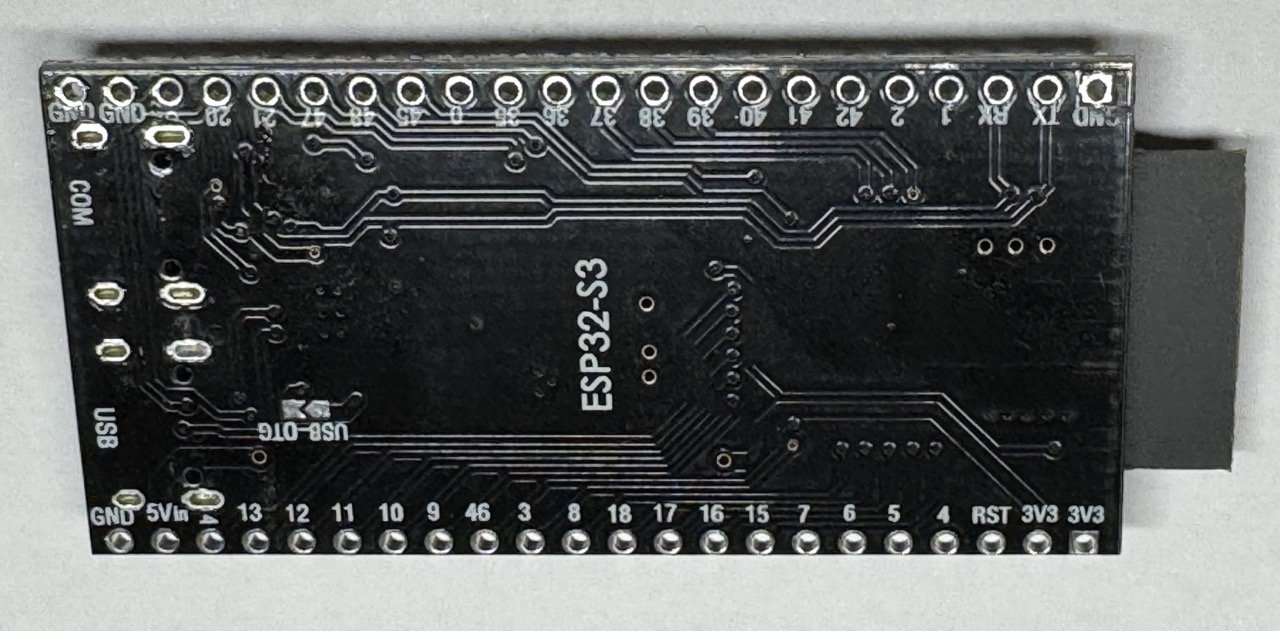
The underside names the ports: USB is the one to use, COM is the serial chip.

EN / RST and BOOT / IO0 sit beside the two USB-C ports.
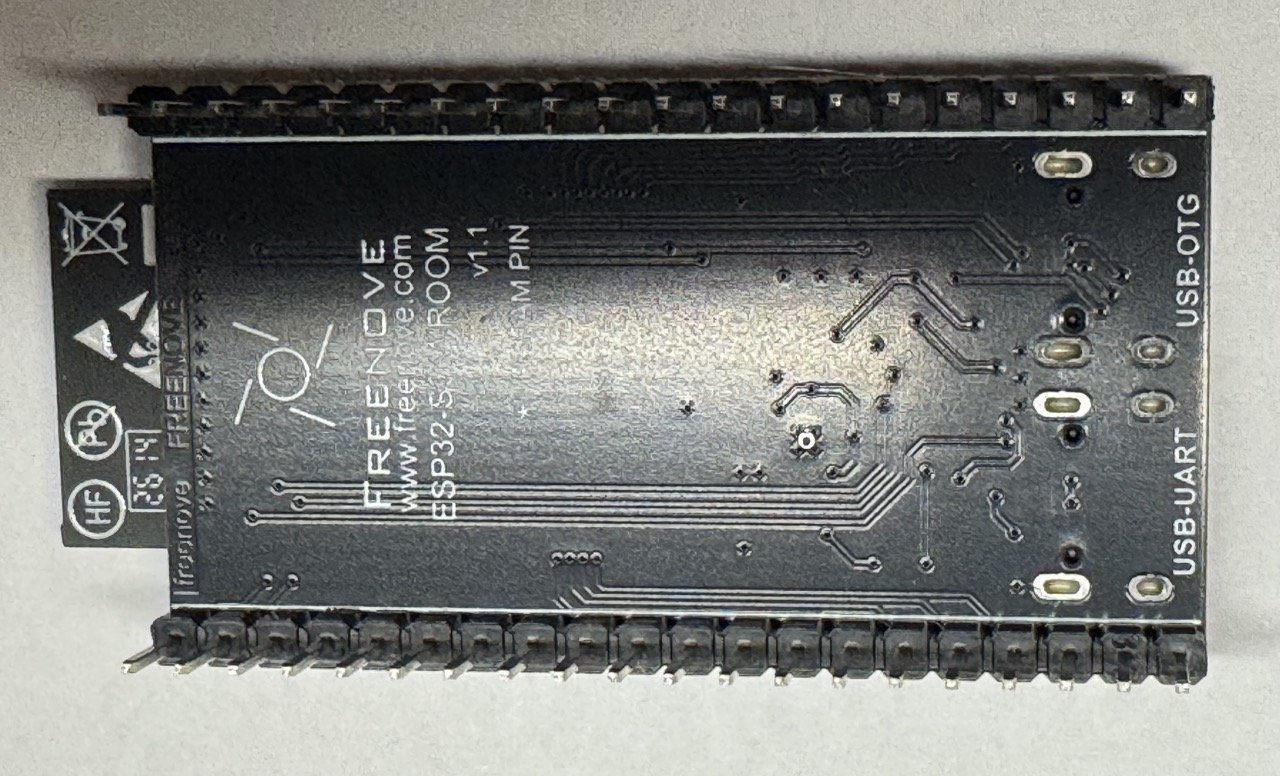
The underside names them: USB-OTG is the one to use, USB-UART is the other.
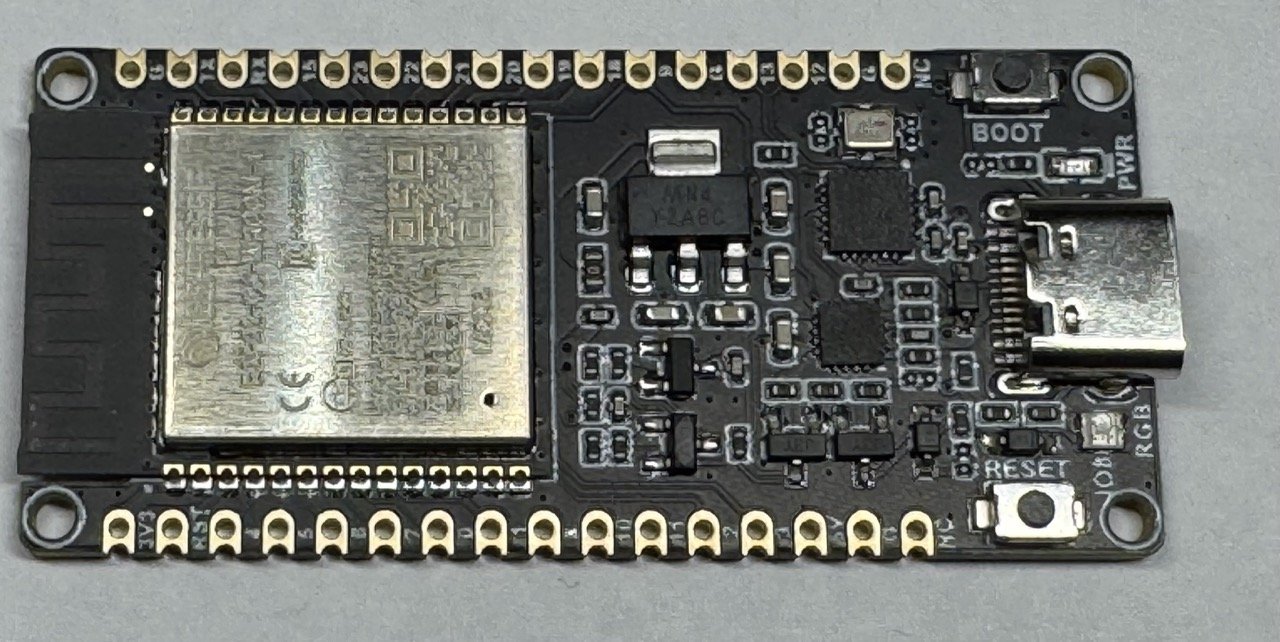
BOOT at the top corner and RESET at the bottom corner, with the USB-C port between them.
- Any other ESP32-S3 board with 8 MB of flash or more whose native USB port reaches a connector. Under ESP-IDF the board name changes nothing but pin defaults, so the one S3 image is the whole S3 family. The flasher page will accept it. If you run one, say so on an issue with the board's name and it joins the table above.
- Any other ESP32-C6 board with 8 MB of flash. Same image as the Waveshare. Note that the Seeed XIAO ESP32C6 has only 4 MB and does not qualify.
- A board with only a USB-to-serial chip (no native USB) can be flashed with ESPHome's command line, but the flasher page's Wi-Fi step cannot reach it, so you would join the box's own setup network instead (Installing).
| Board | Why |
|---|---|
| Classic ESP32 (WROOM-32, DevKitC, ESP32-D0WD and friends) | Not built for it. The firmware needs two update slots, which do not fit beside the Bluetooth mesh stack in the 4 MB of flash these boards carry, and the chip has no native USB. |
| Any 4 MB S3 or C6 board | Same reason: no room for two update slots. |
| ESP32-S2 | No Bluetooth. |
| ESP32-C3 | No image is built for it, and most boards carry 4 MB. |
| ESP32-C5 | Its mesh stack support waits on a newer ESP-IDF than ESPHome ships. Revisit when ESPHome moves. |
| ESP32-H2 | No Wi-Fi. |
| ESP32-P4 | No radio of its own. |
| ESP8266 | Different chip altogether. |
The box needs 5 V over USB and nothing else: any phone charger or a USB port on a powered hub or router does. After the first flash it never needs a computer again. Place it within Bluetooth range of your lights; the mesh relays between fixtures, so one box at the edge of the room is usually enough, and a fixture that is "never heard" on the box's Home page is the sign to move it closer (Troubleshooting).