Time spent: 10 hours spent in total
Objective: Create a honeynet using MHN-Admin. Present your findings as if you were requested to give a brief report of the current state of Internet security.
Summary: To setup the honeypot, I utilized Google Cloud Platform (GCP) since I needed access to a cloud provider to provision the Virtual Machine that would be hosting the honeypot.
First, I installed GCP on my local machine and initialized it to use gcloud on the command line. Once I set up my default region and zone(this project was set to us-west1 and us-west1-a), GCP was initialized, I was able to run the command ‘gcloud config list’, and I could see my project configured in the output.
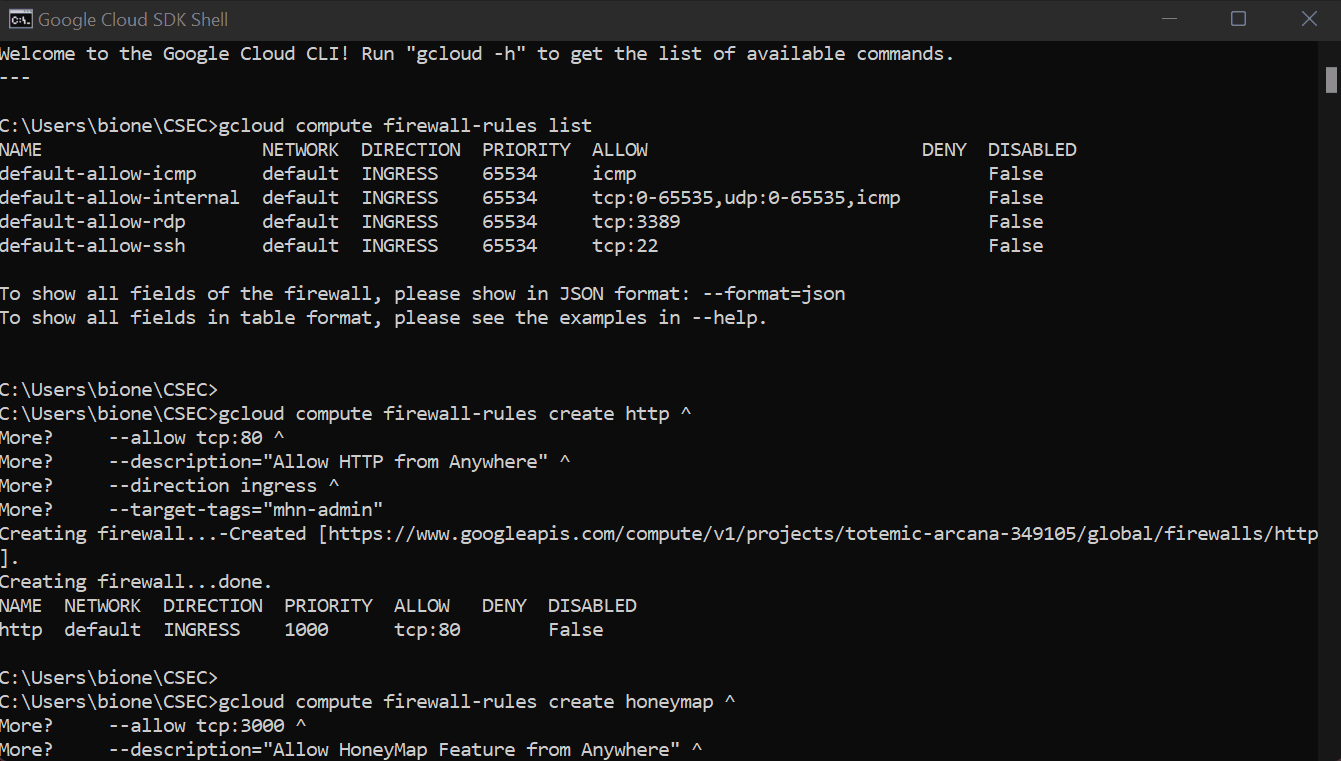
Once that was set, I had to put a firewall rule for my MHN Admin VM to have TCP ports to be open to allow ingress traffic for the honeypot sensor data. In my command prompt I had to input the following commands:
gcloud compute firewall-rules list
This command lists the current default firewall rules. While the following commands enable the required inbound ports for MHN Admin.
Note: The ^ character was used in these commands due to my machine having Windows OS. If one is using Mac or Linux utilize the \
character to continue commands with multiple lines.
gcloud compute firewall-rules create http ^
    --allow tcp:80 ^
    --description="Allow HTTP from Anywhere" ^
    --direction ingress ^
    --target-tags="mhn-admin"

gcloud compute firewall-rules create honeymap ^
    --allow tcp:3000 ^
    --description="Allow HoneyMap Feature from Anywhere" ^
    --direction ingress ^
    --target-tags="mhn-admin"

gcloud compute firewall-rules create hpfeeds ^
    --allow tcp:10000 ^
    --description="Allow HPFeeds from Anywhere" ^
    --direction ingress ^
    --target-tags="mhn-admin"
    ```
Then to create the virtual machine typed the following commands. The “--tags” bind the VM to the firewall’s target tags.
gcloud compute instances create "mhn-admin" ^
    --machine-type "n1-standard-1" ^
    --subnet "default" ^
    --maintenance-policy "MIGRATE" ^
    --tags "mhn-admin" ^
    --image-family "ubuntu-minimal-1804-lts" ^
    --image-project "ubuntu-os-cloud" ^
    --boot-disk-size "10" ^
    --boot-disk-type "pd-standard" ^
    --boot-disk-device-name "mhn-admin"
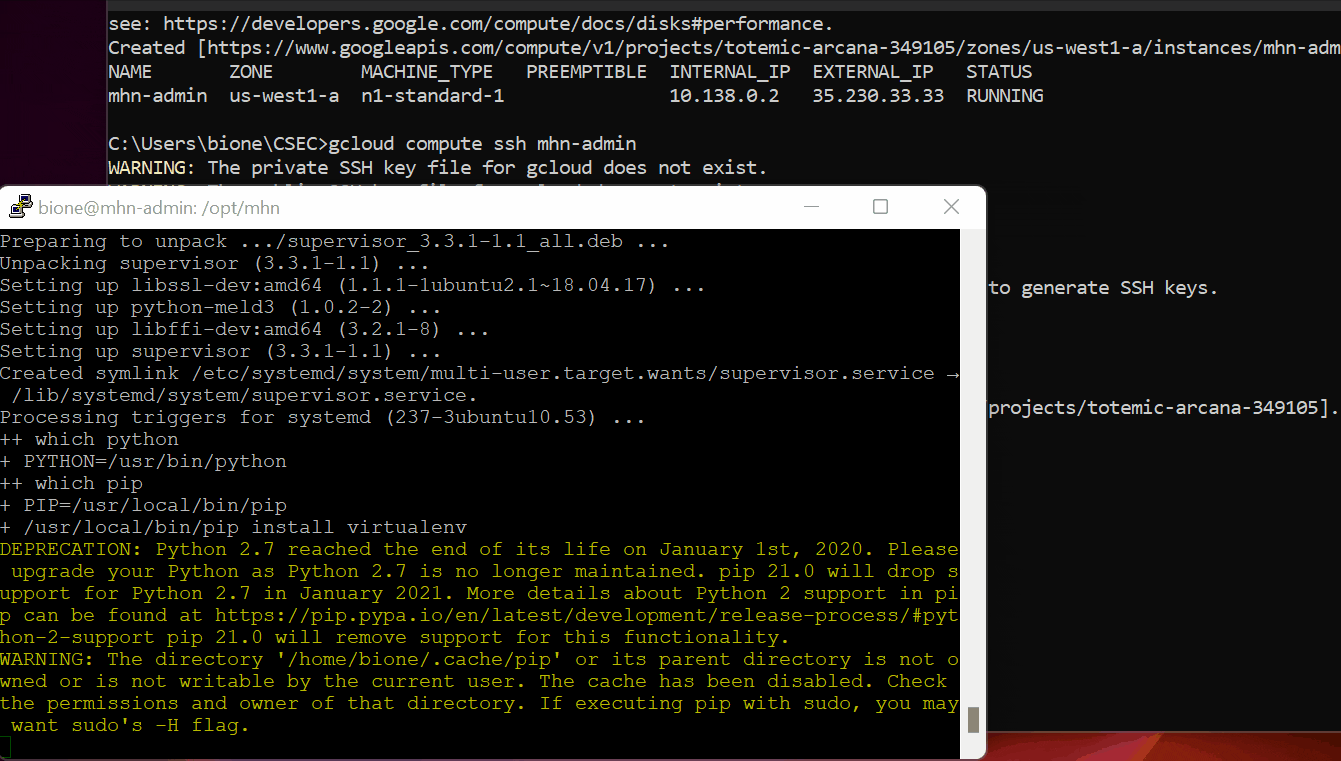
After executing this, the output shows the internal and external IP addresses. It's important to take note of the external IP.

Finally establish secure shell(ssh) to access the virtual machine.
gcloud compute ssh mhn-admin
Once connected, one has to install the latest updates and packages
sudo apt update
sudo apt install git python-magic -y
Then to download MHN, patch its python package requirements file and install:
cd /opt/
sudo git clone https://github.com/pwnlandia/mhn.git
cd mhn/

sudo sed -i 's/Flask-SQLAlchemy==2.3.2/Flask-SQLAlchemy==2.5.1/g' server/requirements.txt

sudo ./install.sh
This script will run for a few minutes, which will then ask certain prompts:
Do you wish to run in Debug mode? y/n : n
Superuser email: tmp@tmp.com
Superuser password:
User can use any email -- this will be the username to login to the admin.
Choose any password (make sure that it is strong and secure!) and re-enter it to confirm.
For the rest of the prompts, also answer n for no and if asked for a value press enter for the default. The script will continue and follow
the same proceedure for any additional prompts. Once finished, one should be able to open a browser and login to the admin console using the
"superuser" credentials created above.
Summary: Dionaea is the service that monitors and captures the malware samples. This is what is hosting the honeypot to run and to trace back the IP addresses of those who are trying to infiltrate our honeypot server. To create the honeypot itself we need to create a VM for it specifically.
First, create the firewall to allow incoming TCP traffic on all ports for the honeypot sensors:
gcloud compute firewall-rules create wideopen ^
    --description="Allow TCP and UDP from Anywhere" ^
    --direction ingress ^
    --priority=1000 ^
    --network=default ^
    --action=allow ^
    --rules=tcp,udp ^
    --source-ranges=0.0.0.0/0 ^
    --target-tags="honeypot"
Now this sets up the VM for the honeypot which this one is called honeypot-1
gcloud compute instances create "honeypot-1" ^
    --machine-type "n1-standard-1" ^
    --subnet "default" ^
    --maintenance-policy "MIGRATE" ^
    --tags "honeypot" ^
    --image-family "ubuntu-minimal-1804-lts" ^
    --image-project "ubuntu-os-cloud" ^
    --boot-disk-size "10" ^
    --boot-disk-type "pd-standard" ^
    --boot-disk-device-name "honeypot-1"
Make sure to note the external IP again and connect to the VM using SSH access by typing gcloud compute ssh honeypot-1
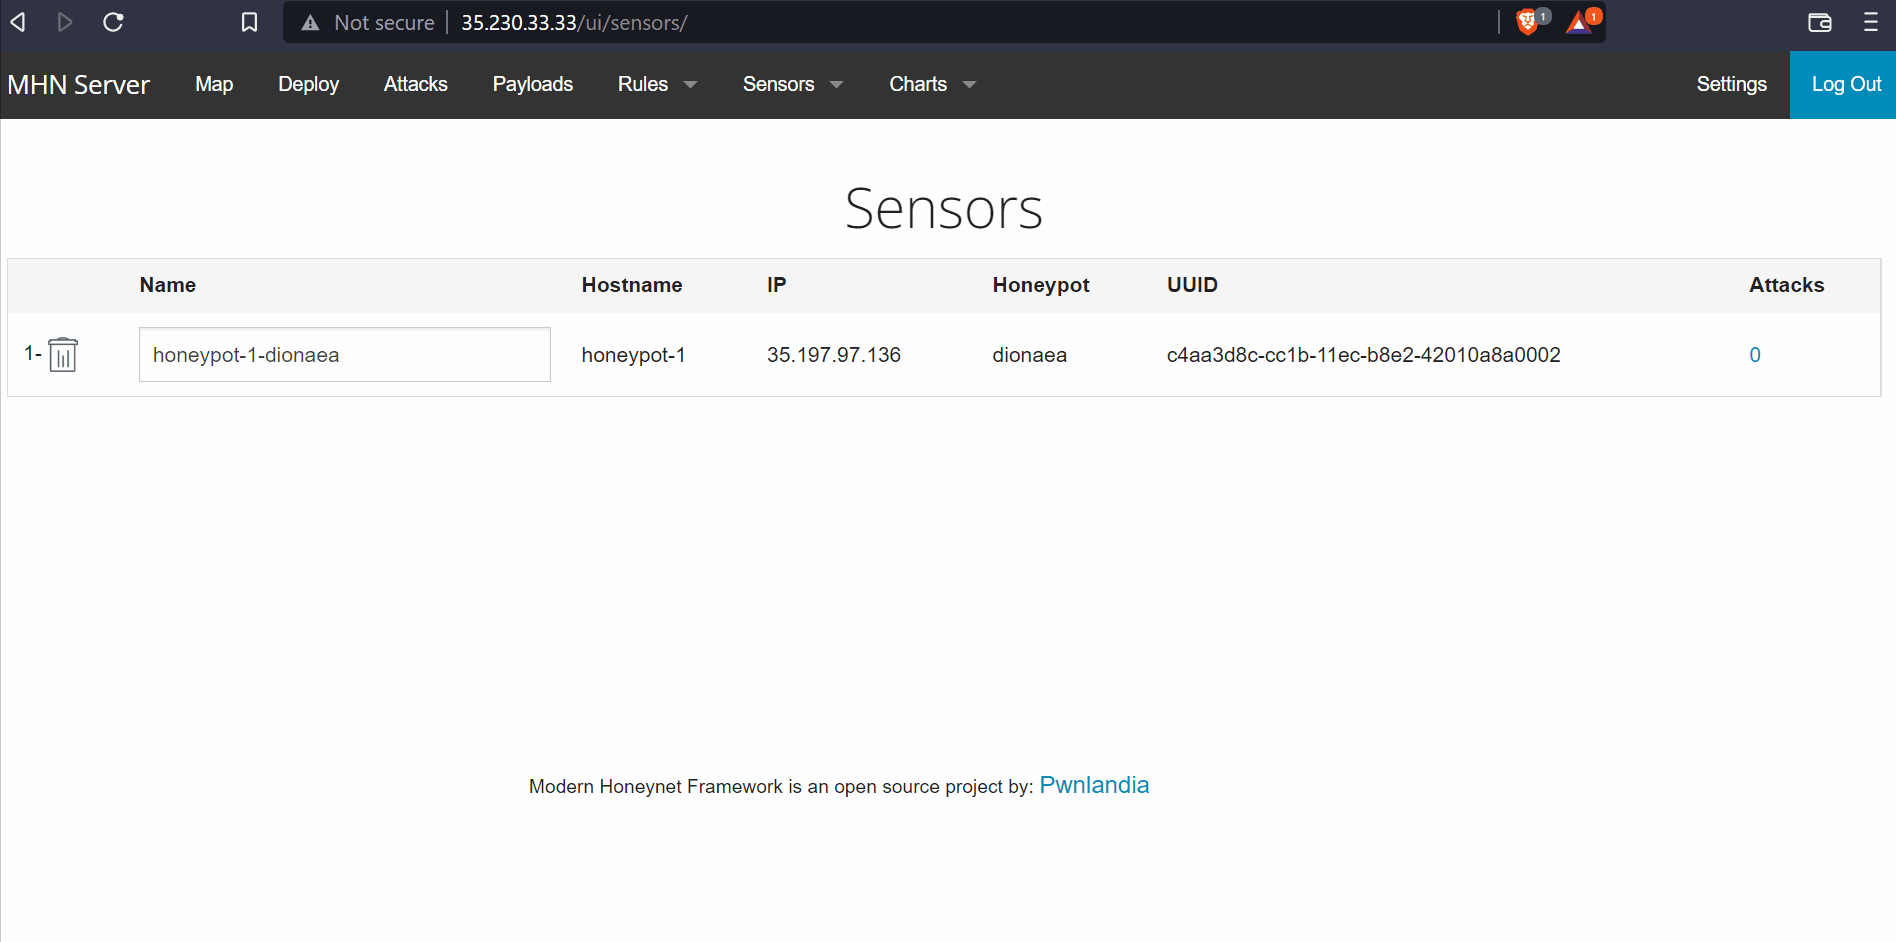
Afterwards in the MHN console in the browser, select Deploy and are asked to input a script. Select Ubuntu/Raspberry Pi-Dionaea
and a deploy command will appear with its own script. Copy the depoly command that begins with wget and execute it within the
honeypot VM just created; this installs the Dianaea software. Once completed, back over in the MHN console in the browser go to the
Sensor tab and select the View Sensors and the honeypot is now listed there.
In Kali Linux, the connection can be tested using nmap to pass the IP of the honeypot and this shows the multiple ports open. These are the services that Dionaea uses to attract attack(er)s.
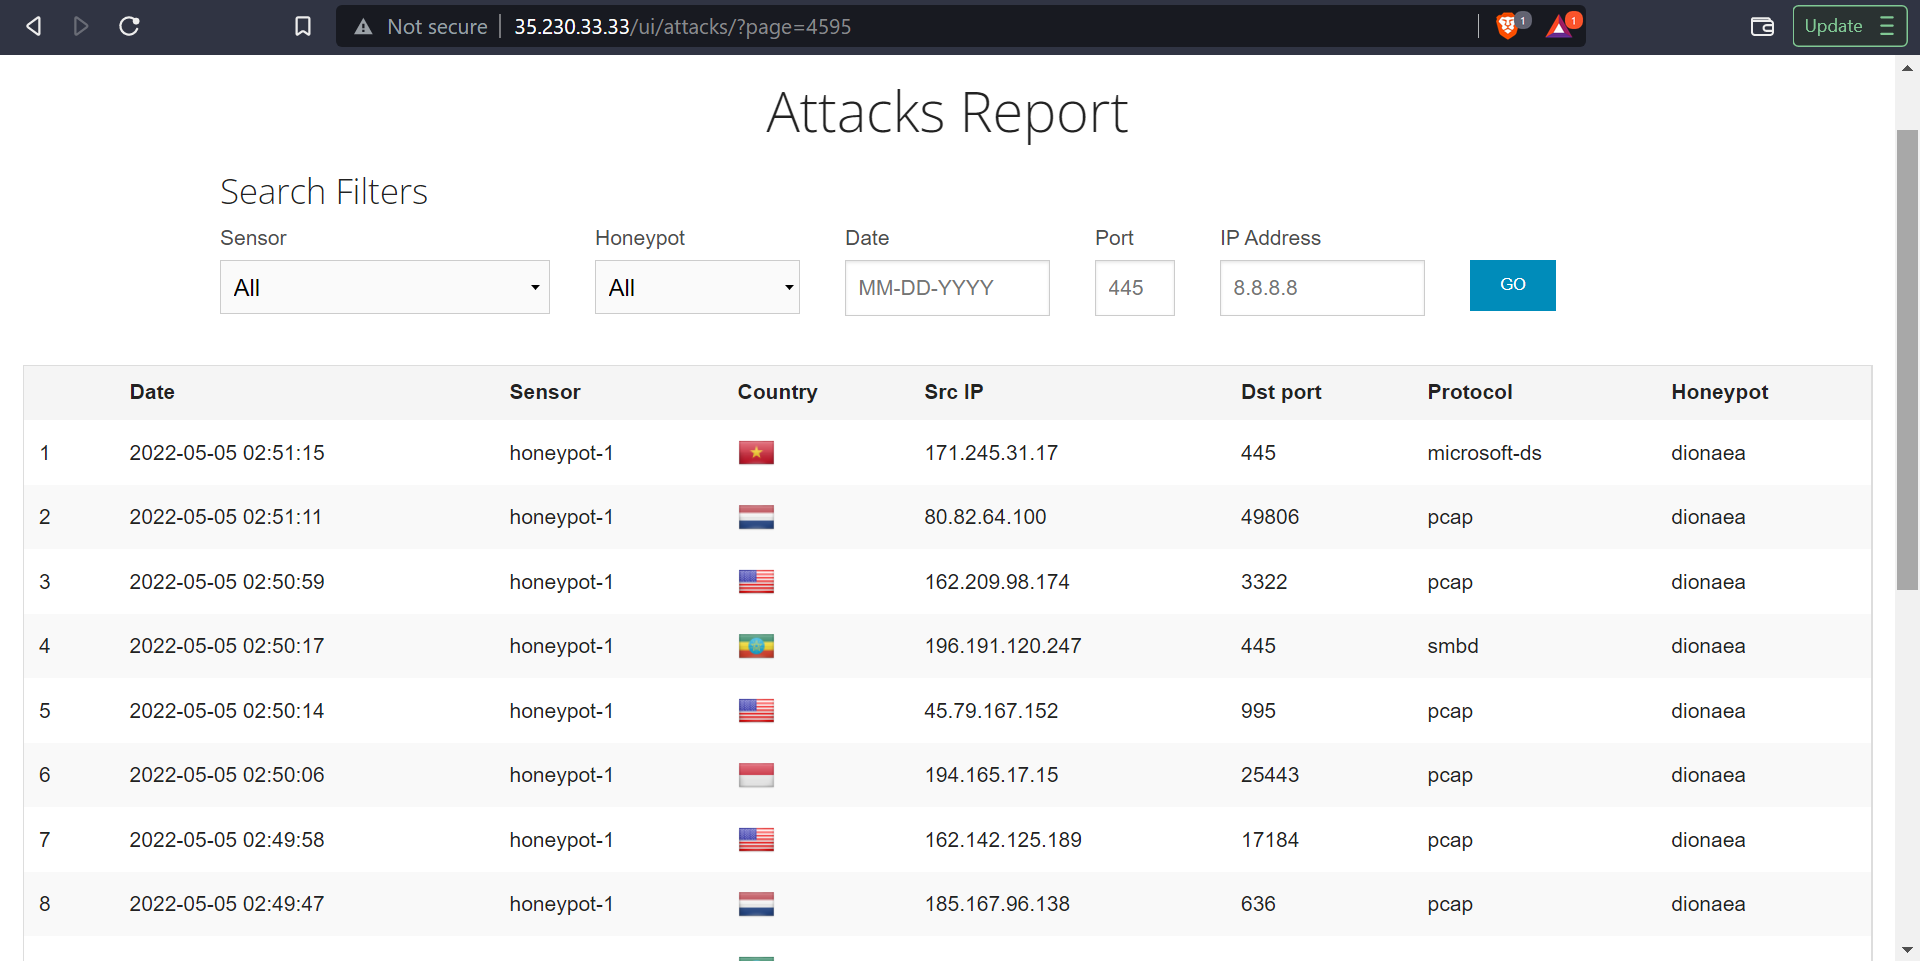
When going to the Attacks tab in the MHN console, we can see all the different IPs that are attacking the honeypot. We can see
from which country it comes from, what open port they went through, and what kind of protocol they used to try to infiltrate the "server".
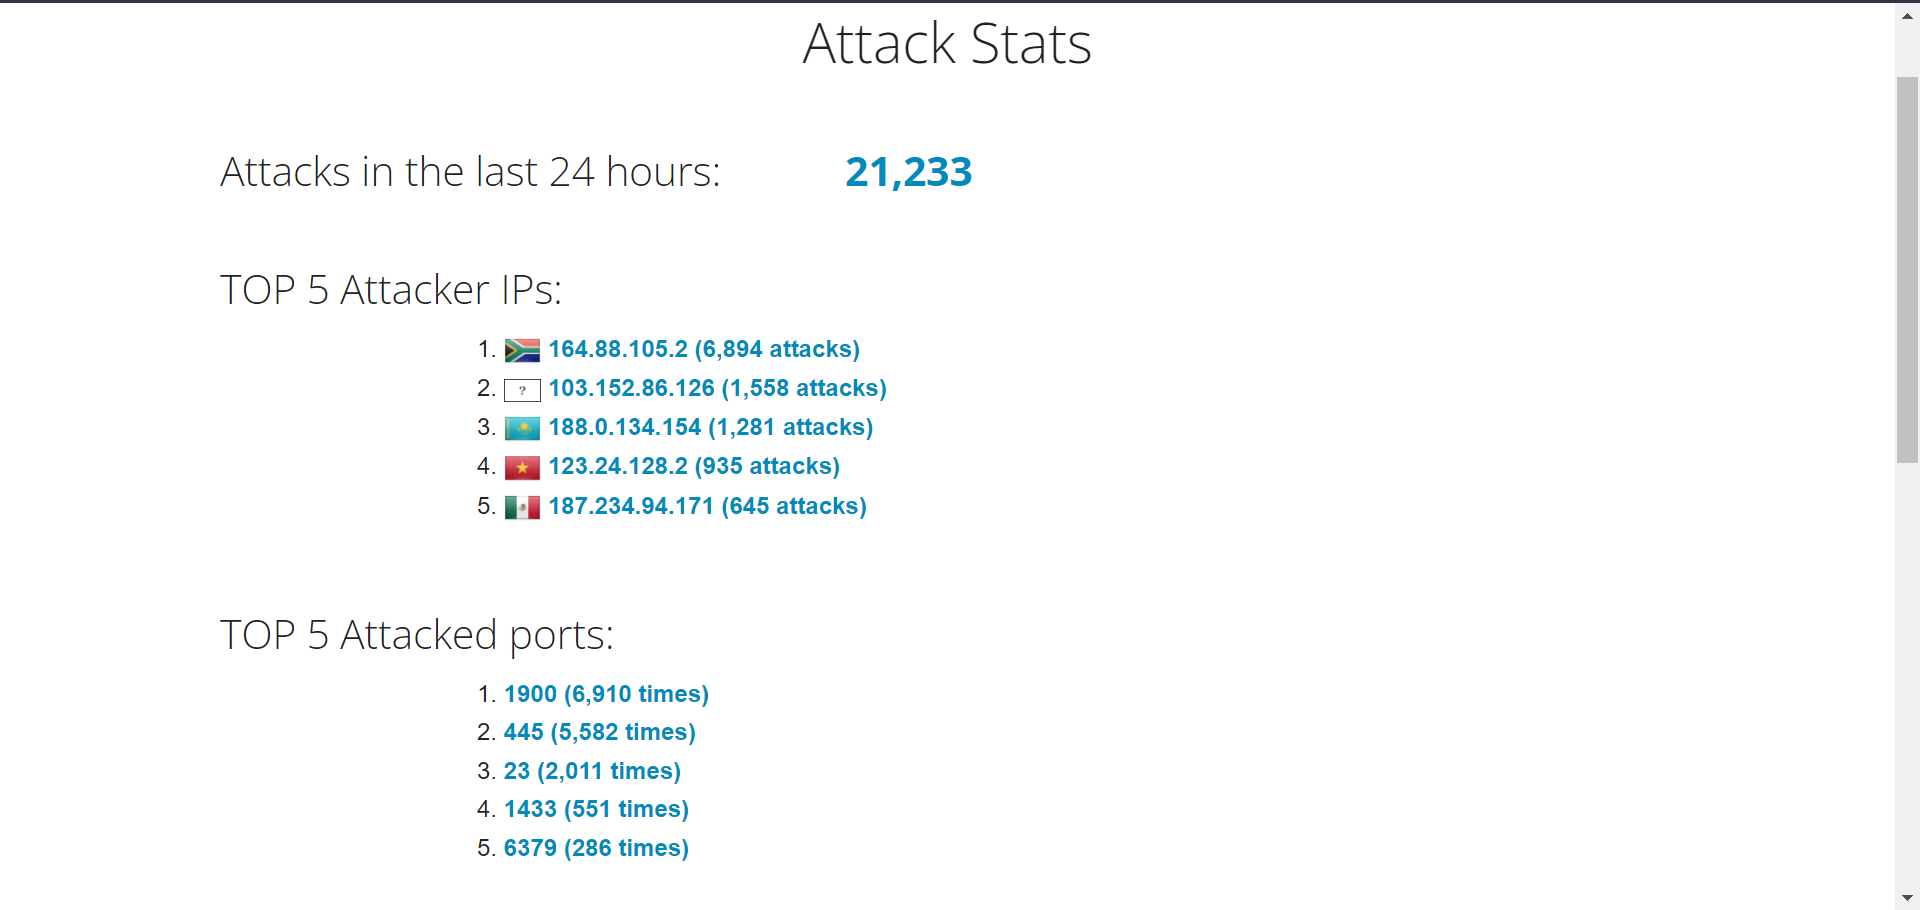
Summary: The Regional Database that MHN-Admin uses is a single admin VM which is used to deploy, manage and collect information from the honeypot(s), which are deployed as separate VMs. Hence why I had to setup 2 virtual machines for the honeypot to run; the single Admin VM and the Honeypot VM. The information that the exported JSON file records is a complex version of the Attacks Report that is available from the MHN-Admin. It shows the IP, the country where the attack came from, and the type of protocol used to try to hack the honeypot server.
Uses of a Honeypot
A honeypot simulates as a fake server in order to monitor internet traffic and see if users attempt to find any open ports in order to exploit a vulnerability. Say a company hosts a server that anyone can look at, but someone wants to hack it. They may hack it to inject malicious code that destroys the server, to install malware (like ransomware and make the company pay to regain access), brute-force attack to find other vulnerabilities(or other open ports), launch a Denial of Service attack (DDOS), or even just for "fun". These hackers may use a program like nmap in Kali Linux to scan the server for open ports. Once they find an open port, then they can execute an attack as previously mentioned. For a security researcher, having a honeypot in place helps to track where most of their users (or hackers in this case) are located, help identify what vulnerabilities are being exploited, and more importantly what specific kind of attacks are occuring in order to prevent them from happening in the first place.
There were no issues or too many challenges whilst creating and running the honeypot.
Hello GenCyber students, here is your flag: GC24{OSINT_IS_FUN}