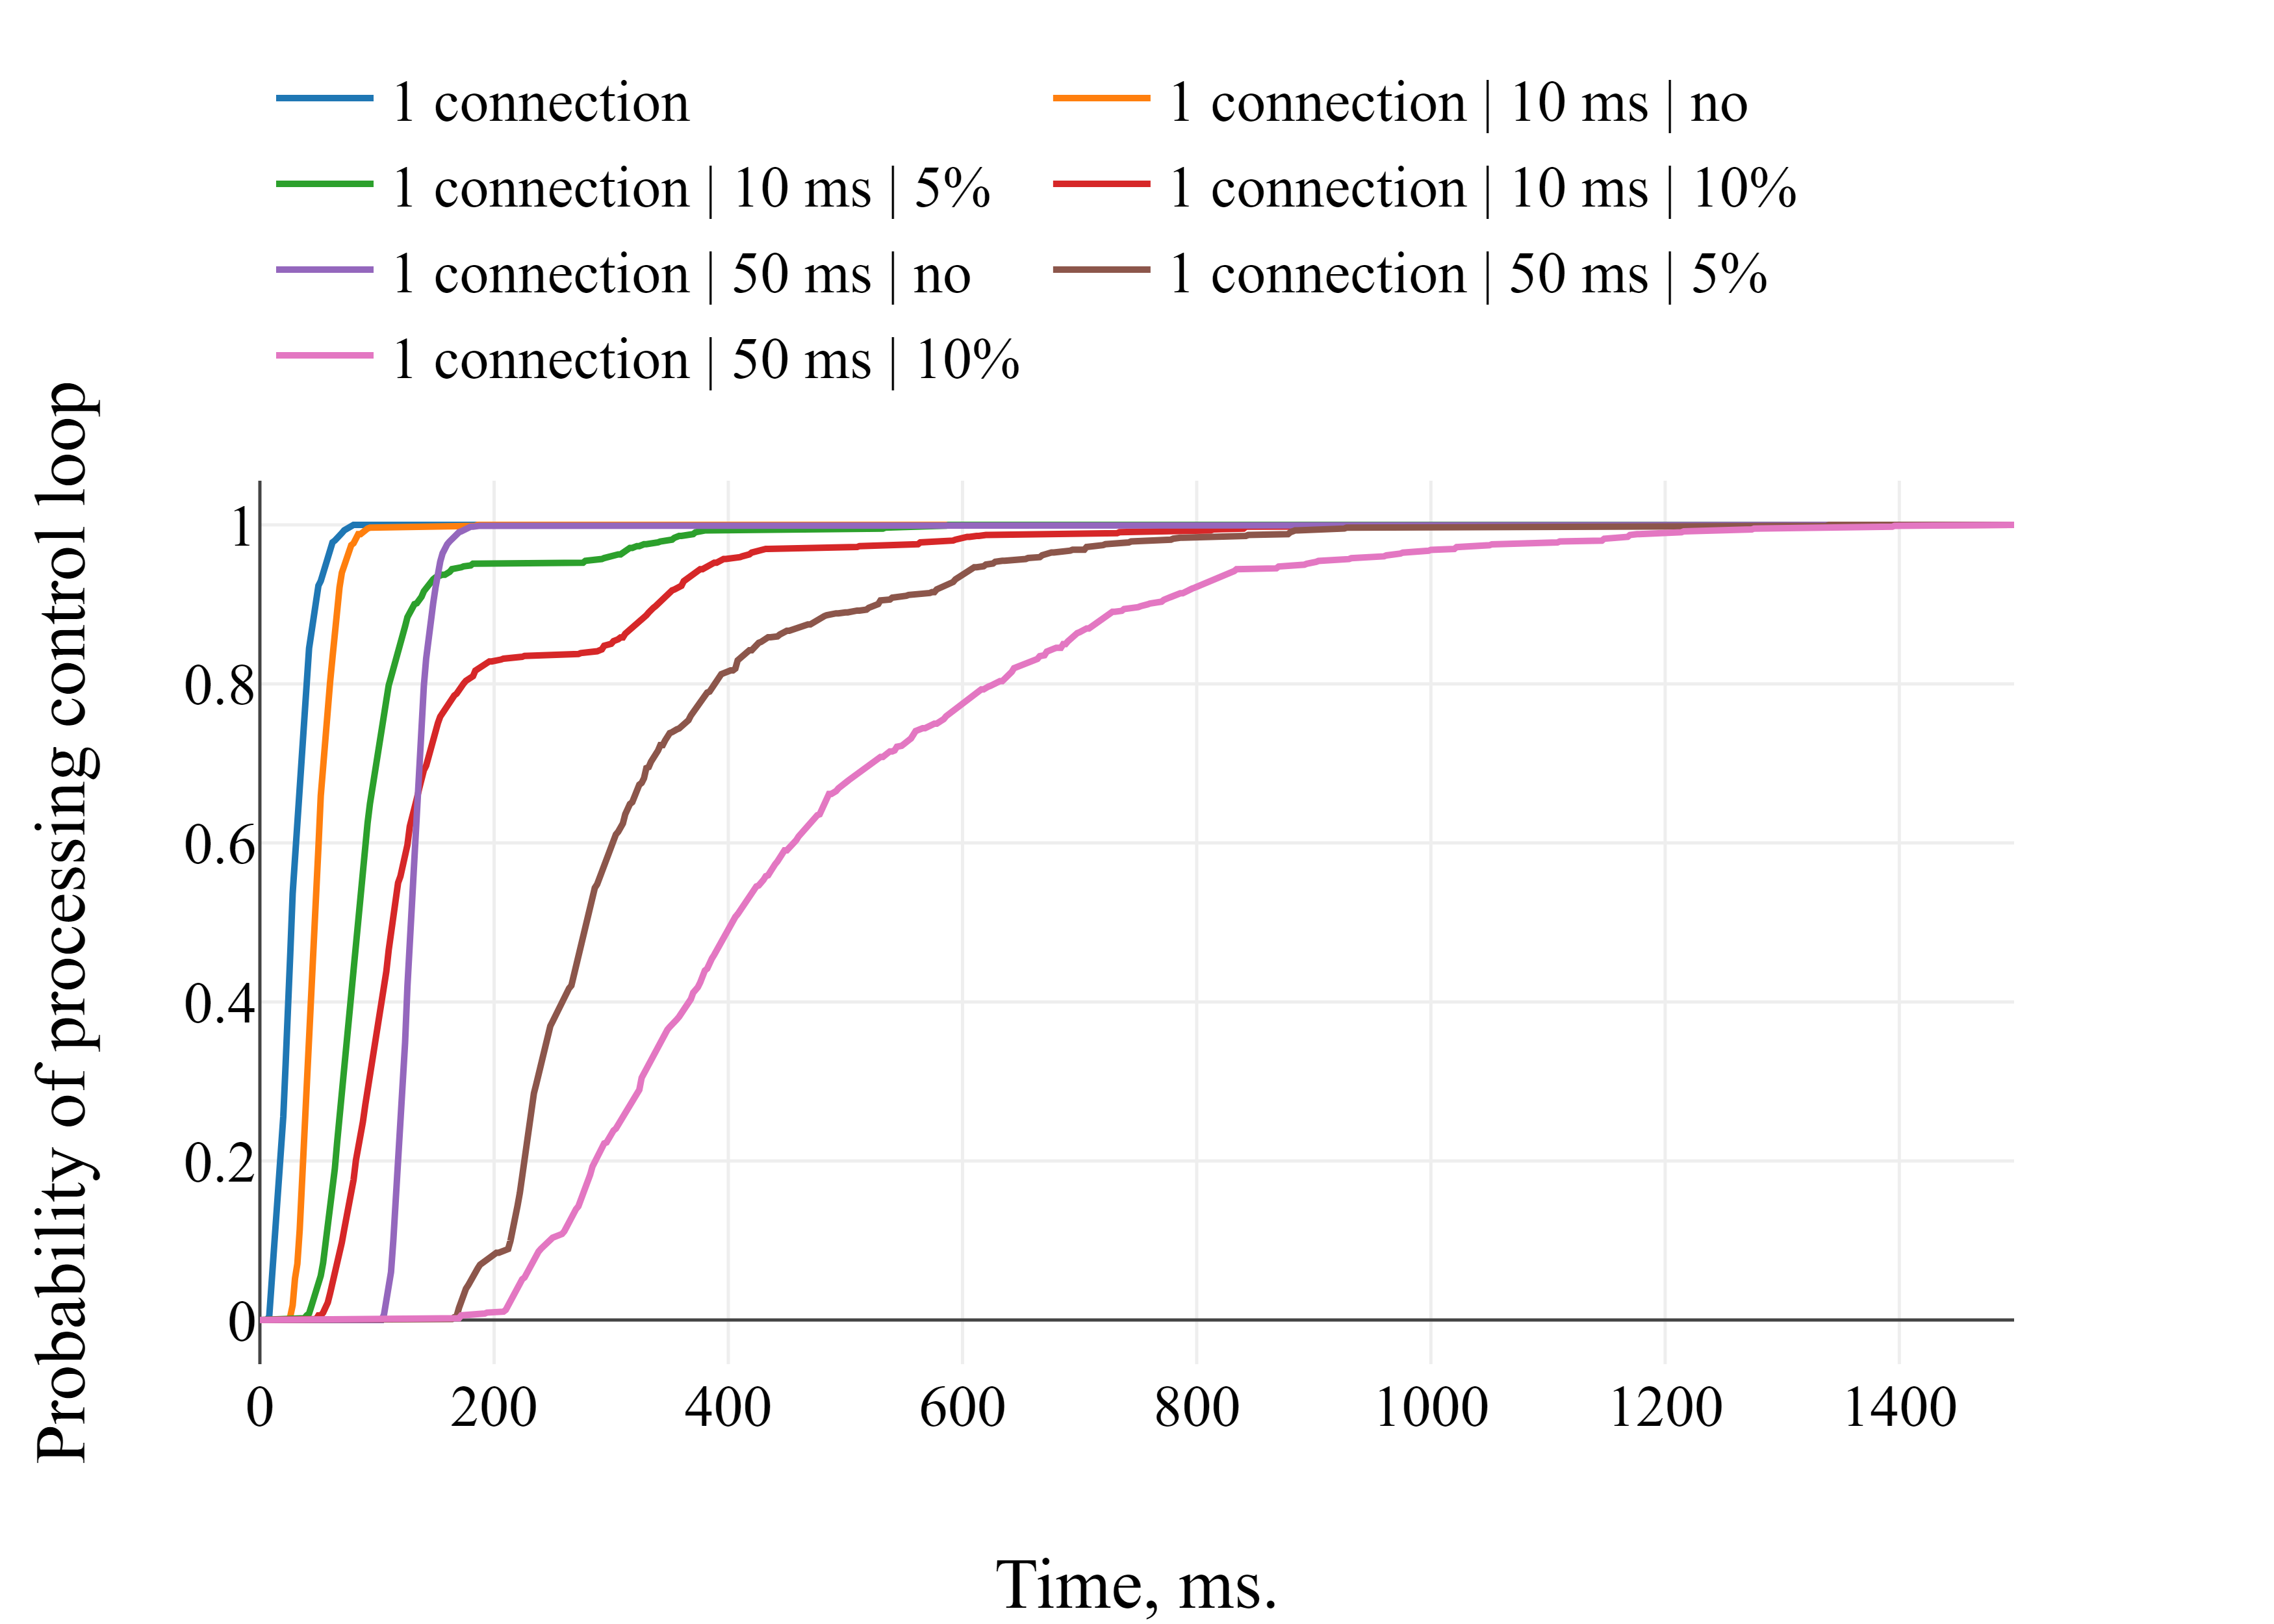
Latency benchmark for time series database
- Install python version 3.6
- Install requirements
pip install -r requirements.txt
- Run
python data_generator.pyto generate data for benchmark
usage: data_generator.py [-h] --out_file OUT_FILE [--frequency FREQUENCY]
                         [--start_time START_TIME] [--end_time END_TIME]
                         [--sensor_number SENSOR_NUMBER] [--format FORMAT]

Generate values

optional arguments:
  -h, --help            show this help message and exit
  --out_file OUT_FILE   Output file
  --frequency FREQUENCY
                        Frequency in seconds (default: 1 sec)
  --start_time START_TIME
                        Beginning timestamp (RFC3339). (default
                        "2019-01-01T00:00:00Z")
  --end_time END_TIME   Ending timestamp (RFC3339). (default
                        "2019-01-02T00:00:00Z")
  --sensor_number SENSOR_NUMBER
                        Number of sensors (default: 10)
  --format FORMAT       Please select output format ["influx", "csv", "json"]
                        (default: "influx")
Here is snippet of Python code to simplify running of data_generator
from datetime import datetime, timedelta
import os

start = datetime(2019, 1, 1)

if not os.path.exists('../data/csv/'):
	os.makedirs('../data/csv/')

for i in range(1, 101):
    delta = timedelta(days=1)
    stop = start + delta
    start_date = start.strftime('%Y-%m-%dT%H:%M:%SZ')
    stop_date = stop.strftime('%Y-%m-%dT%H:%M:%SZ')
    cmd = 'python data_generator.py --start_time "{start}" --end_time "{stop}" --format "csv" --sensor_number 10 --out_file ../data/csv/csv_1sec_{day}d.dat'.format(start=start_date, stop=stop_date, day=i)
    start = stop
os.system(cmd)- Run
python runner.pyto process benchmark
usage: runner.py [-h] [--thread THREAD] [--aggregate AGGREGATE]
                 [--latency LATENCY] [--packetloss PACKETLOSS] --database

DATABASE
Load data test

optional arguments:
  -h, --help            show this help message and exit
  --thread THREAD       number of connections. default is 1
  --aggregate AGGREGATE
                        type of aggregate function [max, count, avg, sum].
                        default is "sum"
  --latency LATENCY     latency in ms.
  --packetloss PACKETLOSS
                        packet loss type in percentage
  --database DATABASE   database type [cratedb, graphite, influxdb, kairosdb,
                        kdb, timescaledb]
- Pull Docker image
docker pull influxdb:latest - Run Docker container
docker run -p 8086:8086 -p 8083:8083 -p 8090:8090 -e INFLUXDB_REPORTING_DISABLED=true -e INFLUXDB_DATA_QUERY_LOG_ENABLED=false -e INFLUXDB_HTTP_LOG_ENABLED=false -e INFLUXDB_CONTINUOUS_QUERIES_LOG_ENABLED=false influxdb:latest
- Download 'q.zip' from https://kx.com/connect-with-us/download/
- Copy 'q.zip' to the docker/kdb/ folder
- Build KDB+ docker with
docker build -t kdb -f kdb/Dockerfile . - Run Docker container
docker run -p 5000:5000 kdb q -p 5000 - To run benchmark for KDB+ it is necessary to install
java. For Ubuntu you can use this command:sudo apt install openjdk-8-jdk.
- Got to the docker directory
cd docker - Build Graphite docker with
docker build -t graphite -f graphite/Dockerfile . - Run Docker container
docker run -p 2003:2003 -p 8000:8000 graphite
- Got to the docker directory
cd docker - Pull Docker image
docker pull timescale/timescaledb - Run Docker container
docker run -p 5432:5432 -e POSTGRES_USER=postgres -e POSTGRES_PASSWORD=postgres -e POSTGRES_DB=benchmarkdb timescale/timescaledb
- Got to the docker directory
cd docker - Build KairosDB docker with
docker build -t kairosdb -f kairosdb/Dockerfile . - Run Docker container
docker run -p 4242:4242 -p 8080:8080 kairosdb
- Pull Docker image
docker pull crate:latest - Run Docker container
docker run -p 4200:4200 -p 4300:4300 -p 5432:5432 crate:latest -Ccluster.name=democluster -Chttp.cors.enabled=true -Chttp.cors.allow-origin="*"
- In case of "ERROR: max virtual memory areas vm.max_map_count [65530] is too low, increase to at least [262144]" please run this command before starting docker:
sudo sysctl -w vm.max_map_count=262144
Network simulation was done by tc and netem
- Install
tcandnetemlinux tools - Run
docker network create slownetto create a slow network - Run
docker network inspect slownetto get the id of the slow network - Run
ifconfigand pick right network id based ondocker network inspectandifconfig. Let's assume it will be called NETWORKID
- Here is an example how to setup network latency 10ms and packet loss 5%:
tc qdisc add dev NETWORKID root netem delay 10ms loss 5%
- Remove any latency and packet loss from network
tc qdisc del dev NETWORKID root
- To apply latency and packet loss it is necessary to provide NETWORKID to container
docker run --net=slownet ...
